A/C is making a hissing noise

Tiny
XAVIER_COX
  • MEMBER
  • 2006 DODGE CHARGER
  • 3.5L
  • V6
  • 2WD
  • AUTOMATIC
  • 120,000 MILES
A/C has been working great other than when I turned on they system it hisses when I turn on the A/C behind the dash and hisses when I turned it off. Yesterday I got home and the clutch started making chirping noises. Today I bought a recharge kit thinking it might be low and could be a quick fix. Started my already warm car. Turn on A/C full blast and looked at the gauge it's reading way way into the red close to 150 psi. Clutch kicks on immediately with no weird noises at all. Radiator fan are on and car is up to temperature.
Wednesday, May 27th, 2020 AT 1:26 PM

37 Replies

Tiny
ASEMASTER6371
  • MECHANIC
  • 52,797 POSTS
Good afternoon,

The hissing may be a leak in the system. If you hear it in the car, it could be the evaporator core leaking.

https://www.2carpros.com/articles/air-conditioner-leak-detection

You need a real set of gauges to read both the high and low side readings while the A/C is running. I need those pressures to help determine the issue.

https://www.2carpros.com/articles/car-air-conditioner-not-working-or-is-weak

Roy
Was this
answer
helpful?
Yes
No
+1
Wednesday, May 27th, 2020 AT 2:15 PM
Tiny
XAVIER_COX
  • MEMBER
  • 34 POSTS
Okay. It has been hissing for about a year now randomly. And A/C has not been refilled or recharged in my owner ship (5 years) so I wouldn't think it's not really a leak per say. It's a loud hiss that if was a leak I am sure I would be all out of Creon by now. To me it sounds like a clog or value. It sounds as if Freon is been restricted passing though one chamber into another. Could there be a value or switch or filter in-between the system that I could check on that might sound like the above? I do agree that if hearing in the cabin might very well be the evaporator.
Was this
answer
helpful?
Yes
No
Wednesday, May 27th, 2020 AT 3:04 PM
Tiny
ASEMASTER6371
  • MECHANIC
  • 52,797 POSTS
Okay, we are back to the gauges. I need to see the reading for the A/C pressures.

Can you rent a set and get them for me?

Roy
Was this
answer
helpful?
Yes
No
+1
Wednesday, May 27th, 2020 AT 3:52 PM
Tiny
XAVIER_COX
  • MEMBER
  • 34 POSTS
Low side reading 105. High side reading 100.
Was this
answer
helpful?
Yes
No
Wednesday, May 27th, 2020 AT 4:01 PM
Tiny
ASEMASTER6371
  • MECHANIC
  • 52,797 POSTS
Nice, thank you.

If the A/C clutch is engaged and that is the reading, then the compressor is bad.

If the compressor is not engaged there is an electrical issue. I attached a wiring diagram for you of the compressor circuit.

You will need a test light to do some tests.

https://www.2carpros.com/articles/how-to-check-wiring

https://www.2carpros.com/articles/how-to-use-a-test-light-circuit-tester

Roy
Was this
answer
helpful?
Yes
No
+1
Wednesday, May 27th, 2020 AT 4:07 PM
Tiny
XAVIER_COX
  • MEMBER
  • 34 POSTS
Yes, the compressor is engage. It looks like its spinning pretty good. When the car is off it spins freely one way and does not spin the other way. Not sure if that's normal or not. Thank you for your help!
Was this
answer
helpful?
Yes
No
Wednesday, May 27th, 2020 AT 4:23 PM
Tiny
ASEMASTER6371
  • MECHANIC
  • 52,797 POSTS
You are welcome.

I would replace the compressor, expansion valve and the dryer.

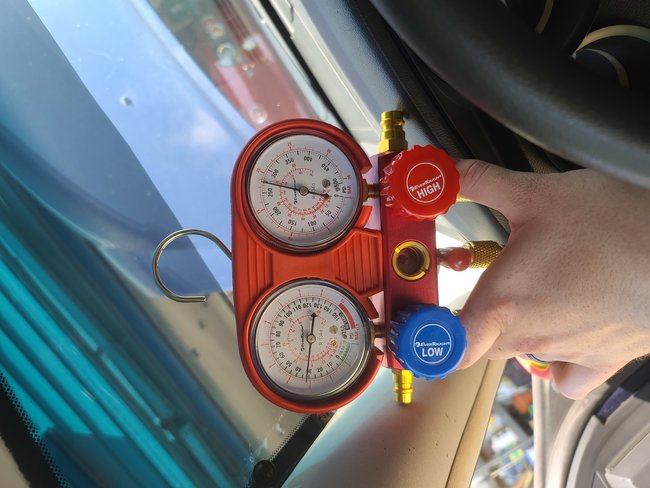
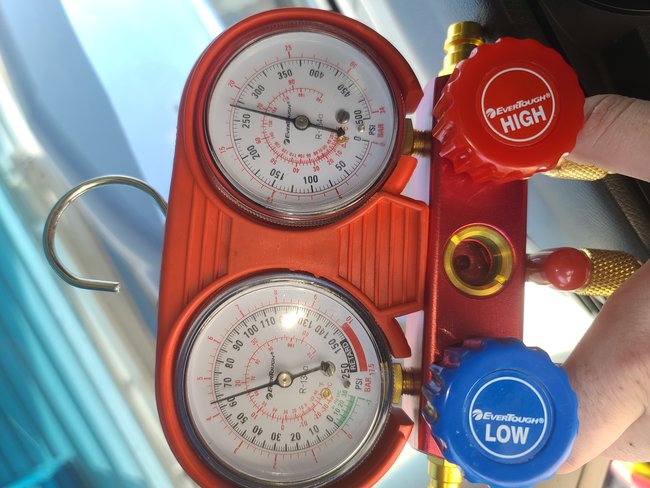
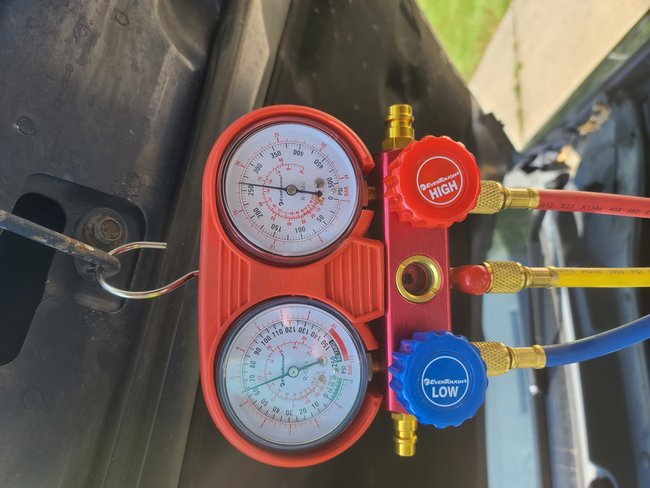
https://www.2carpros.com/articles/re-charge-an-air-conditioner-system

https://www.2carpros.com/articles/replace-air-conditioner-compressor

Roy

Compressor

1. Recover the refrigerant from the refrigerant system.
2. Disconnect and isolate the negative battery cable.
3. Remove the air cleaner housing.
4. Remove the serpentine drive belt.
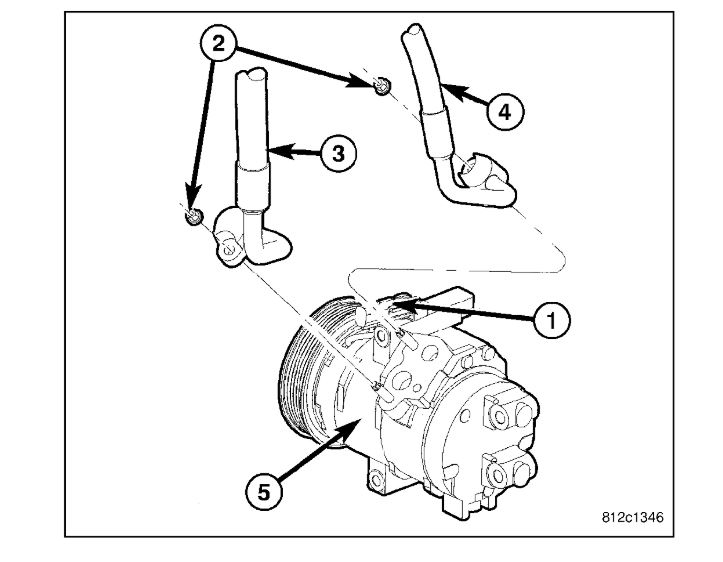
5. Disconnect the wire harness connector from the A/C compressor clutch coil connector (1).
6. Remove the nuts (2) that secure the A/C suction line (3) and A/C discharge line (4) to the A/C compressor (5).
7. Disconnect the suction and discharge lines from the A/C compressor and remove and discard the dual plane seals.
8. Install plugs in, or tape over all of the opened refrigerant line fittings and the compressor ports.
9. Raise and support the vehicle.

imageOpen In New TabZoom/Print

10. Remove the front end splash shield.
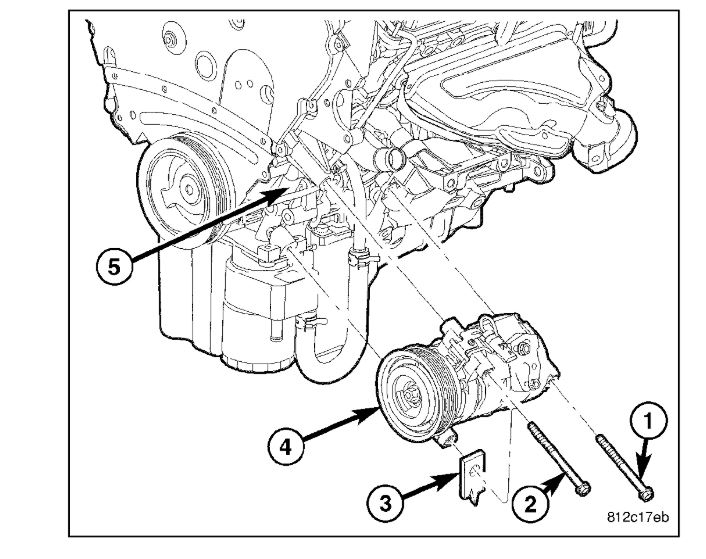
11. Support the A/C compressor (4) and remove the bolts (1 and 2) that secure the compressor and automatic transmission cooler line bracket (3) to the cylinder block (5).
12. Position the cooler lines out of the way and remove the A/C compressor from the engine compartment.

Dryer

1. Recover the refrigerant from the refrigerant system.
2. Disconnect and isolate the negative battery cable.
3. Remove the front fascia.
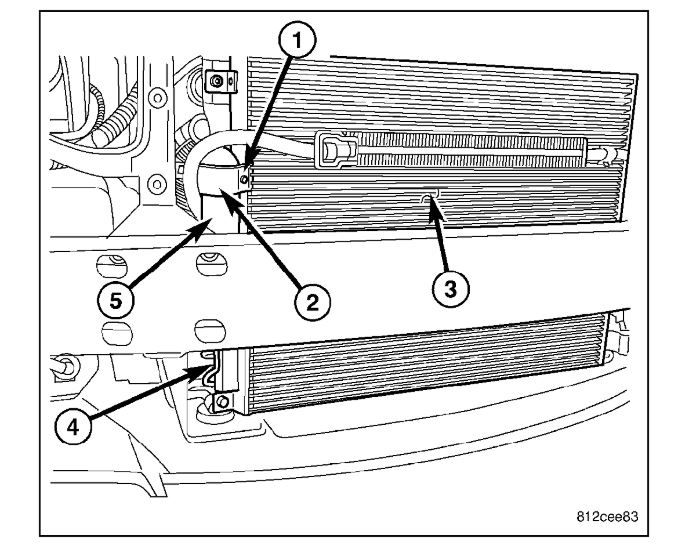
4. Remove the screw (1) that secures the receiver/ drier mounting bracket (2) to the right end of the A/C condenser (3).
5. Remove the bolt (4) that secures the receiver/drier (5) to the A/C condenser.
6. Disconnect the receiver/drier from the A/C condenser and remove and discard the dual-plane seal.
7. Install plugs in, or tape over the opened receiver/drier fitting and the condenser ports.

Expansion valve

1. Recover the refrigerant from the refrigerant system.
2. Disconnect and isolate the negative battery cable.
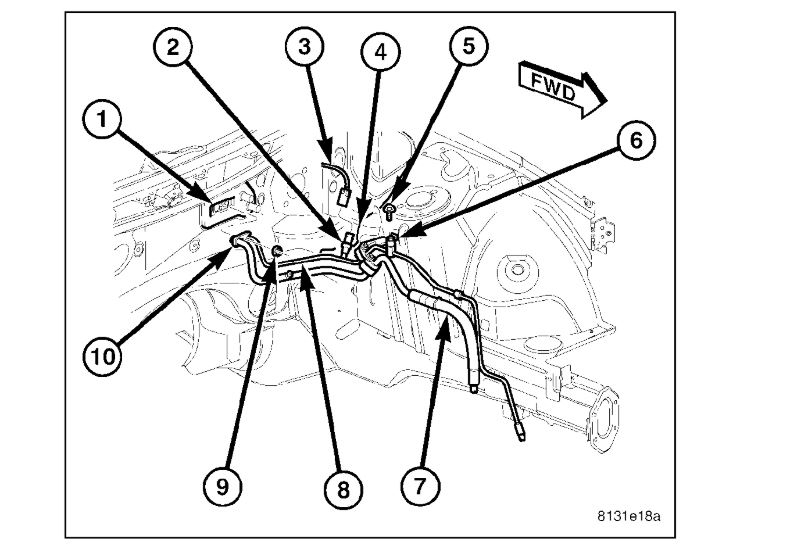
3. Remove the bolt (5) that secures the refrigerant line mounting bracket (6) to the left front shock tower (4).
4. Remove the nut (9) that secures the refrigerant line tapping block (10) to the A/C expansion valve (1).
5. Disconnect the wire harness (3) from the A/C pressure transducer (2) to help allow access to the A/C expansion valve.
6. Disconnect the A/C suction line (7) and the A/C liquid line (8) from the A/C expansion valve and position the refrigerant lines out of the way.
7. Remove the dual plane seal from the suction and liquid line fittings and discard.
8. Install plugs in, or tape over the opened suction and liquid line fittings.

imageOpen In New TabZoom/Print

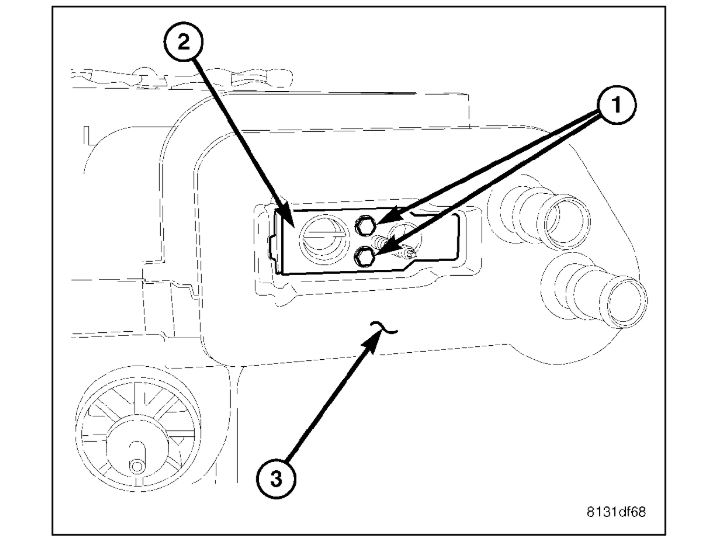
9. Remove the two bolts (1) that secure the A/C expansion valve (2) to the evaporator tube tapping block located within the foam seal (3).
10. Remove the A/C expansion valve from the evaporator tube tapping block and foam seal.
11. Remove the dual plane seal from the evaporator tube fittings and discard.
12. Install plugs in, or tape over the opened evaporator tube fittings and all expansion valve ports.
Was this
answer
helpful?
Yes
No
+1
Wednesday, May 27th, 2020 AT 4:32 PM
Tiny
XAVIER_COX
  • MEMBER
  • 34 POSTS
Today it looks like this. Are we still thinking compressor is bad? It's only 73 degrees out today. Yesterday was 85 or so.
Was this
answer
helpful?
Yes
No
Thursday, May 28th, 2020 AT 9:33 AM
Tiny
ASEMASTER6371
  • MECHANIC
  • 52,797 POSTS
Same result.

The high side should be 2 times ambient temperature plus 15%

The low side should be 25-30 pounds solid.

The fact they are the same indicates a failed compressor.

Roy
Was this
answer
helpful?
Yes
No
+1
Thursday, May 28th, 2020 AT 9:37 AM
Tiny
XAVIER_COX
  • MEMBER
  • 34 POSTS
About to order the parts listed above with good confidence I can do it my self. With help from shop to discharge and recharge. Question on expansion valve. I can see it in the engine bay connected to the fire wall. Am I going to have to go into the dash or remove the dash to disconnect it from the evaporator? Or does it disconnect and get replaced all from engine bay?
Was this
answer
helpful?
Yes
No
Thursday, May 28th, 2020 AT 6:08 PM
Tiny
ASEMASTER6371
  • MECHANIC
  • 52,797 POSTS
No, you will not. Once the lines are removed, there will be 2 hex bolts that you remove and out it comes.

This is an easy one.

Roy
Was this
answer
helpful?
Yes
No
Friday, May 29th, 2020 AT 3:55 AM
Tiny
XAVIER_COX
  • MEMBER
  • 34 POSTS
I do want to say thank you for all your help and detailed instructions got most of the job done this afternoon. I ended up buying a whole new condenser instead of just the dryer. And as you probably know or can see both the transmission line and A/C line used the A/C condenser. I leaked out about 5 oz of transmission fluid plus what was still in the condenser. What would be the proper way to make sure I don't have air in the transmission system? And correct amount of fluid. I do not have a transmission dipstick. Thinking maybe filling the new condenser with fluid and then still adding about 6 oz of fluid to the dipstick whole.
Was this
answer
helpful?
Yes
No
Wednesday, June 3rd, 2020 AT 3:20 PM
Tiny
ASEMASTER6371
  • MECHANIC
  • 52,797 POSTS
The air will bleed itself out. No need to worry about that. Just make sure the level is good.

Roy
Was this
answer
helpful?
Yes
No
Wednesday, June 3rd, 2020 AT 3:23 PM
Tiny
XAVIER_COX
  • MEMBER
  • 34 POSTS
This picture shows fully rev at 2,500 for 20 seconds.
Was this
answer
helpful?
Yes
No
Thursday, July 9th, 2020 AT 1:58 PM
Tiny
XAVIER_COX
  • MEMBER
  • 34 POSTS
This picture is idle with vent temping at 60 degrees on a 90 day.
Was this
answer
helpful?
Yes
No
Thursday, July 9th, 2020 AT 1:59 PM
Tiny
XAVIER_COX
  • MEMBER
  • 34 POSTS
Any clue one what's going on? When I sit in my car it's usually 60 degrees coming out of the vent and if I rev my engine it goes down close to 50 degrees.
Was this
answer
helpful?
Yes
No
Thursday, July 9th, 2020 AT 2:01 PM
Tiny
ASEMASTER6371
  • MECHANIC
  • 52,797 POSTS
Okay, put a floor fan in front of the radiator and take the readings again.

The low side is too high. The high side is good.

Did you change the expansion valve?

Roy
Was this
answer
helpful?
Yes
No
Thursday, July 9th, 2020 AT 2:04 PM
Tiny
XAVIER_COX
  • MEMBER
  • 34 POSTS
Yep, condenser, dryer, compressor, and expansion valve all replaced. I will do that with floor fan and see what it says.
Was this
answer
helpful?
Yes
No
Thursday, July 9th, 2020 AT 2:07 PM
Tiny
ASEMASTER6371
  • MECHANIC
  • 52,797 POSTS
Okay, how much Freon did you add?

Roy
Was this
answer
helpful?
Yes
No
Thursday, July 9th, 2020 AT 2:09 PM
Tiny
XAVIER_COX
  • MEMBER
  • 34 POSTS
I did not have a scale. Trying to think it told me like 26 oz. I ended up doing almost 2 small cans. Tried to leave just a little left in the 2nd can.
Was this
answer
helpful?
Yes
No
Thursday, July 9th, 2020 AT 2:16 PM

Please login or register to post a reply.

Sponsored links