Description
A vacuum down and recharge service is meant for repairs and/or full service of a car's air conditioner system. This guide is different than simply adding refrigerant to the AC system and includes a more in depth service.
This service is usually performed once a repair has been completed (system opened). The air conditioning system in your car is not complicated, if you need a simple explanation please visit this guide, how car air conditioners work. The following process removes moisture that can cause damage once the system has been opened up and repairs performed. Also, manufactures recommend that the AC system be serviced by-yearly to remove moisture during normal operation.
Types of Refrigerant
It is important to know which refrigerant is used before you begin, most systems will have a label or ticker identifying the refrigerant used. Do not mix refrigerants.
- R-12 (Dichlorodifluoromethane):
Start Date: Used by car manufacturers from the 1930s.
End Date: Phased out by manufacturers by the 1990s due to environmental concerns. - R-134a (Tetrafluoroethane):
Start Date: Introduced by vehicle manufacturers in the 1990s.
End Date: Still in use. - R-1234yf (2,3,3,3-Tetrafluoropropene):
Start Date: Used by some manufacturers starting around 2009.
End Date: Still in use.
Note: 1234yf: The latest and even more environment friendly refrigerant is flammable, (the earlier predecessors r-12 and r-134a or not). Due to this flammability, most German car manufacturers have opted to stay with R134a sighting potential fires potential in front end collisions.
Let's Begin
Getting the supplies needed to complete this service from Amazon is about $149.00, plus refrigerant. If a shop or dealer does the job the one time cost will be about $300.00.
- AC Gauge Set
- AC Refrigerant recharge cans
- AC Vacuum pump
Park the vehicle on a level ground with the engine off. Apply the emergency brake with the transmission in park, wear protective eyewear and gloves.
Caution: Do not loosen any air conditioner components/hoses while under pressure.
Locating AC Service Ports
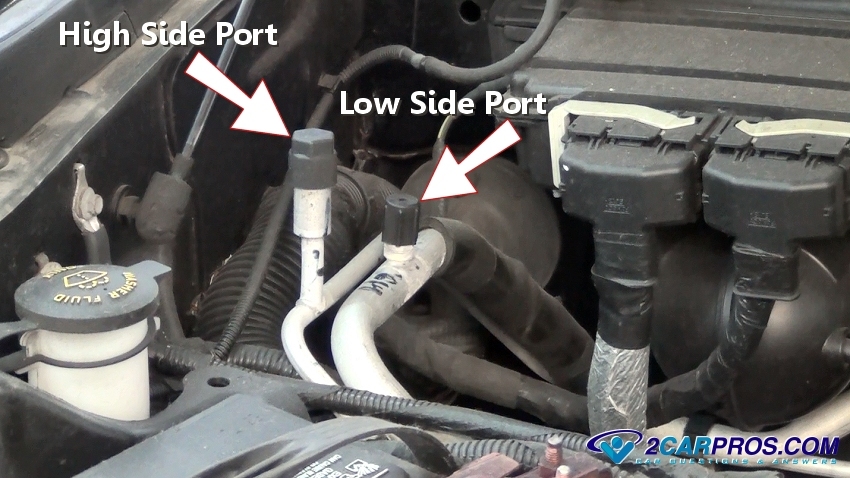
If the system has had a pressure related failure and is flat then continue, if the system has pressure, the refrigerant must be recovered which can be done at most automotive repair shops for a nominal fee, or you can skip down to "Step 10" to see how. If you are unsure if the system has pressure continue down this guide. The high side service port will be on the AC line between compressor and condenser, or from the condenser to the expansion valve/orifice tube.
The low side port will be on the return line between the evaporator (firewall) and compressor. Some ports are located on the compressor or receiver dryer/accumulator. The high side port is smaller in size than the low side. This video will show you how to find the low side port.
Step 2: Prepare the AC Gauge Set
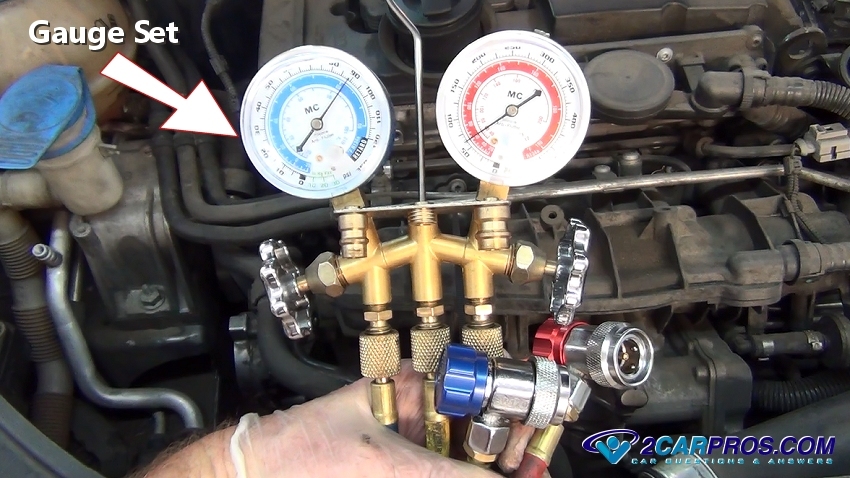
A gauge set is needed to connect and monitor to the AC system on both high and low side pressure ports, it will also be used to vacuum down and recharge the system.
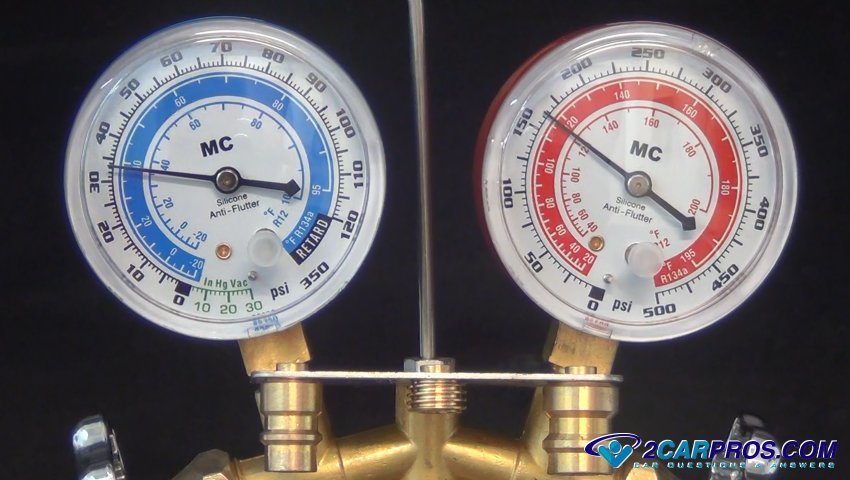
Inspect the hose connections to make sure they are tight to avoid leakage. The gauges must be "air tight" and not have any leaks at hose fittings or valves. The red colored gauge and valve connector represent the high side pressure of the system, while the blue color represents the low pressure side.
The center hose (yellow) is connected to a vacuum pump, and then the new refrigerant supply bottle or can. Both gauge valves should be closed before being attached to the system.
Step 3: Connecting the Gauges to the System
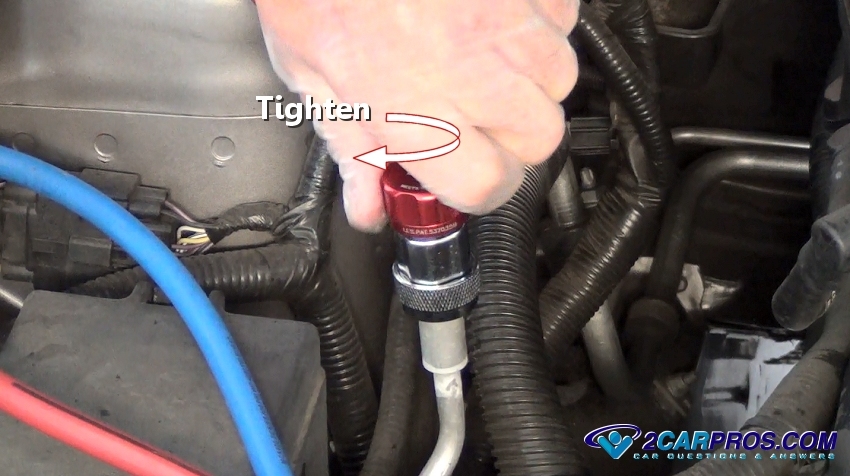
Connect the gauge set to the high and low side pressure ports by lifting up the connector ring and pushing downward. A small amount of pressure might be released which is normal. Then turn the valve screw (blue/red part) inward (clockwise), this will open the service valve below. Repeat this process for both high and low side ports.
The high and low side fittings will only work on their respective ports due to size constraints to avoid confusion.
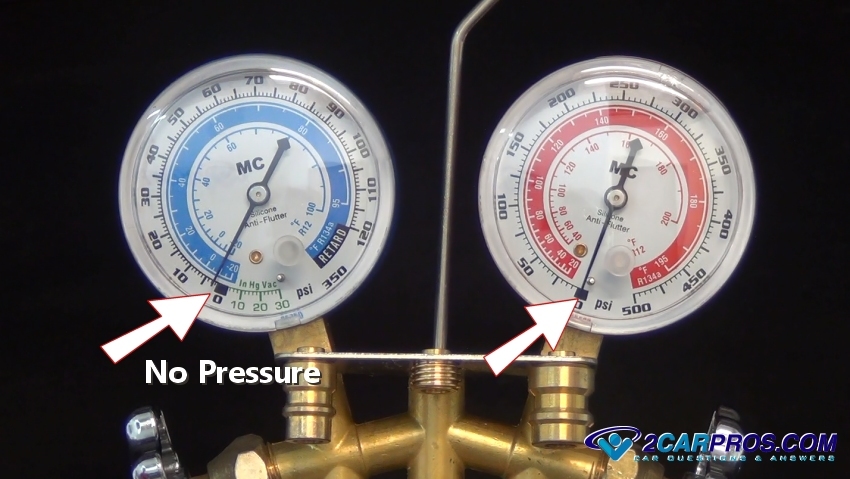
Step 4: Observe Gauge Readings
Observe both high and low side gauges with the valves closed, there should be little to no pressure in the system if it is "flat, no pressure". In this case you are safe to disassemble the AC system and make repairs.
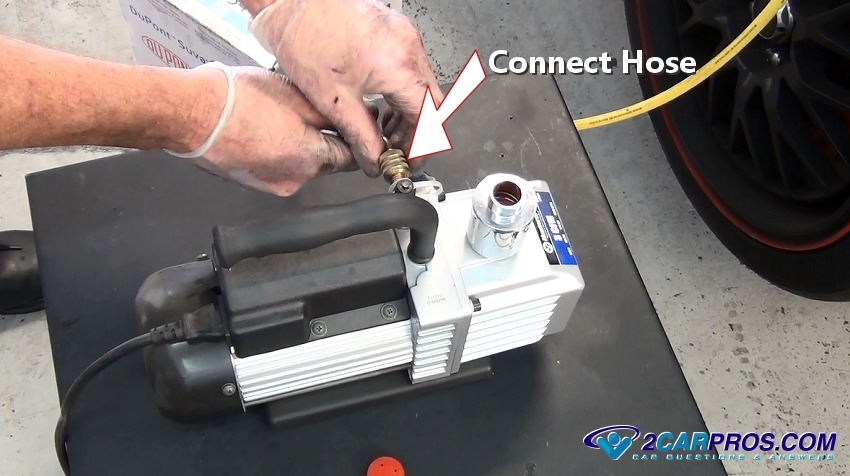
Step 5: Connect the Vacuum Pump
When repairs are complete, or if you are performing a full air conditioner service connect the center hose from the gauge set (yellow) to the vacuum pump and turn the unit on, you will hear a gurgling noise which is normal. This step removes any moisture and static air from inside the system.
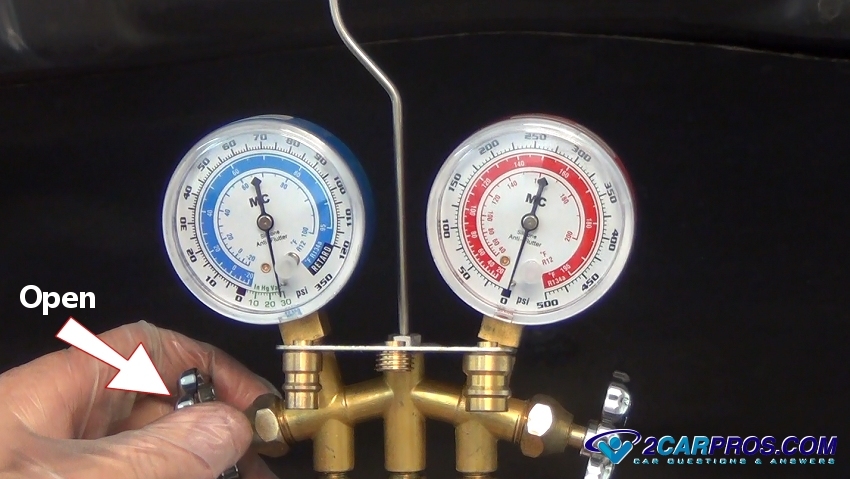
Step 6: Vacuum the System
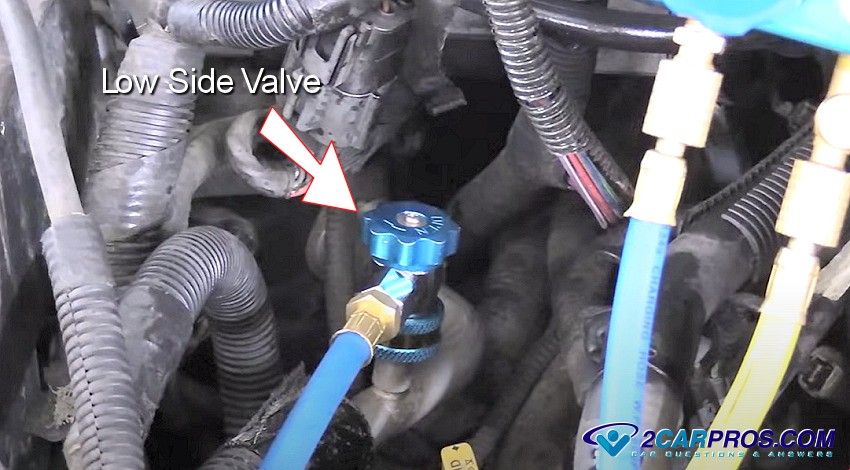
Slowly open the low side gauge valve, the pump will now start pulling vacuum throughout the AC system as the gauge needle slowly moves into the vacuum part of the gauge. The pump will change tone once the valve has been opened and it starts to pull air out of the system.
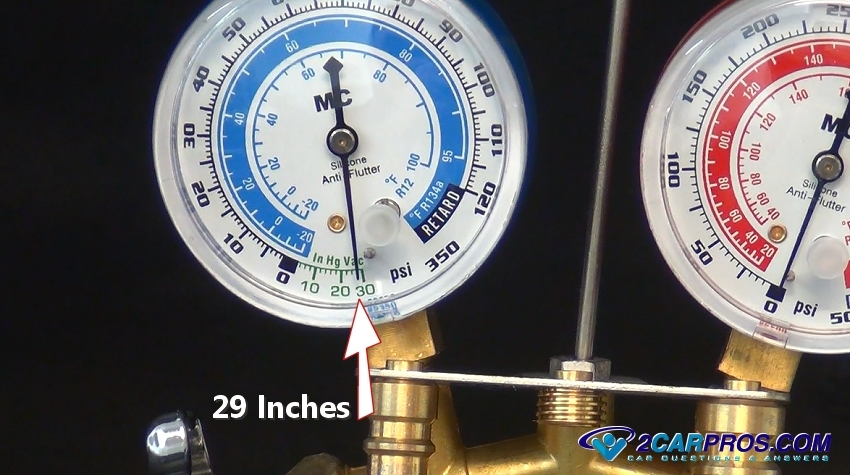
Once the vacuum pump has been on for about 30 minutes close the low side valve and turn the pump off. The system should hold at 28-29 inches of vacuum. If the system never reaches 28-29 inches there is a large leak, if the system loses vacuum after 15 minutes there is a small leak and the system must be rechecked.
Step 7: Compressor Oil
Car AC systems have a mixture of refrigerant and oil to keep the air conditioning compressor lubricated during operation. Measuring the amount of (PAG) oil in the system is difficult because it's spread throughout the system, but the majority of the oil is held inside the compressor. So a rule of thumb is, if the system has suffered a large blow out leak such as a hose failure then estimate the amount of oil lost and add it. If you don't notice any oil leakage then none needs to be added, you must be the judge of this and add appropriately.
If you are replacing the AC compressor then follow the instructions that were included with the unit.
Step8: Recharging the Air Conditioner System
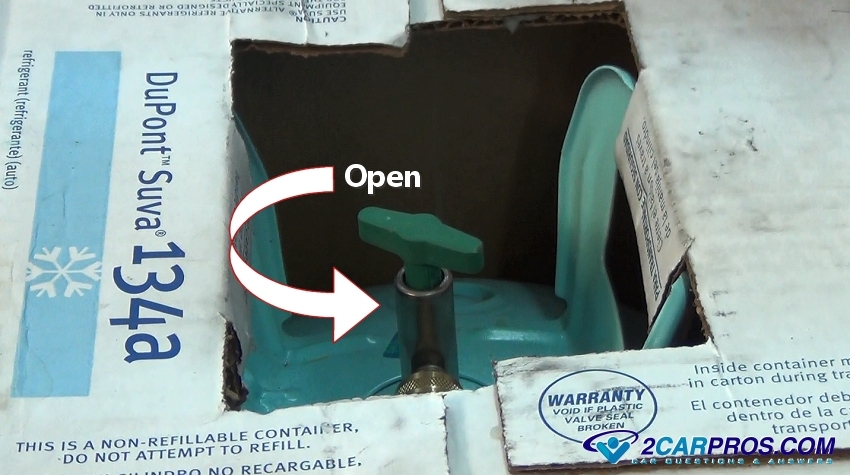
Disconnect the yellow hose from the vacuum pump and attach it to a new refrigerant source which could be a keg (shown) or individual cans which are both available on Amazon or at the local auto parts store.
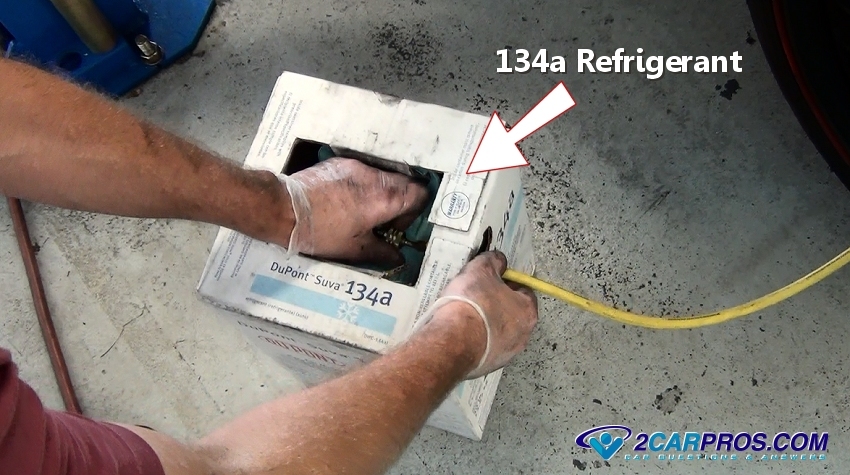
Open the valve on the keg or recharge can to allow the refrigerant to be present at the low side valve on the gauge set.
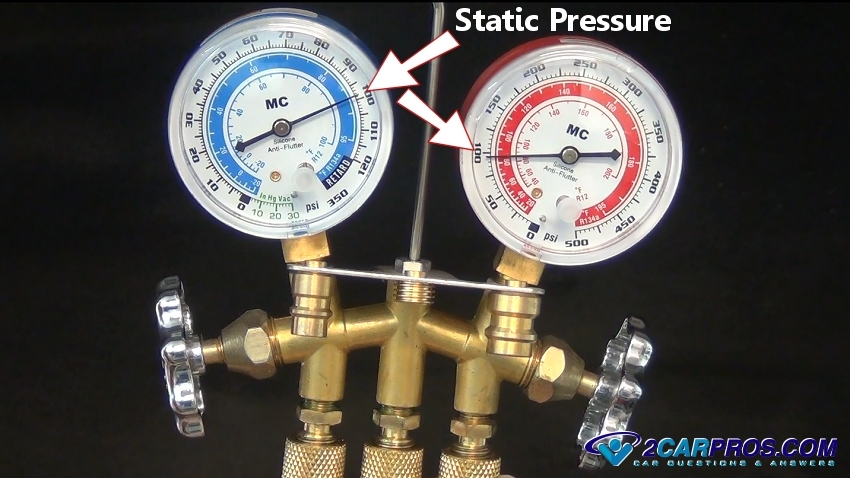
While the gauge valves are still closed, and once the refrigerant source has been opened, the gauges will respond with an equal readings on both high and low side letting you know that refrigerant is present and ready to be installed. This is static pressure which will vary depending on the outside temperature. The warmer the weather the higher the reading will be, this is normal.
Each system has a specific amount of refrigerant that it needs to operate correctly. This amount is located in the owner's manual or on the system underhood sticker/label. If you are using a keg and digital bathroom scale will help tell how much has been added. Using refrigerant cans make this measurement easier because each can will be 8 ounces etc. This guide will successfully recharge the system even if this information is not available.
Reference the image below to see how refrigerant will flow (arrows) once the low side gauge is opened. Never open the high side valve while charging. The high side connection is for monitoring purposes only.
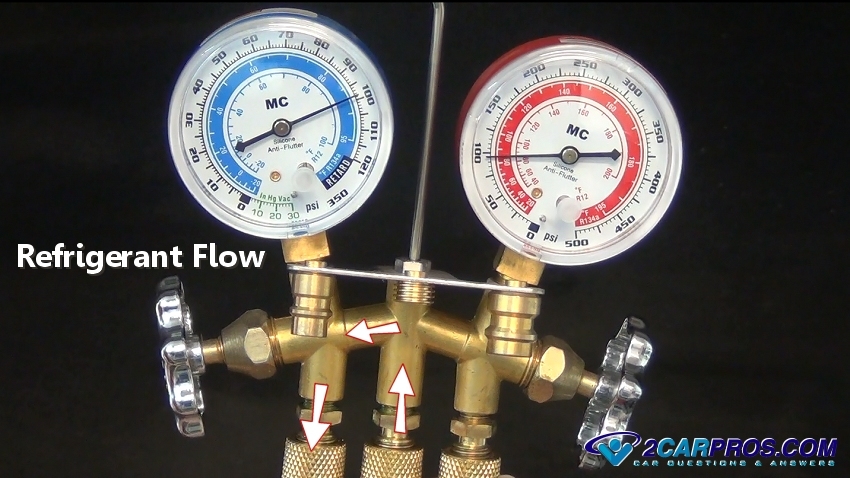
Start the engine and turn the AC system to the highest settings of coldness and fan speed, this will help charge the system completely. Slowly open the low side (blue) valve (never open the valve completely) until the refrigerant starts to flow into the system.
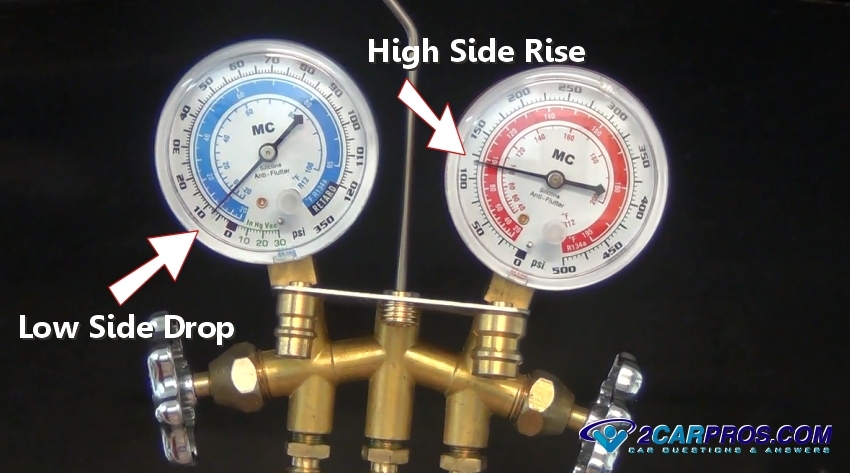
This will turn the compressor on via the system low pressure sensor. When this happens low the gauge pressure will start to drop, and the compressor will cycle on and off as the system low side pressure rises and then lowers, continue to add refrigerant.
The high side pressure will steadily start to rise. Have a helper raise the engine idle slightly, and to use a garden hose to spray water over the condenser at the front of the vehicle to help cool it down (simulated air flow).
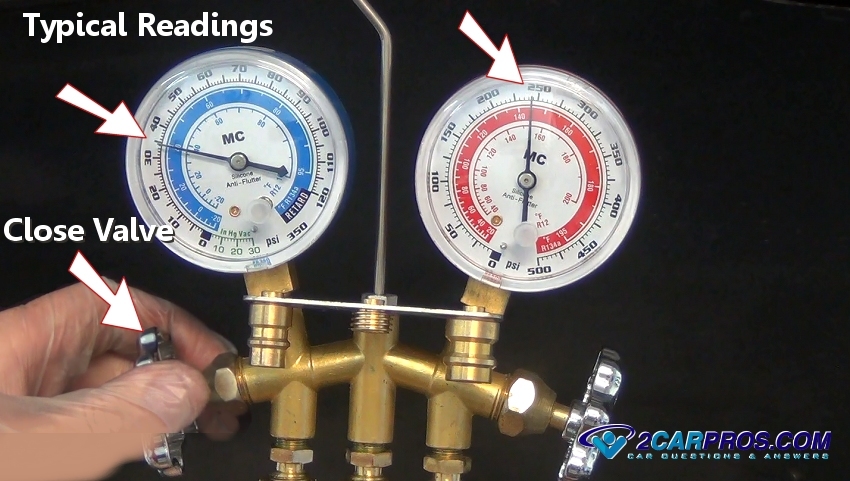
Continue adding refrigerant until the gauges start to look like this (below) and the compressor stops cycling, close the low side valve on the gauges. If both gauges are too high the system is overcharged or the cooling fan is not working. If high side pressure runs way up quickly (300+) and the low side goes into a vacuum the system has blockage such as a plugged expansion valve or orifice tube. If the compressor engages and neither gauge pressures move (stay the same) the compressor has failed and needs replacement.
Here is a chart to help you get an idea of what the pressures should approximately be for r134a, for R-1234yf the readings will be slightly higher on both high and low sides. A general rule of thumb is, if the air becomes cold inside the car then stop added refrigerant, more will not make it even colder.
Outside Temperature - Low Pressure - High Pressure
- 75° F - Low side 30/40 psi - High side 190/210 psi
- 85° F - Low side 45/55 psi - High side 220/240 psi
- 95° F - Low side 50/55 psi - High side 240/265 psi
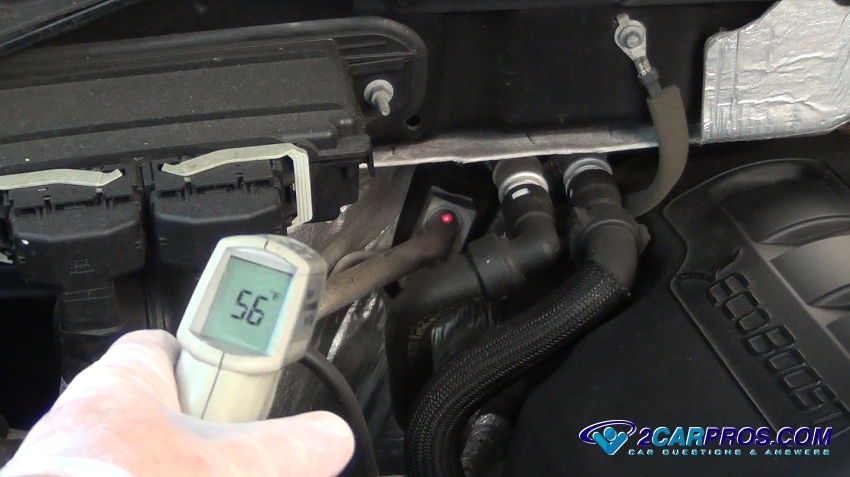
As pressures rise, monitor the temperature of outgoing line (low side) of the evaporator as well as the air vents in the passenger compartment. Both should be cold to the touch signaling the system is full. To much refrigerant will reduce the system's efficiency because it is unable to achieve the pressure drop needed inside the evaporator.
Step 9: Disconnecting the Gauge Set
Once the system is performing properly and producing cold air the gauge set is ready to be removed. If the system is not working troubleshooting the AC system is needed. After you have completed the charge turn the air condition system off, and then shut down the engine.
Turn the high side connector counterclockwise to close the internal valve, effectively closing the service port, repeat this procedure for both high and low side valves.
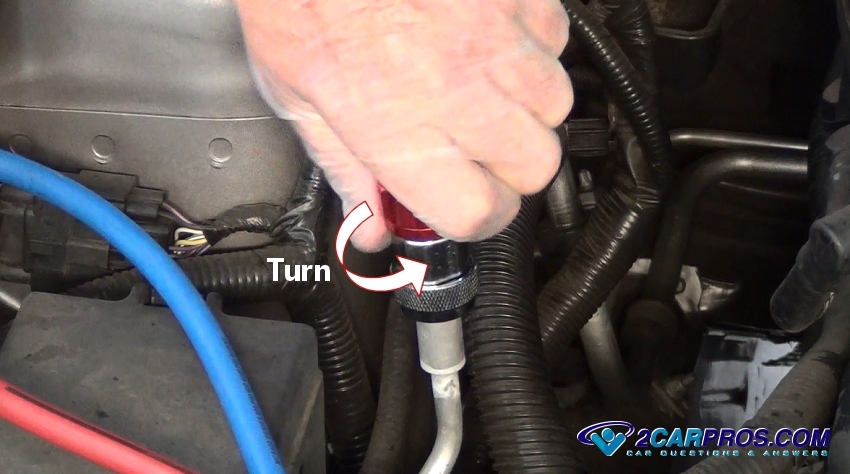
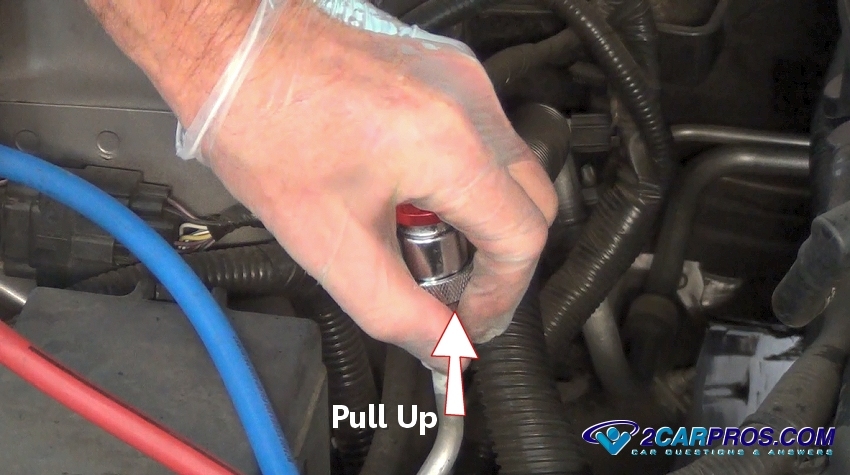
Firmly grasp the valve retainer and pull up, this will release the connector from the service port. You will notice a slight pressure release sound, this is normal, repeat this procedure for both red and blue service connectors.
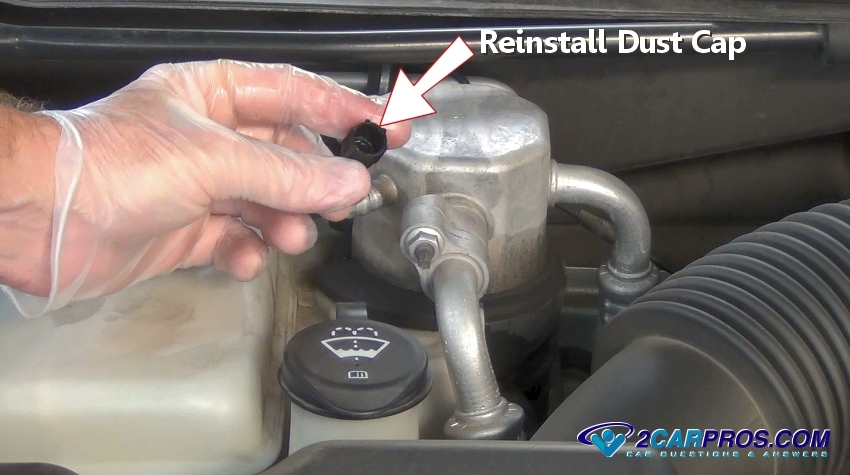
Once both valves have been removed, reinstall the dust caps for each service port. Close the refrigerant supply valve and store the gauge set properly for your next repair. Enjoy the cold air!
Step 10: Refrigerant Recovery
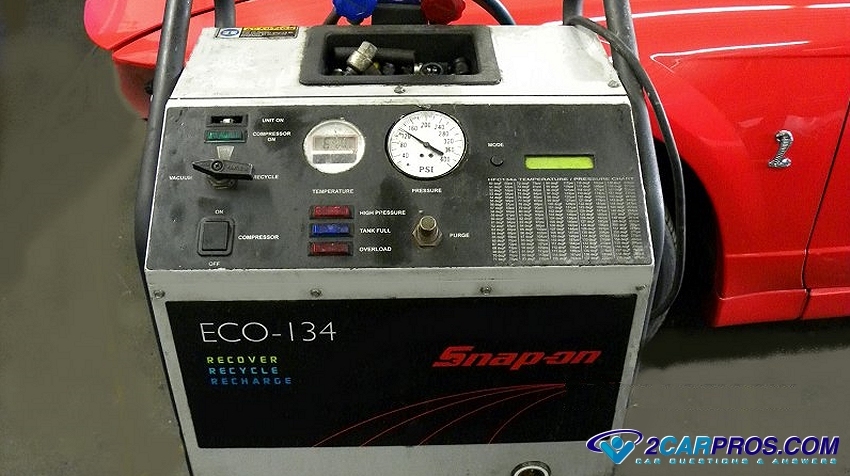
A fully charged system contains refrigerant under pressure (70 to 90 psi static - system not running). If you are performing this service without repairs then the system must be discharged, which is done with an AC recovery machine. Allowing the refrigerant to leak into the atmosphere is illegal though not as harmful compared to it's predecessor r12 which was slowly bled out of the system by loosening a hose fitting at the gauge set.
This liquid/gas can be contained if you have a recovery machine which can be found in most car repair shops. Contact a garage to have the refrigerant recovered before work begins. The recycling machine gathers refrigerant along with a very small amount of compressor oil which is then is separated into individual tanks.
Watch the Video!
Please watch this video of the job being done to glean additional helpful information.
Credits
This guide knowledge base was created by the 2CarPros Team, and by Ken Lavacot: Automobile repair shop owner and certified master automobile technician of over 30 years. If you have question or need help please ask one of our experts we are happy to help. Please visit our 2CarPros YouTube Channel.