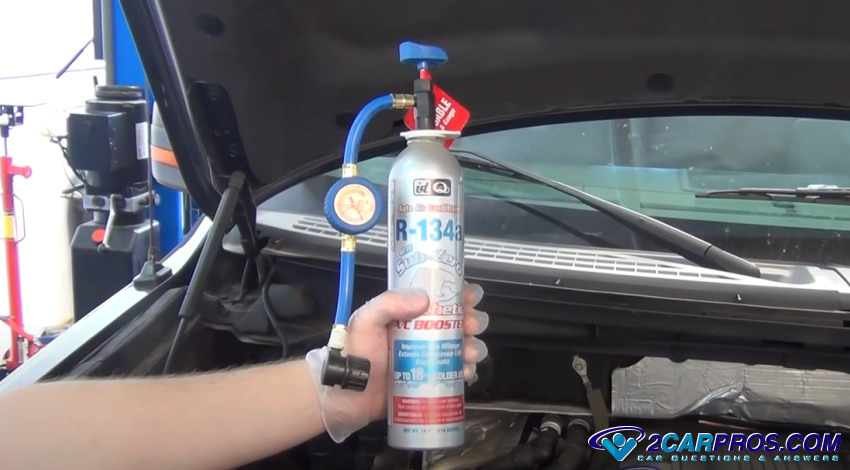
In this guide we show you how to add refrigerant to your car's air conditioner system, simple and easy. Getting started, you will need a refrigerant kit that looks like this which you can get from Amazon or the local auto parts store.
Let's Jump In!
Simple charge kits include
- Control Valve: Limits the refrigerant flow.
- A Pressure Level Gauge: Indicates when the system is full.
- Service Connector: Attaches to the low side service port
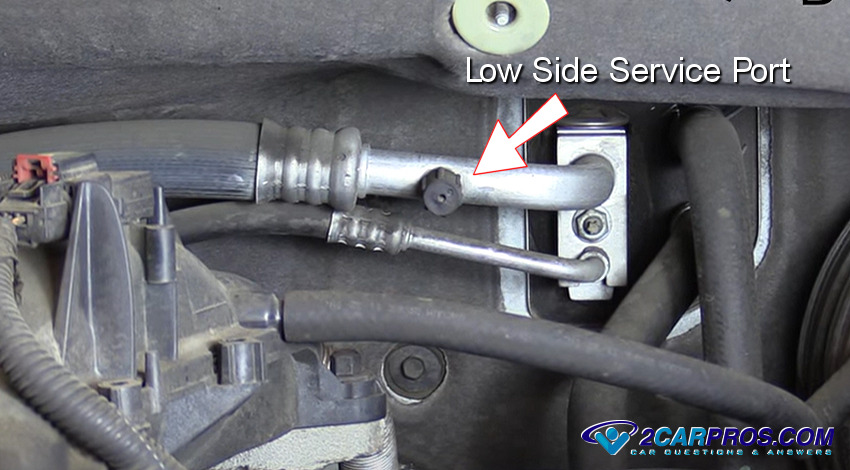
Step 1: Locate the Low Pressure Side Service Port
To add refrigerant, the low side service port must be located which is the larger AC line from the firewall to the rear of the AC compressor. There are two service ports, one high, one low, the low side will be larger is size - Video.
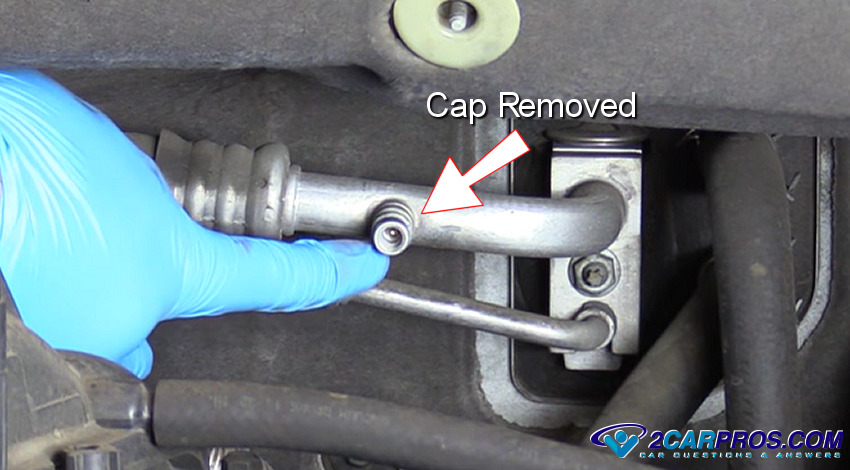
Step 2: Connecting the Recharge Kit
With the engine off, remove the low side service port cap that will expose the internal valve which is much like the tire valve a car or bicycle, (Note: The low side fitting will not fit over the high side port to avoid confusion).
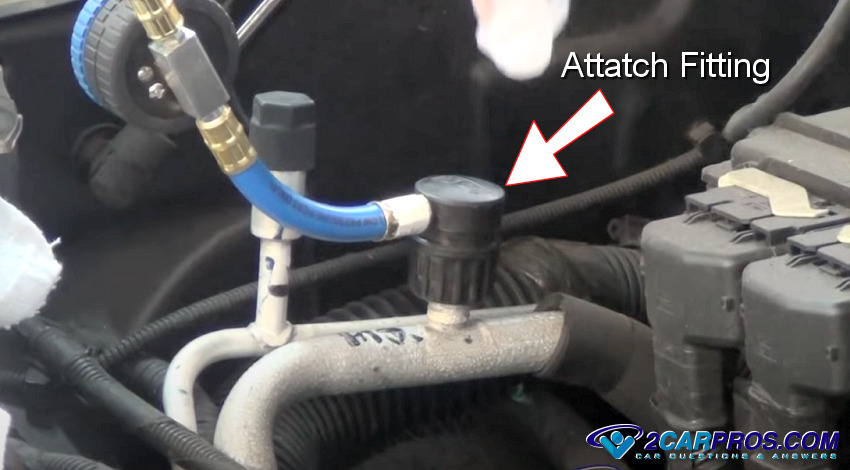
Pull upwards on the valve collar while pushing downward to secure the kit hose onto the low side service port. You will hear a slight amount of pressure being released for a spit second which is normal.
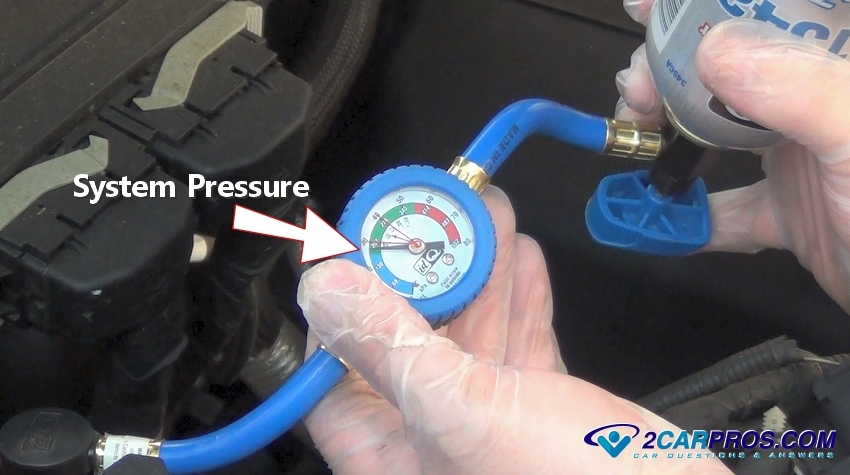
Step 3: Reading the System Pressure
The gauge will indicate the static pressure in the system. If the system is flat with no pressure showing on the gauge there is a leak that must be found and corrected before charging the AC system. In the example below the system is simply low on charge, which is indicated by the gauge. The needle should be in the green for a sufficient charge.
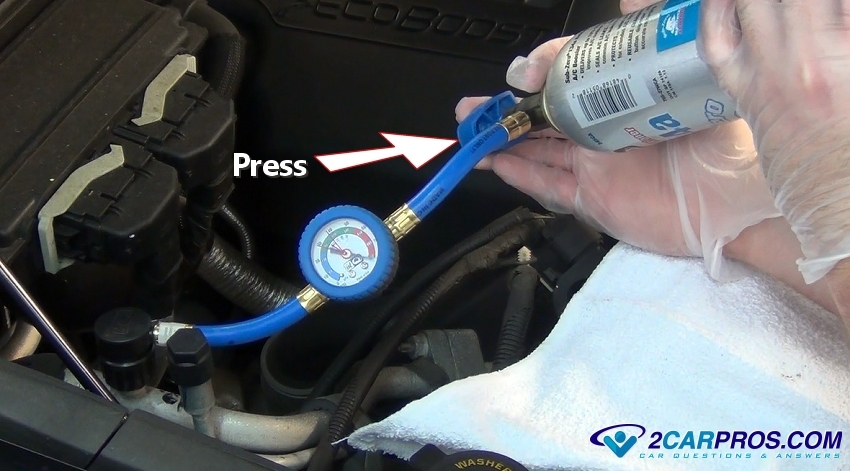
Step 4: Adding Refrigerant
Start the engine and allow it to idle and warm up to operating temperature. Turn the air conditioner on and adjust it to the coldest settings including the highest fan speed.
The compressor should begin operating which will be followed by the pressure dropping on the gauge. Turn the can upside down and press the plunger valve inward toward the can, this will begin the release of the refrigerant into the system.
Continue this for a few seconds then release the plunger. The gauge will go up signaling the transfer from the can into the system, the gauge will go back down again once the plunger is released and give you the state of charge reading.
Continue this process of press and release until the system has the correct pressure which is indicated on the gauge. Do not overfill the system, it will not help it be even colder than it already is. In fact if the system is overfilled it will do the opposite and the system will not work as well.
When the system is full the gauge on the kit will show somewhere in the middle on a normal day with an average temperature (about 80° F or 26° C). If the outside air temperature is warmer then usual the gauge will read on the upper side of full but not into the red. Check the temperature of the air blowing from the vents inside the car. You should feel the coldness coming back to normal, about 52° to 57° F or 11° to 13° C, the system is now fully charged.
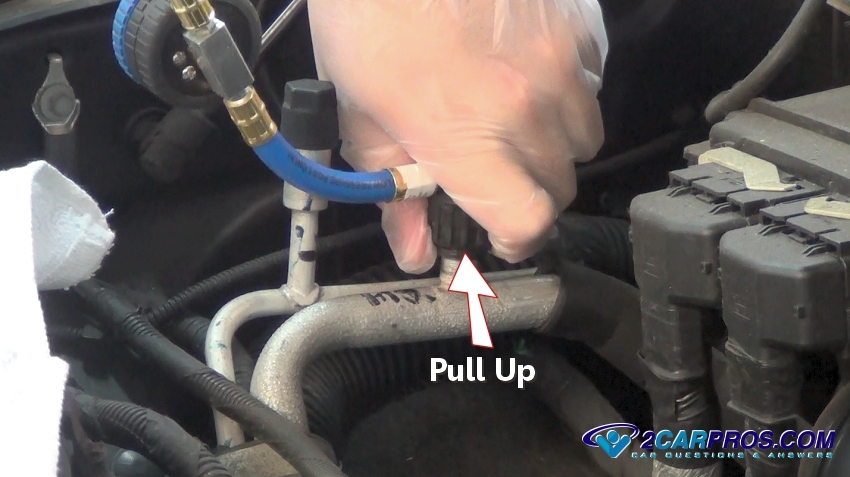
Step 5: Disconnecting the Kit
Once you are done adding refrigerant shut the engine off, pull upward on the valve retainer ring to lease the connector and remove the kit, the service port will close automatically. Reinstall the dust cap to the port, do not over tighten the plastic cap and you are all set, enjoy the cold air!.
Watch the Video!
Please watch this video of the job being done to glean additional helpful information.
Credits
This guide knowledge base was created by the 2CarPros Team, and by Ken Lavacot: Automobile repair shop owner and certified master automobile technician of over 30 years. If you have question or need help please ask one of our experts we are happy to help. Please visit our 2CarPros YouTube Channel.