Welcome to 2CarPros.
What you described sounds like a crankshaft position sensor. When you checked it, was the engine hot or cold?
Also, when the car stops running and won't start, you need to check for spark and fuel to the engine. One will most likely be missing and that way we can limit possibilities. You can either simply see if the engine starts for a couple seconds using starting fluid, or check fuel pump pressure and ignition spark.
If it does start with starting fluid, then you have a fuel related issue. If it doesn't, then it is ignition related (no spark) and most likely the sensor.
Here are links that explain how to check for spark and fuel pressure. You can do it this way or with starting fluid.
https://www.2carpros.com/articles/how-to-check-fuel-system-pressure-and-regulator
https://www.2carpros.com/articles/how-to-test-an-ignition-system
_______________________________
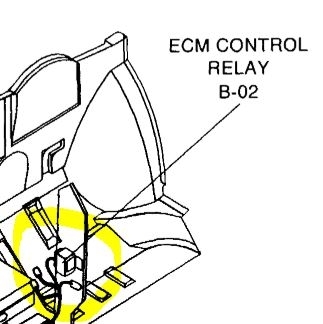
Here are the directions specific to checking fuel pressure. The attached pics correlate with these directions. Also, specifications are included in the directions as well as possible causes based on what is found.
FUEL PRESSURE TEST
pic 1
1. Reduce the internal pressure of the fuel pipes and hoses by the following procedures.
- Open the trunk door and disconnect the fuel pump harness connector in the trunk room.
- Start the engine and after it stalls, turn the ignition switch to the OFF position.
- Disconnect the battery negative (-) terminal.
- Connect the fuel pump harness connector.
2. Remove the bolt connecting the fuel line to the fuel delivery pipe.
WARNING: Cover the hose connection with a shop towel to prevent splashing of fuel caused by fuel residual pressure in the fuel line.
pic 2
3. Using the fuel pressure gauge adapter, install the fuel-pressure gauge to the fuel pressure gauge adaptor.
Tighten the bolt to the specified torque.
Fuel pressure gauge to fuel delivery pipe : 25 - 35 Nm (250 - 350 kg.cm, 18 - 26 lb.ft)
4. Connect the battery's negative (-) terminal.
5. Apply battery voltage to the terminal for the pump drive and activate the fuel pump: then, with fuel pressure applied, check that there is no fuel leakage from the pressure gauge or connection part.
6. Start and run the engine at curb idle speed.
pic 3
7. Disconnect the vacuum hose from the pressure regulator, and plug the hose end. Measure the fuel pressure at idle.
Standard value : 320 - 340 kPa (3.26 - 3.47 kg/Square cm, 46 - 49 psi)
pic 4
8. Measure the fuel pressure when the vacuum hose is connected to the pressure regulator.
Standard value : Approx. 255 kPa (2.57 kg/Square cm, 37 psi)
Condition/Probable Cause
pic 5
9. If the results of the measurements made in steps (7) and (8) are not within the standard value, use the table below to determine the probable cause, and make the necessary repairs.
Condition/Probable Cause
pic 6
10. Stop the engine and check for a change in the fuel pressure gauge reading, which should hold for approximately 5 minutes.
If the gauge indication drops, observe the rate of drop. Determine and remove the causes according to the table.
11. Reduce the pressure in the fuel line.
12. Disconnect the hose and the gauge.
WARNING: Cover the hose connection with a shop towel to prevent splashing of fuel caused by fuel residual pressure in the fuel line.
13. Replace the O-ring of the end of the hose.
14. Connect the fuel hose to the delivery pipe and tighten with the specified.
15. Check for fuel leakage.
___________________________
Let me know what you find or if you have other questions.
Take care,
Joe
Tuesday, May 28th, 2019 AT 7:48 PM