Hi and thanks for using 2CarPros.
Chances are you either lost fuel pressure or spark to the plugs. Take a look through this link:
https://www.2carpros.com/articles/car-cranks-but-wont-start
The easiest way to identify the problem is to see if it will start for a couple seconds using starting fluid. If it starts, then the problem is fuel related. If it won't start with starting fluid, then it is most likely ignition related.
If you don't feel comfortable using starting fluid, what I suggest is to first check fuel pressure since you no longer hear the pump. Here is a link that shows how that is done:
https://www.2carpros.com/articles/how-to-check-fuel-system-pressure-and-regulator
The specific pressures required are as follow:
FUEL SYSTEM PRESSURE
400 kpa ±34 kpa (58 psi ± 5 psi)
If you determine the pump is bad, here are general directions for replacement:
https://www.2carpros.com/articles/how-to-replace-an-electric-fuel-pump
Here are the directions specific to your vehicle. The attached pictures correlate with these directions.
________________________________________________
REMOVAL
1. Release fuel pressure.
2. Disconnect negative battery cable.
3. Remove fuel tank.
4. Vacuum area before removing fuel pump module lock ring.
5. Disconnect vapor line and electrical connector.
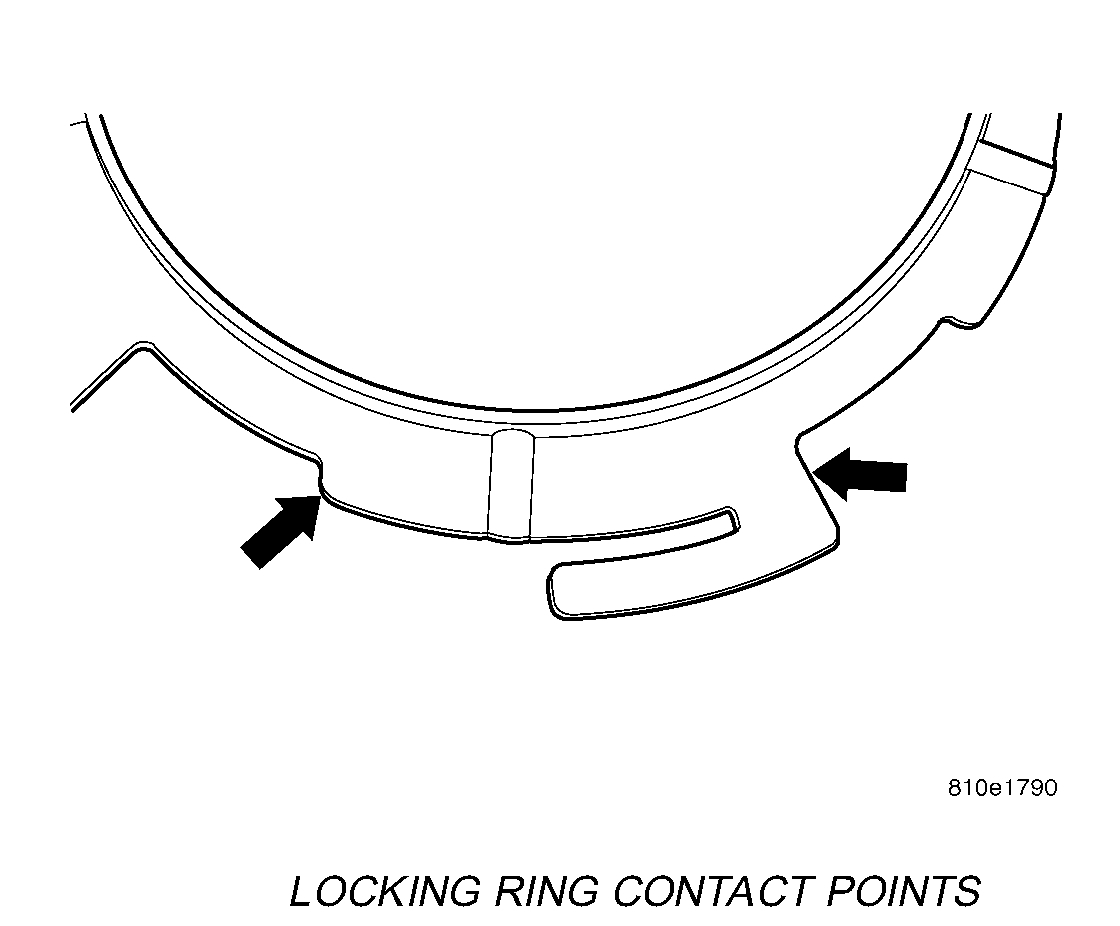
6. Remove Fuel Pump Module lock ring.
Locking Ring Contact Points
picture 1
NOTE: Use a brass punch to remove the 1/4 turn lock ring. Make contact only at the points.
7. Remove fuel pump module top.
8. Drain Fuel Tank using an approved gasoline draining station.
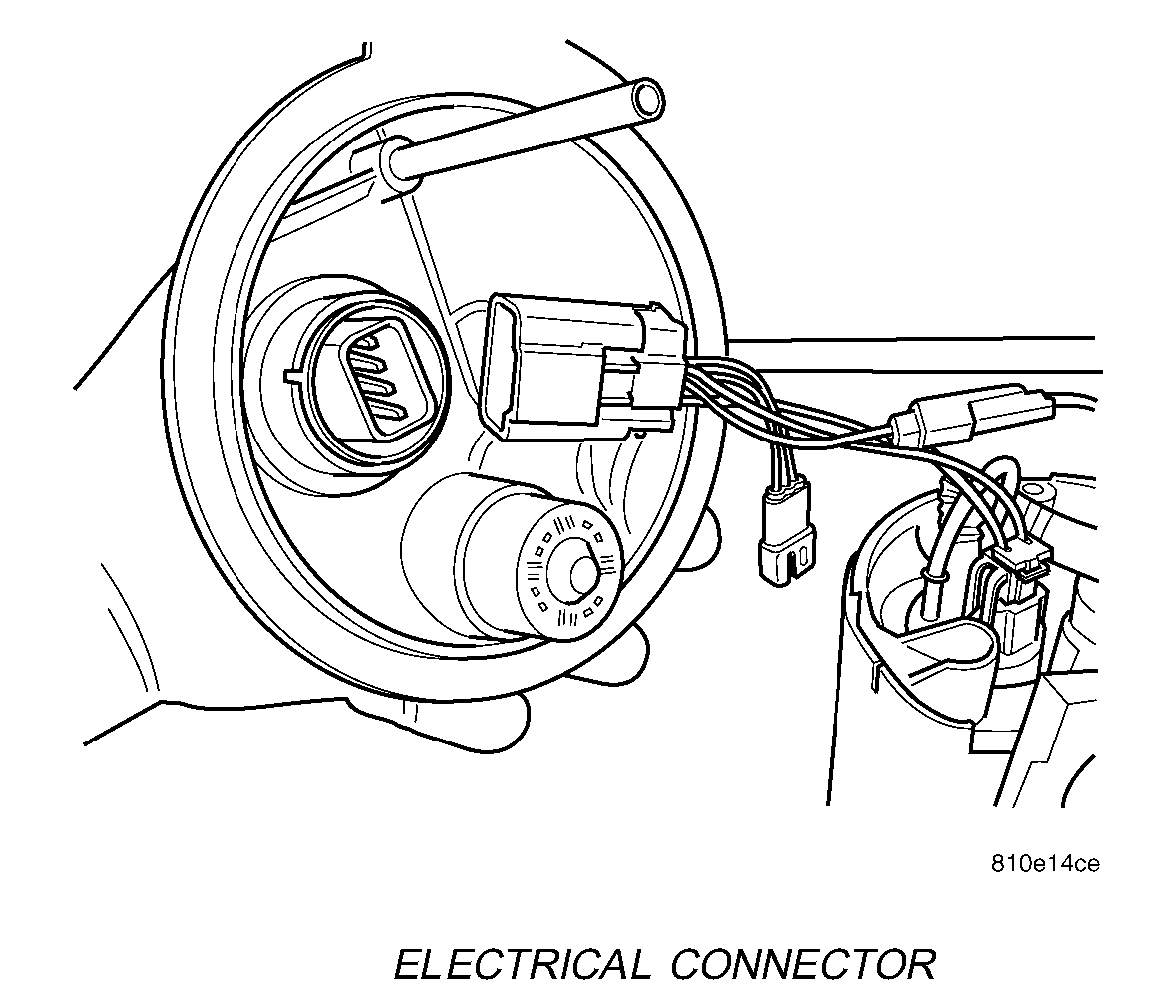
Electrical Connector
picture 2
9. Disconnect electrical connector.
10. The wire connector to the passenger side level sensor needs to be disconnected before removing the reservoir from the tank.
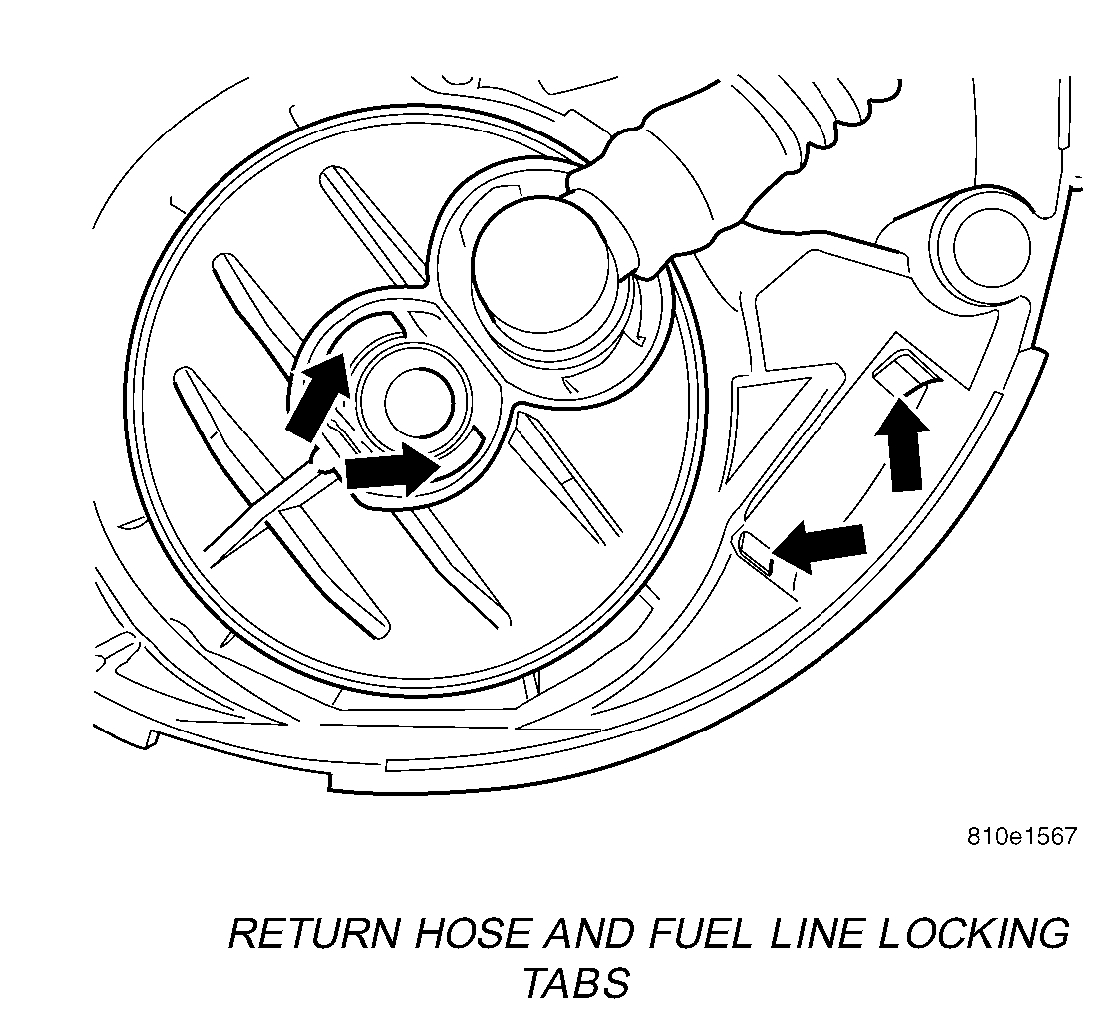
Return Hose And Fuel Line Locking Tabs
picture 3
11. Tab location in fuel pump module for return line and fuel supply line.
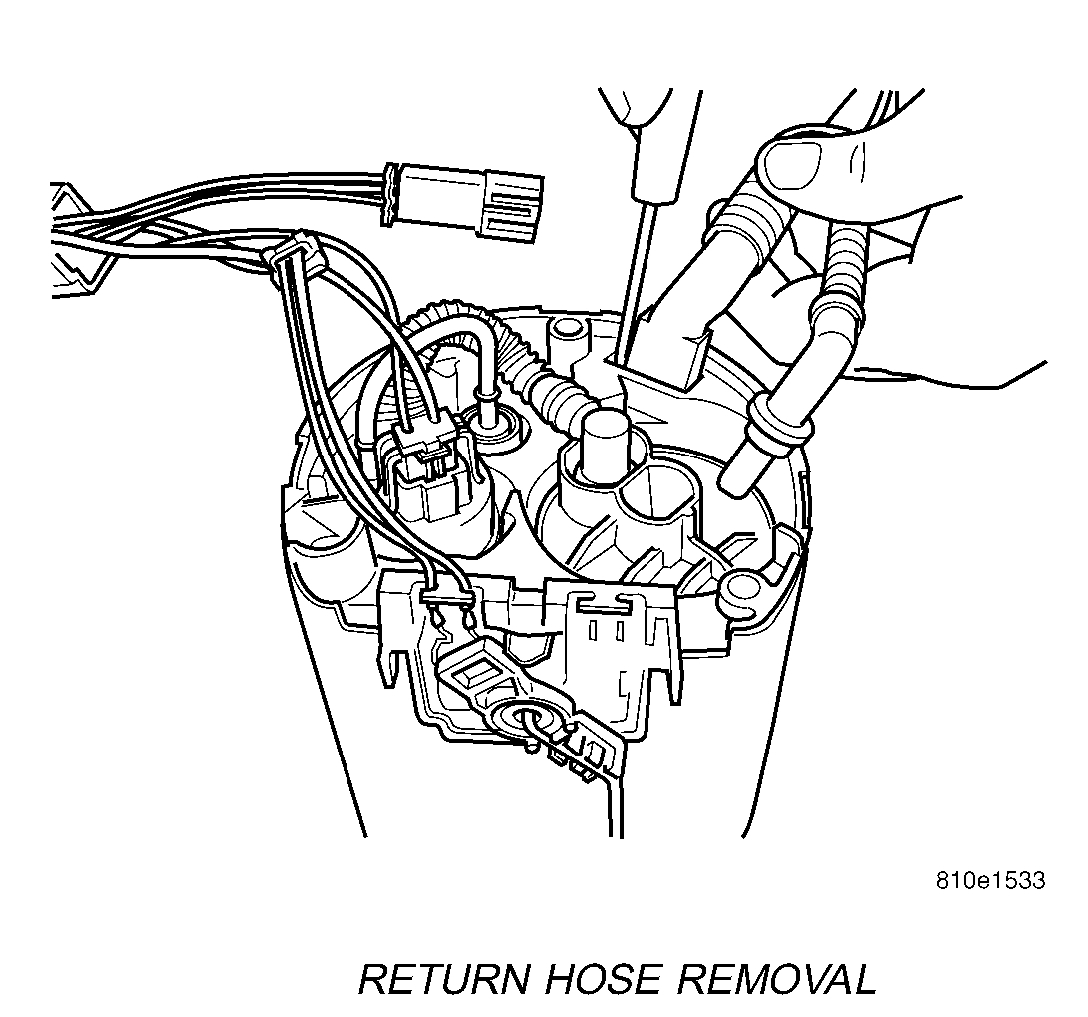
Return Hose Removal
picture 4
12. Remove return line from pump module. Use a small screwdriver to pry tab back and tip hose to one side. Pry tab on other side back to release hose.
CAUTION: Care should be taken to not crack/break the locking tabs or supply line fitting.
13. Remove fuel line from top of the pump module. Use a small screwdriver to pry tab back and tip hose to one side. Pry the tab on other side back to release hose.
14. Tip fuel pump module on its side to remove fuel from reservoir.
15. Remove fuel pump module.
INSTALLATION
1. Install fuel pump module into fuel tank.
Pump With Top Removed
picture 5
2. Connect siphon and fuel line to fuel pump module.
3. Connect fuel pump electrical connector to bottom of module top.
4. The wire connector to the passenger side level sensor needs to be connected.
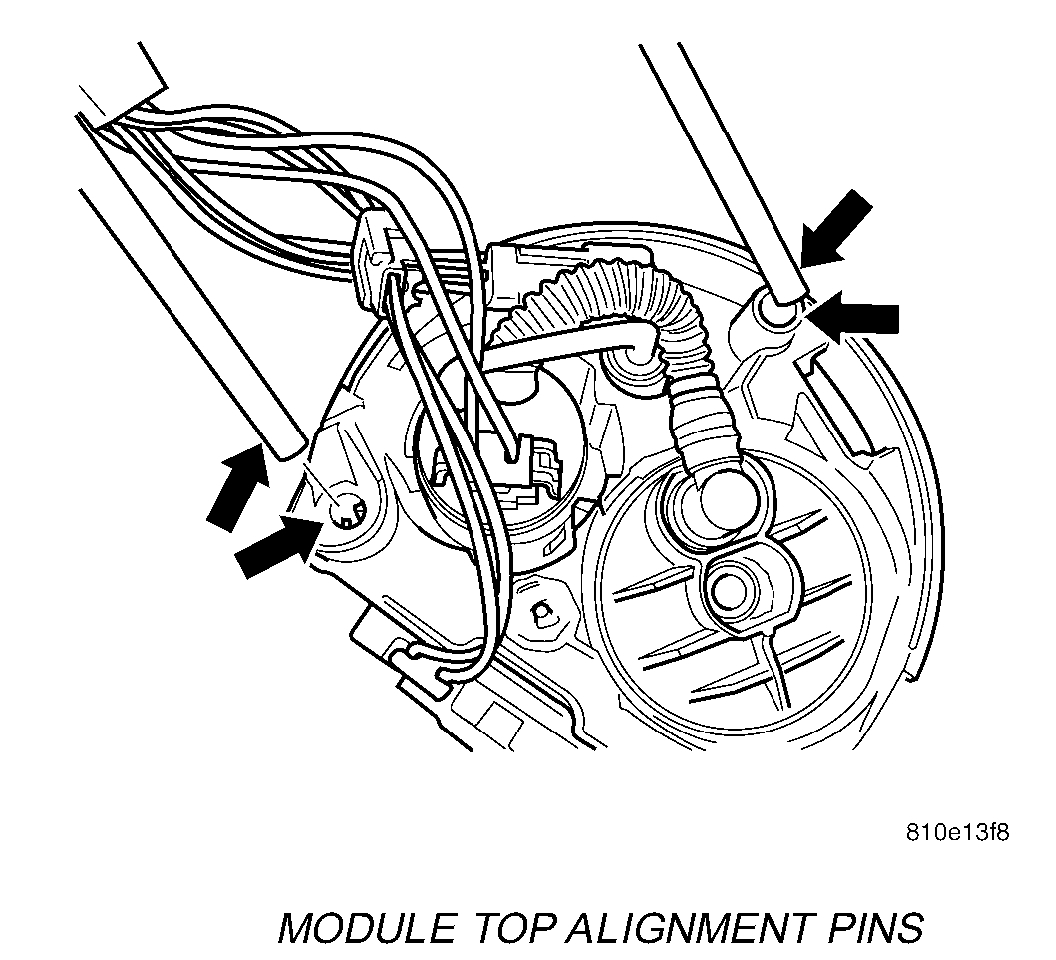
Module Top Alignment Pins
picture 6
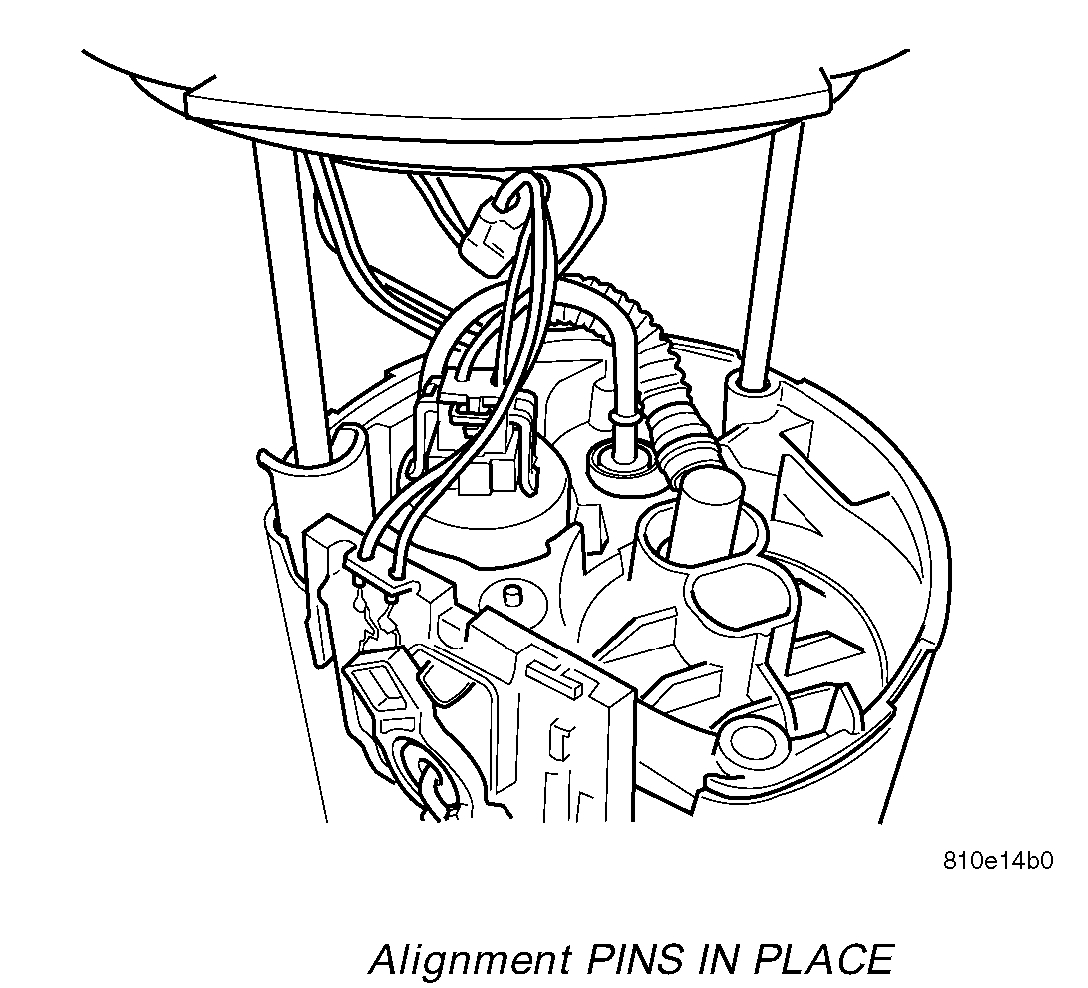
Alignment Pins In Place
picture 7
5. Install fuel pump module top to module.
6. Install Fuel Pump Module gasket and lock ring.
NOTE: Use a brass punch to install the 1/4 turn lock ring.
7. Connect vapor line and electrical connector.
8. Install fuel tank.
9. Connect negative battery cable.
10. Fill fuel tank. Use the scan tool to pressurize fuel system. Check for leaks.
__________________________________
Here are the directions for removal and replacement of the fuel tank. Attached pics correlate with these directions.
PROCEDURES
REMOVAL
1. Release the fuel pressure.
2. Disconnect the negative battery cable.
3. Drain fuel tank dry into holding tank or a properly labeled GASOLINE safety container.
4. Raise vehicle and support.
5. Disconnect the exhaust system between the catalytic converter and the muffler.
6. Support the exhaust system with jack stands.
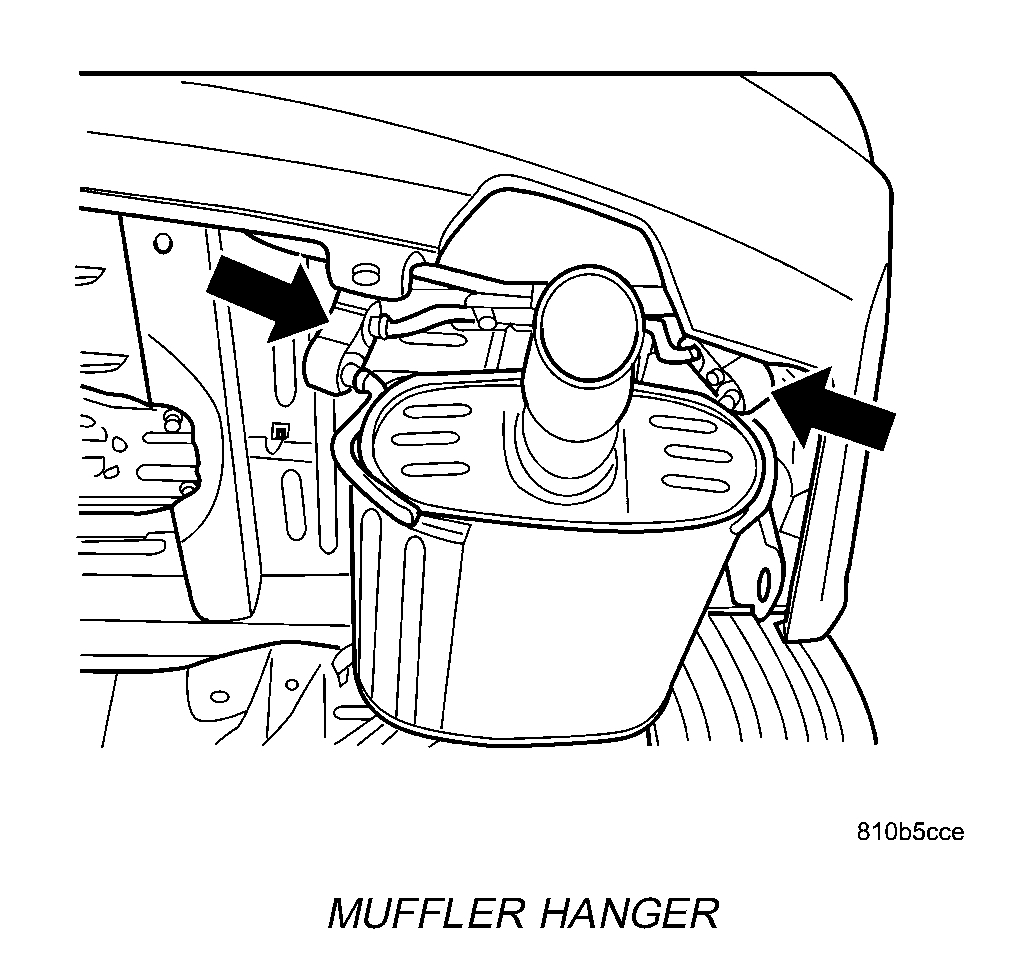
Muffler Hanger
picture 8
7. Remove muffler hanger rubber garments.
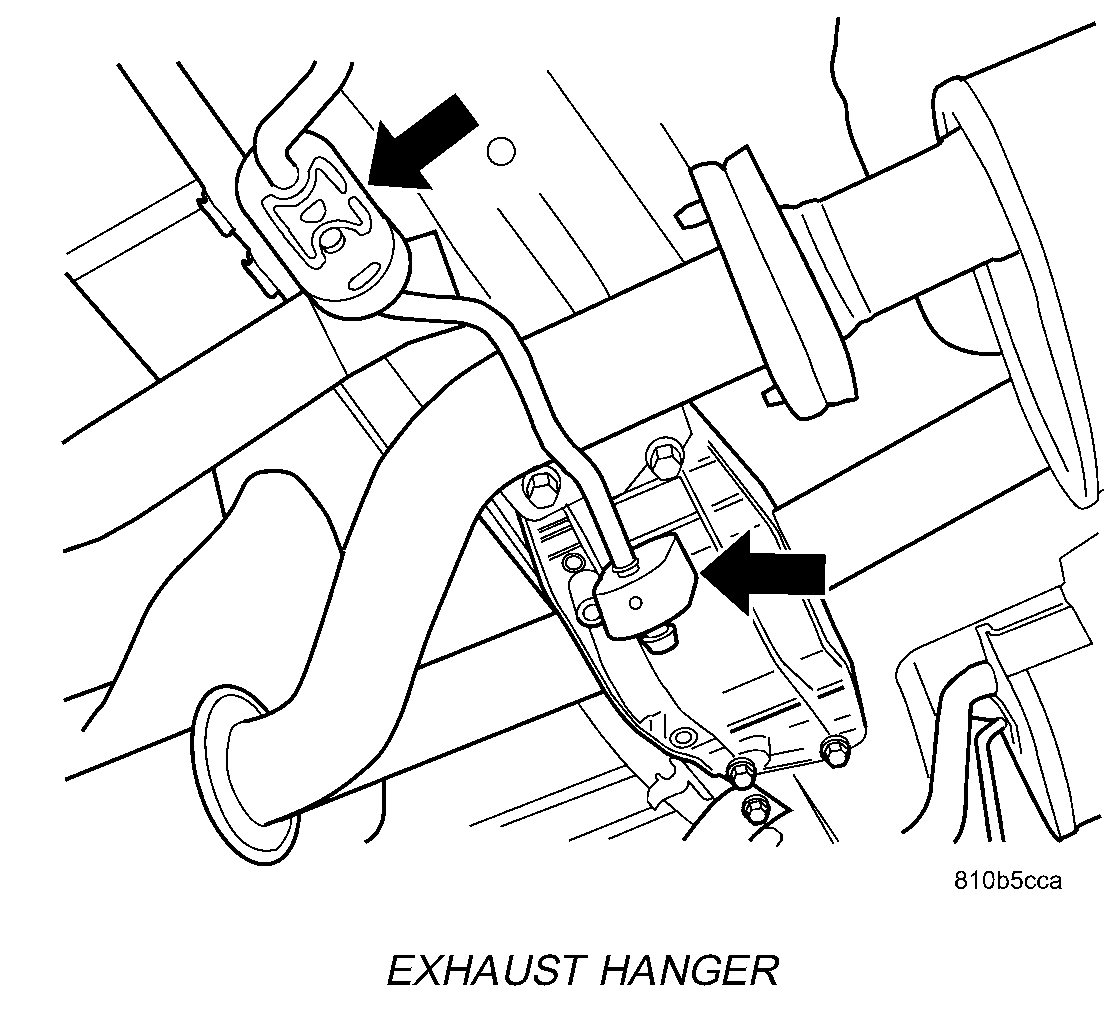
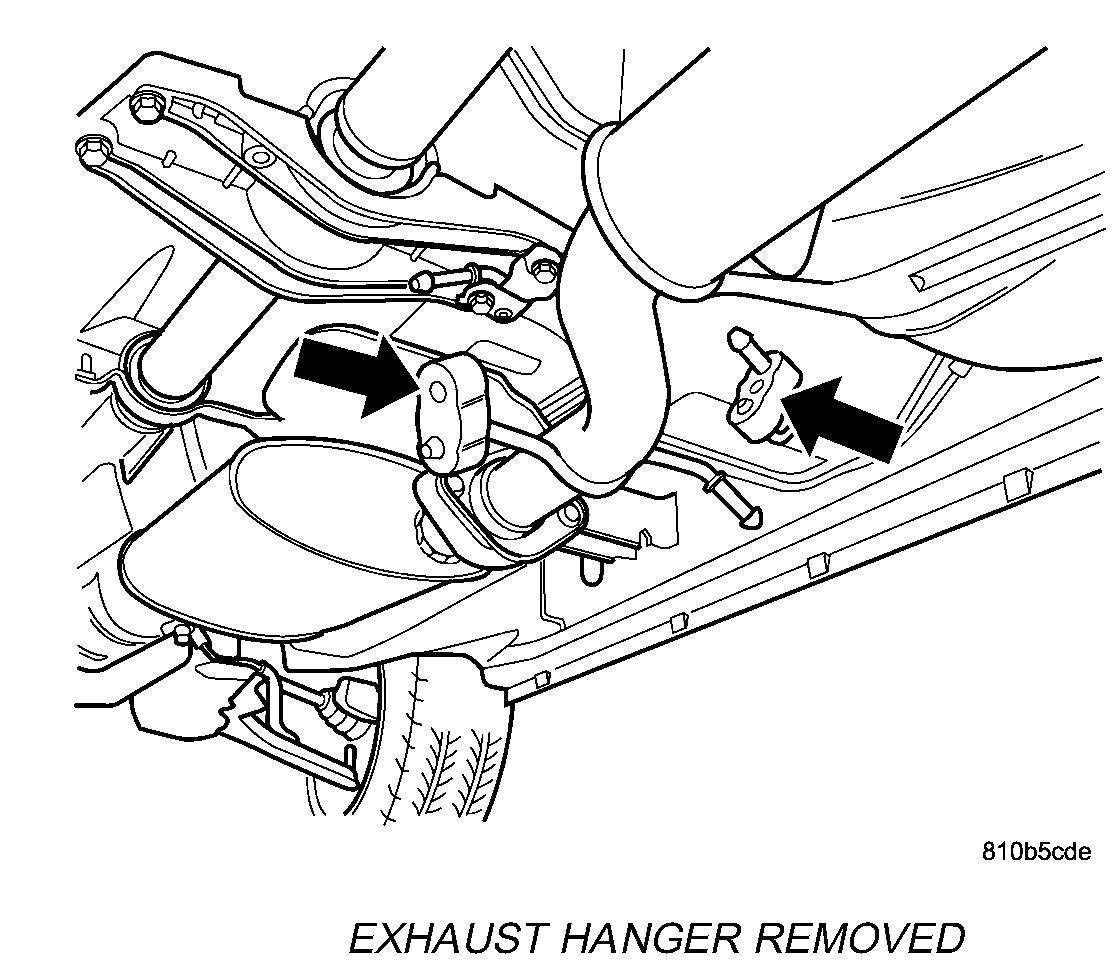
Exhaust Hanger
picture 9
Exhaust Hanger Removed
pic 10
8. Remove the center exhaust hanger rubber grommets.
9. Remove the rear portion of the exhaust system and set on floor.
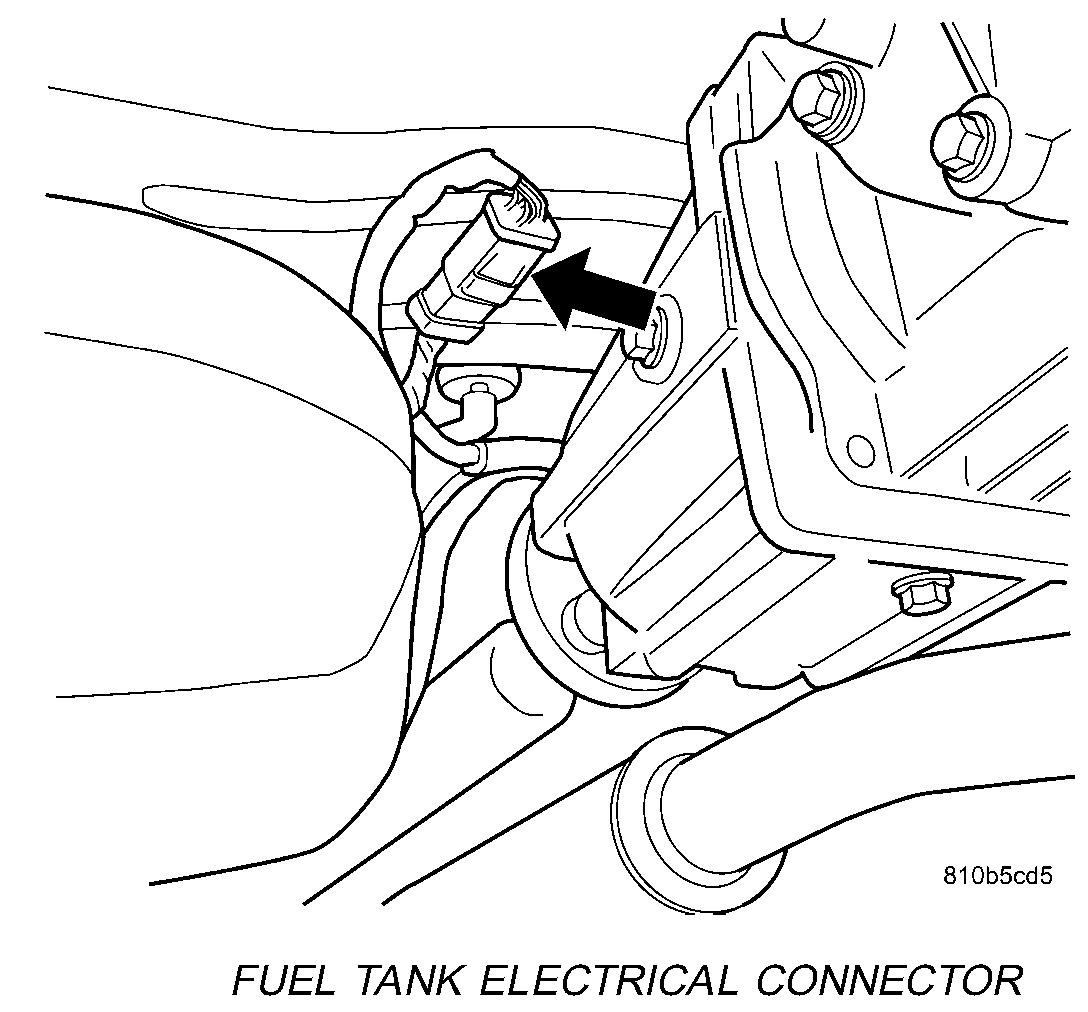
Fuel Tank Electrical Connector
picture 11
10. Disconnect the fuel tank electrical connector.
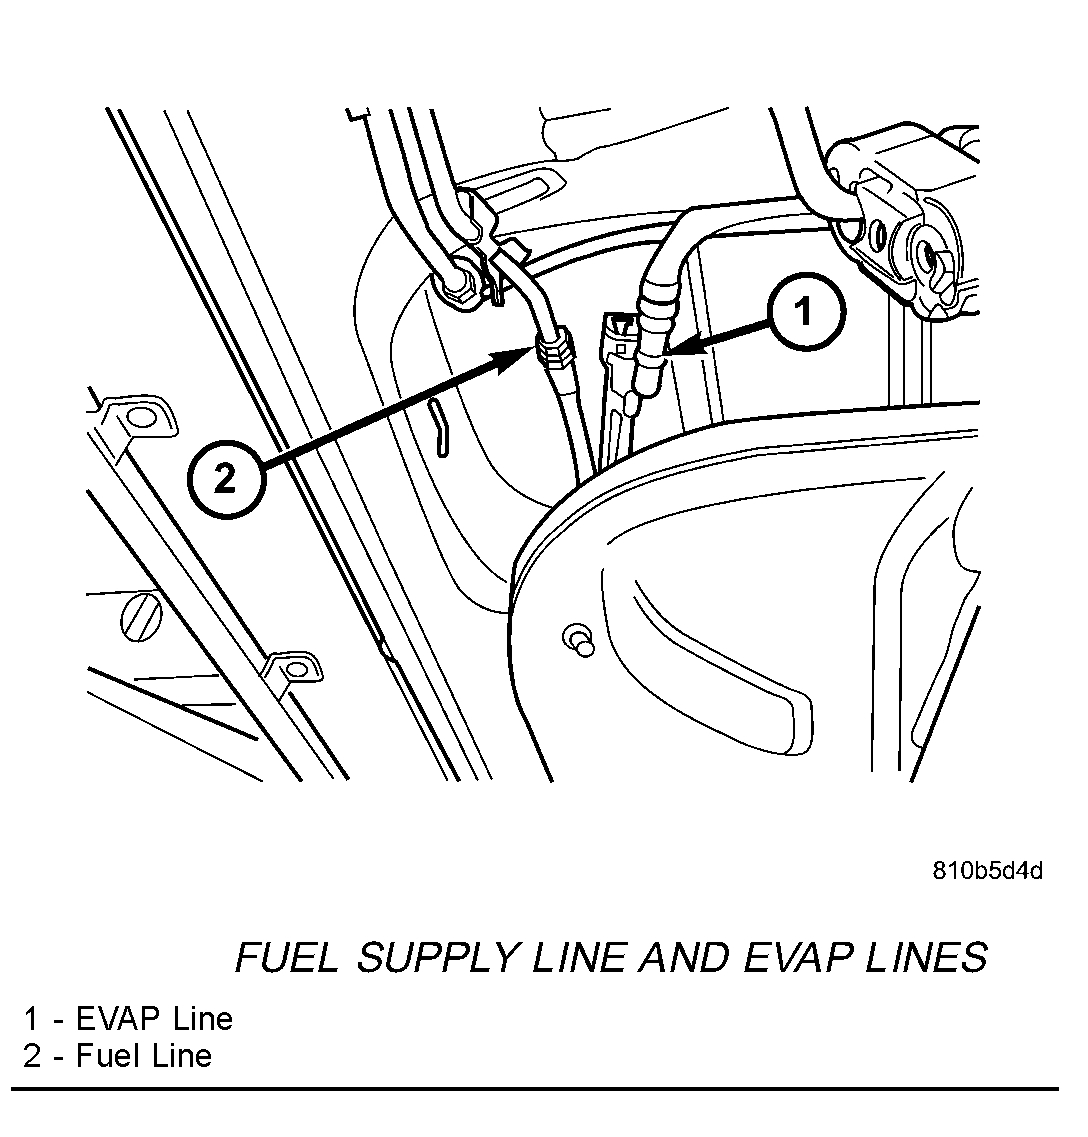
Fuel Supply Line And EVAP Lines
picture 12
11. Disconnect the fuel line and EVAP line.
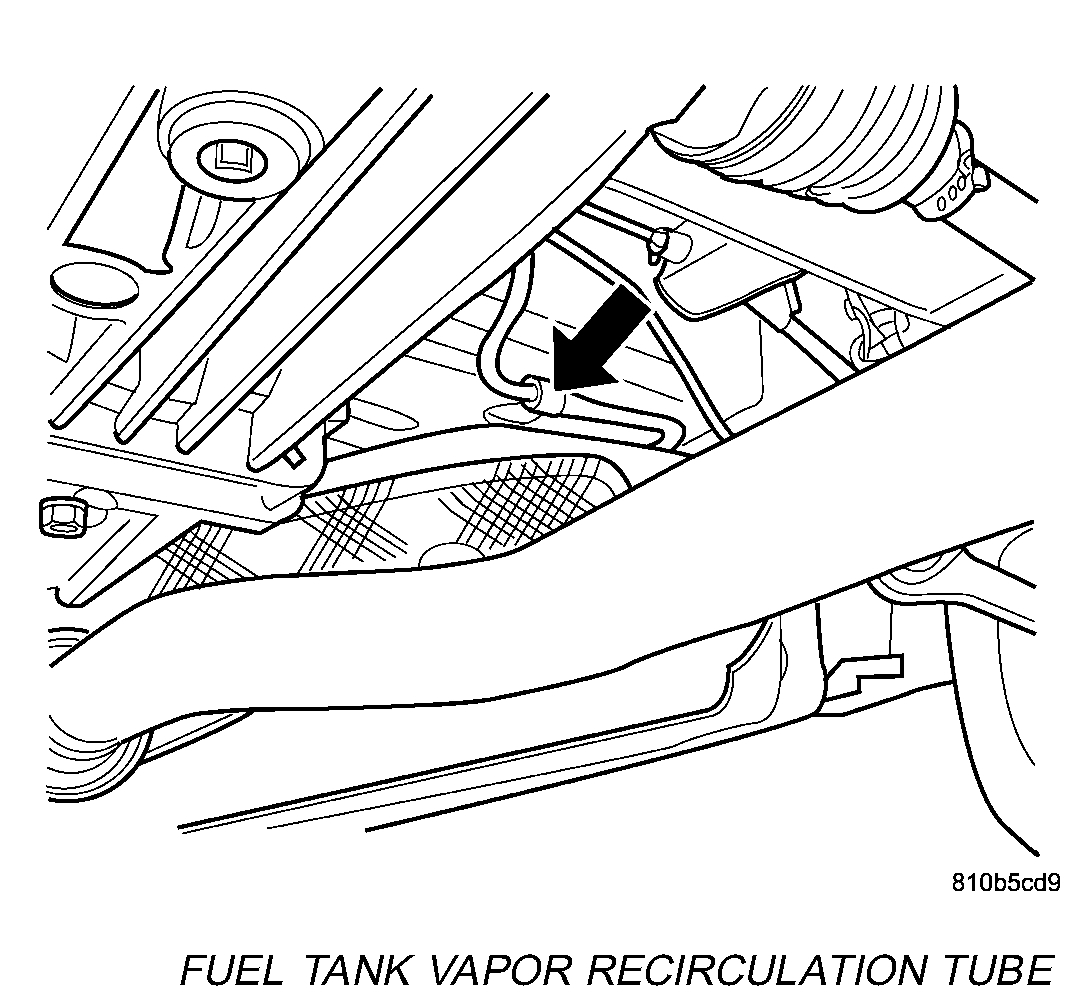
Fuel Tank Vapor Recirculation Tube
picture 13
12. Disconnect the vapor recirculation tube.
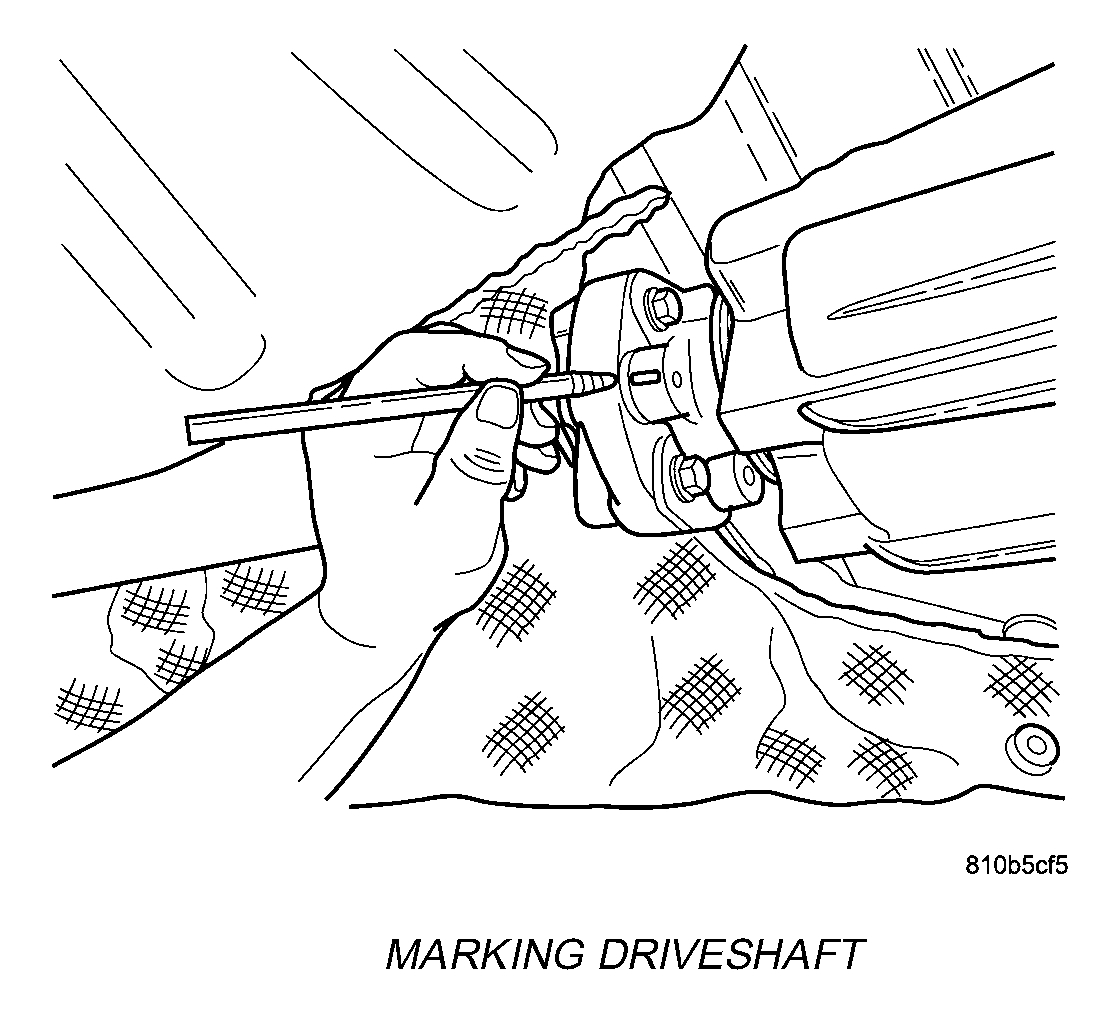
Marking Driveshaft
picture 14
13. Mark the driveshaft rear connection.
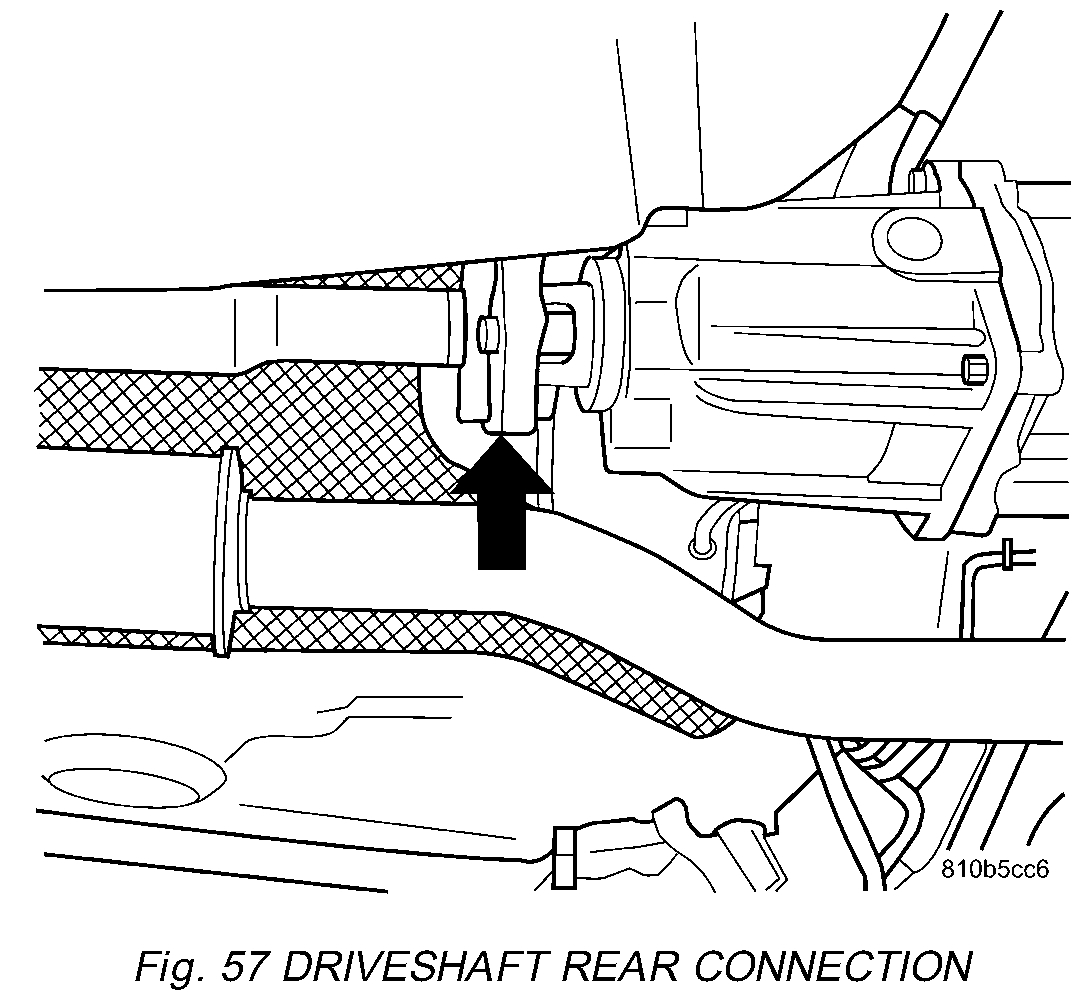
Driveshaft Rear Connection
picture 15
14. Disconnect the driveshaft rear connection.
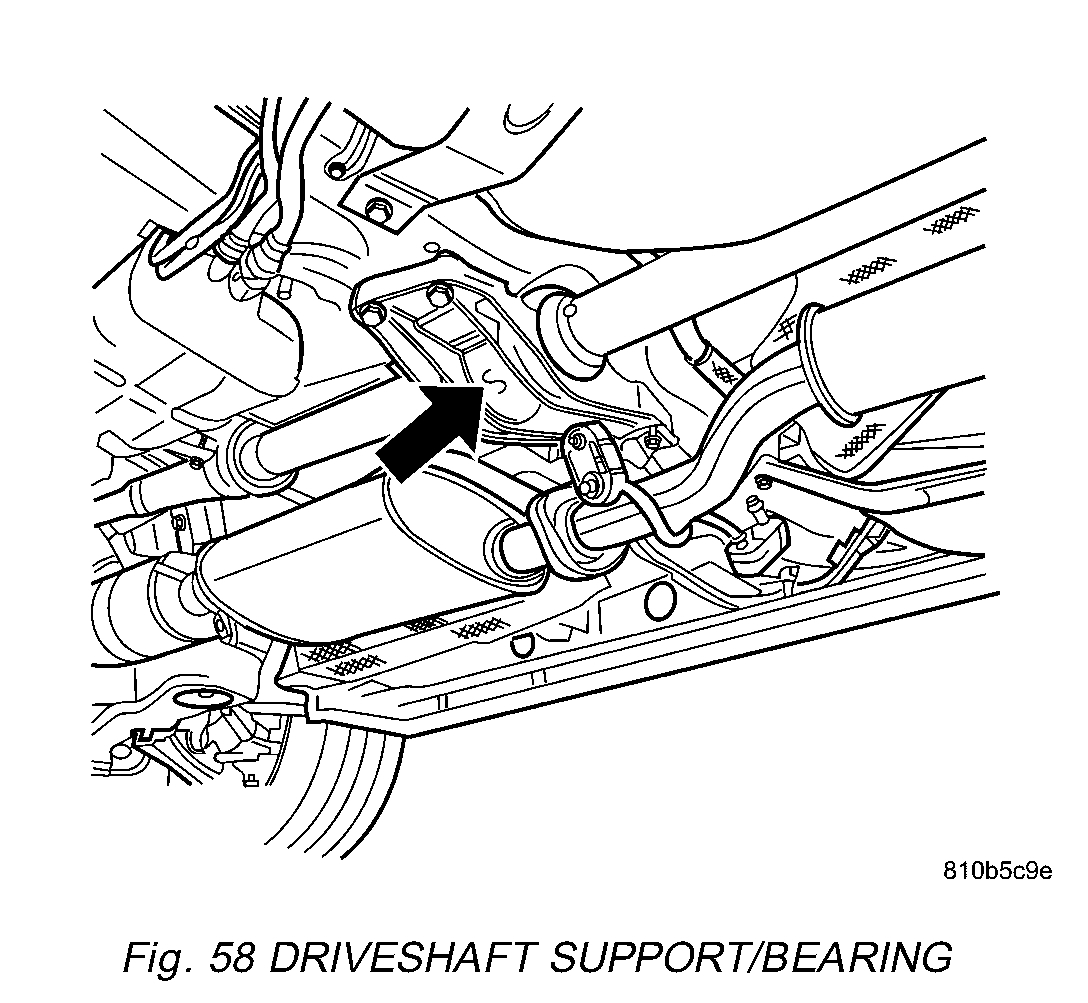
Driveshaft Support/bearing
picture 16
15. Remove the driveshaft support/bearing.
16. Support driveshaft on jack.
17. Remove the left rear tire and splash shield.
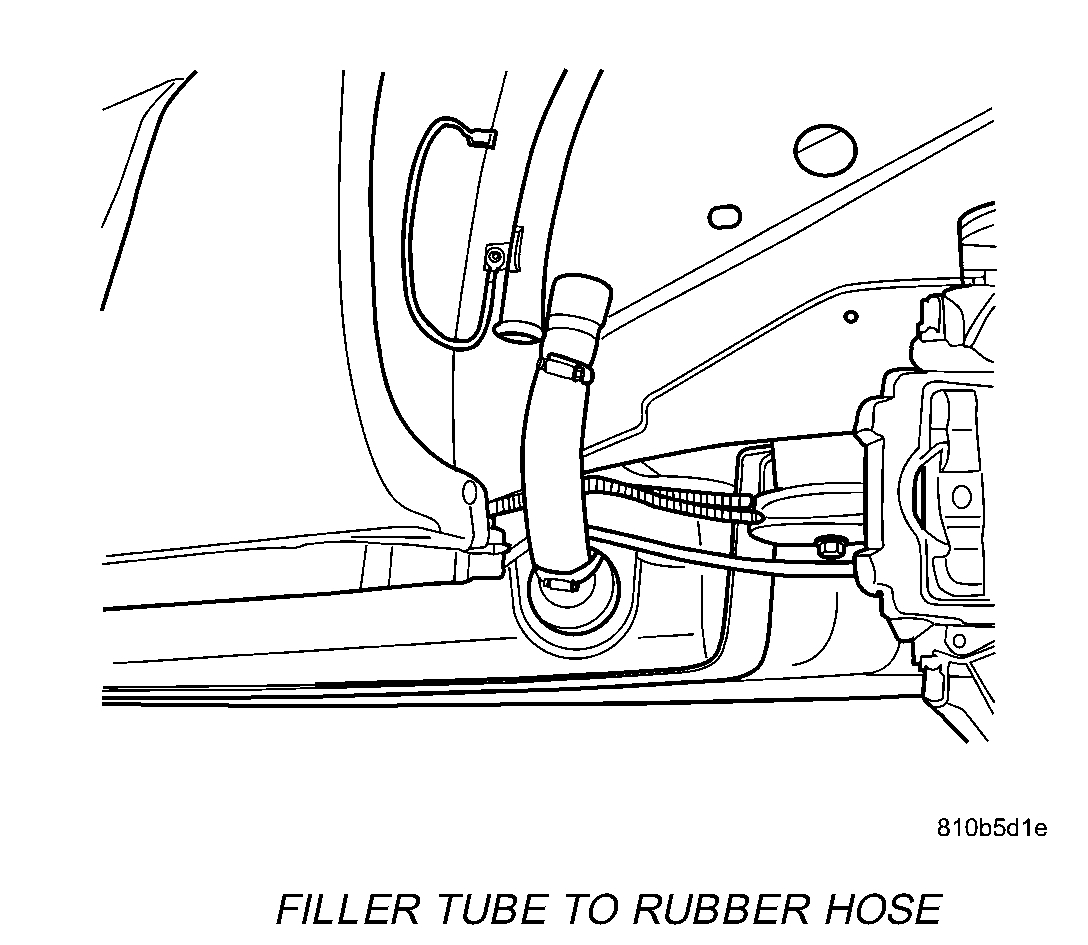
Fuel Filler Tube
picture 17
Filler Tube To Rubber Hose
pic 18
18. Remove the fuel filler tube from the rubber hose at fuel tank.
19. Support the fuel tank with a transmission jack.
Fuel Tank Straps
picture 19
20. Remove the 2 fuel tank straps.
21. Lower fuel tank
22. Drain Fuel Tank, use an approved GASOLINE draining station.
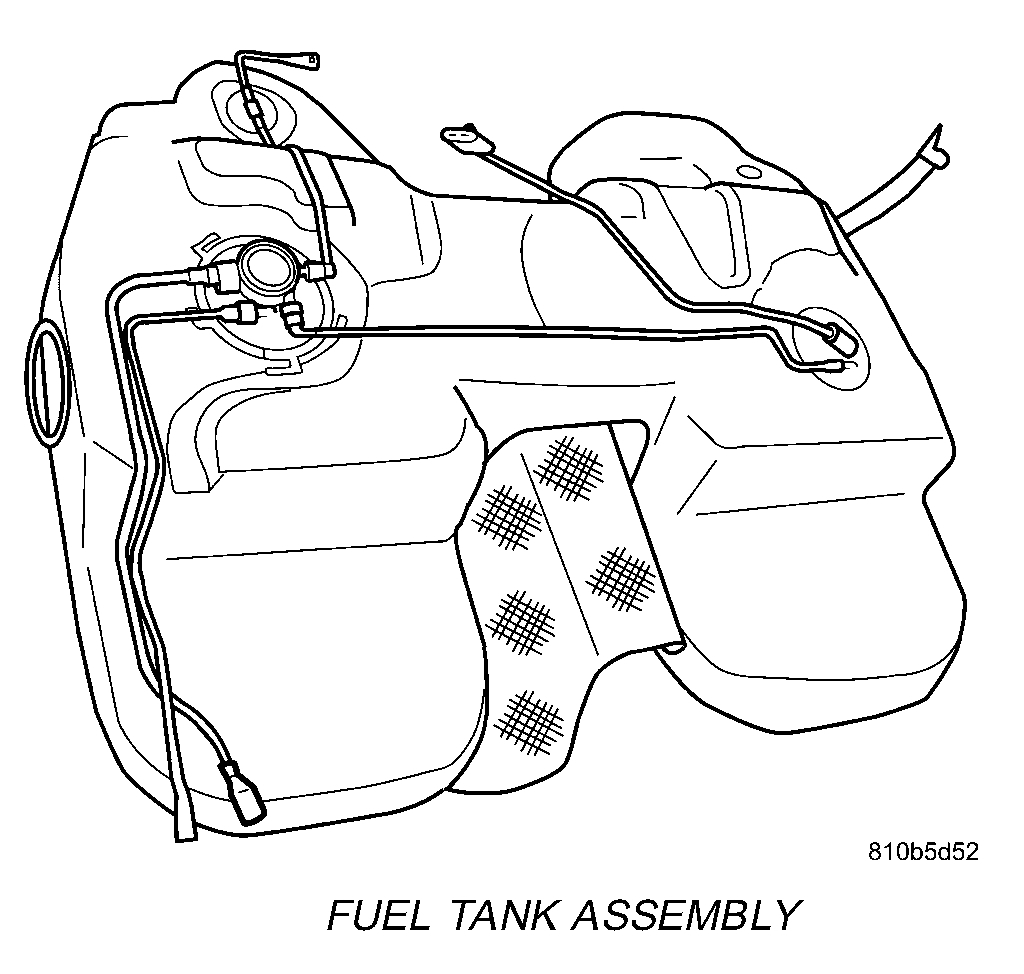
Fuel Tank Assembly
picture 20
23. Remove tank from vehicle.
INSTALLATION
1. Support the fuel tank with a transmission jack.
2. Raise fuel tank and install to vehicle.
3. Install the 2 fuel tank straps.
4. Install the fuel filler tube to the rubber hose at fuel tank.
5. Connect the vapor recirculation tube.
6. Connect the fuel line and EVAP line.
7. Connect the fuel tank electrical connector.
8. Support driveshaft on jack.
9. Install the driveshaft support/bearing.
10. Align the Marks on the driveshaft to the rear connection.
11. Connect the driveshaft rear connection.
12. Install the exhaust system and tighten clamp.
13. Install the center exhaust hanger rubber grommets.
14. Install muffler hanger rubber grommets.
15. Install the left rear tire. (16) Lower vehicle.
17. Connect the negative battery cable.
18. Fill fuel tank. Use the DRBIII(R) scan tool to pressurize the fuel system. Check for leaks.
___________________________________________________
If the fuel pressure isn't an issue, then you need to check for spark to the plugs. Here is a link that shows how it is done:
https://www.2carpros.com/articles/how-to-test-an-ignition-system
If there is no spark, my first suspect is the crankshaft position sensor. Take a look through these links:
https://www.2carpros.com/articles/how-a-crank-shaft-angle-sensor-works
https://www.2carpros.com/articles/symptoms-of-a-bad-crankshaft-sensor
https://www.2carpros.com/articles/crankshaft-angle-sensor-replacement
Here are the directions specific to replacing the sensor for your vehicle. The last two pictures correlate with this procedure.
REMOVAL
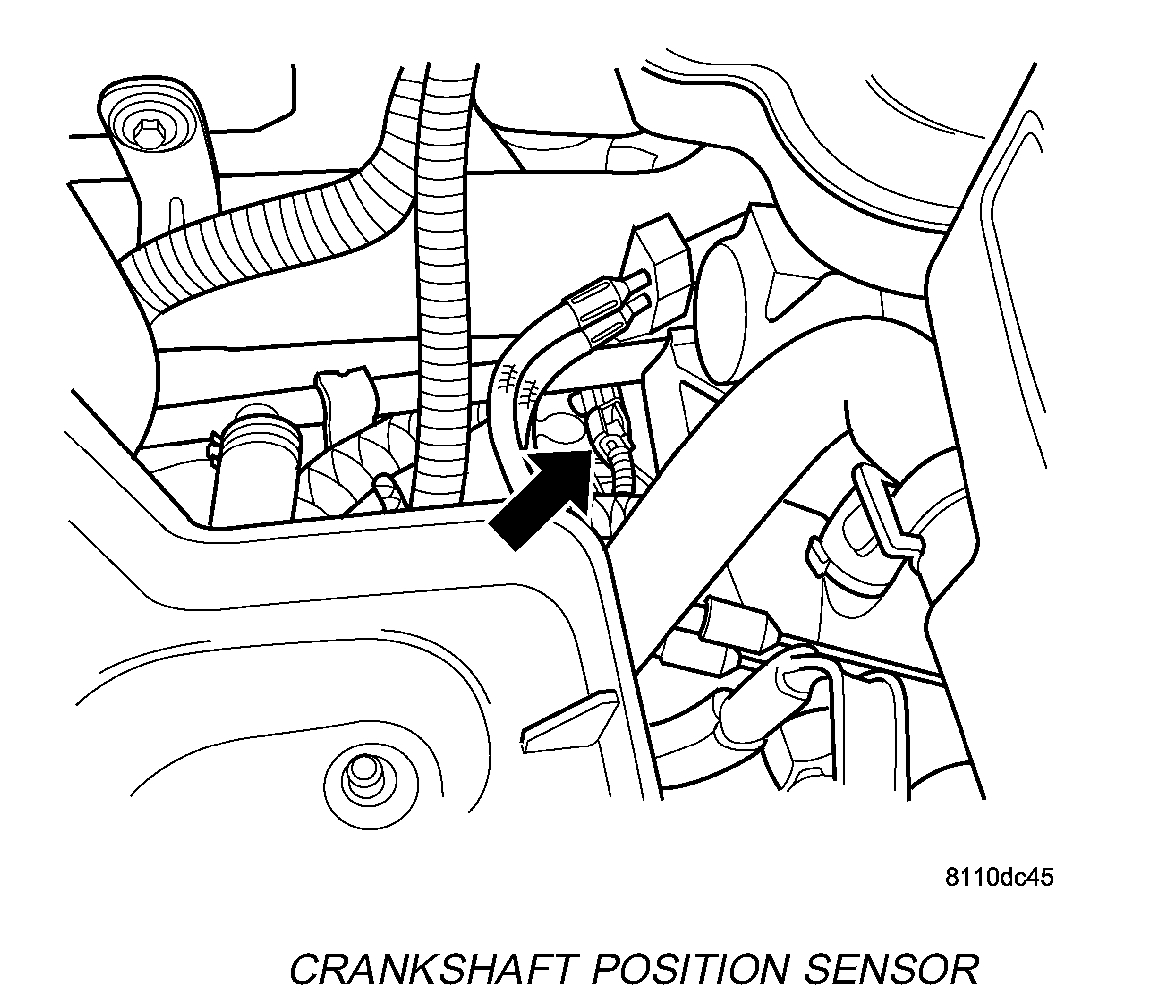
Crankshaft Position Sensor
Picture 21
The crankshaft sensor is located on the driver side of the vehicle, above the differential housing. The bottom of the sensor sits above the drive plate.
1. Disconnect the negative and positive battery cable.
2. Remove the battery.
3. Unlock and disconnect electrical connector from crankshaft position sensor.
4. Remove sensor mounting screw. Remove sensor.
INSTALLATION
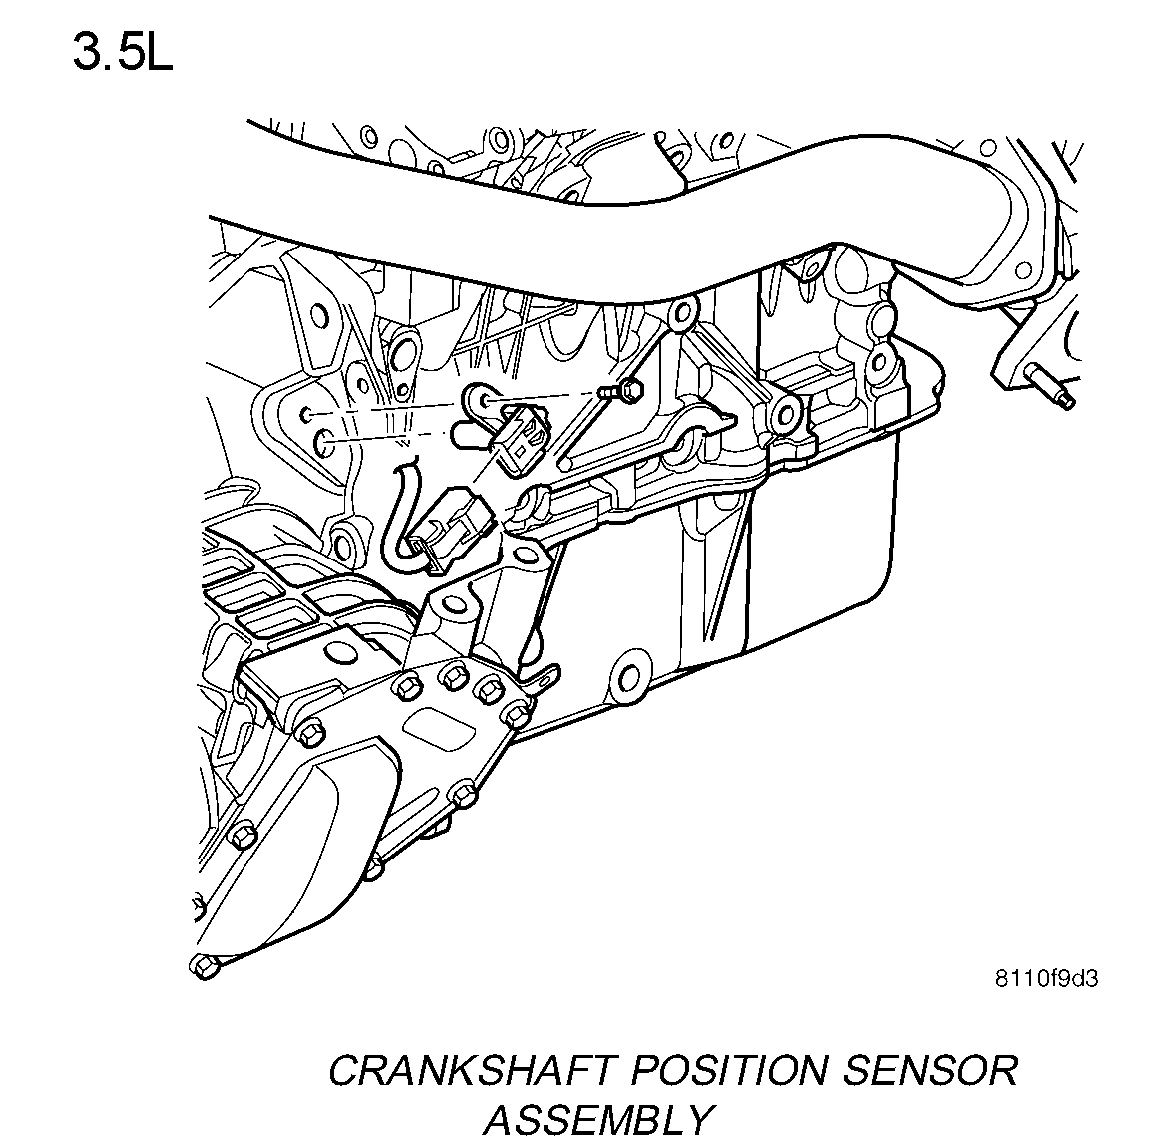
Crankshaft Position Sensor Assembly
Picture 22
1. Install sensor and push sensor down until contact is made with the transmission case. While holding the sensor in this position, install and tighten the retaining bolt to 12 N.m (105 in. lbs.) torque.
2. Connect electrical connector and lock to crankshaft position sensor.
3. Install battery.
4. Connect the positive then the negative battery cable.
__________________________
Let me know if this helps or if you need additional help or have other questions.
Take care,
Joe
Images (Click to enlarge)
Feb 21, 2019 at 8:24 PM