We are a team of ASE certified mechanics that have created this guide to help you replace an intake manifold and gasket. A gasket is used to seal the intake manifold to the cylinder head or heads depending on the engine's configuration. An intake manifold is constructed from aluminum or plastic and is prone to leakage due to high engine temperatures and corrosion. Replacement of the intake manifold gaskets is common among older and high mileage vehicles. In the guide below the engine is out of the car so you can see what we are doing more clearly. Each intake manifold design is a little different from one to the next, but the procedure is the same.
What Goes Wrong?
When an intake gasket or intake manifold fails it can create a vacuum or coolant leak which will cause the engine to run poorly or overheat. This can happen over time, if the gasket was incorrectly installed or if the cooling system has not been serviced. In the example below the engine is being rebuilt so there is no need to clean it prior to disassembly.
Precautions
Clean the engine before you begin to help not get dirt inside the engine while you are taking it apart. Some intake manifolds are made of plastic so use caution when working with them. Take pictures of the job before and during the repair to help facilitate the reassembly.
Let's Jump In!
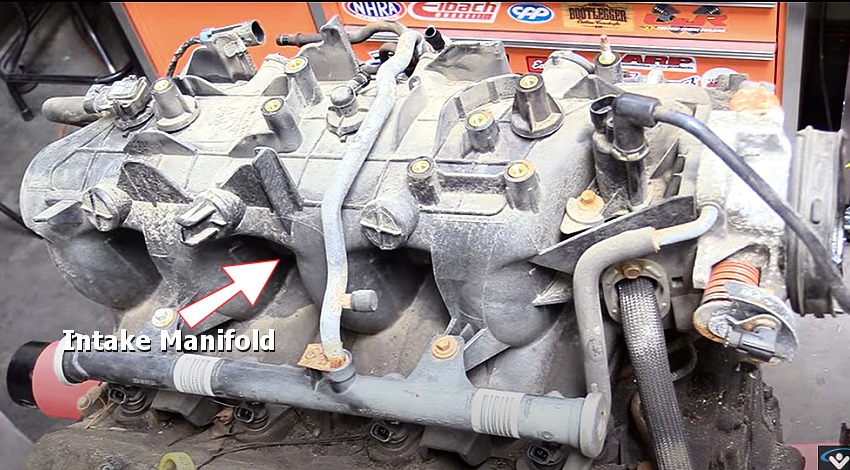
Disassembly: Here you see the engine has been prepared for the intake and gasket
removal, beginning with the
coolant drained and the
battery disconnected. Also,
all peripheral items have been removed such as engine cover, fuel lines, wiring
connectors, vacuum lines, throttle cable, air intake and EGR tubes. It is best to
use your phone to take pictures to help when you are reassembling the intake.
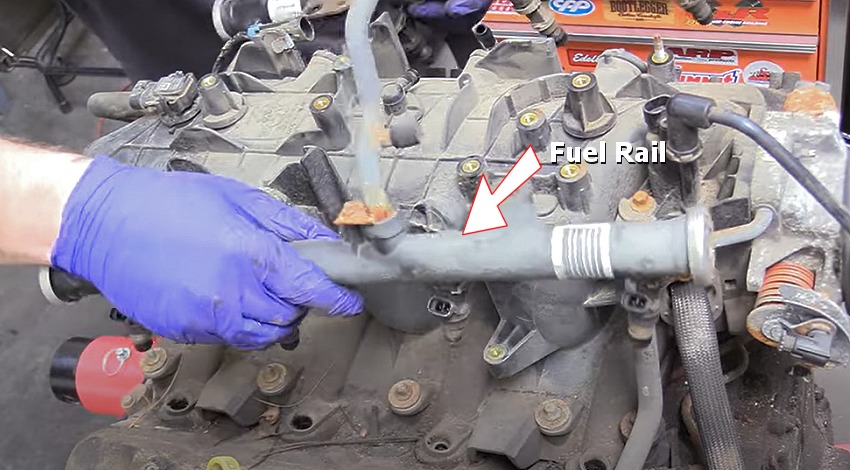
Remove the fuel rail mounting bolts then pull up to remove the fuel rail and
fuel injectors, the injectors are sealed with O rings so they can be a little stuck,
gently wiggle the injectors out of the intake manifold.
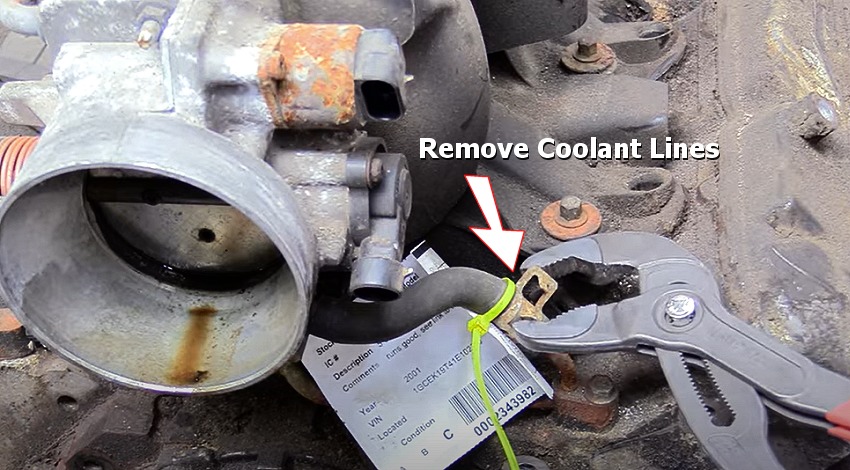
Inspect the intake and remove any remaining hoses or tubes. Older engines will
have the distributor mounted onto the intake, make sure to note or mark the position
of the rotor under the distributor cap before removing it. It must go back in the
same exact position for the engine to run properly, a cell phone image works great
for this.
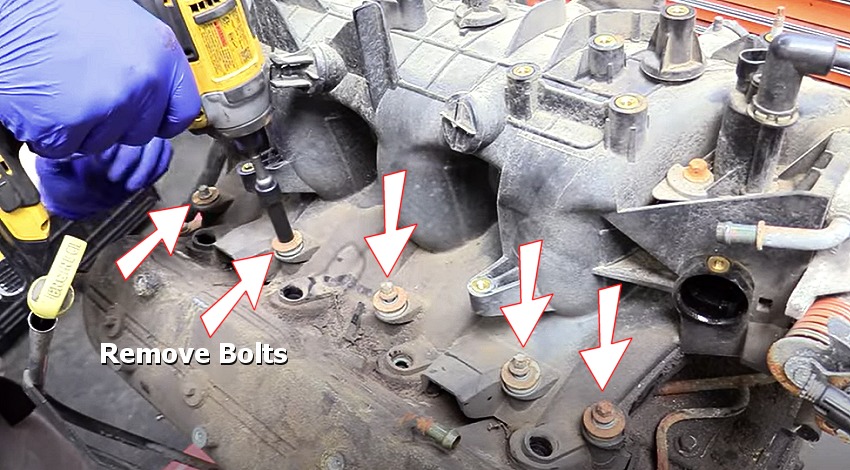
Intake manifolds are bolted to the cylinder head by either right and left sides,
or top and bottom. Locate the mounting bolts and remove them, the example below
shows right and left side bolts. Before removal use compressed air to clean excess
dirt from the intake area.
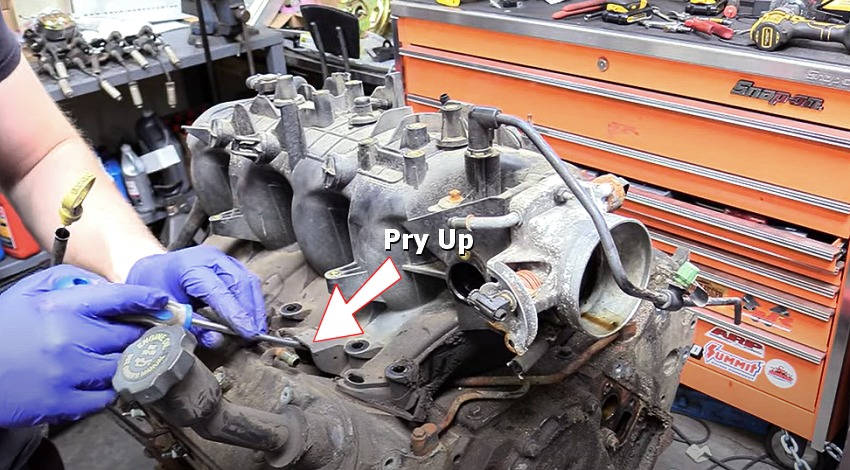
Double check to make sure all mounting bolts have been removed. Use a large screwdriver
or pry bar to "pop" the seal loose on the intake manifold.
Gently lift the intake manifold from the engine while taking note of any lines
or hoses you may have not noticed previously.
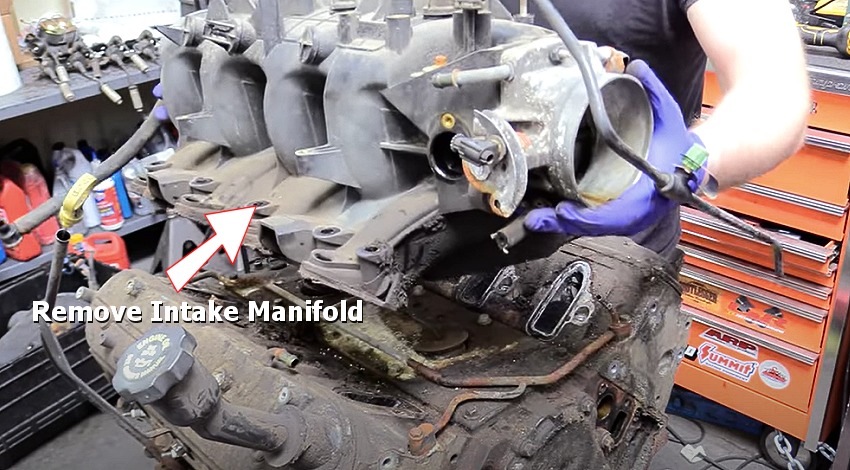
Once the intake manifold has been removed the intake runners in the
cylinder heads will be exposed.
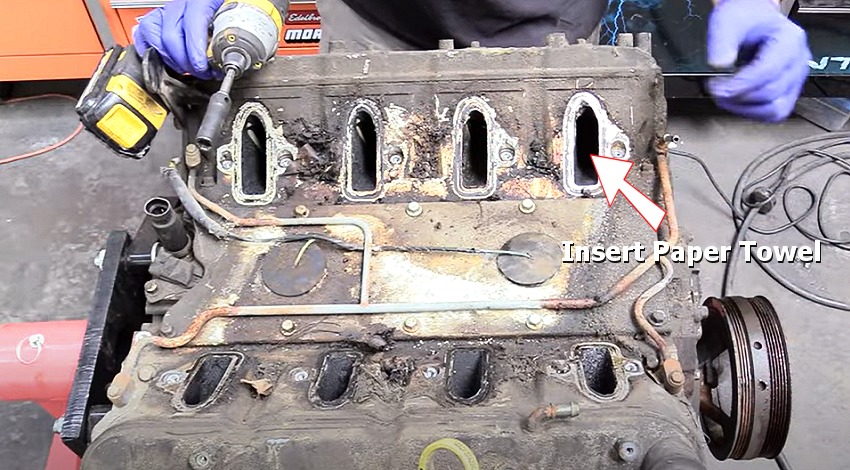
It is important not to allow any dirt or debris down into the intake runners or
engine, before any cleaning can begin insert a paper towel into each port to help
stop dirt contamination. Using a gasket scraper to clean the gasket surface thoroughly,
then remove the paper towels and you are ready to install the new intake gaskets.
Watch the Video!
Please watch this video of the intake disassembly job being done, then continue down the guide to glean additional helpful information.
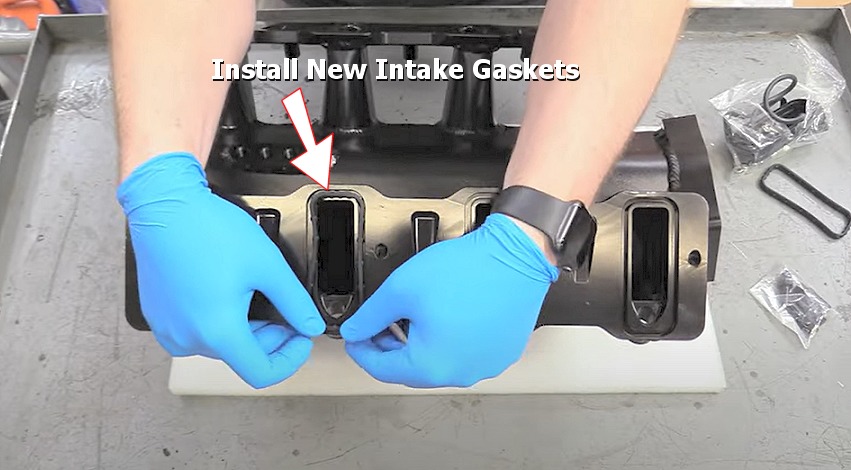
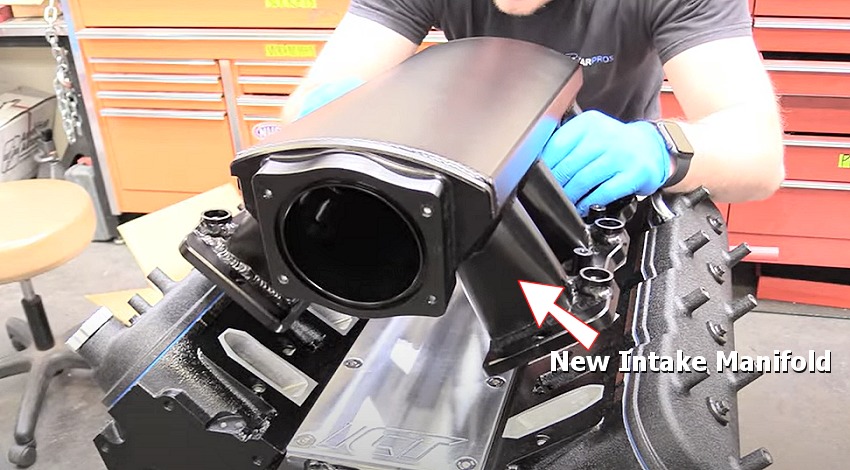
Here we are installing the new intake manifold and gaskets which will vary
per application. These particular gaskets do not need gasket sealer or adhesive,
they simply press into place, use silicone rubber to help seal at the manifold
ends and coolant ports.
Once the intake is ready to be installed, gently lower it down while lining up
the mounting bolt holes onto the clean cylinder head surfaces using the new gaskets.
It is important not to move the intake manifold around once it has been lowered
onto the engine to ensure the integrity of the gaskets.
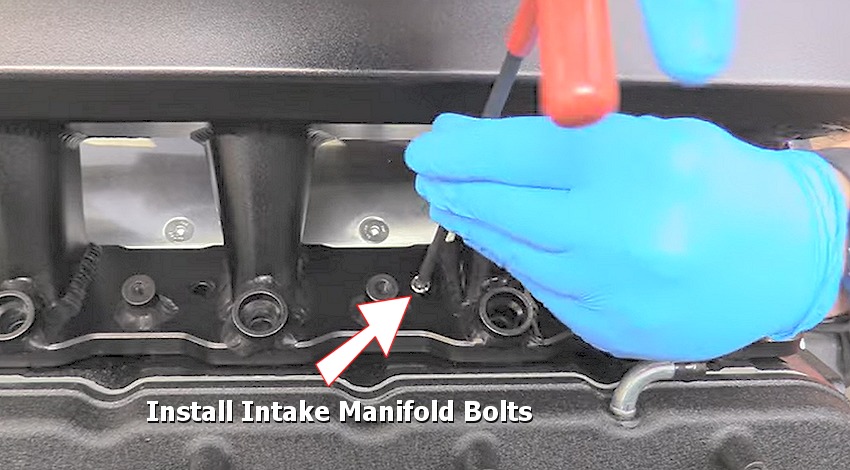
Install the intake manifold mounting bolts by hand in a cross pattern, then tighten
by hand from the center working outward in increments. It is important to finish
tightening the bolts to the manufacturers specs including the tightening pattern
which you can get from one of our experts for free,
in this case it was 14 pounds of torque. Do not over tighten or the intake manifold
could break. Once complete, reassemble in the reverse order to finish the job and
refill with coolant. Some intake manifold jobs will expose the inside of the engine.
In this case it is a good idea to
change the engine oil and filter, this will help flush out any debris that may
have gotten inside of the engine. Start the engine and check for leaks, allow time
for the engine idle speed to be relearned by the computer. If the engine is running
poorly check the injector wires and coil wire/plug wire connection also check for
vacuum
leaks. If further problems exist scan the PCM for
trouble codes and repair accordingly.
Watch the Video!
Please watch this video of the intake manifold job being reassembled.
Best Practices
- Re-torque the intake manifold mounting bolts after a few miles of driving to help seal the gaskets.
- Replace the thermostat and gasket.
- Refill with new engine coolant.
- Change engine oil and filter shortly after the job completion.
Questions?
Our certified technicians are ready to answer intake manifold questions for free. We hope you saved money and learned from this guide. We are creating a full set of car repair guides. Please subscribe to our 2CarPros YouTube channel and check back often for new videos which are uploaded regularly.