Welcome to 2CarPros.
The first thing we need to determine if is the engine is getting spark to the plugs. Often times, a crankshaft position sensor will fail and the engine won't start due to loss of ignition spark.
First, here are a few links for you to review:
https://www.2carpros.com/articles/car-cranks-but-wont-start
https://www.2carpros.com/articles/how-a-crank-shaft-angle-sensor-works
https://www.2carpros.com/articles/symptoms-of-a-bad-crankshaft-sensor
If you find there is no spark, my first suspect is the sensor. Here is a link that explains how one is replaced:
https://www.2carpros.com/articles/crankshaft-angle-sensor-replacement
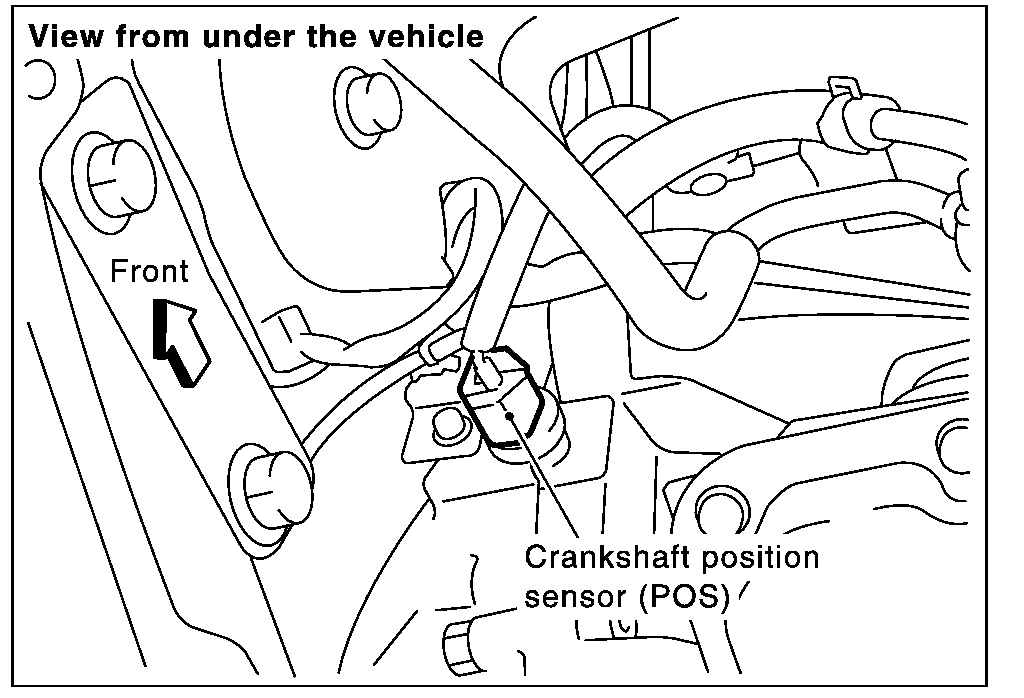
The attached picture shows location. Also, if you are able, here are the directions for testing and inspecting the sensor. Additionally, here is a link that explains how to check for spark:
https://www.2carpros.com/articles/how-to-test-an-ignition-system
+++++++++++++++++++++++++++++++++++++++++++++++
COMPONENT INSPECTION
Component Inspection
pic 2
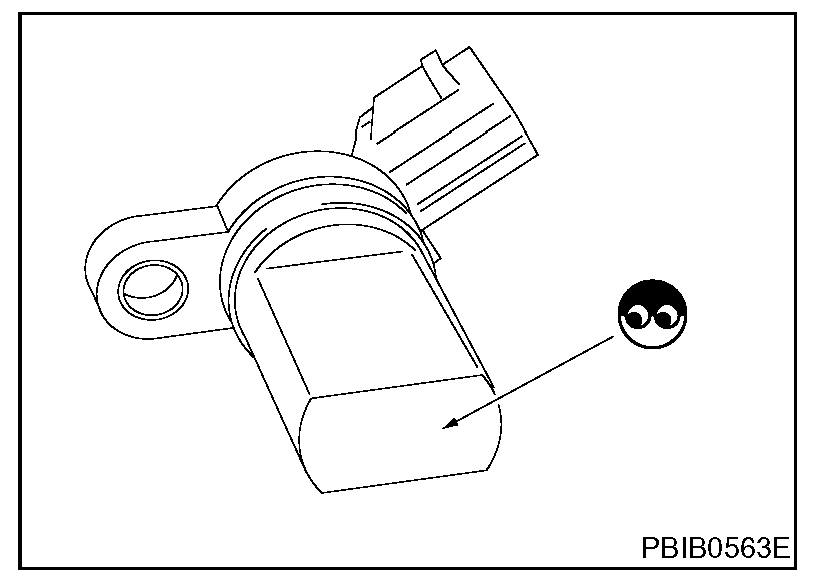
CRANKSHAFT POSITION SENSOR (POS)
1. Loosen the fixing bolt of the sensor.
2. Disconnect crankshaft position sensor (POS) harness connector.
3. Remove the sensor.
4. Visually check the sensor for chipping.
pic 3
pic 4
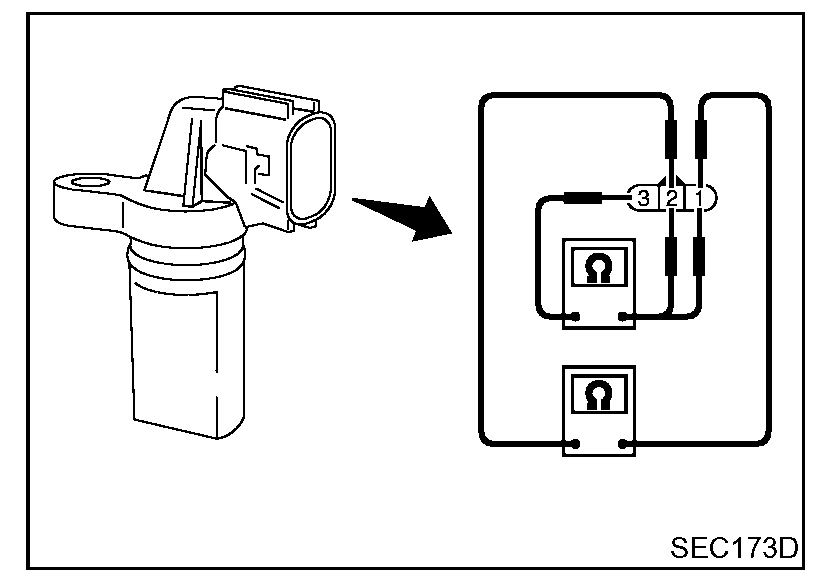
5. Check resistance as shown in the figure.
___________________________________________________________
You will need a multi meter to check the part. Here is a link that explains how one is used along with a couple others you may find helpful:
https://www.2carpros.com/articles/how-to-use-a-voltmeter
https://www.2carpros.com/articles/how-to-check-wiring
https://www.2carpros.com/articles/how-to-use-a-test-light-circuit-tester
_________________________________________________________
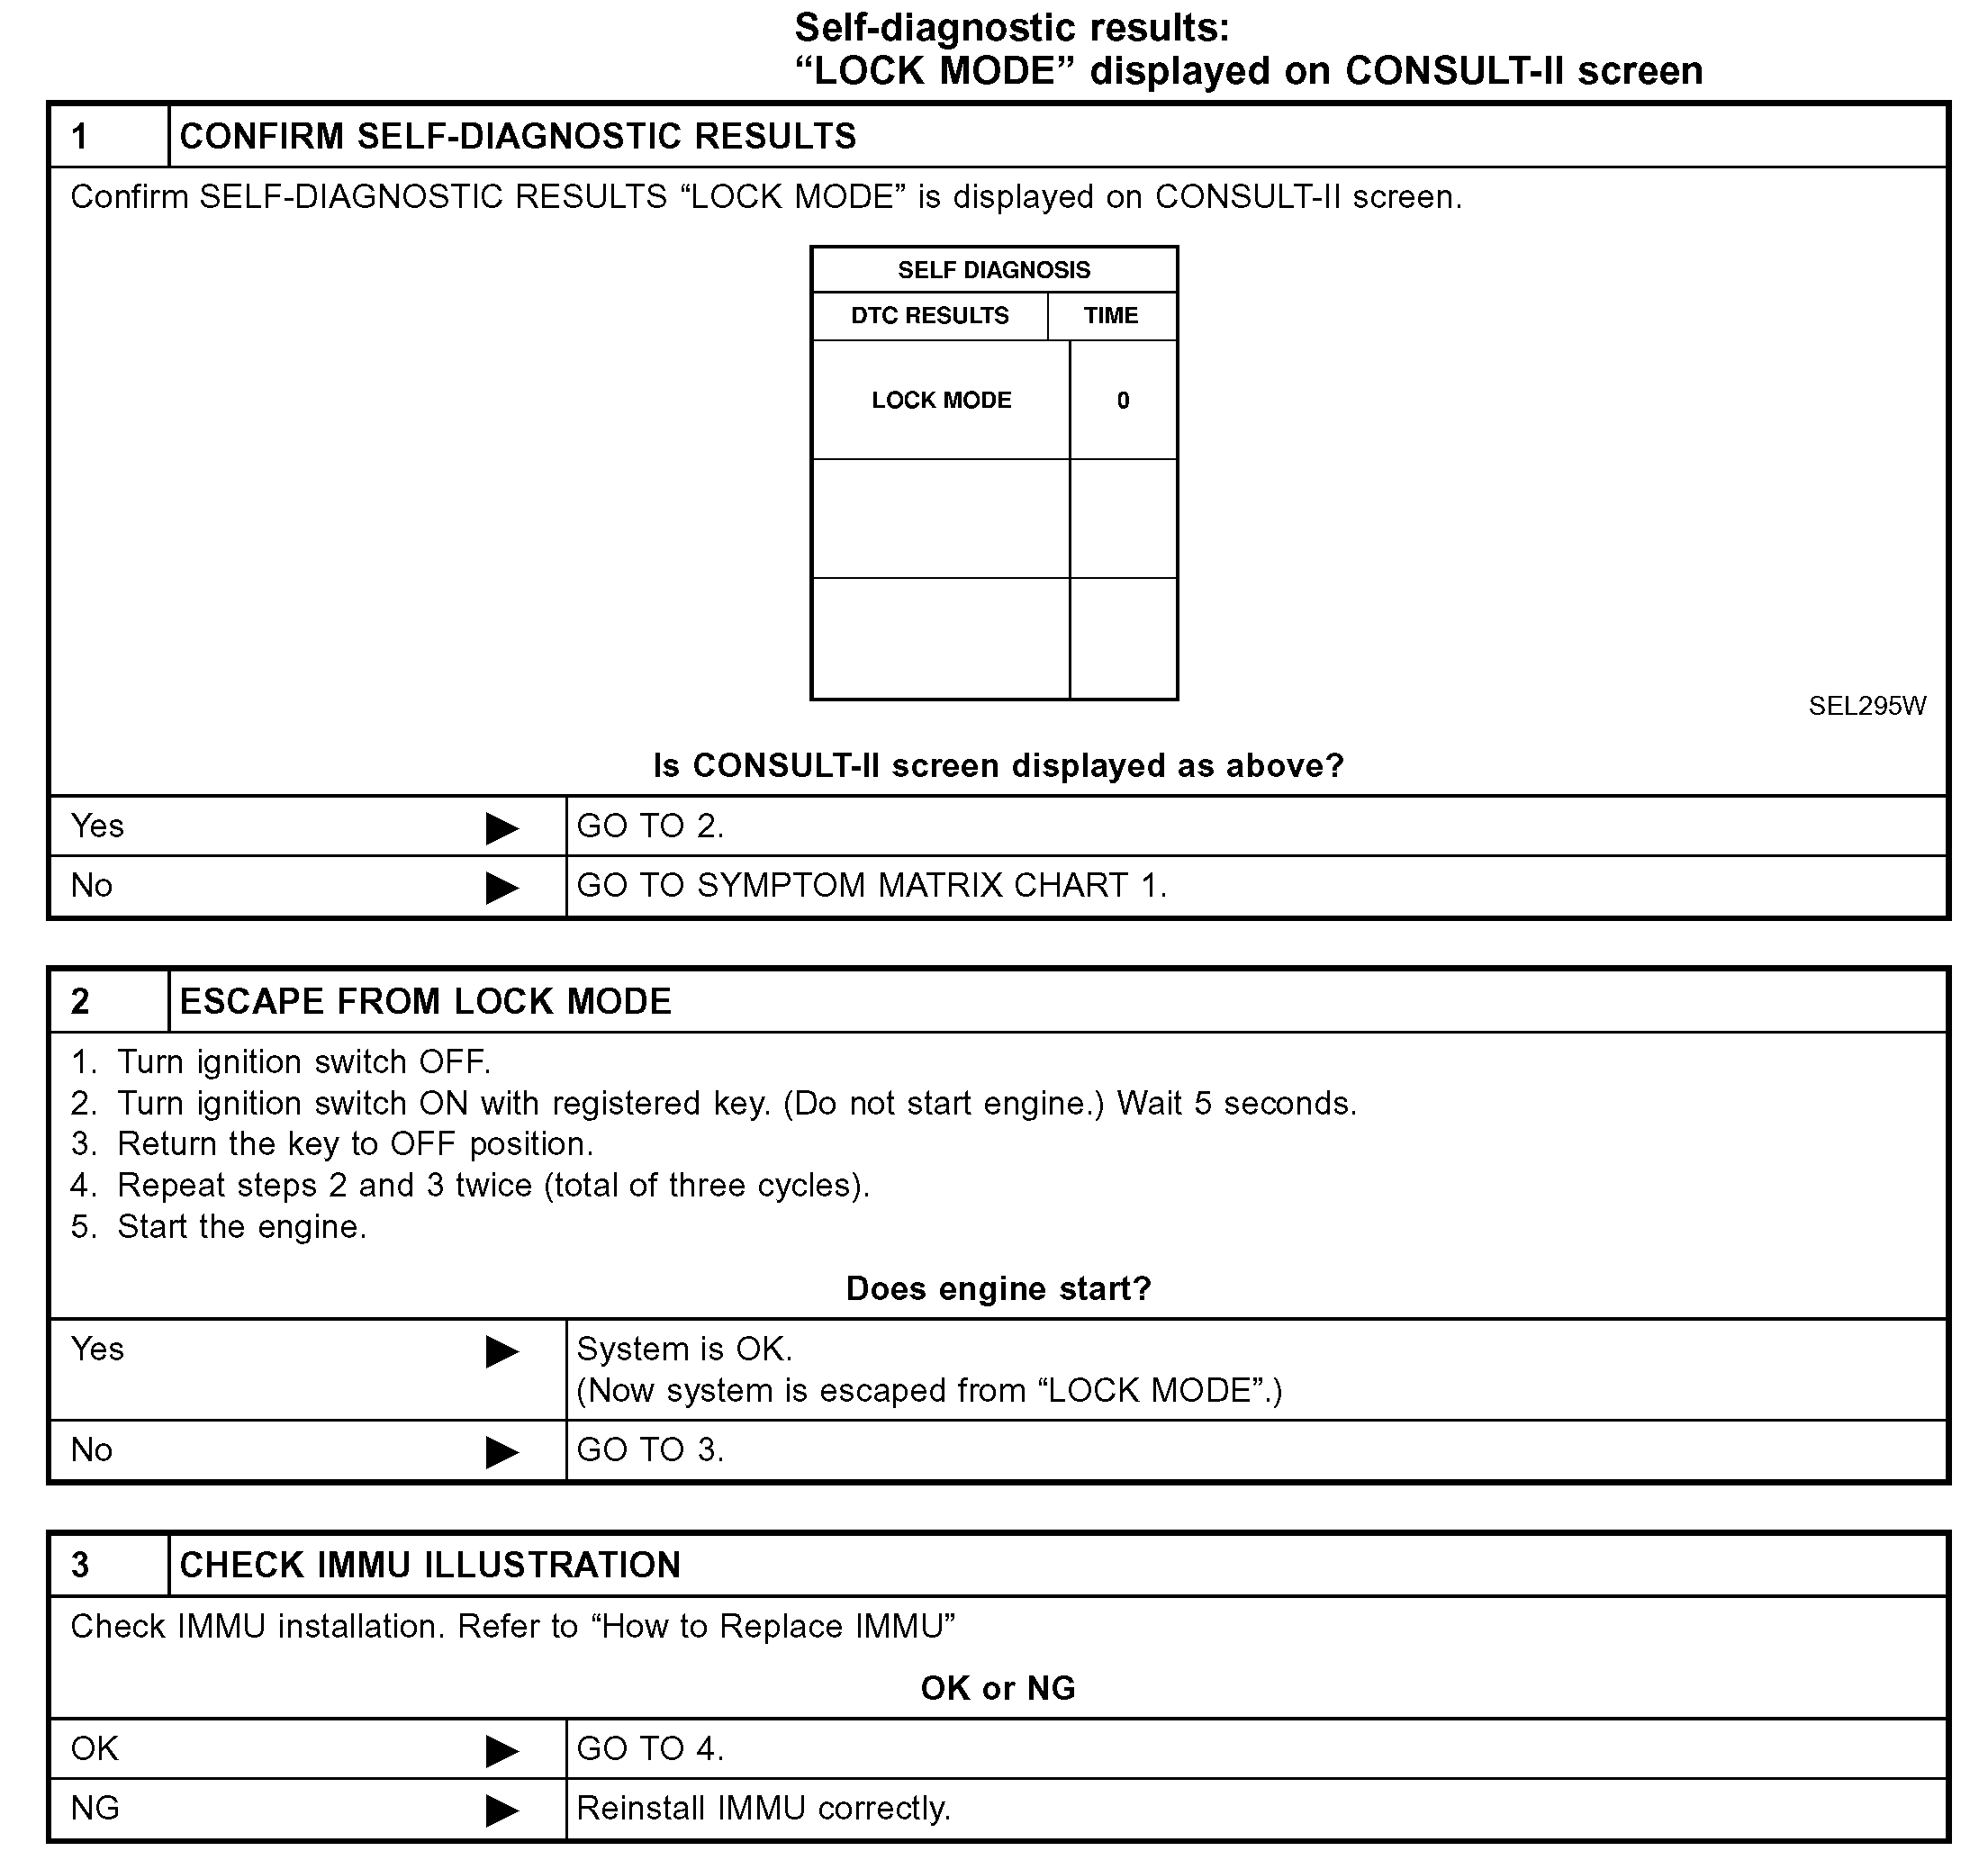
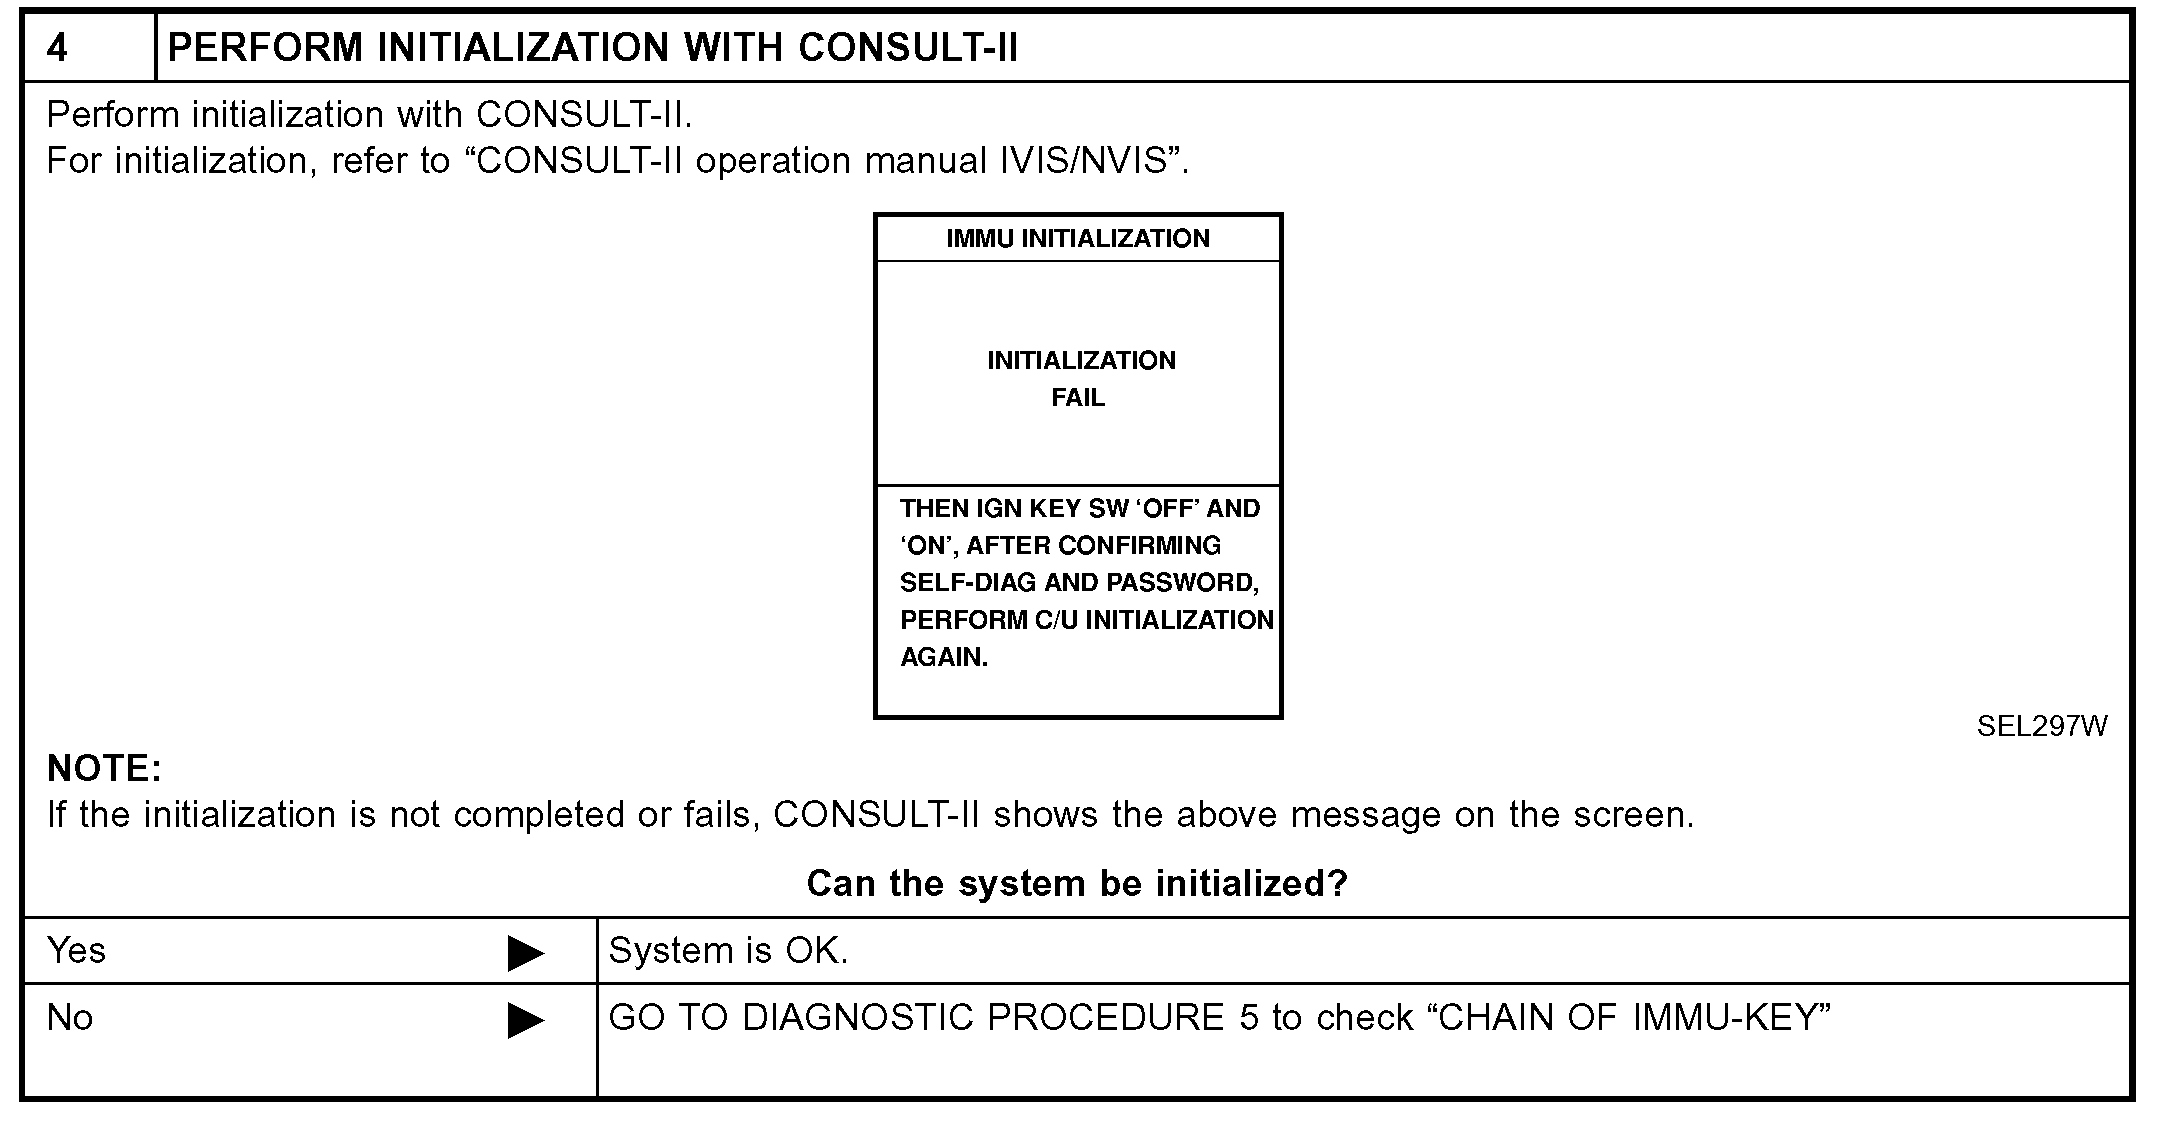
As far as the security system, if I recall it will shut down the fuel as well. You mentioned you hear the fuel pump turn on. If you do find there is spark to the plugs, then we need to suspect a possible fuel pump issue. You may hear the pump run, but it may not be sending fuel.
Here is a link that explains how in general to check fuel pressure:
https://www.2carpros.com/articles/how-to-check-fuel-system-pressure-and-regulator
If you look at pic 5, I attached the pressure info for you. The manual indicates with the engine at idle, but in this case it should be close with the key in the run position (engine off)
________________________________________________________
If you find the pump is bad, here are the directions for replacement. The remaining pics correlate with the directions.
++++++++++++++++++++++++++++++++++++++++++++++++++++++++
PROCEDURES
FUEL SYSTEM
Removal and Installation
WARNING: When replacing fuel line parts, be sure to observe the following.
Put a "CAUTION FLAMMABLE" sign in workshop.
Be sure to furnish workshop with a CO2 fire extinguisher.
Do not smoke while servicing fuel system. Keep open flames and sparks away from work area.
CAUTION: Before removing fuel line parts, carry out the following procedures:
a. Put drained fuel in an explosion-proof container and put the lid on securely.
b. Perform Fuel Pressure Release Procedure.
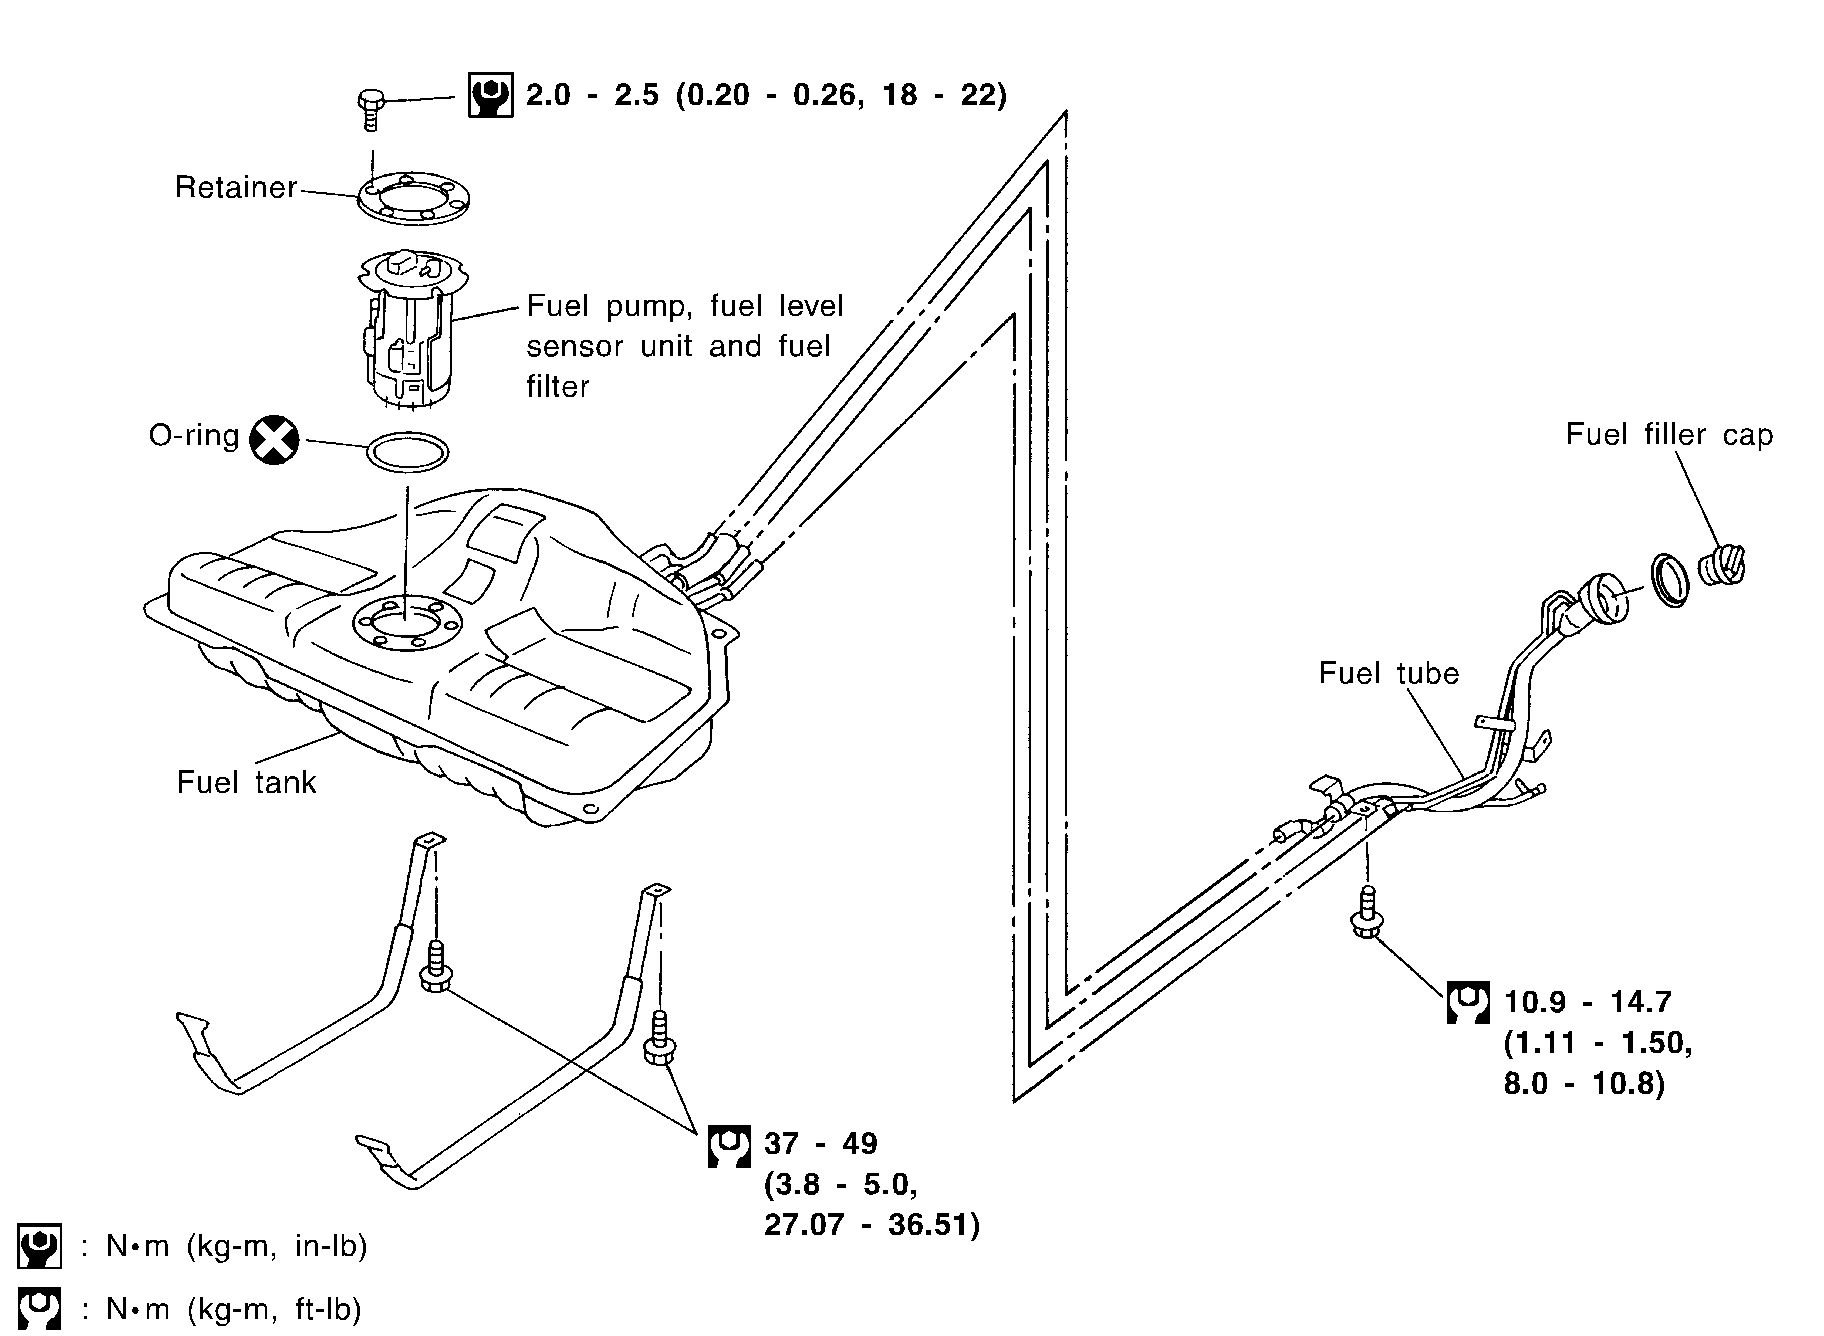
Fuel Tank, Fuel Pump Assembly, Fuel Lines
Pic 6
c. Disconnect battery ground cable.
* Always replace O-ring and clamps with new ones.
* Do not kink or twist tubes when they are being installed.
* Do not tighten hose clamps excessively to avoid damaging hoses.
* After installing tubes, run engine and check for fuel leaks at connections.
* Use only a genuine NISSAN fuel filler cap as a replacement. If an incorrect fuel filler cap is used, the MIL may come on.
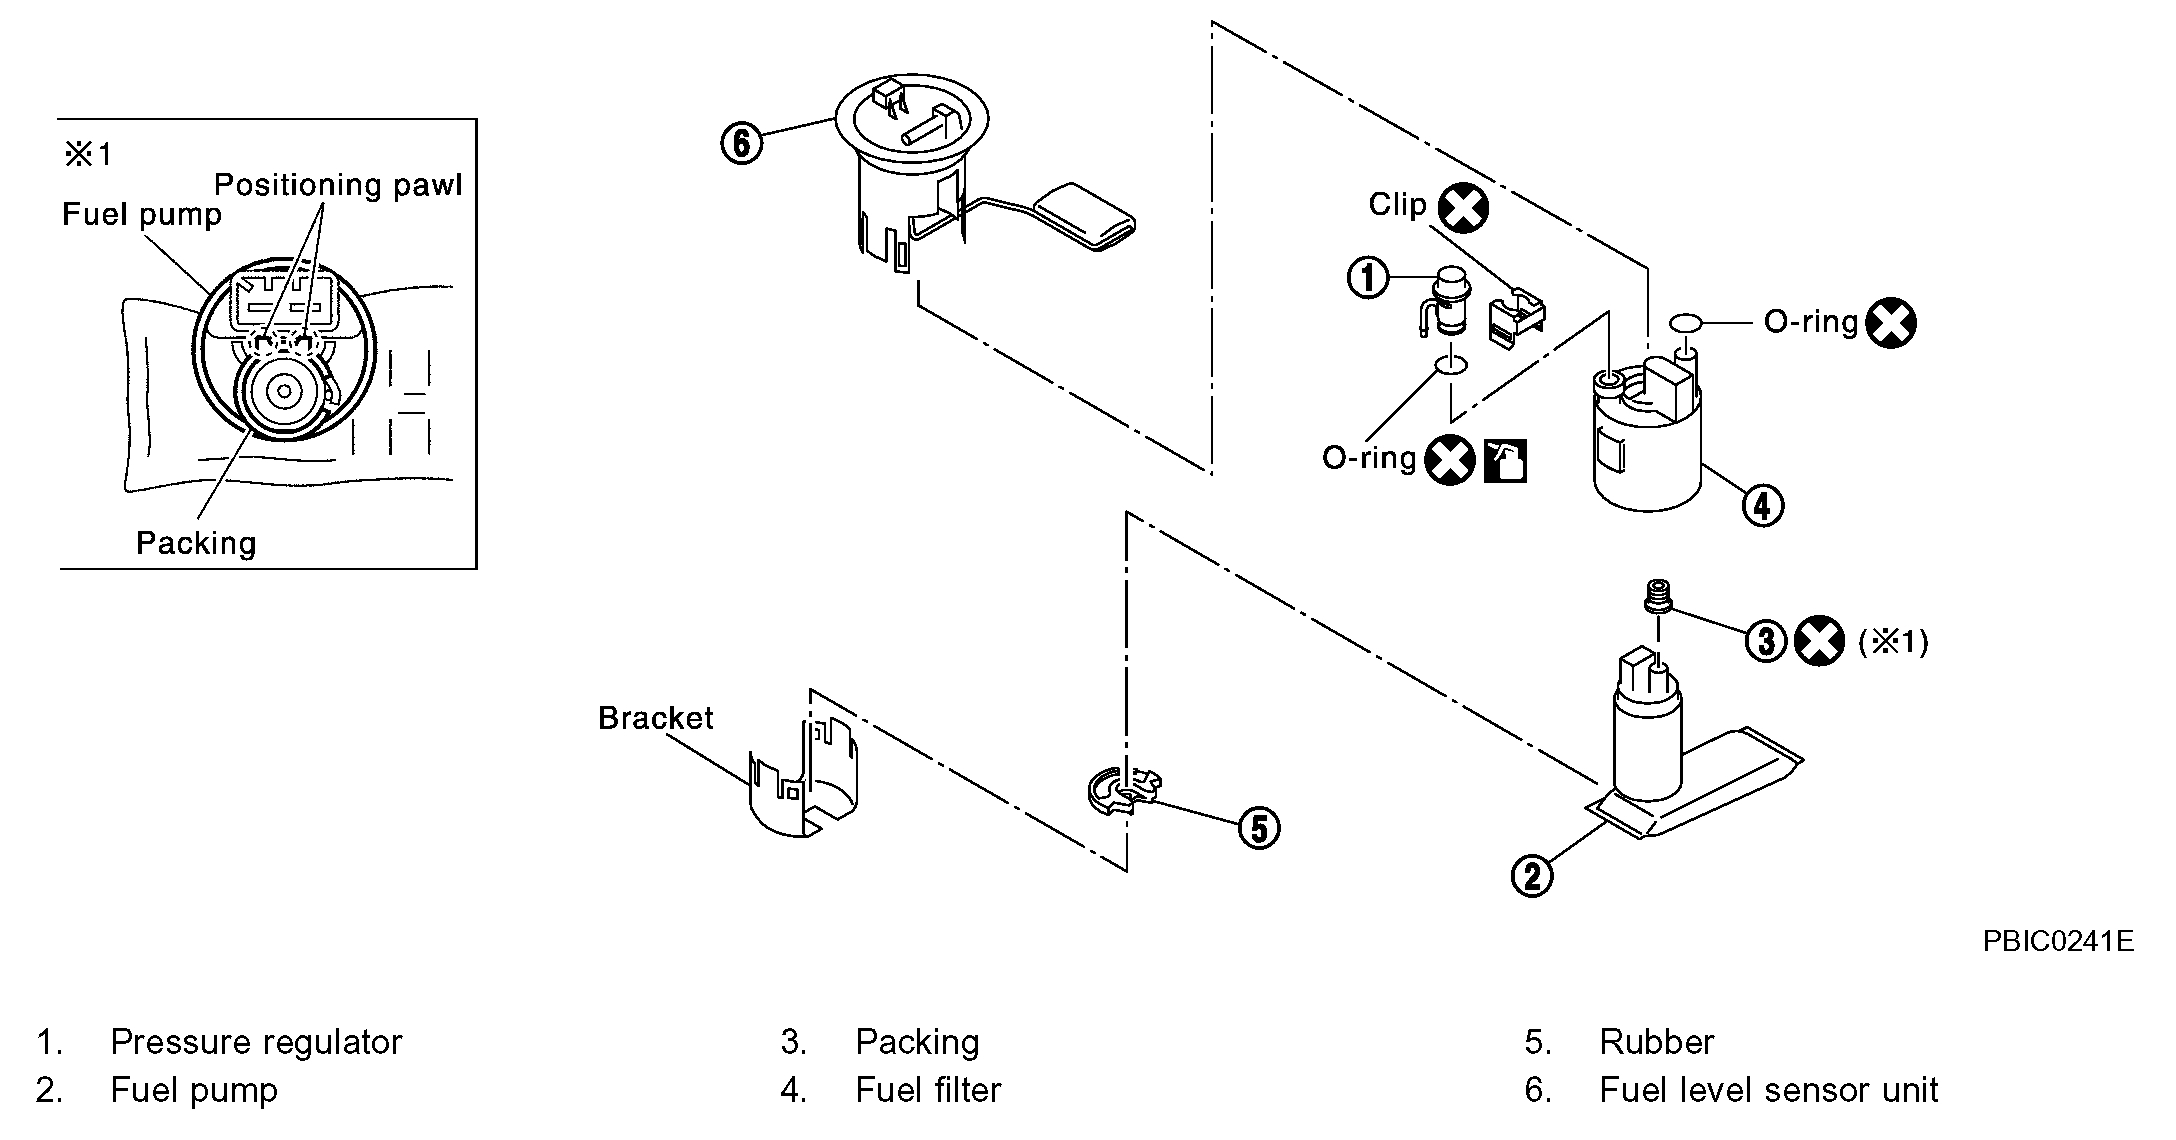
Fuel Pump / Fuel Level Sensor / Pressure Regulator / Fuel Filter
pic 7
pic 8
REMOVAL - Fuel Pump / Fuel Level Sensor / Pressure Regulator / Fuel Filter
1. Perform Fuel Pressure Release Procedure.
2. Remove rear seat bottom.
3. Remove inspection hole cover located under the rear seat.
4. Disconnect electrical connector.
5. Remove the quick connectors.
6. Remove the six screws.
pic 9
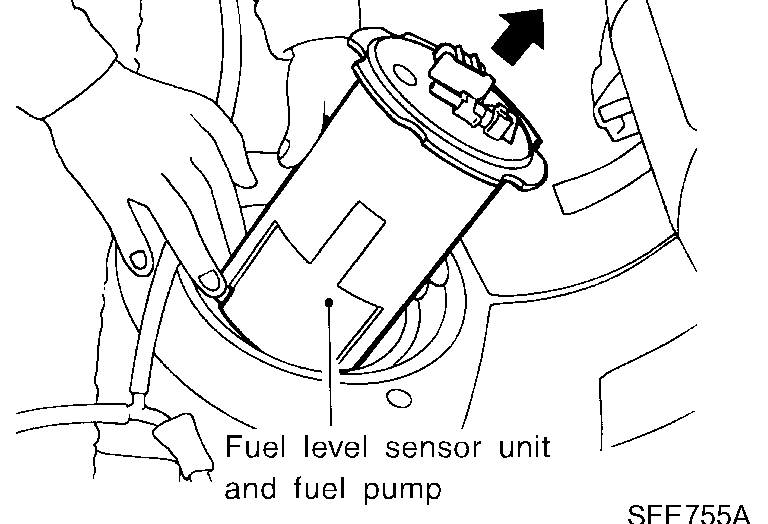
7. Pull out the fuel level sensor unit and fuel pump.
Do not damage the arm of the fuel level sensor and fuel tank temperature sensor.
pic 10
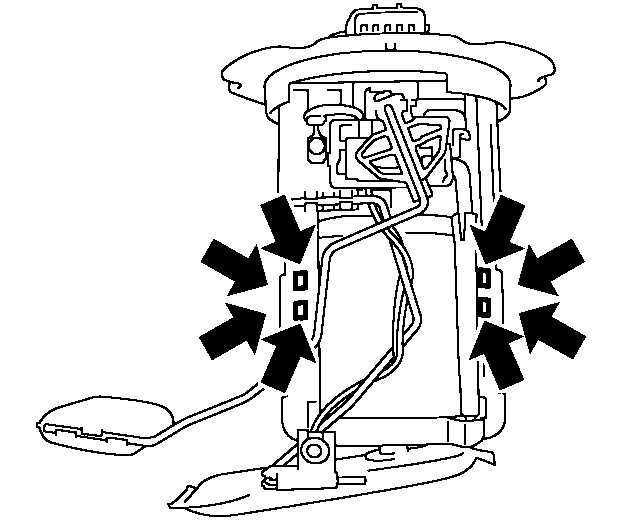
8. Remove flange of fuel level sensor unit and fuel pump.
Using a screwdriver, remove the snap fit portion as shown in the figure.
pic 11
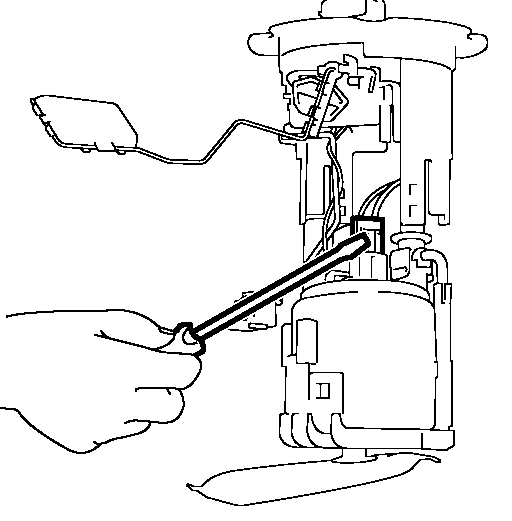
9. Push fuel level sensor flange.
Using a screwdriver, remove the snap fit portion as shown in the figure.
10. Pull up the fuel level sensor.
pic 12
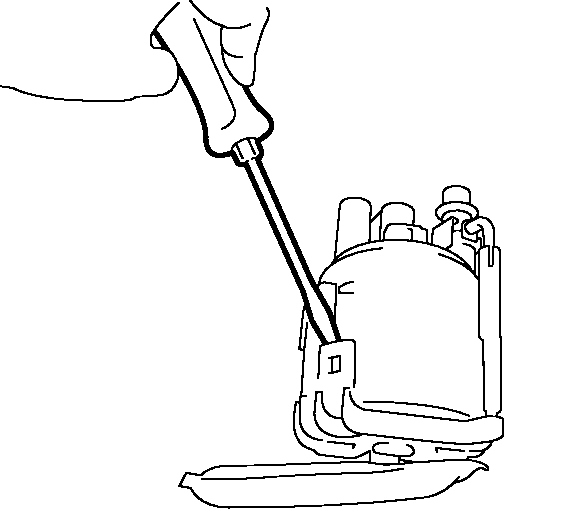
11. Remove fuel filter from chamber.
Using a screwdriver, remove the snap fit portion as shown in the figure.
pic 13
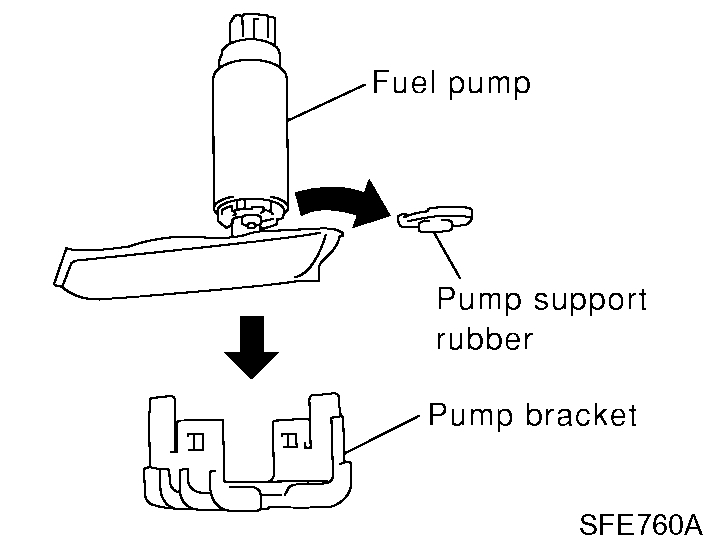
12. Remove fuel pump, then push down the fuel pump as shown in the figure.
pic 14
13. Remove the pump support rubber from the fuel pump.
Fuel Pump / Fuel Level Sensor / Pressure Regulator / Fuel Filter
pic 15
Pic 16
INSTALLATION
Install in the reverse order of removal paying attention to the following.
Install the fuel filter and fuel pump with the tabs aligned, make sure a click sound of secure engagement is heard.
Securely connect the harness connector of the fuel pump.
Install the pressure regulator O-ring as follows.
CAUTION: When replacing, always use a new O-ring.
Handle it with bare hands. (Do not use gloves.)
Visually check the O-ring, mounting parts and mating parts for foreign materials and flaws.
Before installing, apply new engine oil.
To avoid damage, do not apply an excessive force (pulling or starching).
Install the pressure regulator as follows.
Fuel Pressure Regulator
pic 17
1. Insert the clip to the groove of the regulator.
2. With the clip installed, insert the regulator straight by matching the fuel filter protrusion and the clip notch.
3. Make sure that the fuel filter protrusion and clip notch are securely engaged.
______________________________________
I've given you a lot here. Sorry... Let me know if any of this helps, what you find, or if you have other questions.
Take care,
Joe
Images (Click to enlarge)
Jul 11, 2019 at 8:38 PM