A water pump is bolted to the front of the engine block or timing chain cover and is driven by a serpentine belt, timing belt or timing chain which you should consider servicing at the same time. A water pump and coolant pump are the same thing, the following guide is performed on a rear wheel drive vehicle.
What Goes Wrong?
When a water pump goes bad it can do so in three different ways, the pump shaft seal can fail allowing coolant to leak from the pump's weep hole causing the the engine to overheat, The second failure is the shaft bearing will fail causing a grinding, rumble or squeaking noise. The last way a water pump can go bad is if the impeller either falls off or deteriorates failing to circulate the coolant throughout the engine and radiator. A water pump will typically last between 70,000 and 110,000 miles.
What's the Cost?
Labor time will vary due to the configuration of the vehicle. The determining factors are, front or rear wheel drive, and if the water pump is driven by the timing belt or timing chain, these jobs can take longer because parts of the engine must be taken apart. A new water pump can cost between $65.00 and $130.00 on Amazon or the local parts store. If exact times or procedures are needed you can ask our experts to supply you with the information (free), or consult an online resource such as AllData DIY (pay) but this guide and video will be sufficient in most cases.
Let's Jump In!
Start with the engine cool, and the vehicle on level ground.
Raise and support the vehicle
using jack stands, use latex gloves and protective eyewear. Slowly loosen the
radiator or reservoir cap to relieve any residual pressure inside the cooling system,
this will also allow the system to drain more rapidly.

The engine coolant should
be drained to avoid spillage when unbolting the pump from the
engine block
or timing cover. Use a fluid catch basin, and open the radiator drain valve or remove
the lower radiator hose. (Keep coolant away from animals).

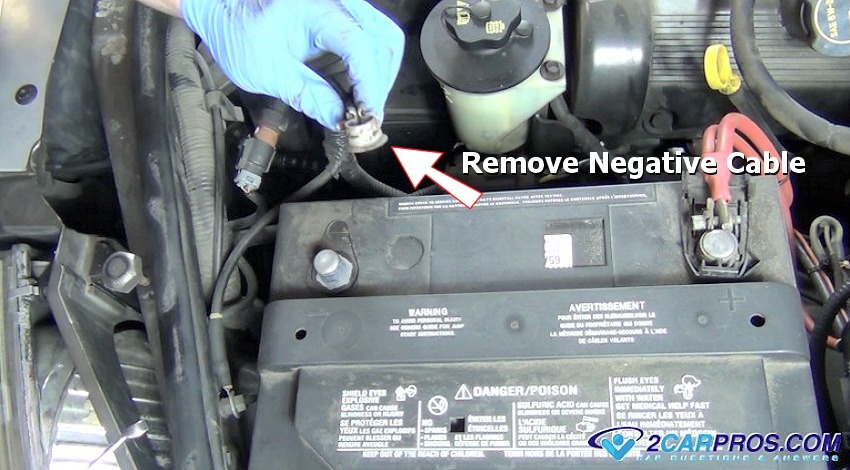
It's a good idea to disconnect
the battery to ensure there are no accidental electrical short circuits while
working.
To help gain access to the water pump a few parts will needed to be removed first,
such as plastic covers to help uncover the engine.
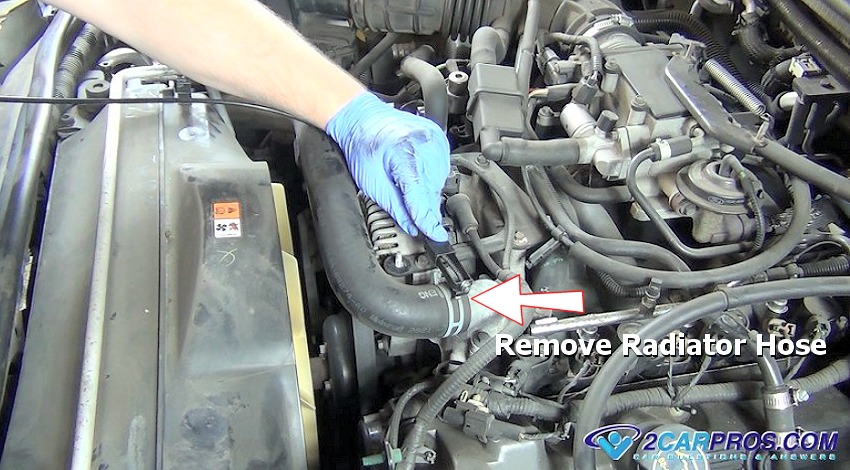
Use a hose clamp tool to remove the
upper radiator hose, a pair of channel
locks can do the job as well.
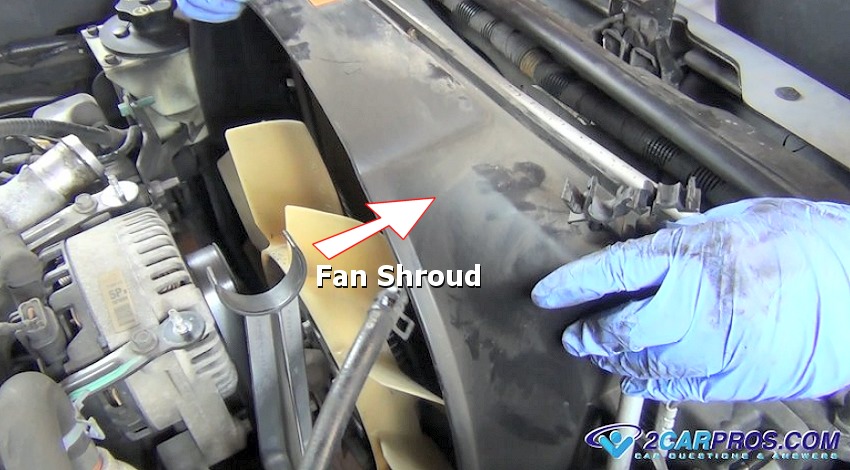
Remove the mounting bolts that hold the upper fan shroud to the radiator, also
to the lower part of the shroud. In some cases the fan shroud is one piece, you
will be able to remove the shroud completely once the fan blade is removed.
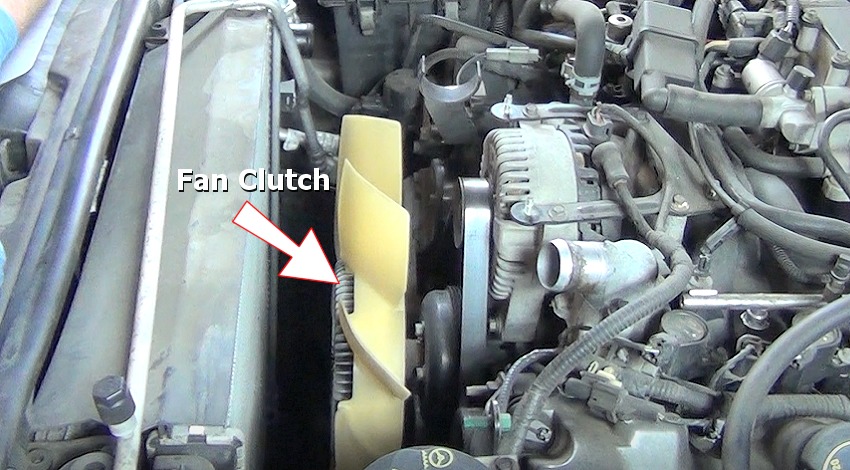
A cooling fan may be connected to the water pump, some cars use an electric fan
which will be attached to the radiator shroud and will come out in one piece, in
this example the fan is mounted to the water pump. A water pump pulley holding tool
is necessary to keep the pulley from turning while
loosening the clutch fan. You can rent
this tool at the local auto parts store,
watch this video to see how to remove the fan clutch.
 Fan Clutch Removal Tool
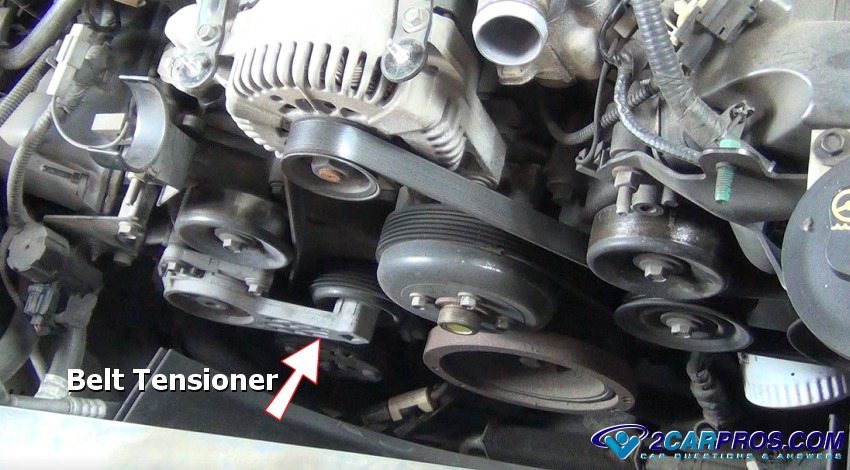
Use your cell phone to take a picture of the serpentine belt routing, then locate
the belt tensioner which is spring loaded, apply downward pressure to
release the belt from the pulleys,
in this case we use a 1/2 inch ratchet.
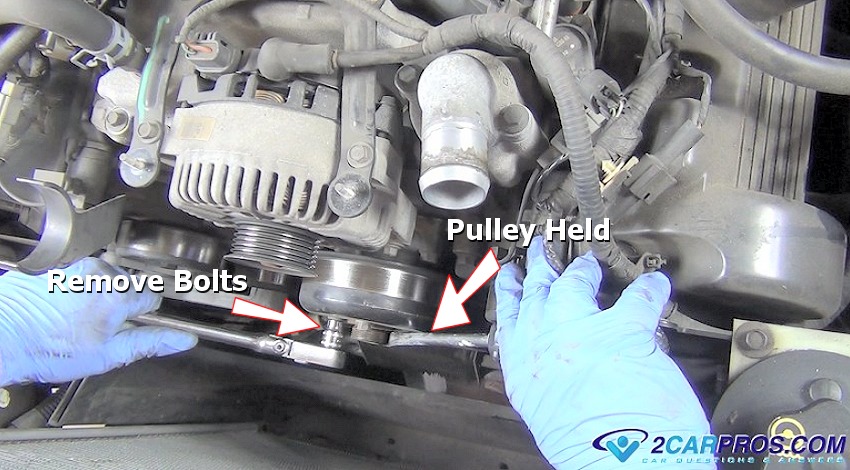
In this case, the water pump pulley must be removed before the water pump. The
pulley must be held in place to remove the mounting bolts which is done by wedging
a large standard (flat blade) screwdriver between the bolts and the center thread.
Use a socket or wrench to loosen and remove the bolts and pulley, (Some manufacturers
press the pulley onto the water pump which cannot be removed, skip this step).
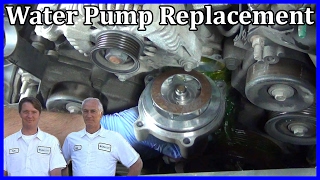
Watch the Video!
Please watch this video of the job being done, then continue down the guide to glean additional helpful information.
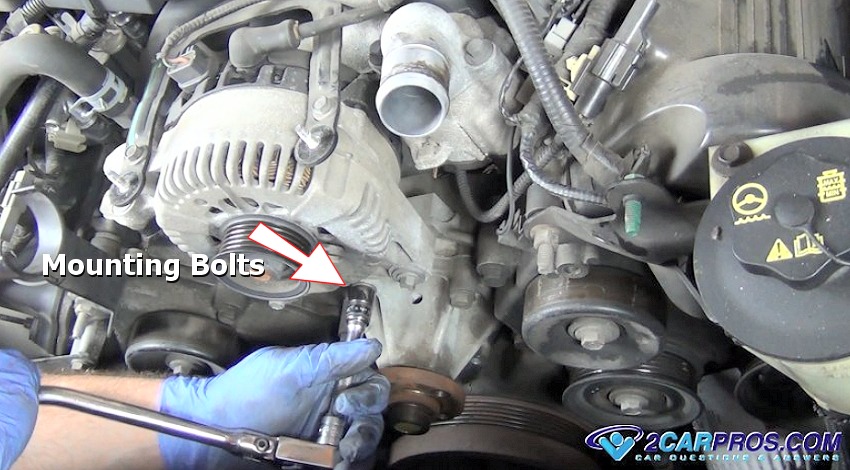
The water pump mounting bolts are now exposed, there may be additional hoses
or brackets that will need to be removed depending on the design.
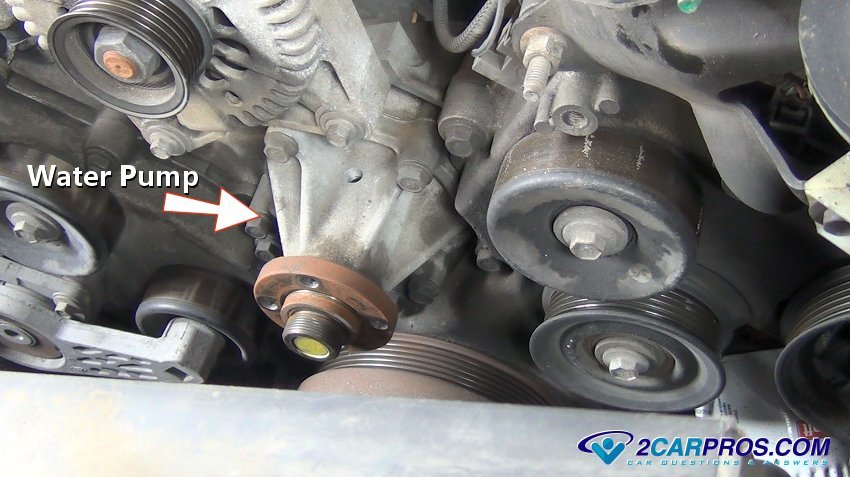
Locate the mounting bolts that hold the water pump to the engine block or timing
cover, use a socket or wrench to remove the bolts, turn counterclockwise, take note
on which bolts come out of which location because some bolts can be different lengths
that can create problem during reassembly.
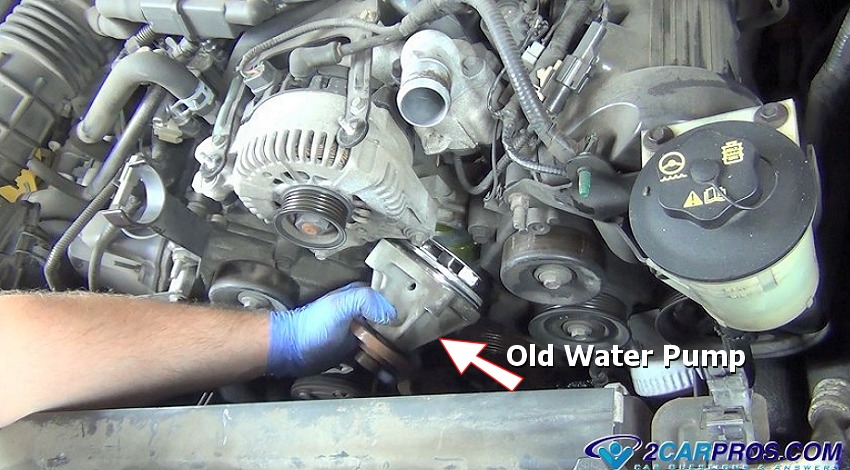
Make sure all water pump mounts bolts have been removed, gently tap the pump
using a small hammer to break the seal which will enable the pump to be removed
from its location, a small amount of coolant will also be released so have your
fluid catch pan ready.
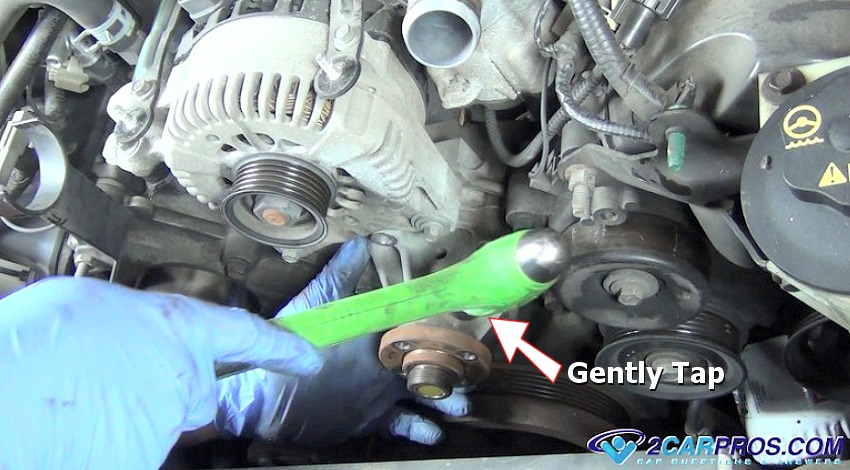
Firmly grasp the water pump and wiggle it loose, be careful no to drop it because
it could roll into the radiator damaging it.
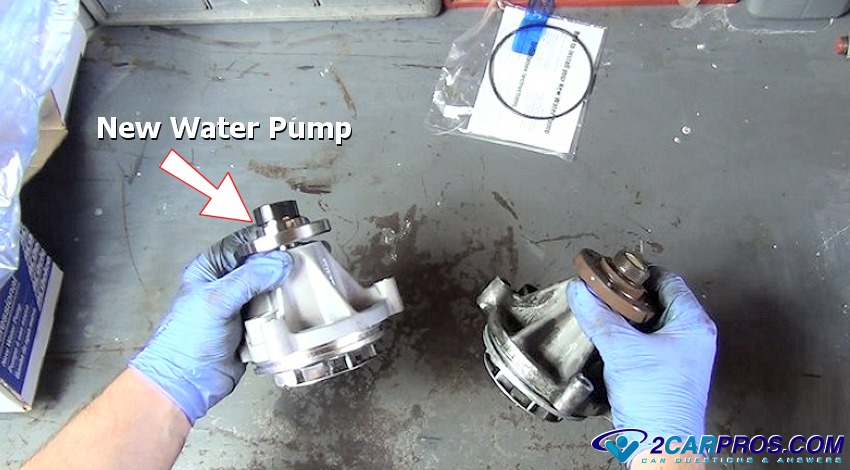
Remove the new water pump from the box and match it to the old pump, check the
mounting flange for the fan clutch and the gasket surface, they should be identical.
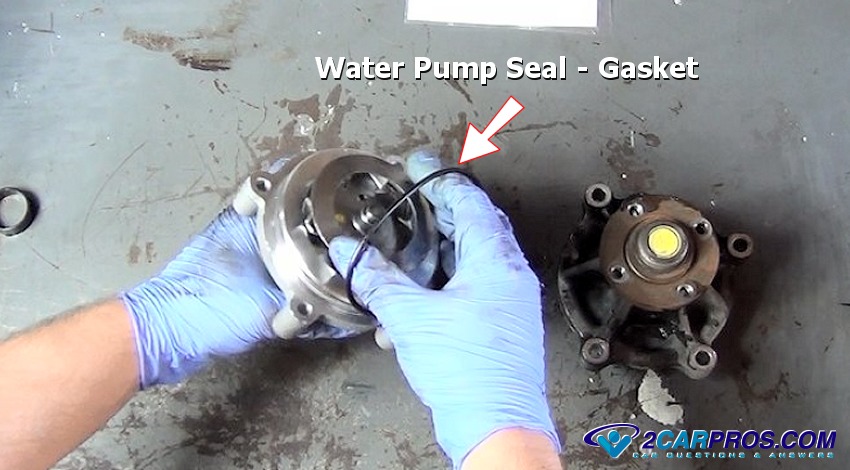
A new gasket or O ring will be included with the new pump, this will help seal the
pump to the block or timing cover and avoid leaks.
Install the new gasket or O ring seal while making sure not to damage the integrity
of either the gasket or the seal, this step is important because it can cause a
leak.
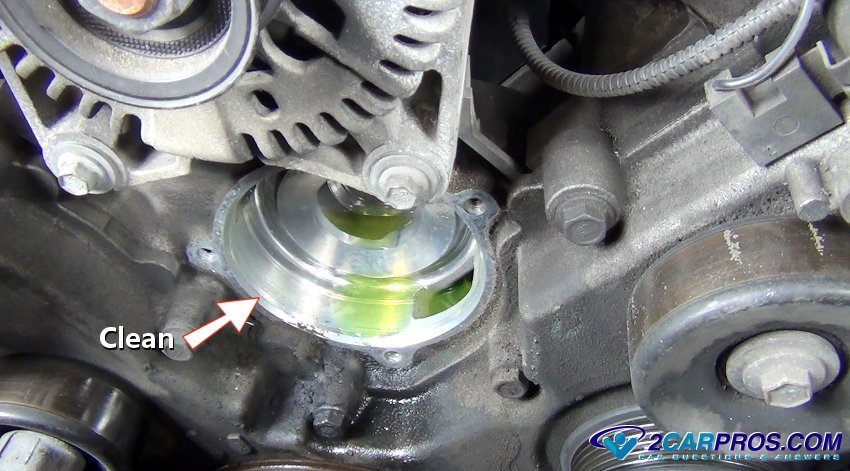
Before the new water pump can be installed the sealing surface must be prepared,
this is done by using a gasket scraper or razor blade to remove old gasket making
the surface as clean as possible. Use a shop towel and wipe away any dirt and grease
from the area until the metal is clean and smooth.
Use a small amount of gasket sealer (silicone rubber) while mounting the gasket
to the pump. Lower the new water pump down into the engine bay and gently insert
it into the engine block or timing cover and push it into place. Insert one of the
pump's mounting bolts to help keep it in place and tighten it by hand, follow up
with the remaining bolts. Be sure to insert the right length bolts into their rightful
place or damage can occur when tightening.

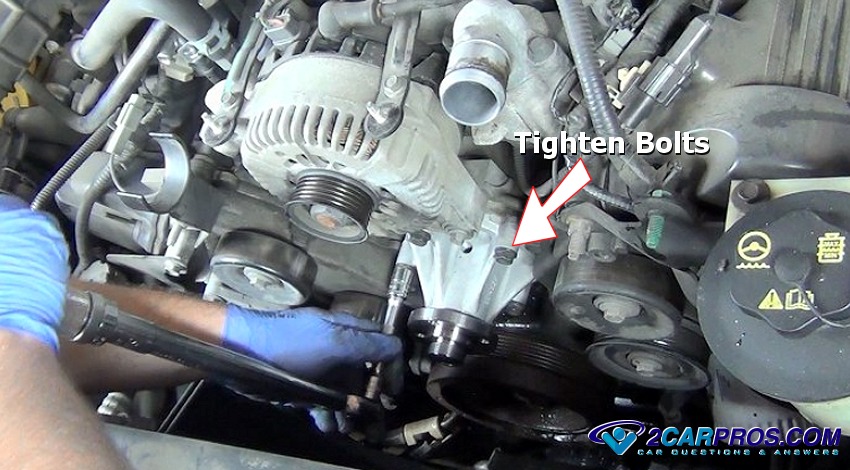
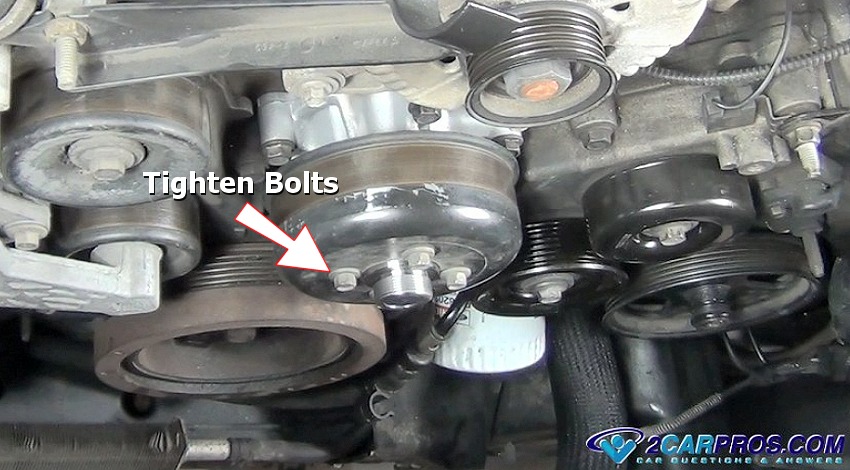
Use a wrench or ratchet to tighten the mounting bolts in a even cross pattern,
torque to factory specification which is usually between 19 and 22 foot pounds.
If your water pump is equipped with a detachable pulley reinstall the pulley
back onto the pump and insert and tighten the mounting bolts in a cross pattern.
Use a large flat blade screwdriver to hold the pulley from turning while tightening.
The bolts can also be tightened once the serpentine belt is reinstalled.
Reinstall the serpentine belt and the fan clutch in the same way it was removed,
again this would be a good time to replace the belt with a new one. Also, many mechanics
feel this is a good time to replace the thermostat,
coolant hoses and
flush the radiator for
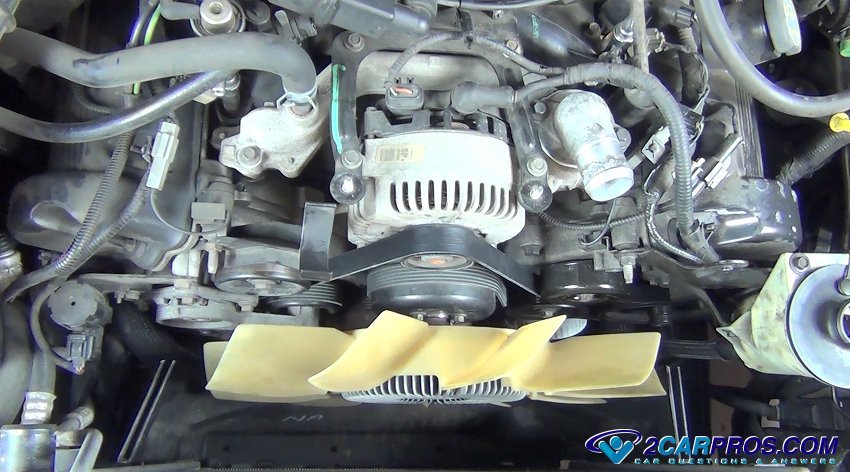
safe measure. Reassemble the upper fan shroud and any other plastic clips and guards.
Make sure everything is out of the way of the fan blade area.
Reinstall the upper and lower radiator hoses and double check your work. Then
start adding coolant while looking under the car for any obvious leaks, once the
reservoir is full step back from the engine compartment and start the engine. Listen
for any strange noises which can be an indication that something is wrong. If the
belt has coolant on it you may hear a squeaking noise that should go away in a short
amount of time. Watch the level of the coolant and add more while the engine is
warming up to operating temperature. Once the engine is warm the thermostat will
open and there may be a drop in the coolant level. After topping off the reservoir
or radiator coolant level reinstall the radiator cap with the engine still running.
Drive the car for a few days and then double check the coolant level once the engine
has cooled down, also check for leaks.
.jpg)
Questions?
Our certified technicians are ready to answer car repair questions for free. We hope you saved money and learned from this guide. We are creating a full set of car repair guides. Please subscribe to our 2CarPros YouTube channel and check back often for new videos which are uploaded regularly.
Article published 2022-03-08