A heater core is positioned inside the car and is part of the HVAC system. Hot engine coolant is run through the core which air is blown through via the blower motor which provides heat for the passengers.
What Goes Wrong?
When a heater core fails it can do so in one of two ways, either the core can become plugged due to poor cooling system maintenance or it can leak allowing antifreeze (coolant) to be present on the passengers side floorboard. This will usually be accompanied by a foul odor being expelled from the ventilation system.
Cost to Replace?
The heater core itself should cost about $120.00 (US) depending on application. The labor is the tricky part, some heater cores are easily replaced while others seem like the car is built around them, so it is important to know the labor time before you get started or have the core replaced. Also, most core replacement will require the air conditioner system to be vacuumed down and recharged. This is because the evaporator core is included in the HVAC plenum which will be removed along with the heater core. Using a resource like AllData will help show you step by step how to do the job (specifically), additionally they show labor time, cost and part numbers to the parts needed to do the job. If you have additional questions our 2CarPros experts are here to help (free).
Replacing the Heater Core
The following guide shows what needs to be done when replacing the core which can be used to see what you are paying for when the job is being done by a shop, or what you are in for when doing the job yourself. (It helps to visualize how the dashboard was installed at the factory).
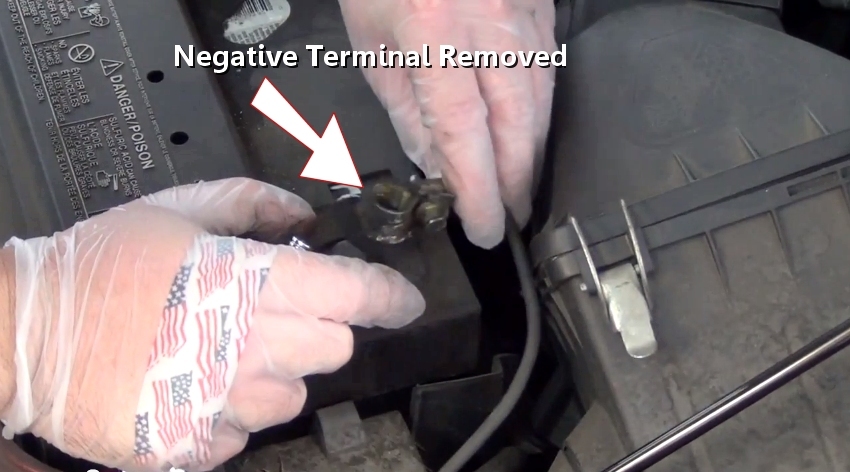
Start with the engine cold, wear appropriate clothing and safety gear (goggles,
gloves etc.). Remove the negative battery cable, move the cable end far enough away
to avoid an accidental connection. (Cars 2017 and newer may need a
CAN memory device
connected to preserve settings). Allow a minimum of 10 minutes before working with
the airbag system.
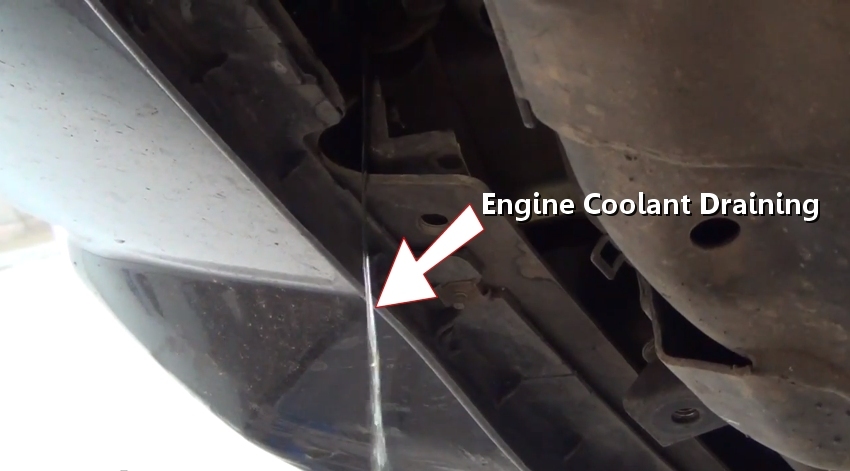
Release the radiator cap (engine cold), and loosen the radiator drain valve or
remove the lower radiator hose to drain the cooling system, have a fluid catch basin
ready.
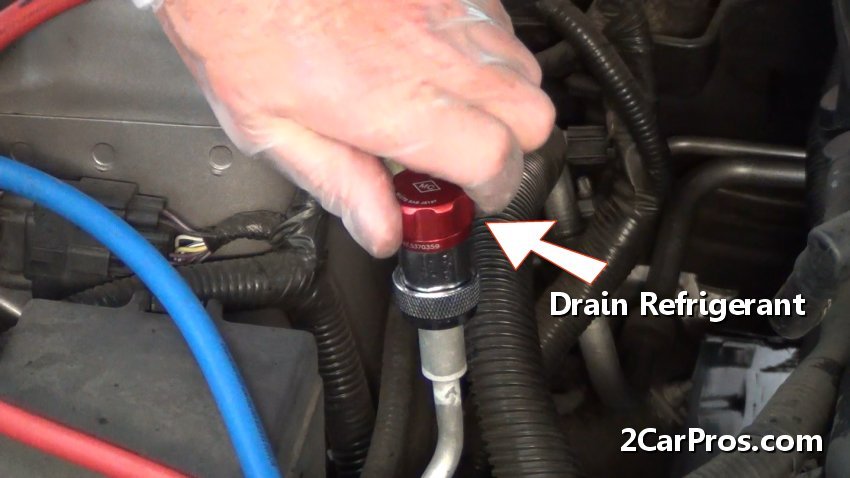
Most vehicles utilize a common plenum for both heater core and evaporator core,
these types will require the refrigerant be
evacuated from the system,
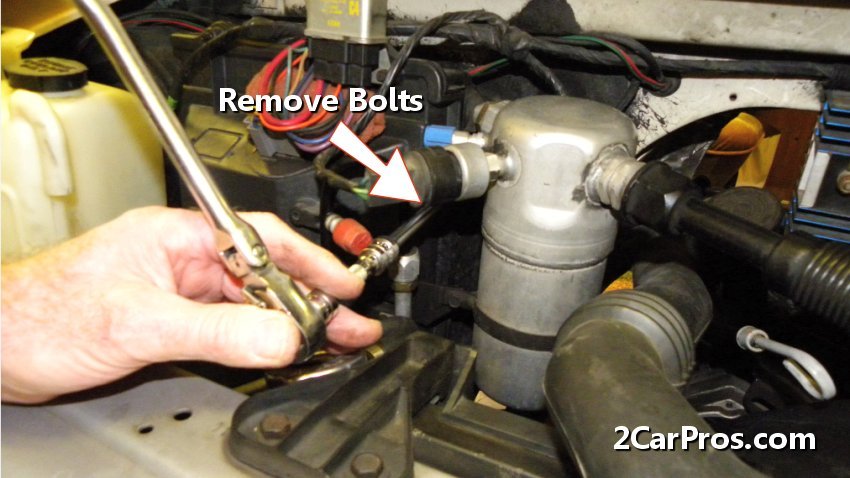
once evacuated, disconnect heater hoses and necessary air conditioner hoses (lines).
Using the hose clamp removal tool, loosen and
remove the heater hoses from the heater
core inlet and outlet fittings. Check the condition of the heater hoses and replace
if needed.

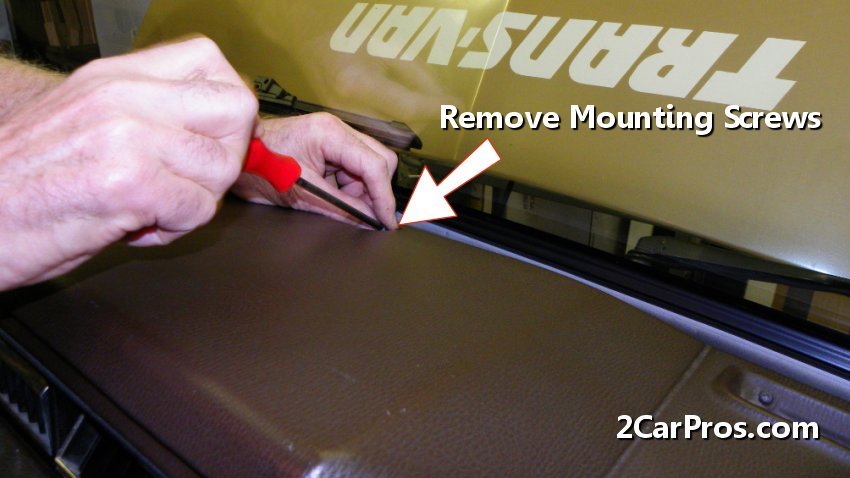
Locate and remove upper dash mounting screws. Remove any mounting hardware across
the top of the dash assembly, which is usually covered by pop-in trim pieces along
the base of the windshield.
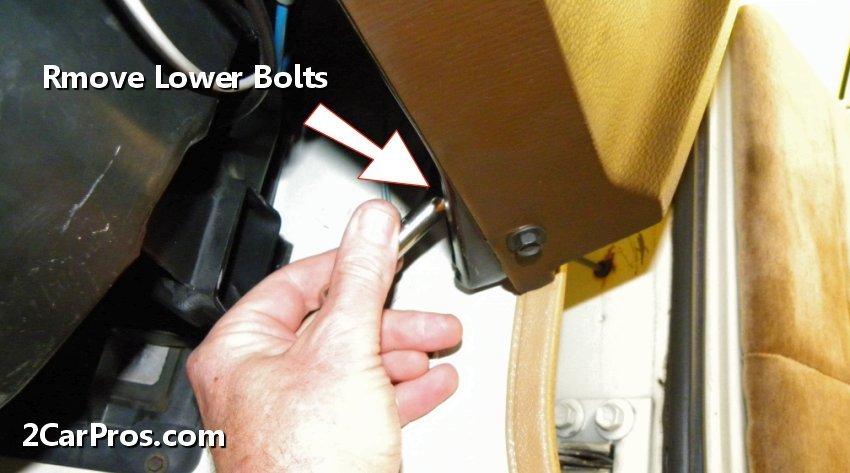
Locate and remove the lower dashboard mounting bolts. (Note: Some vehicles require
the center console to be removed to access center mounting bolts.)
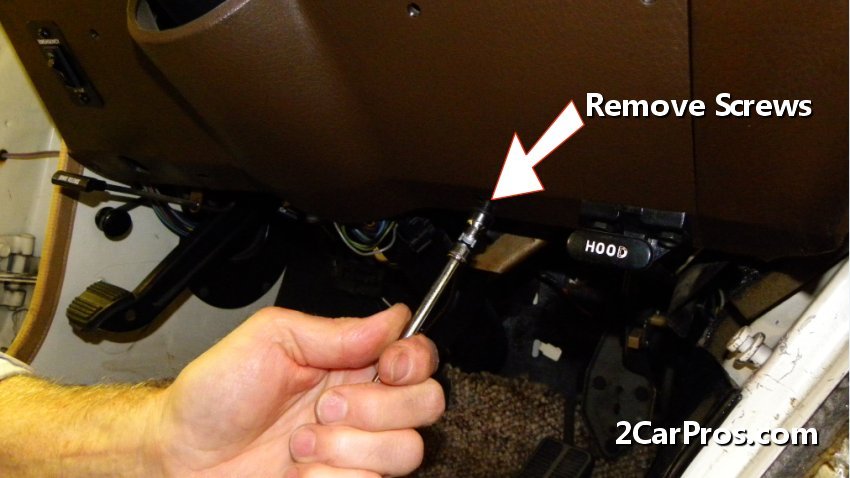
Use a small socket or screwdriver to remove mounting screws to the lower bezel
allowing access to the lower steering column mounting bolts.
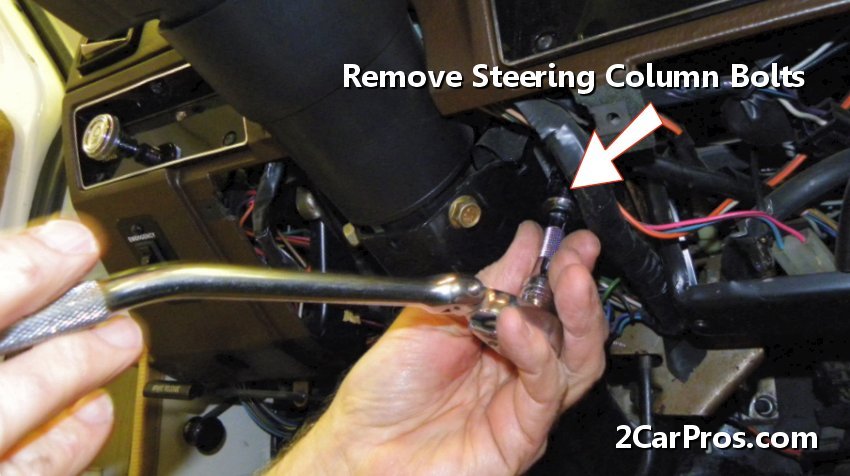
You will need to lower the steering column to allow dashboard clearance. This
is done by removing the shift indicator cable (if applicable), then removing the
nuts/bolts that hold the column to the dash assembly. This will allow the column
to become loose from the dashboard, in most instances allowing the column to rest
on the drivers seat will supply sufficient room. Locate the left side dashboard
mounting hardware and remove.
The dashboard should now be loose from the vehicle with nothing but electrical
connectors or vacuum lines, gently pull the dashboard away to inspect.
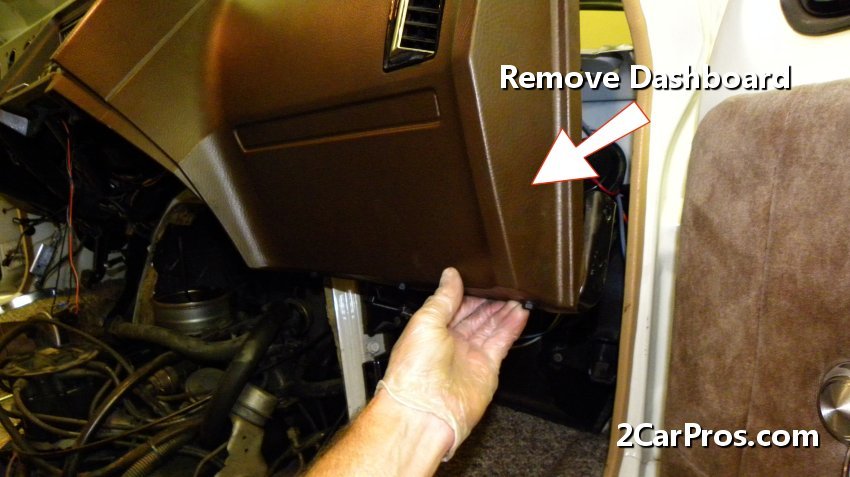
Slowly pull away from firewall while keeping an eye out for any wiring or vacuum
lines, once back far enough support (hang) dash assembly in a position that will
allow for enough room to remove the HVAC plenum.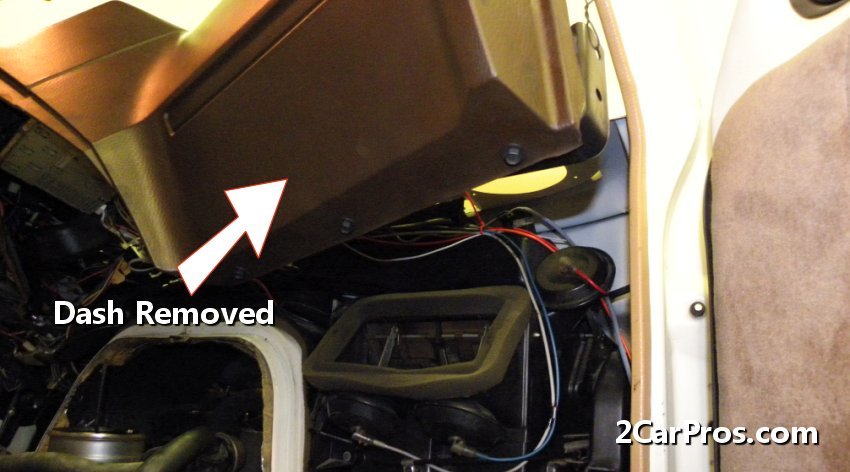
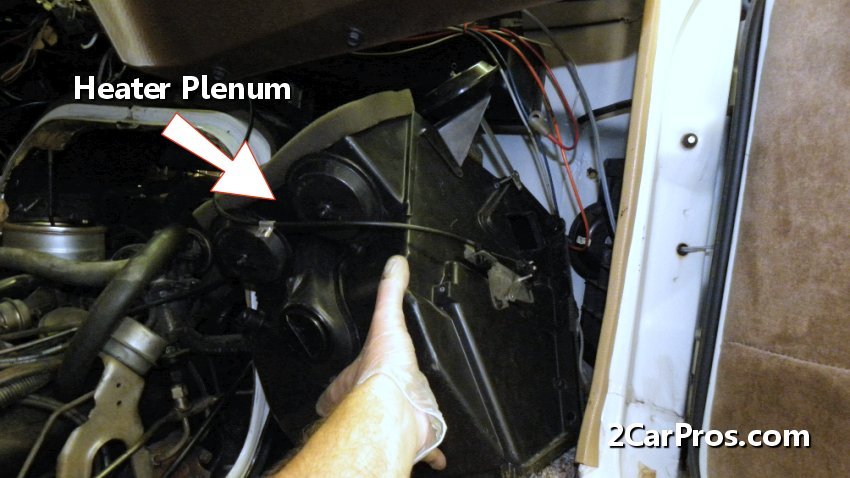
The HVAC plenum will now be exposed.
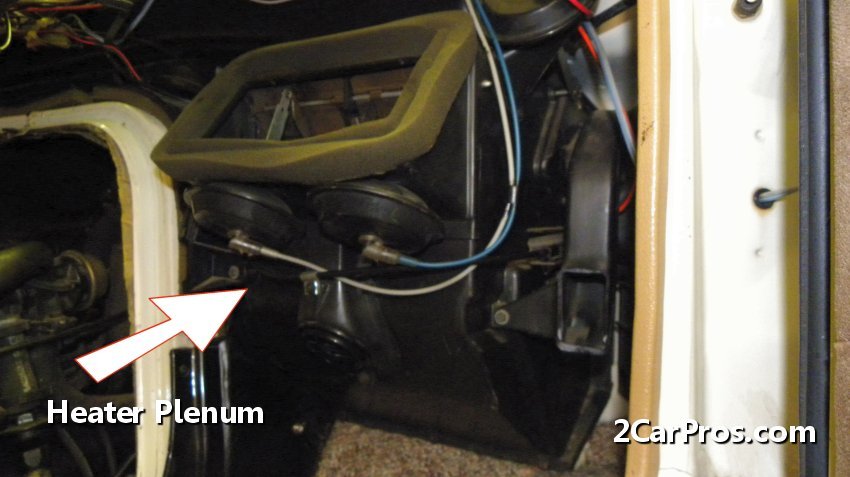
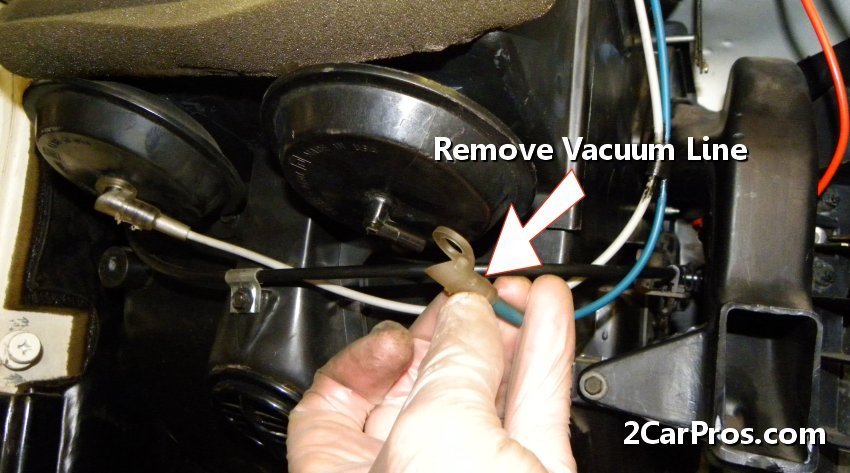
Remove electrical connectors from the blend door actuators, temperature sensors,
blower motor also, remove any vacuum lines if equipped (use your cell phone to
snap pictures of the wiring if needed).
Remove ductwork including windshield and mid-vent distribution ducting. Locate
inner heater plenum mounting bolts and screws to remove them.
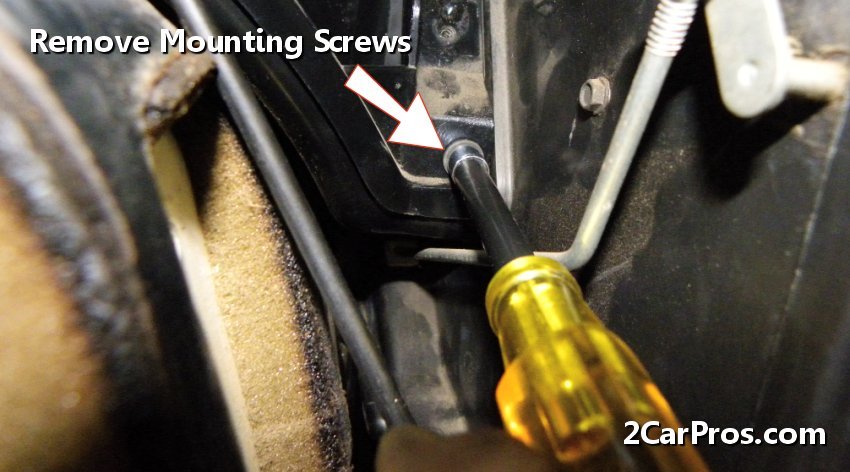
Inside the engine bay, locate the heater plenum mounting bolts and remove. This
will allow the heater box plenum to become free of the vehicle which will allow
removal of the unit.
Gently pull backwards on the plenum assembly (this can be stuck slightly due
to sealing gaskets from the firewall to the plenum). Keep an eye out for anything
that you missed, then remove the HVAC plenum from the vehicle. Again use your cell
phone to take shots of the assembly to ensure proper reinstallation. (There might
be coolant leaking from the heater core so use an old towel to help control spillage.)
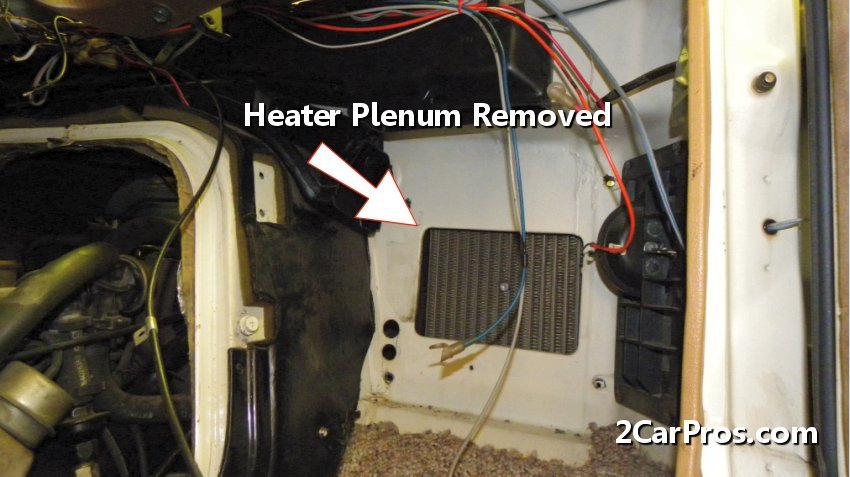
Place the HVAC plenum assembly on a suitable work area for disassembly.

This is what it looks like after the HVAC plenum has been removed. On this application
you can see the air condition evaporator core which did not need to be removed in
this instance.
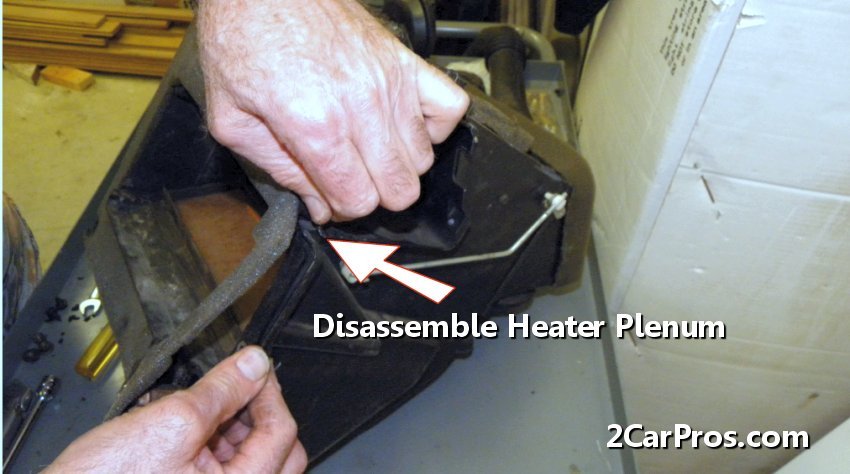
To remove the heater core the plenum will need to be disassembled. Locate and
remove plenum screws to dissemble and gain access to the heater core.
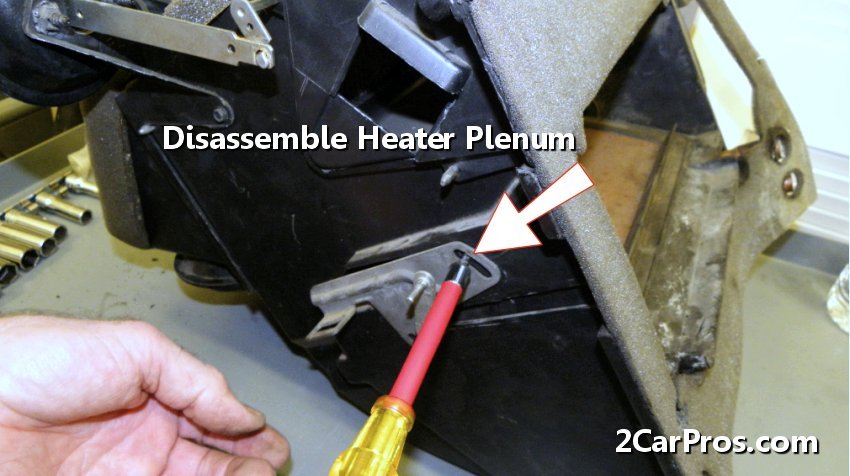
Gently pull the plenum open to expose the heater core.
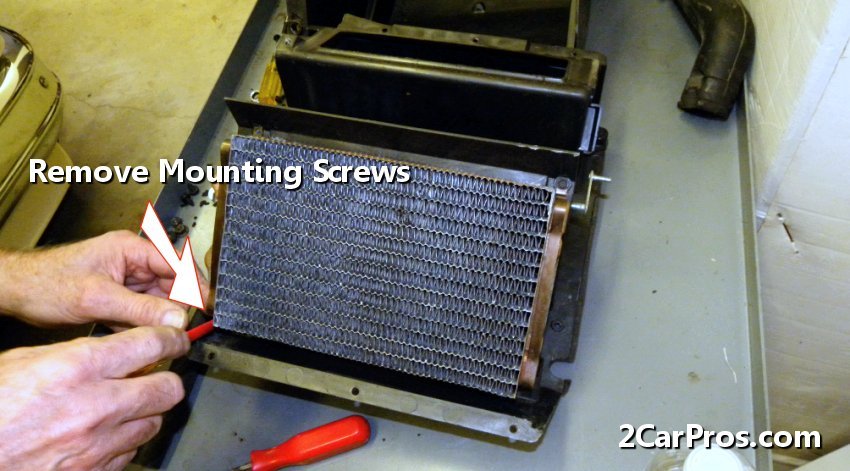
Remove the mounting screws holding the core to the housing.
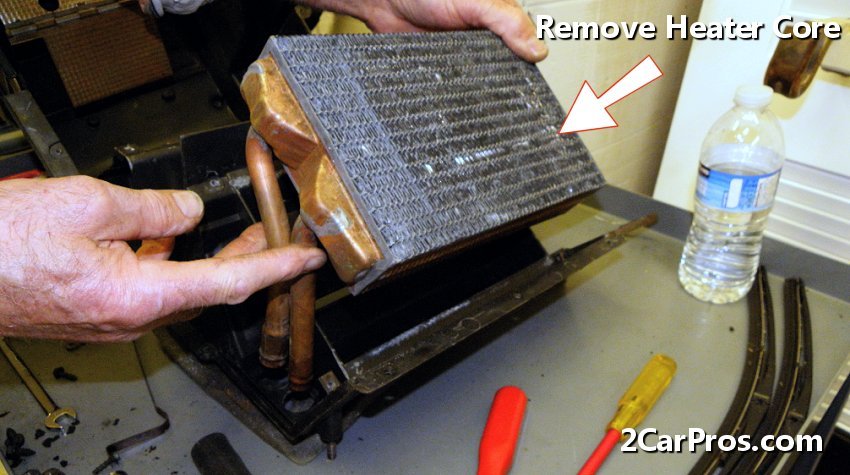
Remove the core from the housing mounts.
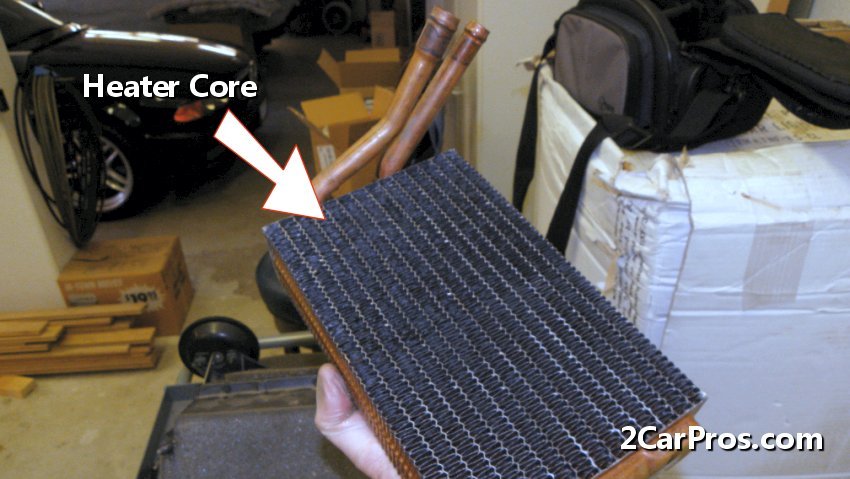
Match the new heater core to the old core to ensure a proper installation, reverse
these steps to reassemble. Ensure the heater core hose connections are in good condition
(round with no dents, this will allow coolant to leak). In our shop we would test
for leaks before installation. Use caution when installing the heater core, these
units are made of thin metal and plastic and are easily broken. Clean and inspect
the HVAC unit to make sure seals and gaskets are reusable and in good condition,
reassemble the HVAC plenum accordingly.
Reassemble heater plenum and reinstall connecting all hoses, wiring connectors, control cables and vacuum lines using the cell phone pictures from earlier. Reassemble completely by reversing the order.
Refill with coolant and start the engine while adjusting the heater to the highest setting while topping off the coolant.
After completing the job, recharge the air conditioner (if needed.) Recheck the system for leaks while testing the blend door operation, verify all dash functions operate properly.
Questions?
If you have a car repair question, you can ask the 2CarPros community for help. We hope this guide helped you understand the repair. Please visit our 2CarPros YouTube channel for more helpful repair videos.