Heater hoses transfer hot engine coolant into the heater core where it's processed into warm air and utilized by the heater system. Some systems are designed with a fluid control valve which stops coolant from flowing into the core which should also be replaced with the hose set. Heater hoses should be inspected for wear and failures when inspecting other coolant hoses such as the radiator hoses. Occasionally the heater core will trap air inside (post repair) the core producing a bubbling noise which should dissipate.
Let's Jump In!
Begin with the engine cold, in park with the emergency brake set, drain the cooling system.
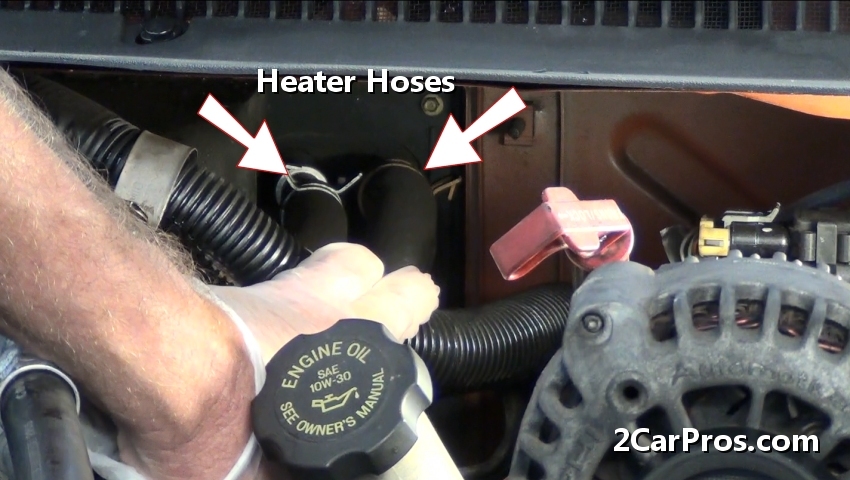
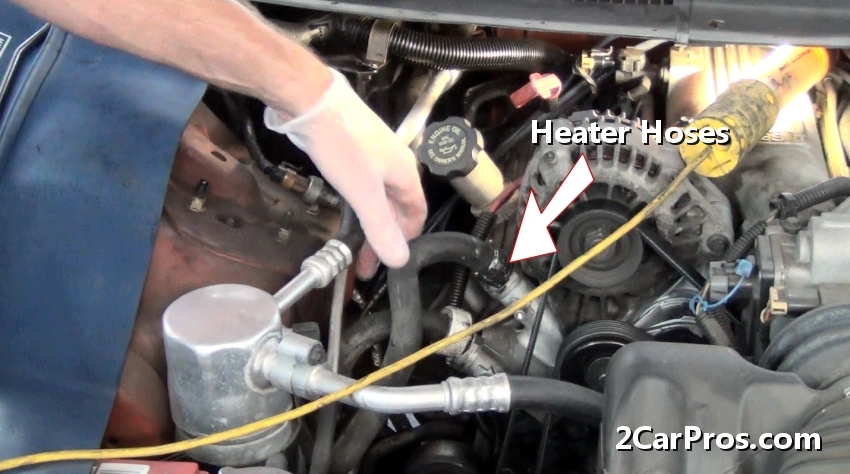
Step 1 - Locate the heater hoses to be replaced and remove or relocate any obstructions.
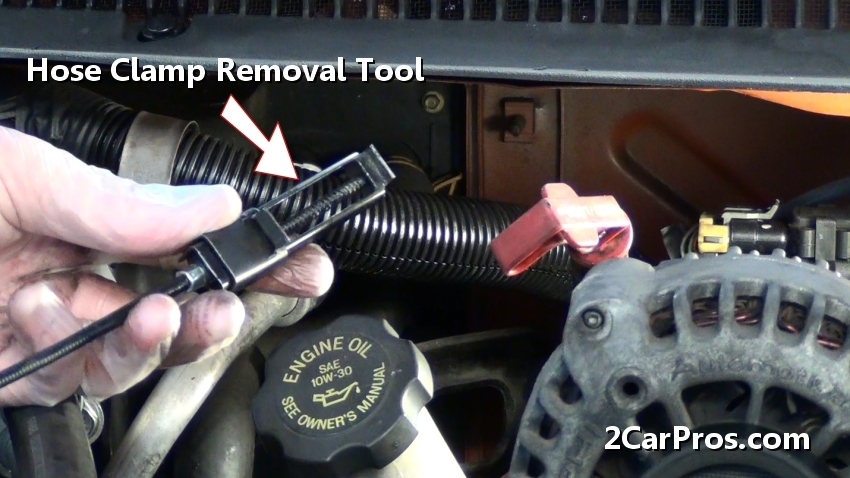
Step 2 - Some vehicles use a spring loaded hose clamp which can be removed by using a special hose clamp removal tool, a pair of pliers can also be used. A worm screw style of clamp will use a screw driver to remove.
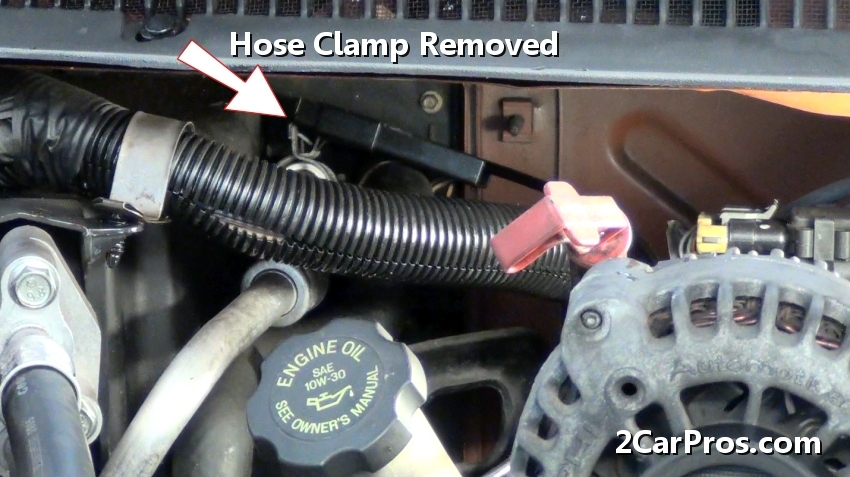
Step 3 - Once the tool has been installed, move the hose clamp to gain access to the hose mounting fitting. (Note: Heater hoses are connected to the heater core, this core is fragile so caution should be used when removing the heater hoses to avoid breaking the core and causing a coolant leak.)
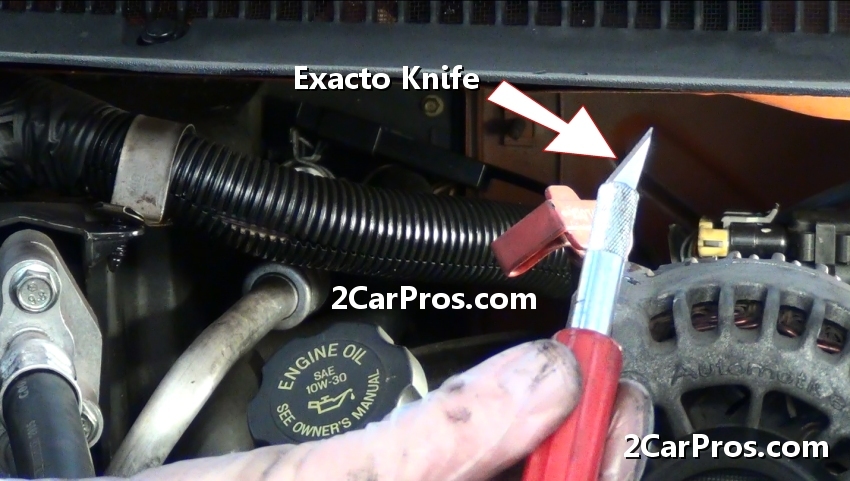
Step 4 - After the hose clamps have been loosened and relocated down the hose, use an exacto knife or razor blade to gently slice the hose long ways along the fitting.
Step 5 - Once the heater hose has been cut, gently lift and twist the hose to release it from the heater core fitting, repeat this process for the remaining hose.

Watch the Video!
Please watch this video of the job being done, then continue down the guide to glean additional helpful information.
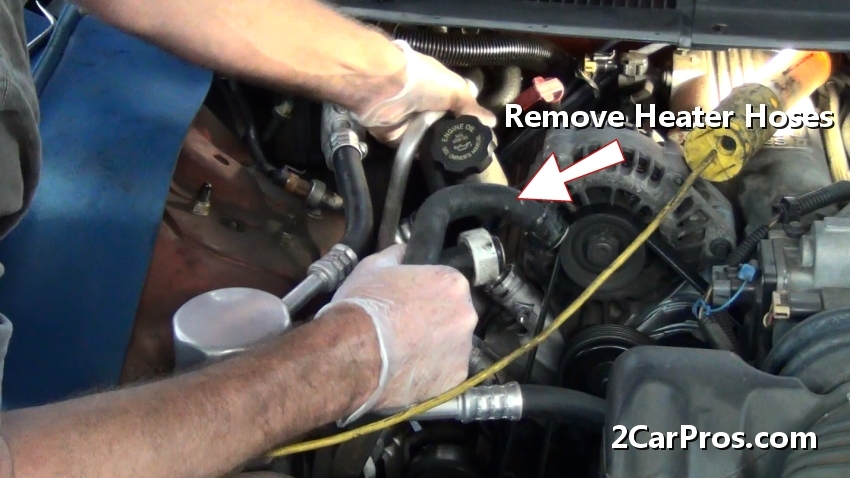
Step 6 - Next, locate and remove the heater hoses from the engine which are usually near the engine water pump.
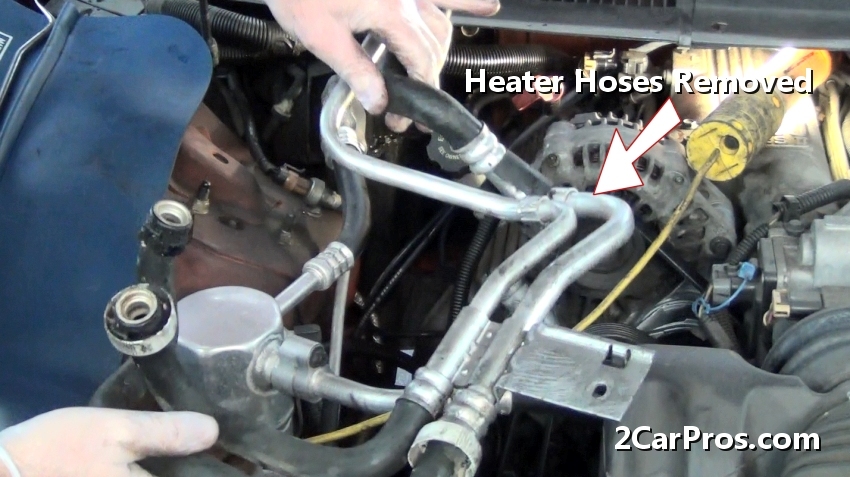
Step 7 - After the hoses have been released from the heater core and engine, remove any remaining mounting hardware and remove the hoses from the engine bay.
Step 8 - It can take a little ingenuity to configure the hoses for removal.
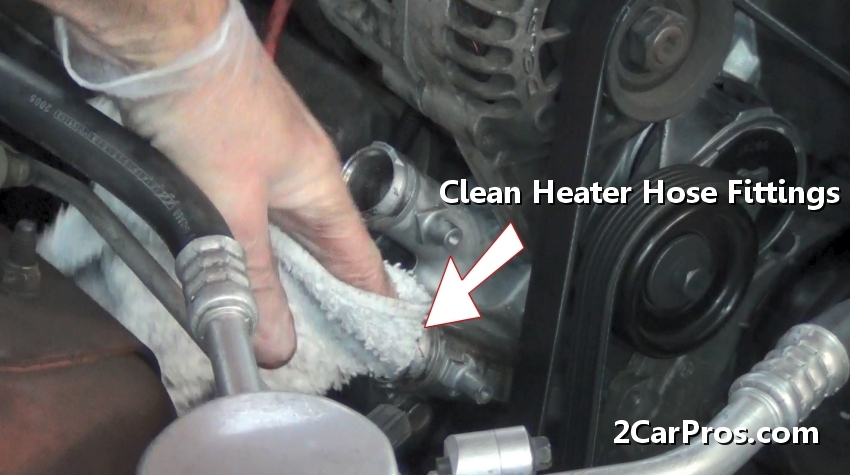
Step 9 - Once the heater hoses have been removed, use a shop towel to clean the heater hose fittings to help seal the new hose installation.
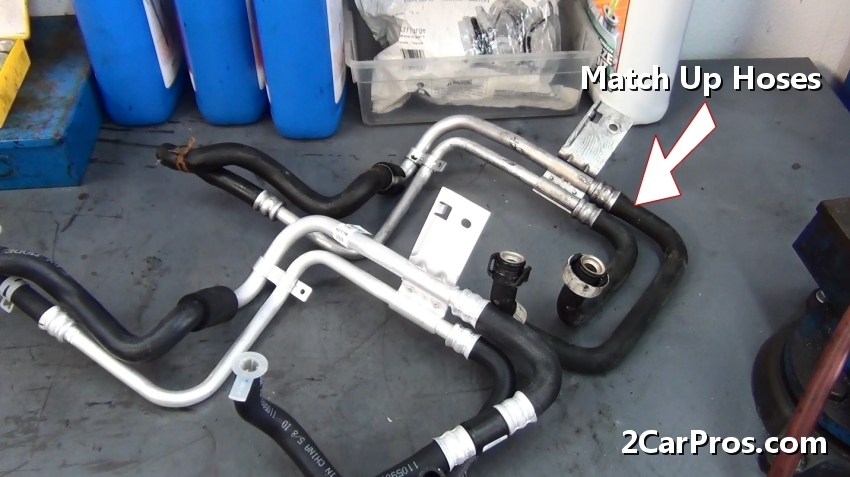
Step 10 - Compare the worn heater hose set to the replacement hoses to ensure a proper installation.
Step 11 - After comparing the new hose set, install the hoses into the engine bay.
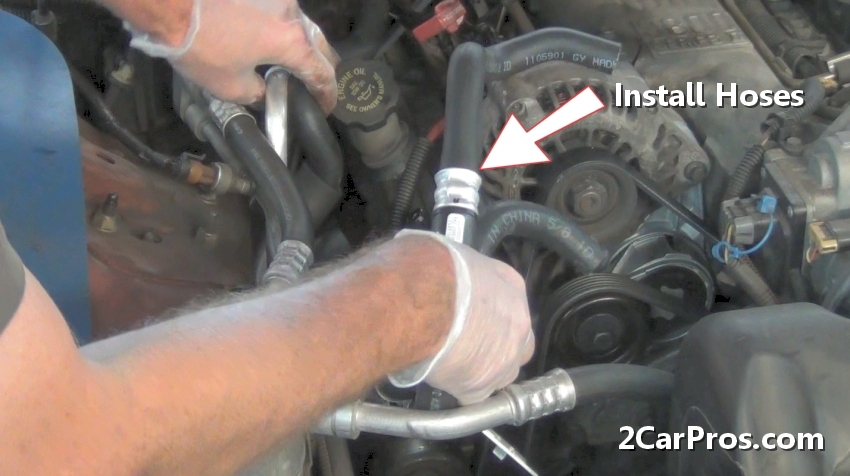
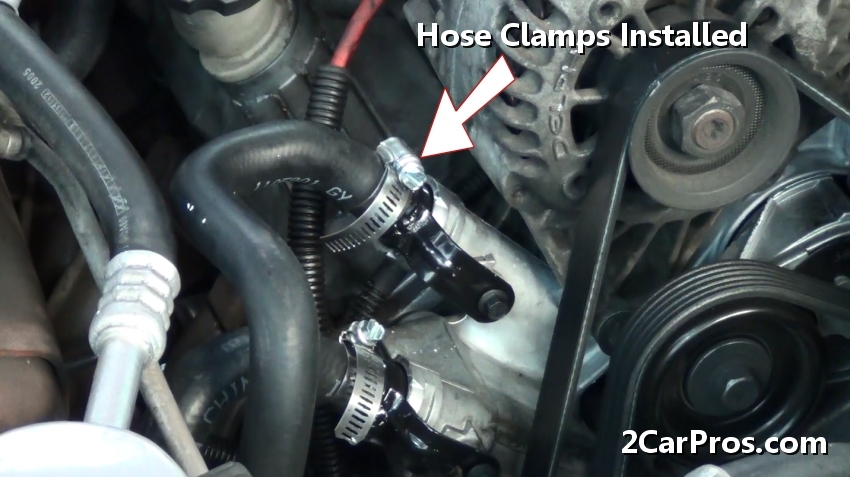
Step 12 - Once the heater hoses have been placed into the engine bay, connect the hoses to the engine using new hose clamps.
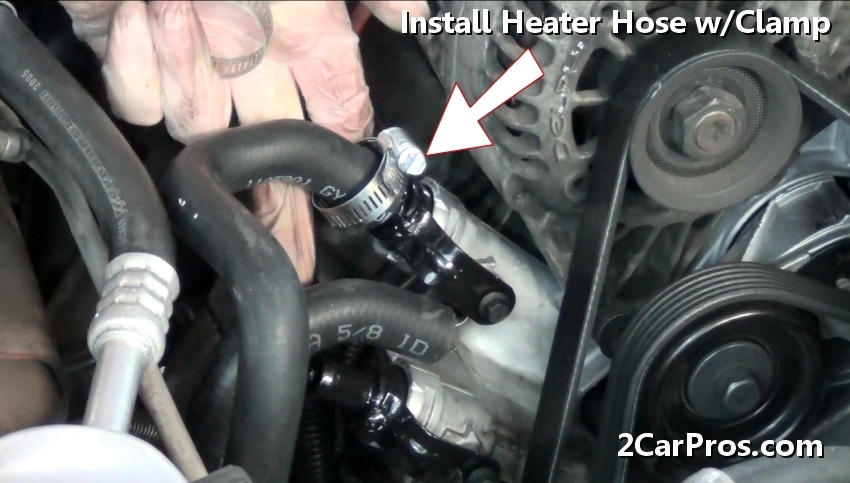
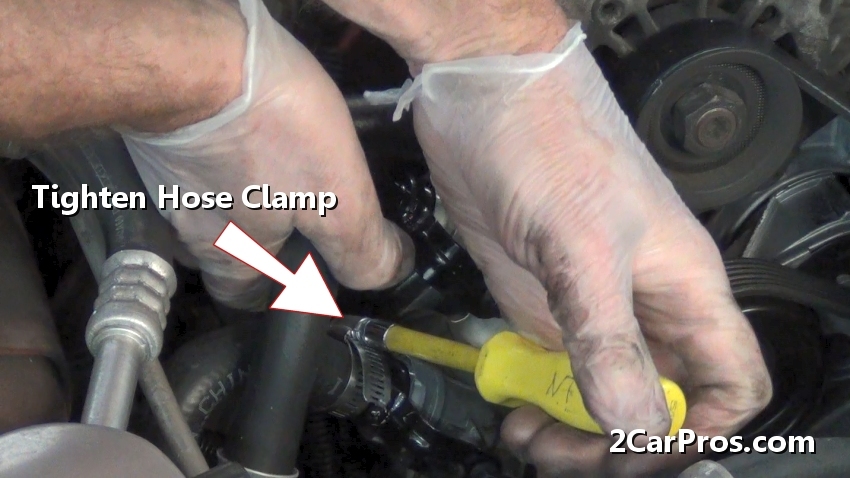
Step 13 - Next, position the hose clamp over the middle of the hose fitting and tighten securely, repeat this process for the remaining hose.
Step 14 - After the hoses are installed and clamps tightened, inspect for obstructions such as metal shielding that can damage the hose and relocate to prevent damage to the hose.
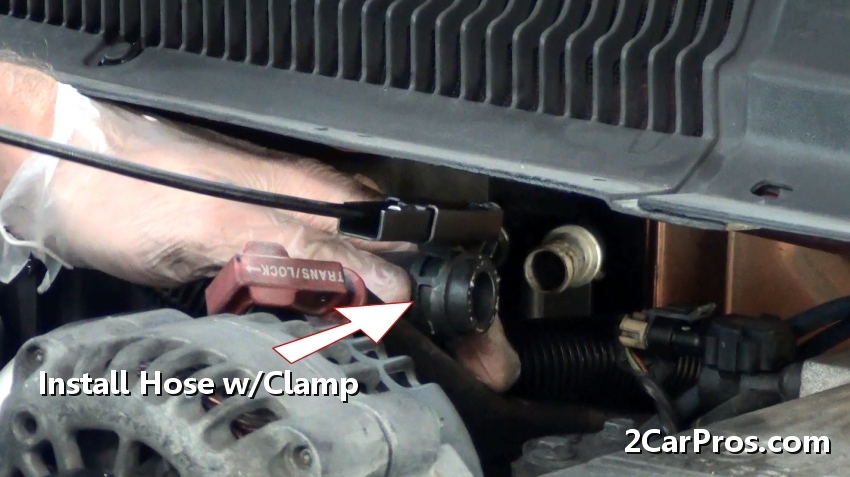
Step 15 - Connect the remaining hose ends onto the heater core fittings using a hose clamp tool to activate the clamp.

Step 16 - It helps to activate the clamp tool before attaching the hose to the fitting. (Note: Do not use lubricant to aid hose installation as it may cause it to prematurely fail.)
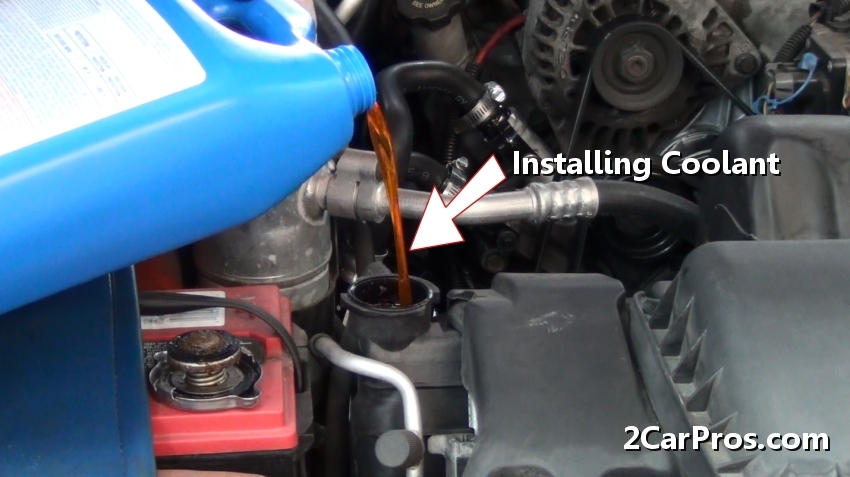
Step 17 - Once the heater hose connections are complete, refill the cooling system. Once the job is complete, and the radiator is being refilled, start the engine and allow to warm up to operating temperature (thermostat open) and top off with coolant, then reinstall the radiator cap. Once the car has been driven, check for coolant leaks and recheck the coolant reservoir fluid level.
Questions?
If you have a car repair question, you can ask the 2CarPros community for help. We hope this guide helped you understand the repair. Please visit our 2CarPros YouTube channel for more helpful repair videos.