A starter motor is a high torque motor that utilizes a small pinion gear to contact the flywheel and a starter solenoid to initiate the electrical connection when the ignition key is used to crank the car engine over and begin the internal combustion process, (engine running). This motor uses 12 volts from the battery which is transferred by the positive and negative battery cables. The engine is fitted with a flywheel or flex plate which acts like a large gear for which the starter engages to crank the engine over.
What Goes Wrong?
As with all electrical motors, they have a duty cycle and must be replaced with a new or rebuilt unit. When a starter motor fails, it can not work at all, grind when in use, crank the engine over slowly or make a rapid clicking sound.
What's the Cost?
A starter motor replacement at a shop will run between $350.00 and $550.00 depending on the engine configuration. You can get a new or rebuilt starter motor from RockAuto.com or Amazon.com for between $95.00 and $190.00 (US) in most cases.
Let's Jump In!
You must disconnect the negative
side of the battery while making sure the cable end is clear of the battery
terminal to avoid an accidental connection, also
raise the car on jack stands
to gain access to the starter motor. If you are having troubles locating the starter,
or need specific instructions for your car please ask one
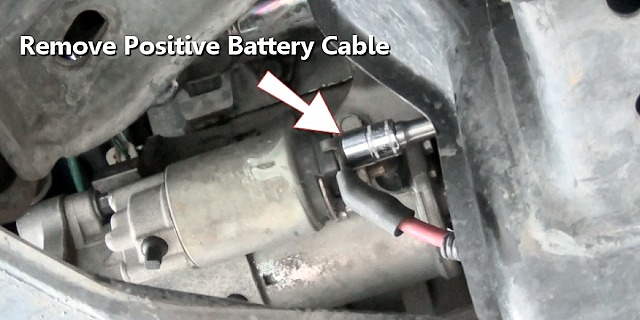
of ythe 2CarPros community, it is free. The image below shows the starter motor and the
removal of the positive battery cable as well using a 13mm socket.
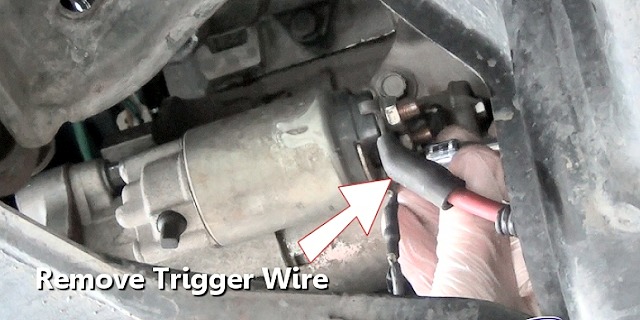
It's a little difficult to see but here we are using a 8mm socket to remove the
starter trigger wire from the rear of the starter solenoid, note the position of
the wires on the solenoid or take a picture with your phone to avoid confusion of
its location.
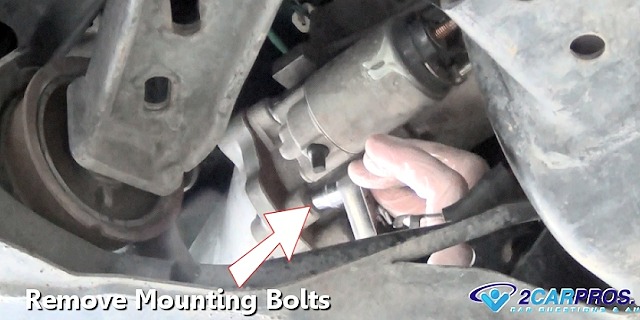
Using a flashlight, locate the starter mounting bolts, the upper bolt may be
slightly hidden, also there may be two or three bolts. Use a 13mm wrench or socket
to remove them, (sizes may vary).
Now, the starter will become free from the bell housing or block, it weighs a
few pounds so grasp the starter firmly and remove it from the engine bay area, again
use a flashlight to inspect the flywheel or flex plate gear teeth condition. If
wear is excessive the flywheel/flex
plate will need to be replaced.

Match the old starter to the new unit to ensure a proper installation, count
the teeth on the pinion gear and note the location of the mount bolts, they should
be the same on both.

Watch the Video!
Please watch this video of the job being done, then continue down the guide to glean additional helpful information.
Gently install the new starter motor and insert one of the mounting bolts by
hand to hold the starter motor in-place while you reinstall the remainder of the
mounting bolts.
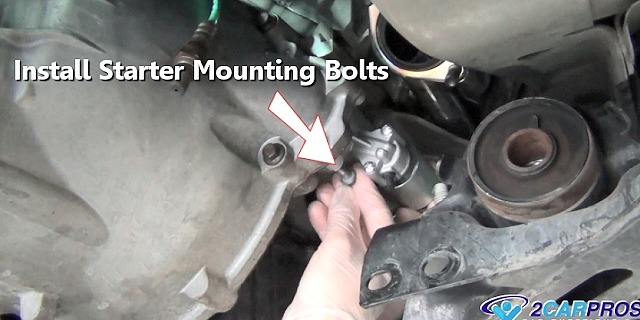
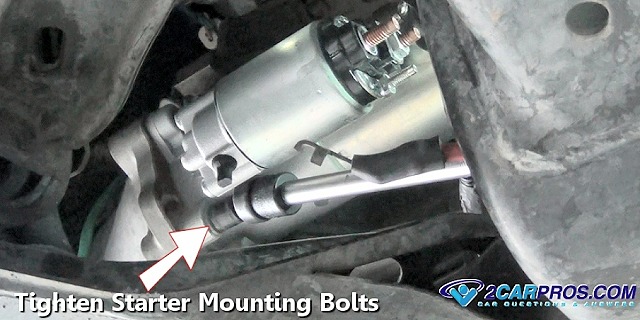
Use a socket and extension to tighten the bolts to the correct specification,
which in this case is 28 foot pounds of torque, tighten evenly.
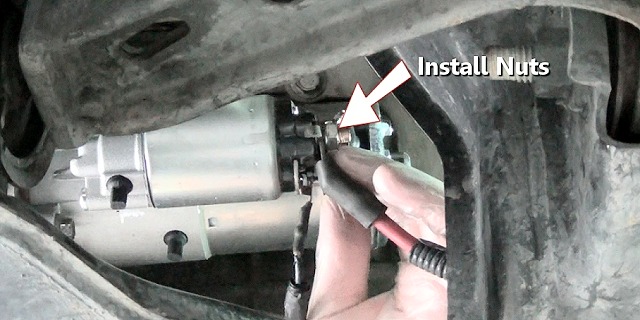
Reconnect the positive battery cable and starter trigger wire onto the solenoid
and tighten the mounting nuts. Be careful when tightening these nuts because the
solenoid is made of composite plastic and it can break if over-tightened. Before
lowering the car, double check all wiring connections to ensure there is no contact
to ground (engine block, frame, etc.). When reconnecting the negative battery cable,
quickly (lightly) touch and release the cable to the battery terminal, this quick
test checks for a short circuit, a light (little) spark is normal, a large zap means
there is a problem with the starter wiring installation.
Once the job is complete, turn the ignition key to check the starter operation, if the engine does not crank over or makes abnormal noises you could have a defective starter replacement (common), recheck the job wiring and starter mounting bolts.
Starter Replacement Videos
Questions?
If you have a car repair question, you can ask the 2CarPros community for help. We hope this guide helped you understand the repair. Please visit our 2CarPros YouTube channel for more helpful repair videos.