
An engine flywheel is used to couple the engine to the transmission while holding the clutch assembly. When replacing a flywheel the transmission and clutch must be removed as well.
What goes wrong?
When a starter or clutch goes bad it can cause abnormal wear of the flywheel which can warrant replacement or to have the clutch surface re-machined which creates a new surface for the clutch disc to sit against.
Replace flywheel
- Transmission must be removed
- Starter grinding
- Clutch slipping
- Can be overheated (heat checked)
- Ring gear damage
- Must be resurfaced when replacing the clutch
What's the cost?
There are two type of flywheels solid and dual mass which has a internal plate that can move independently from the main flywheel housing. This unit can cost upward of $500.00 or more while the conventional one piece units are about $120.00 (US). In most cases the transmission will need to be remove which will run between $800.00 and $1200.00 (US)
Flywheel replacement
- Before replacing the flywheel you must remove the
manual transmission
and clutch assemblies. Once
this is complete the flywheel is exposed, start by using an air impact gun to
remove the flywheel mounting bolts. At this point the flywheel may become loose
so keep your hands on it. A flywheel is heavy (25 pounds) so be ready.
- If the flywheel is not lose use a large pry bar to wedge the flywheel from
the crankshaft flange. Use caution not to damage subsequent parts when applying
pressure.
- Match up the old flywheel to the new unit or when having the flywheel resurfaced
check the condition of the clutch mating surface. Hot spots and cracked caused
by excessive heat can render the flywheel useless which you will see in the
images and videos below. Also check the condition of the ring gear starter teeth.
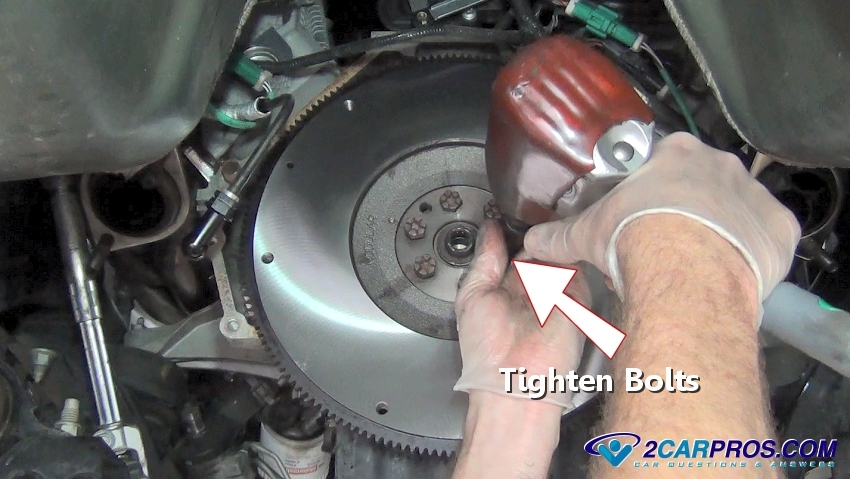
- Clean the surface of the crankshaft flange using carburetor cleaner and a shop towel. Insert the flywheel back onto the crankshaft while having at least one mounting bolt ready to install. Once installed check the alignment of the remaining bolts because the flywheel can only be mounted one way. Hold the engine from turning over with a breaker bar in the front crankshaft bolt while using a torque wrench to tighten the flywheel bolts to manufacturer's specifications (usually between 70 and 90 foot pounds).
Let's see!
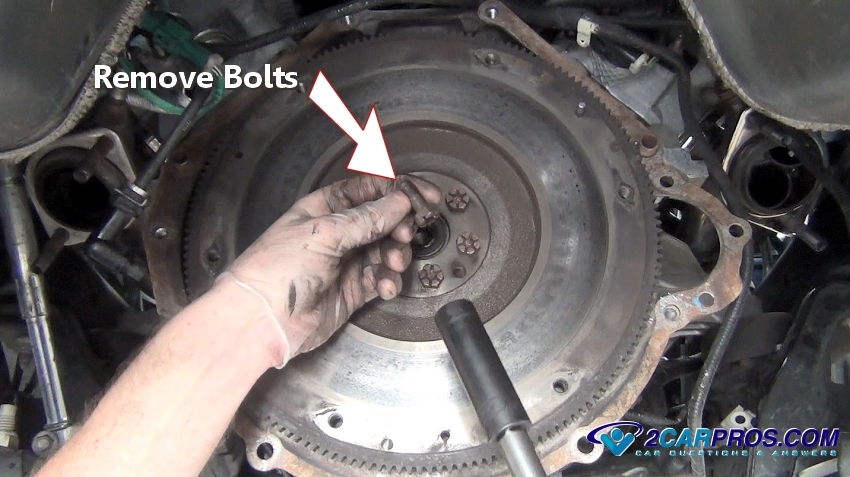
Remove flywheel mounting bolts which can be difficult because the can flywheel turn. Have a helper wear gardening gloves and hold it as you position the ratchet or wrench outward to minimize spin or use an impact wrench or flywheel holding tool (not shown).
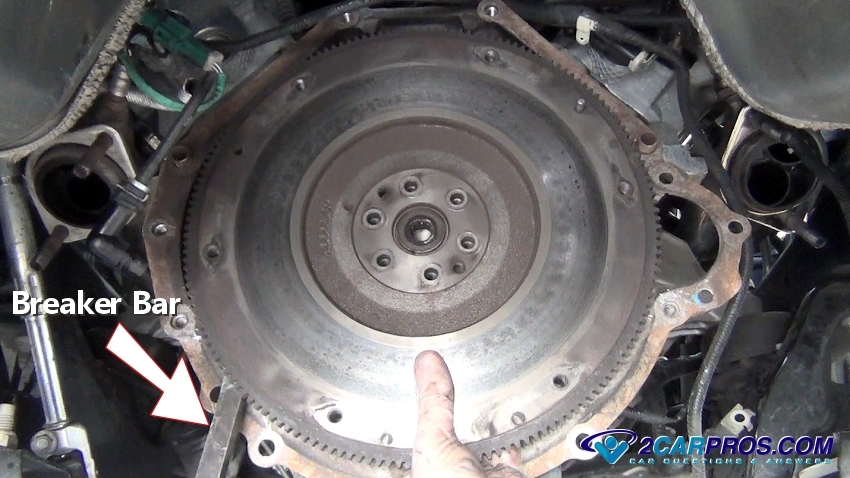
Use a breaker bar and gently wedge it behind the flywheel and in between the engine block. While grasping the flywheel firmly jar the flywheel loose from the engine. (Note: The flywheel is heavy, so be ready.)
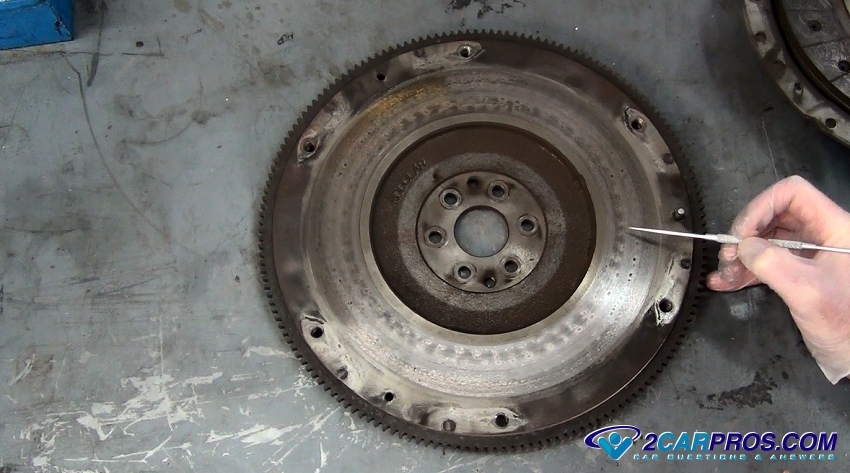
Inspect the flywheel's condition, hard spots are an indication of extreme use. If large cracks are present the flywheel will need replacement and will not be eligible for resurfacing.
Watch the Video!
Please watch this video of the job being done, then continue down the guide to glean additional helpful information.
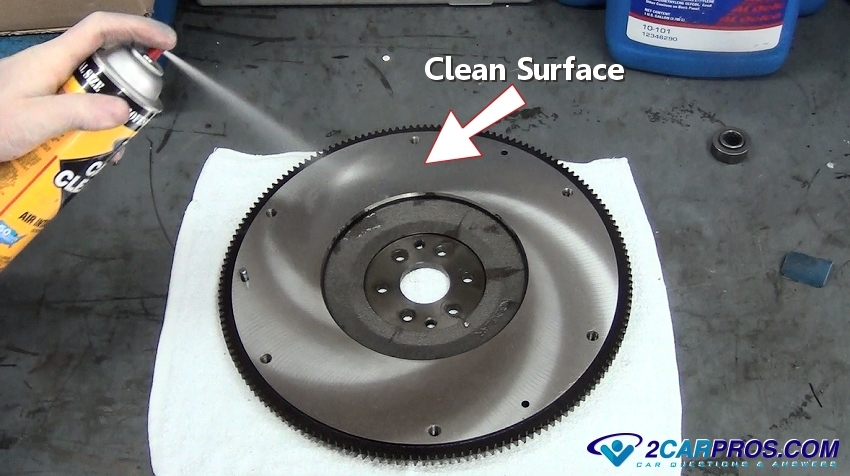
Here is a resurfaced or new flywheel. Before installation use carburetor cleaner to clean the clutch surface thoroughly. (Note: Most automotive machine shops resurface flywheels.)
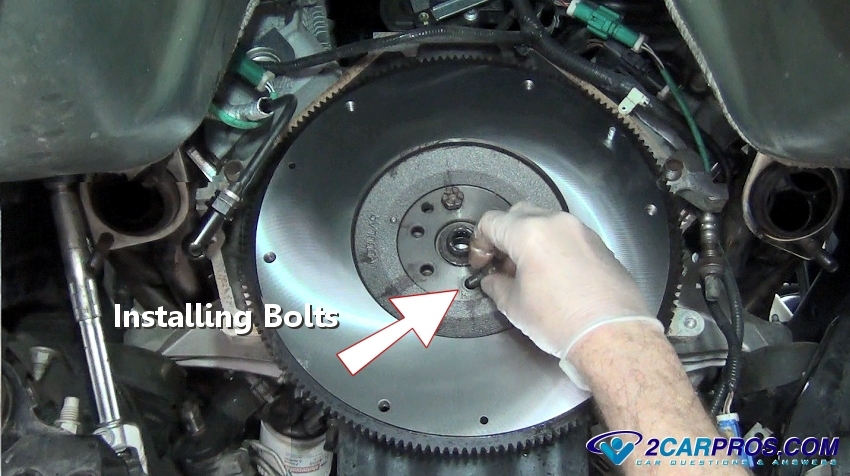
Gently mount the flywheel onto the crankshaft and install the mounting bolts by hand (Note: Flywheel bolt pattern lines up in one direction to avoid improper installation).
Tighten the flywheel mounting bolts in a star pattern to factory specification.
Watch The Video!
Chevy Sonic
Questions?
If you have a car repair question, you can ask the 2CarPros community for help. We hope this guide helped you understand the repair. Please visit our 2CarPros YouTube channel for more helpful repair videos.