A cylinder head gasket is used to seal the combustion charge between the cylinder head the engine block, this gasket also controls the flow of coolant between the two as well. There is no "one way" to replace a blown head gasket by removing the cylinder heads, this guide will help walk you through the job while giving pro tips along the way. It is best to consult an online repair manual such as AllData to get specific instructions and torque specs which will vary, you can ask one of our experts at no charge. Take pictures of the engine using your phone for reference later on.
In the following guide we show you how to do the job with an engine that has overhead camshafts and timing chains, if your engine does not have please skip over these steps, read the guide completely before starting.
SPONSORED LINKS
Before You Begin
This is considered a "big job" so organization and cleanliness is key, go over the supplies needed below
- Mechanics tool kit, including torque wrench
- Cylinder head gasket set
- Engine Coolant
- Engine oil and filter
- Protective gloves and eyewear
- Fluid catch can or basin
- Head bolts (in some cases)
Let's Get Started
Step 1. Disconnect the battery by removing the negative side of the battery terminal, this will help avoid electrical problems while the job is being done.
Step 2. Drain the radiator coolant into a catch basin and be sure to keep it away from animals. Then, go ahead and remove the radiator for easier access to the engine timing cover on rear wheel drive vehicles. (Non-overhead camshaft engine's can skip the timing cover access.)
Step 3. Using a breaker bar, turn the engine over by hand to line up the timing marks to TDC. This will help align the timing marks for the timing chains and the #1 cylinder reference which is needed if your engine has an ignition distributor that will need to be reinstalled.
Step 4. Remove components such as the air filter tube/housing, any wiring or brackets that are obstructing the cylinder heads. Then remove the air intake, exhaust manifold, this should expose the cylinder heads and valve cover(s).
SPONSORED LINKS
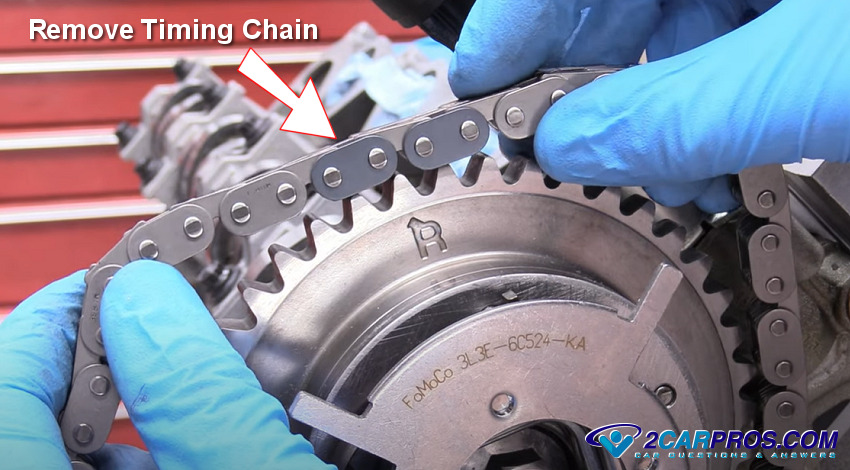
Step 5. Remove the harmonic balancer and front timing chain cover, this will expose the timing chains and guides. Note the timing marks on the chain sprockets, use your phone and take an image of the set up so you can use them for reference during reassembly. (Non-overhead camshaft engines can skip this step.)
Step 6. Remove the timing chain guides and tensioner to carefully remove the timing chain. For some engine configurations a wedge can be placed between the chain and guides which helps to hold the chains in place. Use a permanent marker to help distinguish the timing marks. (Non-overhead camshaft engines can skip this step.) Note: In block camshaft engine's will have push rods and rocker arms which will need to be removed, do not mix these up, they must go together the way they came apart.
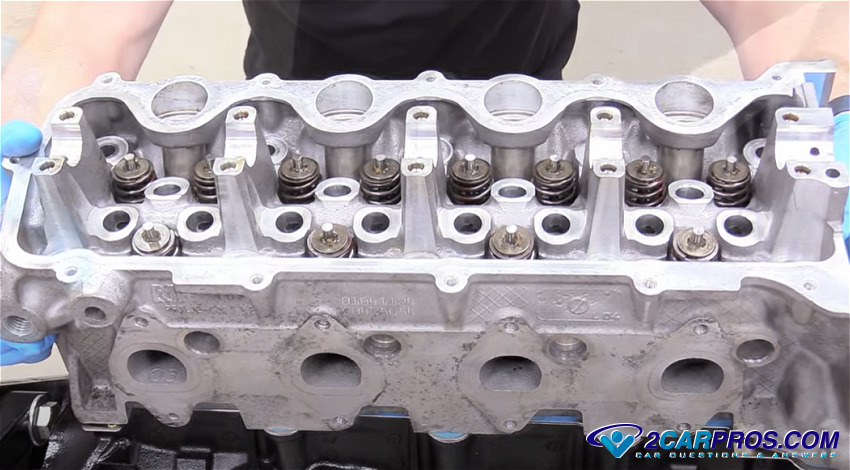
Step 7. The next step is to remove the cylinder head bolts in order to help prevent warpage. Start with the outside bolts and work your way inwards in a spiral pattern. Use a small pry bar to help break the seal of the old head gasket while keeping your hands on the cylinder head so it doesn't fall. Now, lift the cylinder head from the engine bay and inspect the combustion chambers, intake and exhaust valves. Pro tip: Take the cylinder head(s) to an automotive machine shop where they can be cleaned, pressure tested, resurfaced and a new valve job if needed.
SPONSORED LINKS
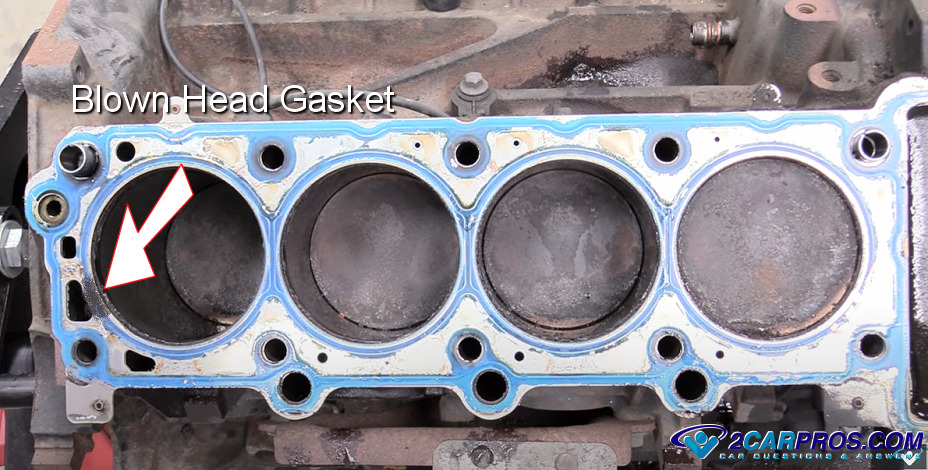
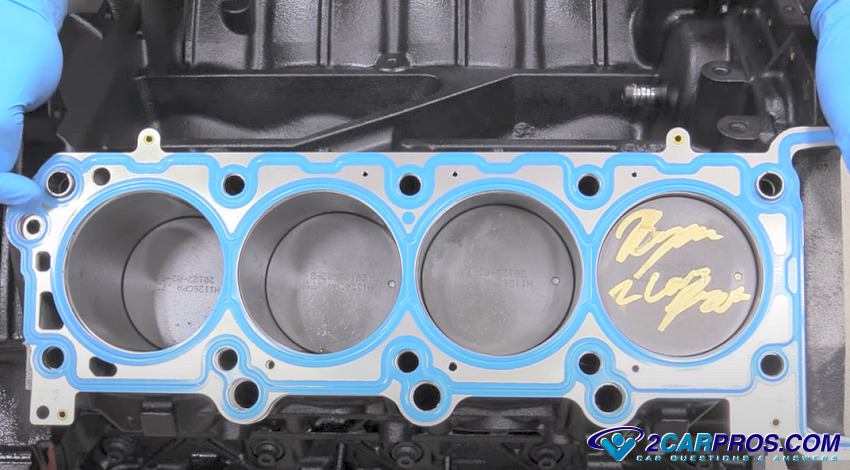
Step 8. Now that the cylinder head has been removed you can inspect the head gasket for failures which is good to find and confirm the problem. This failure is usually on the ring that seals the cylinders or the coolant passages. Check out the image below for example:
Step 9. Clean the gasket surfaces using a gasket scraper, carburetor cleaner and shop towel. This is very important and should be done with the care that if this step is not done correctly, you will be doing the job over again due to leaks. Pay attention to the block, valve cove gasket, intake and exhaust manifold surfaces which are machined smooth. Do not allow any grit or dirt to enter the cylinders of the engine or the intake manifold, this can cause damage. Once clean, install the new cylinder head gasket.
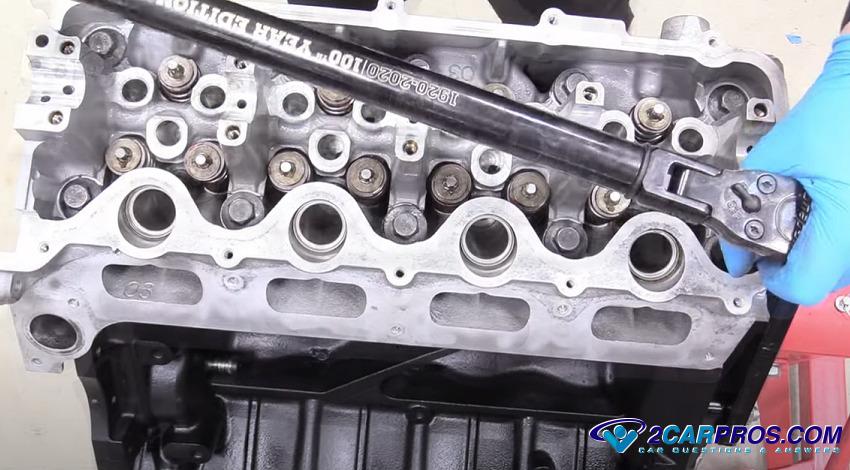
Step 10. Gently lower the cylinder head onto the new gasket and engine block, there will be alignment dowels the head will fit onto to unsure a proper installation. You must check the manufacture's tightening instructions because on some applications the head bolts are called "torque to yield" which need to be replaced each time they are used.
Tighten the head bolt evenly according to the instructions supplied by the manufacturer, if you you need help finding them please ask one of our experts at no cost. Use your torque wrench to tighten the head bolts in steps and in a spiral pattern. You will need a torque wrench capable of measuring degrees along with the torque specifications for your engine.
SPONSORED LINKS
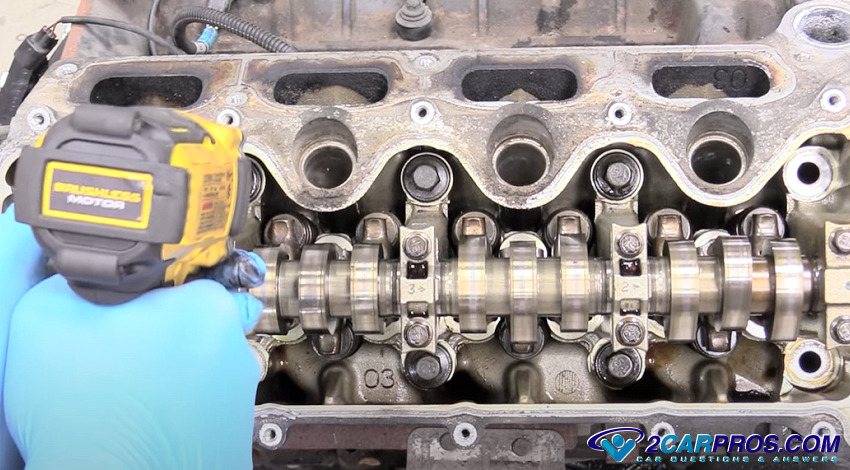
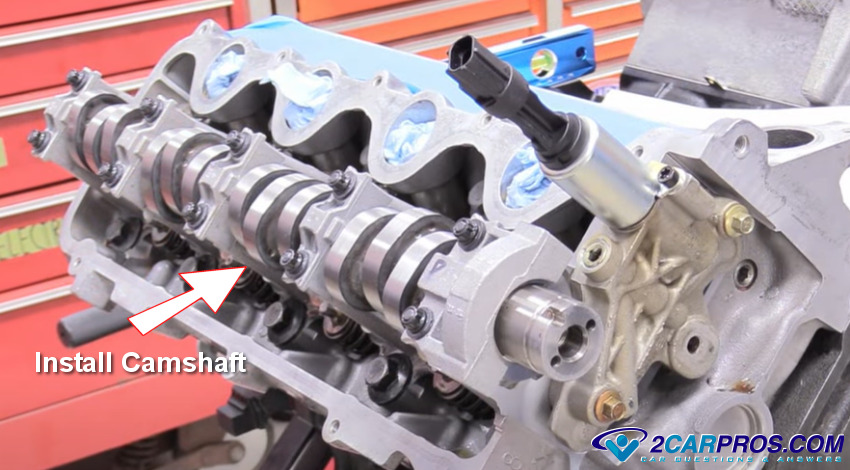
Step 11. Once the cylinder head has been installed it is time to insert the camshafts. Apply engine oil onto the bearing surfaces of the cylinder head to ensure proper lubrication for the camshaft upon start up. These camshaft journal caps will have a torque setting as well, make sure the camshafts can rotate once completed.
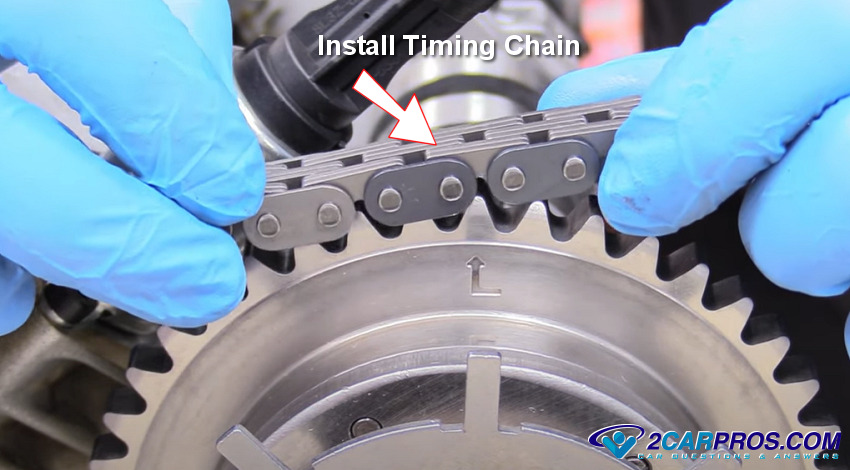
Step 12. Install the timing chains while aligning the timing chain and sprocket marks. If the timing chains, tensioner or guides look worn it is advisable to replace the timing chain and guide set at this interval.
Step 13. Once the main comments are reinstalled it is time to reassemble the valve cover(s) and timing chain cover with new gaskets that come in cylinder head gasket kit. Also, install the intake manifold along with the remainder of the air intake system. Then, reinstall the serpentine belt and all other peripheral components to complete the repair.
Pro Tip After Reassembly
- Go over the job to make sure everything is back together correctly by checking the photos you took earlier.
- When refilling the engine with coolant keep an eye out for leaks by looking under the engine.
- Reconnected the battery, if you experience a large electrical spark it means the wiring is not reinstalled correctly and must be fixed before continuing.
- Change the engine oil and filter to help remove any contaminates that may have fallen into the engine during disassembly.
- Once the engine has stared, continue to fill with the radiator coolant until warm, also top up the coolant reservoir as well.
Final Notes
As the engine is running you may hear a slight tapping noise which should go away soon after start up, this noise is the valve train readjusting itself which is normal. When driving keep an eye on the temperature and check engine lights which can alert you to a potential problem. Removing an engine cylinder head with timing chains can be a challenging, but if you stay focused it can be accomplished successfully.
Watch the Video!
Please watch this video of the head gasket job being done to glean additional helpful information.
SPONSORED LINKS
Credits
This guide knowledge base was created by the 2CarPros Team, and by Ken Lavacot: Automobile repair shop owner and certified master automobile technician of over 30 years. If you have question or need help please ask one of our experts we are happy to help. Please visit our 2CarPros YouTube Channel.

Article published 2024-04-16
SPONSORED LINKS

Oil Change and Filter Replacement Ford Focus


Oil Change Chevrolet Silverado HD Diesel 2013
