An automobile engine ignition distributor is used to allocate the ignition spark from the coil to the appropriate cylinder for the combustion process to occur. In this guide we will walk you through the tips and tricks to install the distributor correctly. It helps to have an understanding of how an engine works. Note: There is no ignition distributor included for engine designed with COP systems (coil over plug) systems.
Getting Started
Before you begin you will need a few things:
SPONSORED LINKS
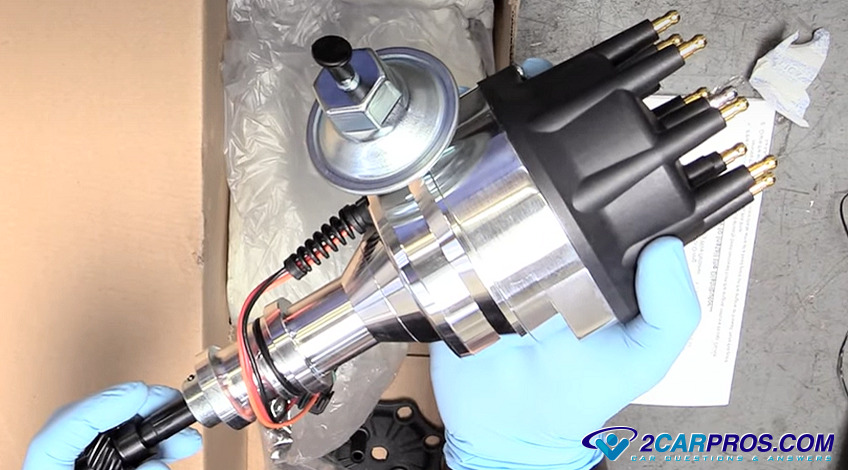
- Distributor assembly (specific to engine)
- Basic tool set
- Distributor wrench (optional)
- Felt pen - (sharpie)
- Anti-seize grease
- New O ring or distributor gasket
- Shop towels
- Gloves and protective eyewear
Safety First
Park the car on level ground with the parking brake set. It is best if the engine is cool to the touch, disconnect the negative side of the battery.
Good to Know
There are several type of ignition distributors which can be fully electronic (solid state) which do not need adjustment. Older models will have a contact point set that will need to be set, this will be easier while the distributor is removed. The point gap should be between .016 and .018 (thousands of an inch) which can be measured using a feeler gauge. Also, some distributors have a multi-tooth gear while others have an offset slot that can only be installed one way such as Honda and Toyota.
Old Distributor Removal and Installation
Here are the steps to remove the old unit, please note that the engine should not be rotated or cranked over once this process has begun.
Pro Tip: clean the dirt and debris from around the base of the housing so the engine will not get contaminated once the unit is removed.
1. Remove the distributor cap to note the distributor rotor position in relation to the distributor housing. Use a felt pen to mark the location onto the housing, and then again from the housing to a reference point somewhere on the engine, this is the most important part. You can use your phone to take an image to help as well.
SPONSORED LINKS
2. Loosen and remove the distributor hold down bolt and clamp, this can be a little tough because the housing can cover access.
3. The housing should now be loose, grasp the housing body and turn it back and forth, this will help break loose any varnish build up on the housing stem.
4. While moving the distributor back and froth slightly lift upwards and the unit should come out of the engine block or cylinder head.
5. Install a shop towel into the open port of the engine block or cylinder head to keep contaminants from entering the engine.
6. Now, match the marks from the old distributor to the replacement unit and install it so the marks line up the same as the old one. There might be an issue caused by the distributor drive gear which will cause the rotor to be off slightly (one tooth) which is normal, simply rotate the housing to match the rotor to housing marks. If you want to have the alignment directly as the old unit please follow down this guide to show you how, also watch the video below.
SPONSORED LINKS
New Engine Distributor Installation
This portion of the guide is meant to help with the installation of a new engine ignition distributor or if the marks are lost on the old unit.
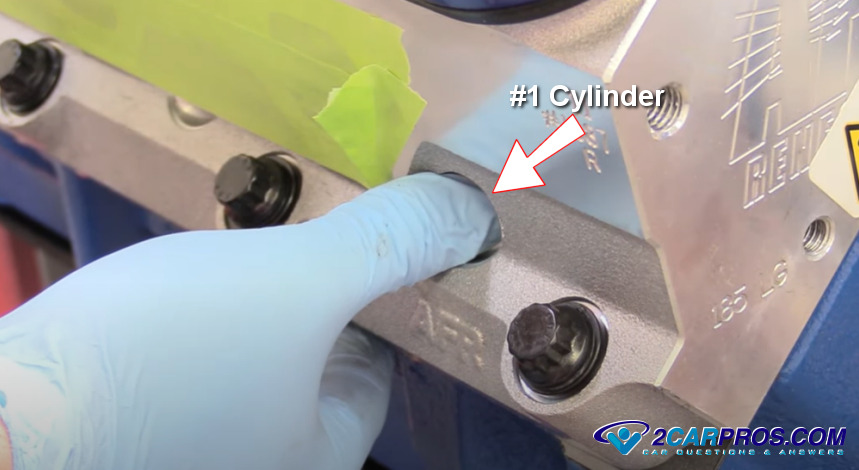
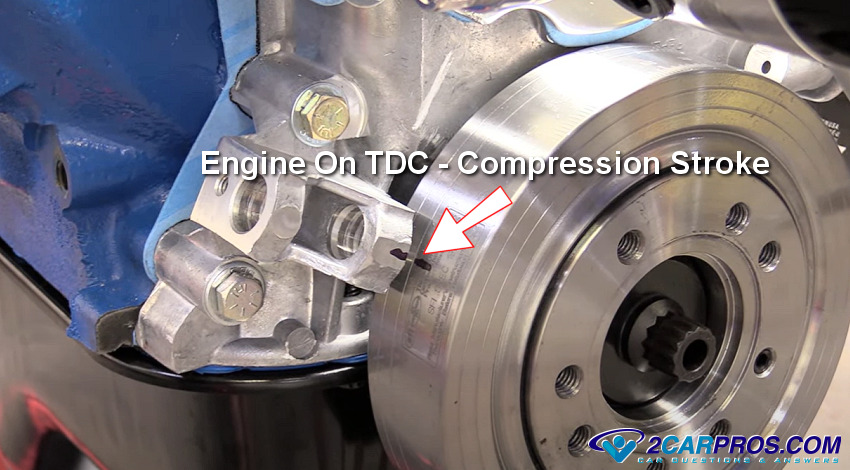
1. The engine must be on top dead center on the compression stroke to begin the process. This is done by removing the #1 cylinder spark plug and rotating the engine over by hand until air is felt escaping from the spark plug hole, and then stopping on the timing mark on the front balancer.
Here is what the timing marks on the front balancer will look like:
2. Use engine assembly lube or grease and apply it to the distributor drive gear, this will help lubricate the camshaft and distributor drive gears which will avoid damage.
SPONSORED LINKS

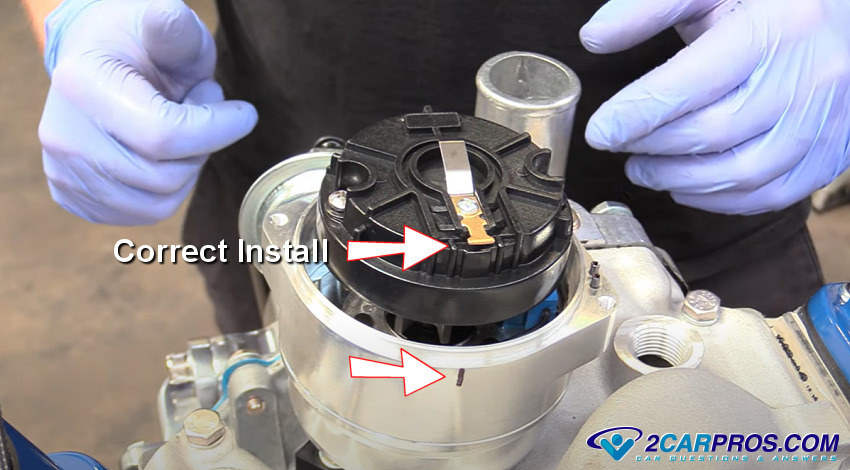
3. Located the number one cylinder spark plug wire on the distributor cap and mark the location on the distributor housing. This is where the ignition rotor should point to once the installation is complete, since the rotor will move slightly due to the "pitch" of the gears when installing it so you want to start with the rotor off to the side. Please check out the image below to see what I am talking about.

4. With out moving the distributor shaft gently install the unit into the engine block.
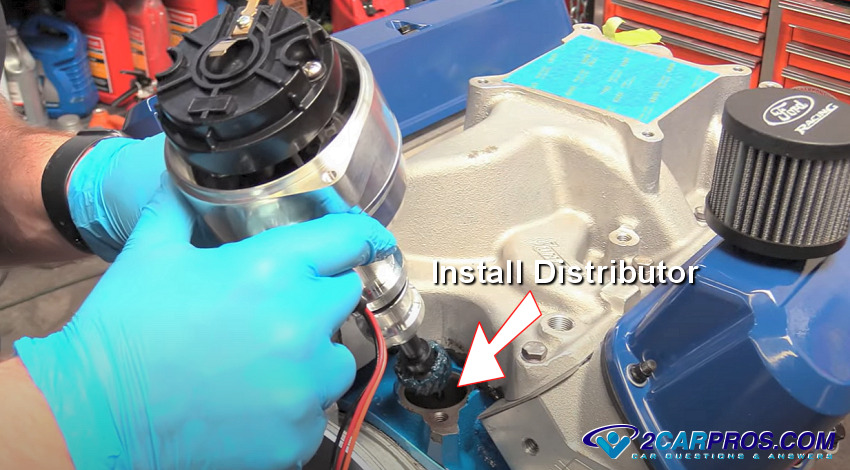
5. The distributor might not sit down in the block completely so don't force it. At the bottom of the distributor shaft there is an oil pump drive connection which might need be rotated slightly to get the desired rotor and housing position particularly on GM products. This can be done using a long standard screwdriver to move the oil pump drive shaft and might take more than one try. The distributor installing should look like this when completed, the ignition rotor aligned with the the #1 spark plug on the distributor cap.
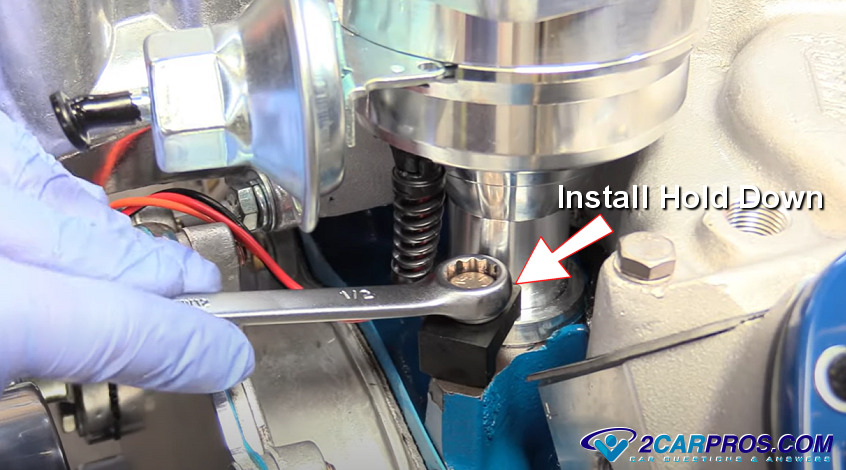
6. Install the distributor hold down bolt assembly and tighten, do not tighten completely at this time, just snug it down. Take note to confirm the housing is down completely before tightening the bolt or internal damage can occur.
SPONSORED LINKS
7. Install the remainder of the components such as the cap and spark plug wires by following the engine firing order.

8. Once the job is completed it is time to crank the engine over to see if it starts. If it doest start, rotate the distributor back and forth slightly until the engine fires up, at this time use a timing light to adjust the setting to the specification of your vehicles recommendation which is unusually between 4 and 8 degrees TDC (top dead center). This timing light video will show you how, once the timing is set finish tightening the distributor hold down bolt and you are all set!
Final Notes
If once the engine is running and you notice low engine performance, it could be the timing needs to be advanced. If the engine cranks over hard, or pings while under acceleration then the timing needs to be backed off a few degrees, this can cause the engine to run hot as well.
Watch the Videos!
Please watch this video of the job being done to glean additional helpful information. Here is the installation on GM products.
SPONSORED LINKS
Please watch this video of the job being done to glean additional helpful information. Here is the installation on Ford products.
Credits
This guide knowledge base was created by the 2CarPros Team, and by Ken Lavacot: Automobile repair shop owner and certified master automobile technician of over 30 years. If you have question or need help please ask one of our experts we are happy to help. Please visit our 2CarPros YouTube Channel.

Article published 2024-04-22
SPONSORED LINKS

Code Read Retrieval/Clear Mercedes Benz

Spark Plug Replacement Mercedes Benz

Topdon OBD2 Scanner Review - This thing rocks
