An engine oil and filter change is necessary to keep your engine running without internal damage. When mileage has been put on an engine the oil inside becomes dirty due to carbon blow by from the pistons and small metal particles which occur because of rotating and moving internal metal parts. Changing your own oil ensures the quality of the oil installed back into the engine.
Oil change duration will vary depending on which type oil your engine has in it. Most manufactures require synthetic motor oil which will last between 6 and 7 thousand miles whereas conventional engine oil will last between 3 and 4 thousand miles while still offering the engine a satisfactory level of protection. If you do not know the last time the motor oil was changed remove the dipstick and inspect the color of the oil. If it is dark brown or black it is time to do an oil change.
How Much Does it Cost?
There are two different kinds of oil change: conventional and synthetic which vary greatly in price. This is due to the cost difference between conventional oil and synthetic oil. If you were to take your car into the shop to have the oil changed you can expect to pay between $45.00 and $65.00 for a conventional oil change whereas synthetic oil changes will run between $95.00 and $145.00. If you are doing the job yourself you can get Mobil1 (best synthetic oil) for about $25.00 per 5 quarts and a factory oil filter for between $5.00 and $10.00. Conventional oil will run about $11.00 per 5 quarts.
Let's Get Started!
You will need to raise the car up with the floor jack and support it on jack stands. Wear protective eyewear and gloves. It's best if the engine is warm but not hot with the hood open before you begin.
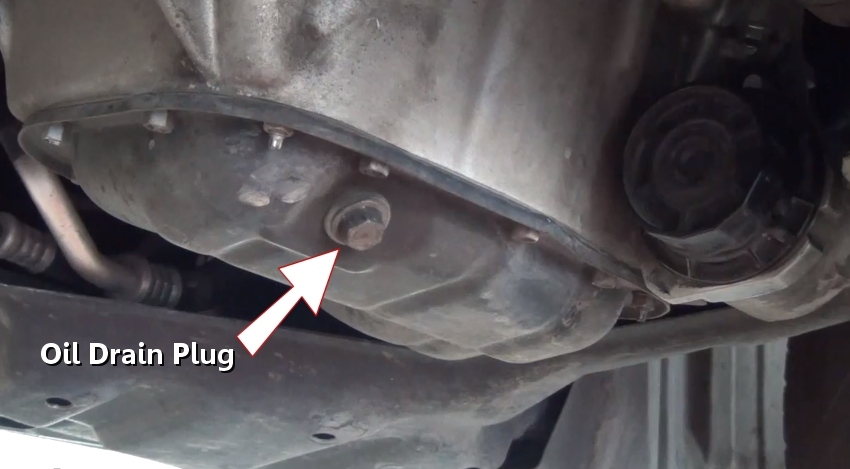
1. Locate Engine Oil Drain Plug
The motor oil drain plug will be located at the lowest part of the engine oil pan. You might need to remove a plastic shield or open a plastic door to access the plug. Be careful not to get the transmission drain plug confused with the engine oil drain plug.
2. Remove the Drain Plug
Use a 13mm, 14mm, 15mm or 16mm wrench or socket to loosen the oil drain plug by turning it counterclockwise. This plug can be fairly tight so make sure the wrench or socket is on squarely to minimize the chance of rounding the plug head.
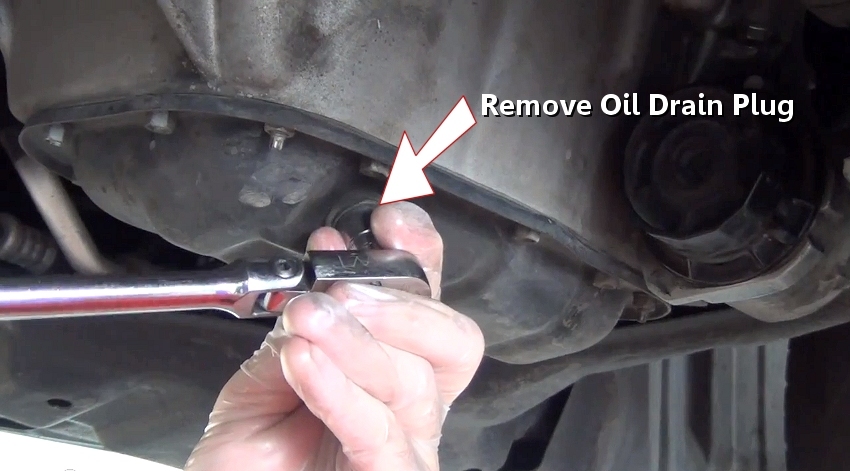
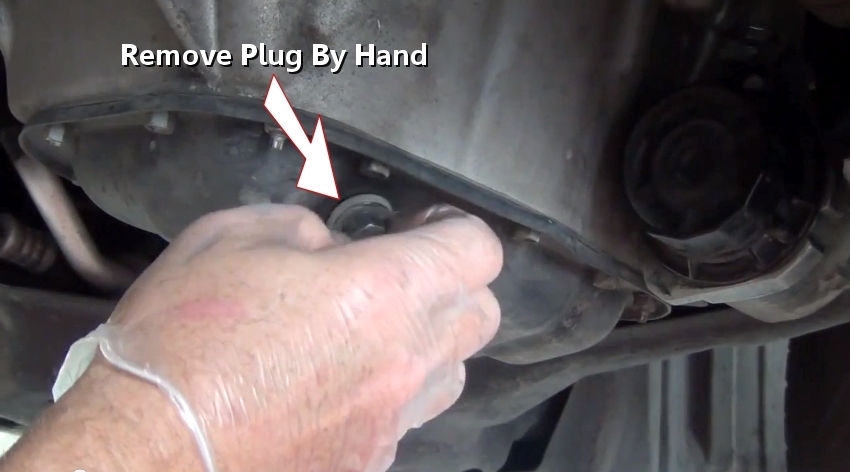
While having an oil catch basin ready slowly start removing the drain plug by hand. Once the plug is loose from the pan oil will begin the flow so be ready.
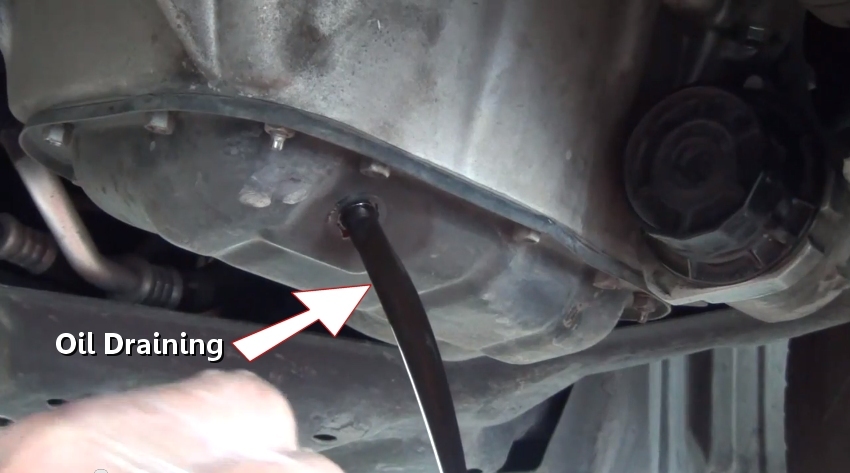
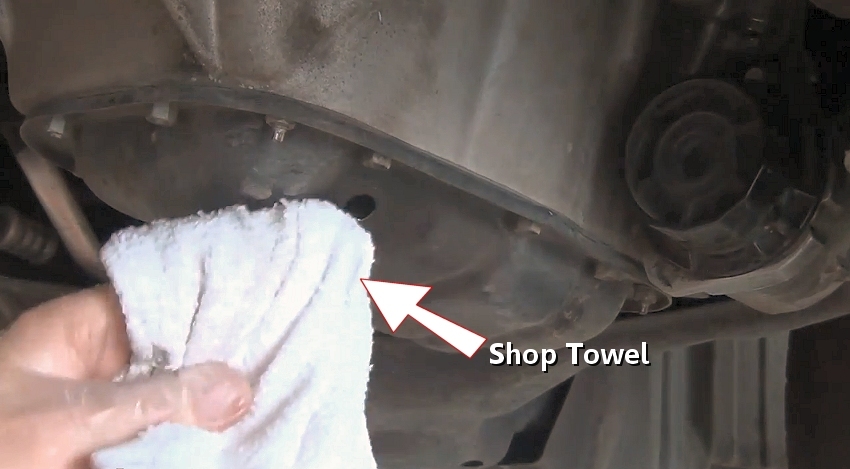
3. Drain Motor Oil
Once you feel the drain plug becoming loose from the pan quickly remove the plug. The oil will drain out in a stream so you might need to quickly reposition the oil drain pan. It's a good idea to have a shop towel handy to wipe up any oil spills. It's best to drain the oil first before removing the oil filter. This will help drain oil from the filter to minimize spillage in the removal process. The engine is vented so you don't need to worry about removing the oil cap to allow air to enter the engine while the oil is draining.
4. Reinstall Oil Drain Plug
Allow all of the engine oil to drain out. Use a shop towel to wipe any excess oil and dirt from the oil drain plug area. This will help the drain plug seal once it's reinstalled.
If the drain plug has as a metal sealing washer such as with Mercedes Benz or Honda cars you should replace the washer with a new one to avoid drain plug leaks. Manufactures such as Chevy have a reusable drain plug seal that is rubber and can be reused many times. Start the drain plug by hand to avoid cross threading.
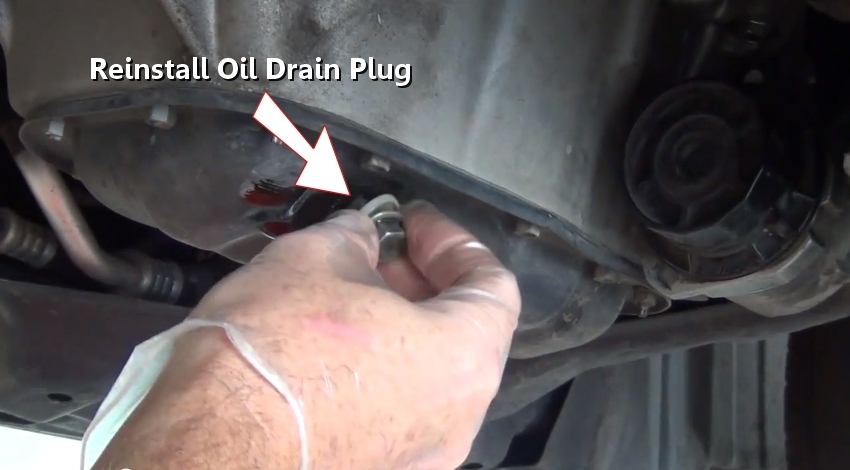
Tighten to manufactures specification which is usually between 20 and 30 foot pounds of torque.
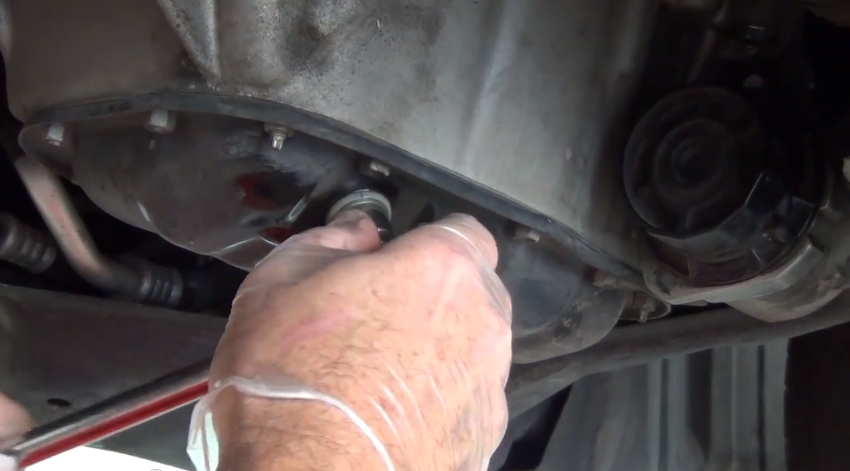
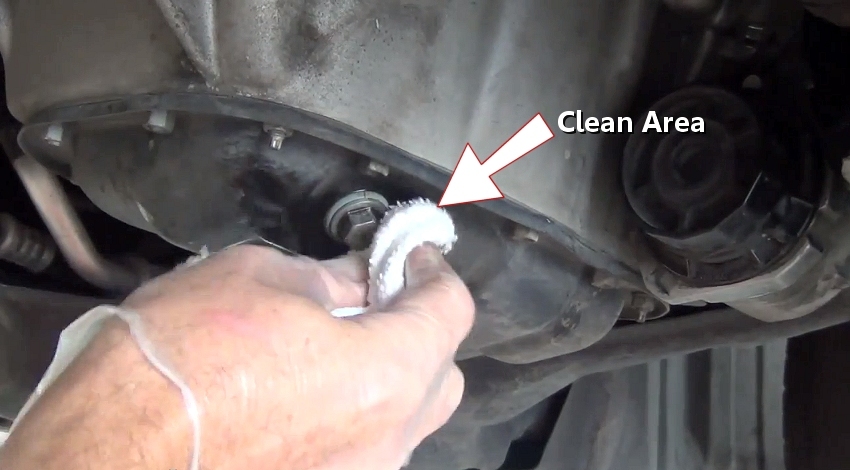
Use a shop towel to wipe clean the drain plug area. This will make it easier to see if the seal has a leak once the job is complete.
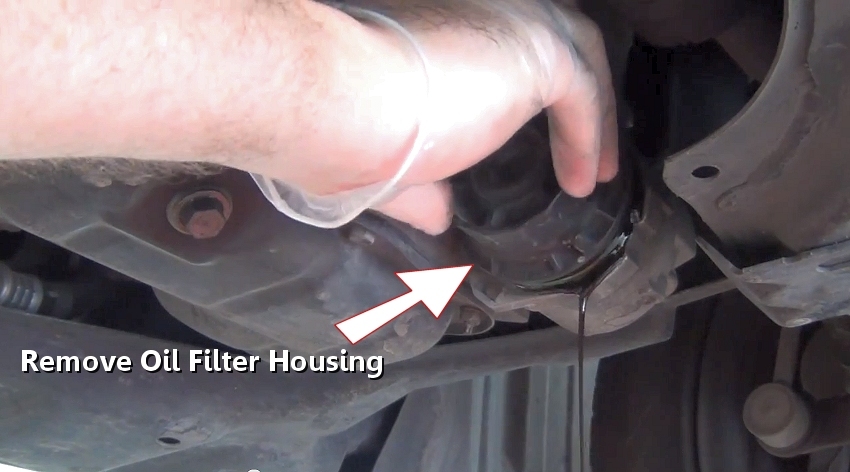
5. Remove Oil Filter
This step will vary depending on manufacturer. Some oil filters are incased within a canister like in the example below while others have a metal casing which is discarded along with the inner part of the filter. The oil filters location will vary as well. This filter is located at the bottom of the engine near the front but they can be near the rear or in the middle of the block. Some are located upside down at the upper part of the engine under the hood. Canister style of filters can require a special wrench to loosen the unit or a large 22mm socket. In the image below we have improvised and used a large channel lock which can be used on both style filters. They make a regular oil filter wrench for metal filters which straps on the filter with a handle used for leverage to loosen. Remove the filter or housing by rotating it counterclockwise.

The oil filter or filter housing will begin to come undone as you loosen the filter or housing. Oil will begin the stream from the filter in some cases so have your oil catch basin ready. In under hood style of filters the oil will be drained from the filter when the pan is emptied which make the job much less messy.
Here is what it looks like when the oil filter housing is removed while the remainder of the oil is still dripping out. You can also see the O ring seal designed to seal the housing to the oil filter adapter.
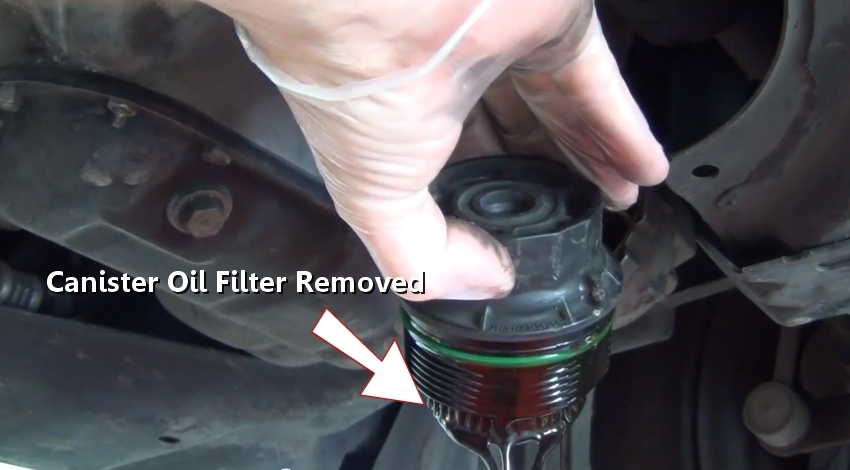
Remove the dirty oil filter from the filter housing by grasping the paper filter and twisting it from the housing while pulling upward. This step will not be necessary if the filter is a metal style of filter.

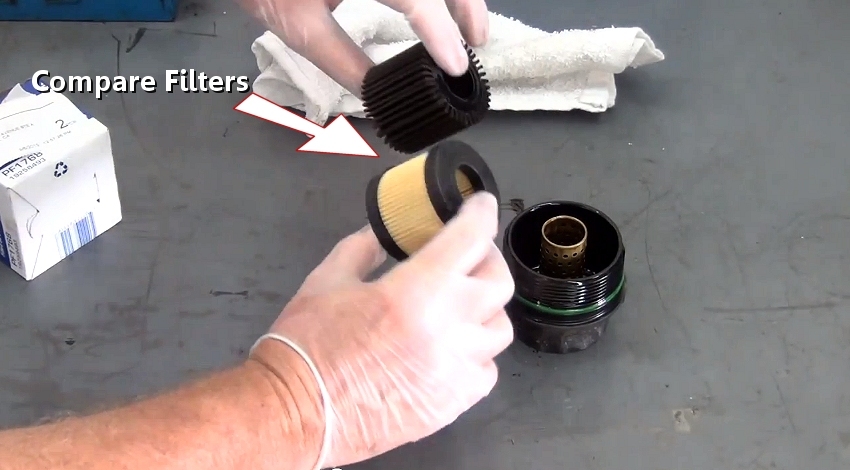
Compare the used oil filter to the new filter making sure size is the same. On metal housing filters check internal thread size and sealing gasket size. Quality of the oil filter will vary such is in the image below. You can see the new filter is much higher quality than the old oil filter.
Watch the Video!
Please watch this video of the job being done, then continue down the guide to glean additional helpful information.
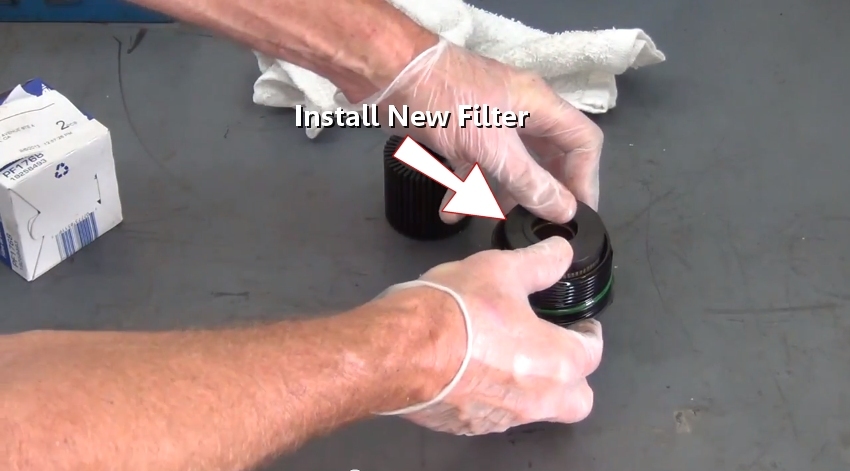
6. Install New Oil Filter
Clean the filter housing by using a clean shop towel and wipe the inside of the housing free from dirty oil and grime. Push the new oil filter into the oil filter housing firmly.
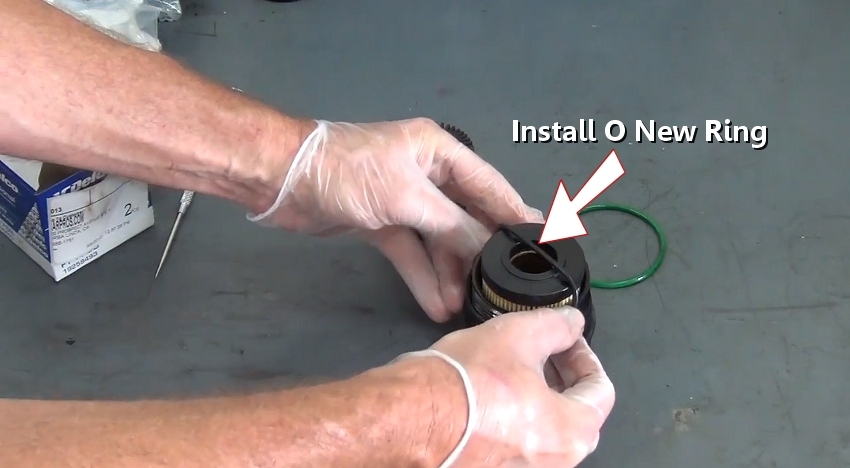
Remove the old sealing O ring from the housing to make way for the new seal. This step is not needed for metal style of oil filters.
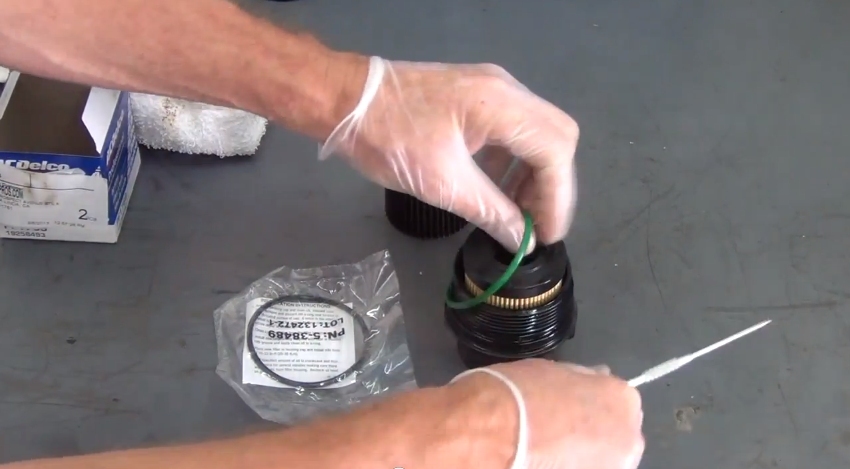
After using a shop towel to clean the housing and O ring gland install the new O ring seal and wipe clean.
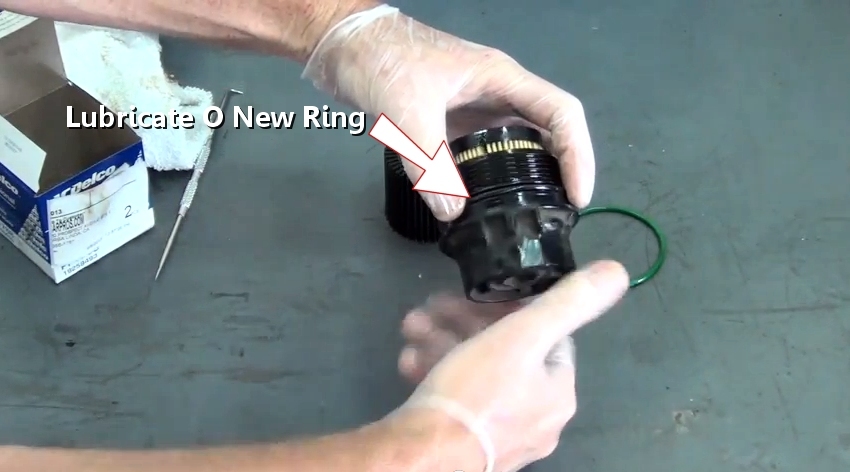
Apply a small amount of engine oil to lubricate the O ring seal which helps the installation of the oil filter. This step will be needed for both styles of oil filter.
Make sure the old oil filter gasket is removed from the area before installing the new filter. Install the oil filter assembly by tightening the housing. This action should be done by hand. The final tighten should also be done by hand.

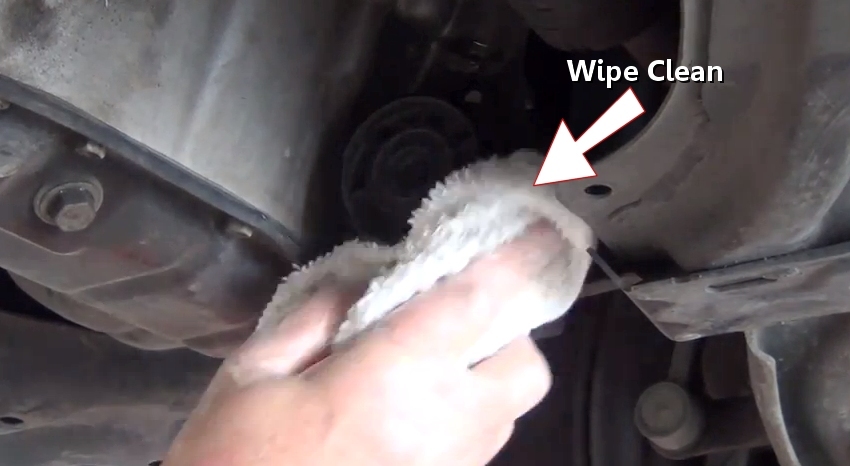
Use a shop towel to wipe down the area and any excess oil so it will be easier to tell if there are leaks once the job is complete.
7. Refill the Motor Oil
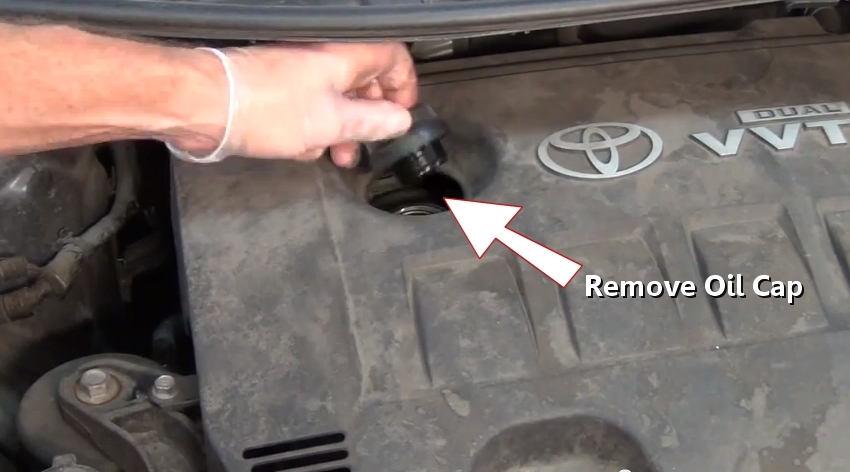
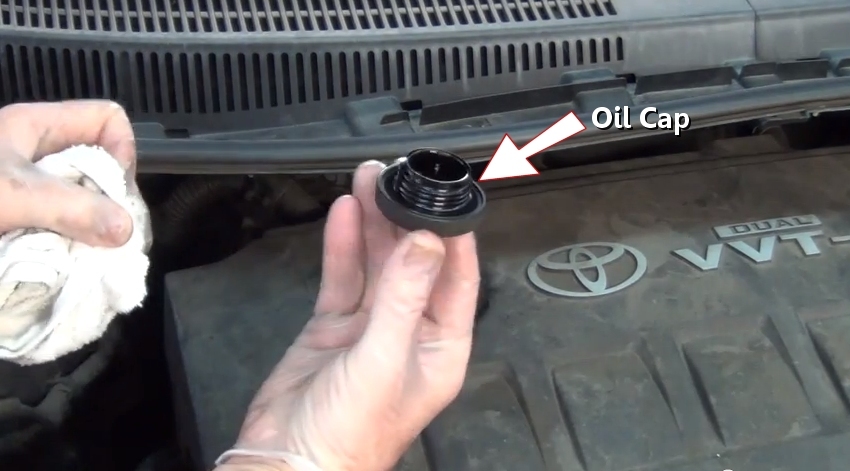
At this point you are all done under the car so you can reinstall any plastic covers you have removed while doing the job and lower it down off of the jack and jack stands which make reaching the upper part of the engine easier. Locate the engine oil fill cap and remove it. On the cap necessary recommended oil weight will be mentioned. Grasp the oil filler cap and remove it by twisting it counterclockwise. Use a shop towel to wipe up any oil that might be present. Be sure not to knock any dirt into the engine and clean around the cap if necessary before removal. Learn more about motor oil grades
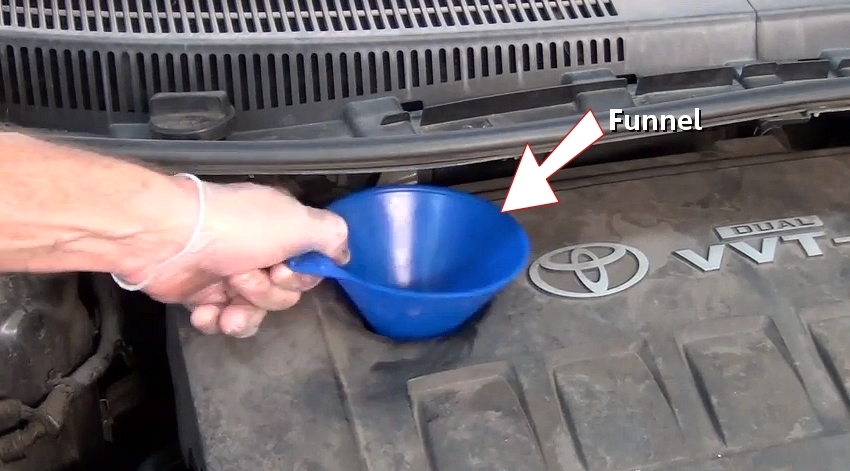
Install an oil funnel to assist the motor oil installation to avoid spillage. Make sure the inside of the funnel is free of dirt because you don't want added debris to enter the engine while you are pouring the clean oil in.
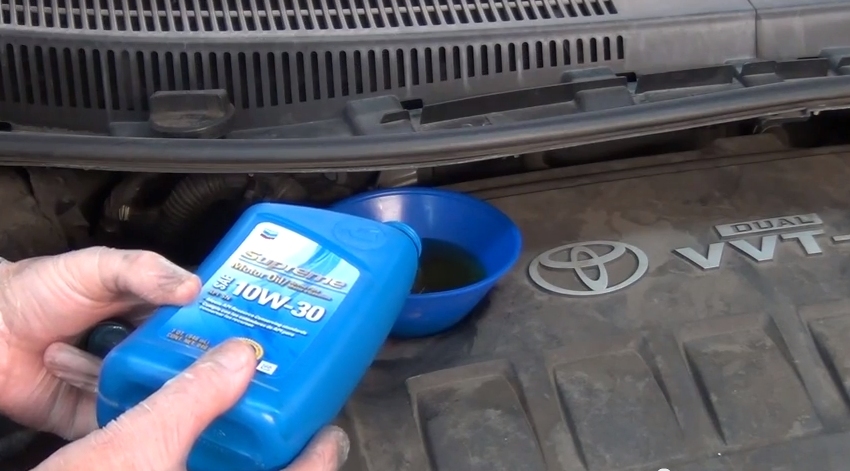
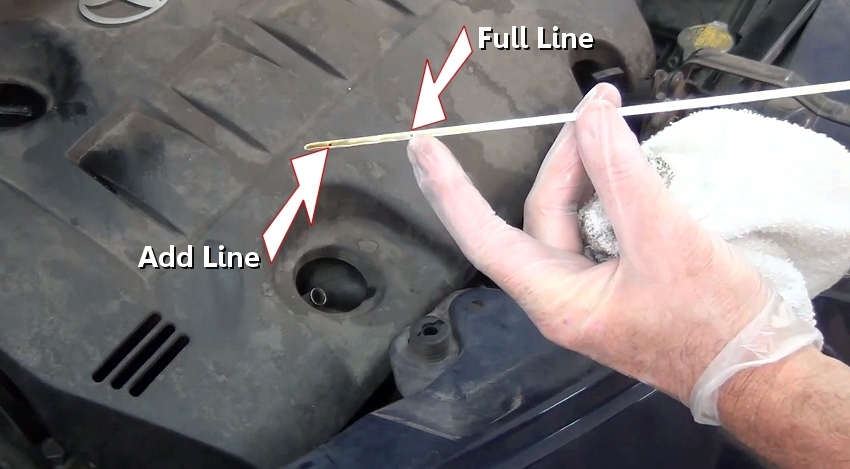
All engines take a specific amount of oil but a good general rule of thumb is to pour 4 quarts in and reinstall the oil cap and fire the engine up. Let the engine run for about 2 minutes and then shut it off. Check the oil level using the dip stick then add as needed. Most engines will take between 5 and 6 quarts but it's better to be safe than having to drain excess oil from the engine to avoid blowing out the front or rear main seal.
Use a shop towel to catch any random drips of oil that may come from the funnel while you are removing it from the valve cover.
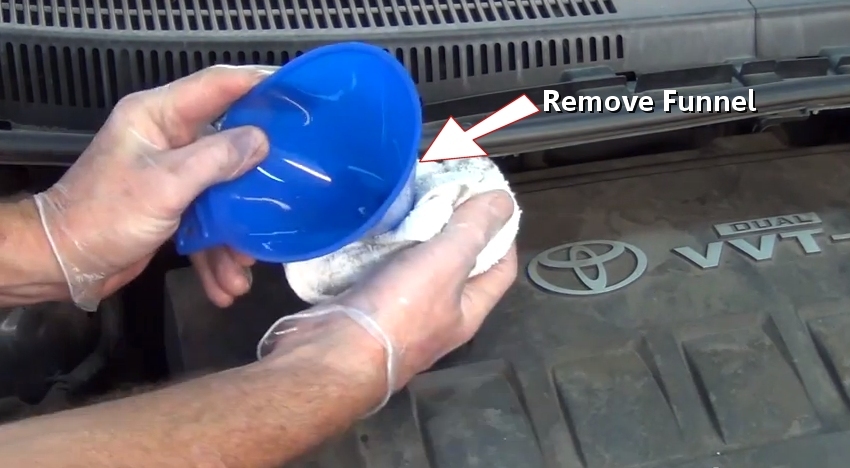
Before reinstalling the oil filler cap inspect the O ring seal to make sure it is intact and in good condition. This will help eliminate leaks once the cap is reinstalled. Reinstall the cap by turning it clockwise and tighten it by hand.
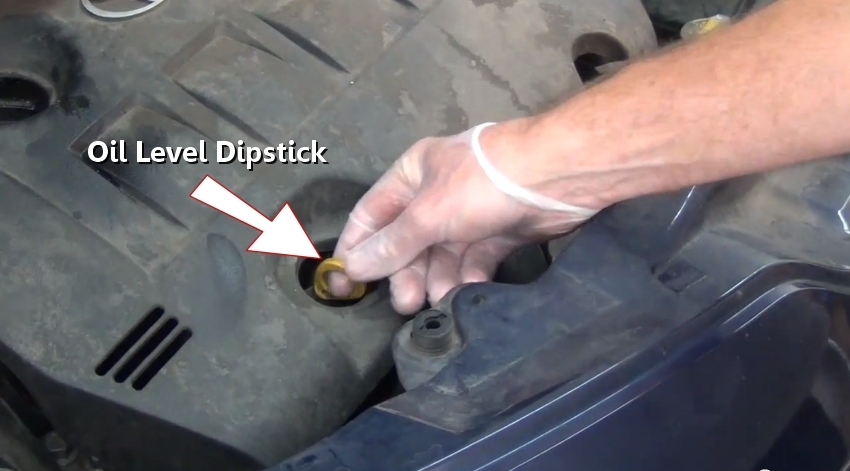
8. Check Oil Level
Start the engine up and allow it to run for 2 minutes then shut the engine off. This action fills the oil filter. Wait about 30 seconds for the oil to completely drain into the oil pan and then locate the engine oil dip stick which is identified by a yellow or orange handle. Pull the dip stick from the engine and wipe clean. Then reinstall the dip stick fully and remove it slowly.
The engine oil level should be at the top full mark between the “add” and “full” lines which represents a quart. Due to the clarity of new engine oil it can be difficult to see it on the dip stick. In these cases use a flashlight to help detect the oil level. Clean any excess oil spilled using carburetor cleaner before starting the engine to avoid smoke when the engine heats up. When the engine is running check under the car for any leaks that may have been caused during the oil change.
Disposing of Dirty Oil and Filter
After the oil change is complete you will have a volume of dirty oil and a dirty filter. These items must be returned to any auto parts store which will be glad to take these hazards from you for no charge. This action will help to keep the environment clean. Never dump waste oil down a drain or in waste cans.
Got Any Questions?
If you have any oil change questions please visit our forum. If you need car repair advice, please ask our community of mechanics is happy to help you and it is always 100% free. We hope you enjoyed this guide and videos. We are creating a full set of car repair guides. Please subscribe to our 2CarPros YouTube channel and check back often for new videos which are uploaded almost every day.