Hi,
As always, the first thing to do is confirm the battery is charged and good. Here is a link that explains how to load test the battery at home. It's very simple to do.
https://www.2carpros.com/articles/car-battery-load-test
Next, if the battery is good, confirm the battery terminals are clean and tight. Often times a poor connection at the battery can cause the issue. A loose terminal or corrosion are the common issues.
Here is a link that explains how that is done:
https://www.2carpros.com/articles/everything-goes-dead-when-engine-is-cranked
If the terminals are tight, clean, and the battery is fully charged and all you get is a clicking, then we have to check the starter itself. At the starter, you will see one heavy gauge wire straight from the battery and a smaller, lighter gauge wire. The smaller one should only have 12v when the key is in the start position. Therefore, you will need a helper to perform this test. Here is a link to help you through this test:
https://www.2carpros.com/articles/starter-not-working-repair
Okay, if you have power to the smaller wire when the key is in the start position and the larger wire has 12v from the battery, chances are the starter motor is bad. Here is a link that shows in general how it is replaced:
https://www.2carpros.com/articles/how-to-replace-a-starter-motor
Here are the directions specific to your vehicle for replacement. The attached pics correlate with the directions. Before purchasing a new starter, have the parts store bench test the old one to confirm it is bad.
____________________________________
2001 Volvo S40 L4-1.9L Turbo VIN 29 B4204T3
Removal and Replacement
Vehicle Starting and Charging Starting System Starter Motor Service and Repair Removal and Replacement
REMOVAL AND REPLACEMENT
Replacing the starter motor
Preparations
Disconnect the battery lead according to Note when disconnecting and connecting the battery lead See: Battery > Procedures > Battery Disconnecting.
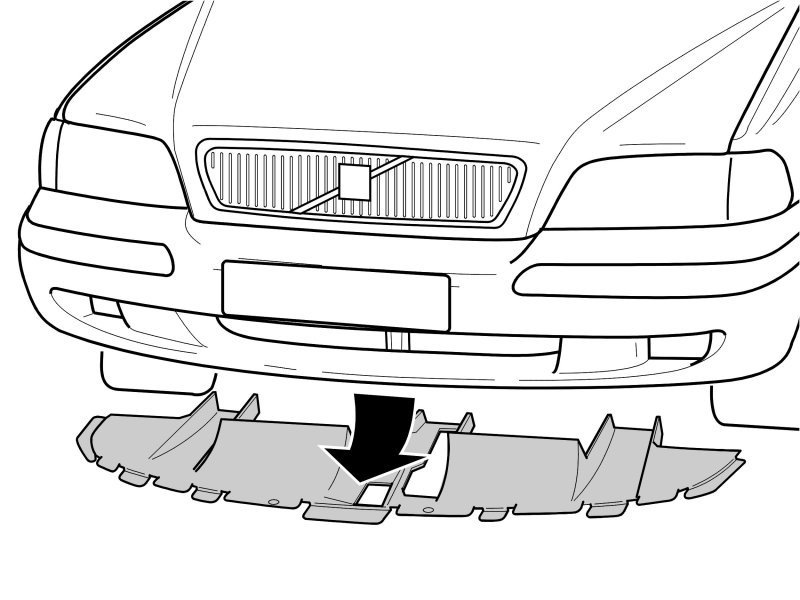
pic 1
Remove the air baffle.
Removing the hose and pipe for the charge air cooler (CAC)
pic 2
Remove the hose clamps (A).
Remove:
- the nut (B)
- the hose.
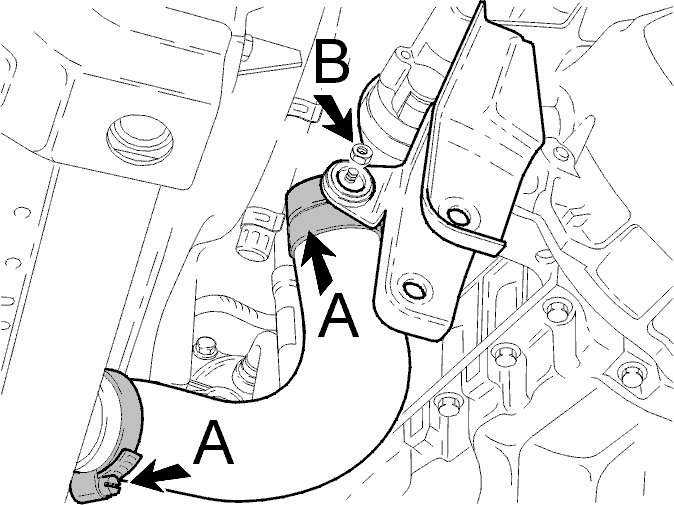
pic 3
Remove the hose clamp (A).
Remove:
- the vacuum hose (B)
- the mounting for the charge air cooler pipe (C)
- the charge air cooler pipe.
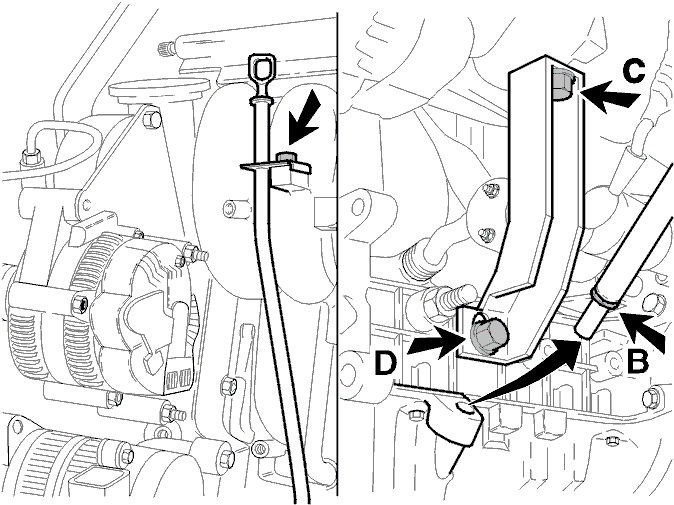
Removing the pipe for the dip stick
pic 4
Remove:
- the pipe for the dip stick and the O-ring (B).
Note! Clean thoroughly and plug the hole.
- the two screws (C) and (D), the bracket for the manifold.
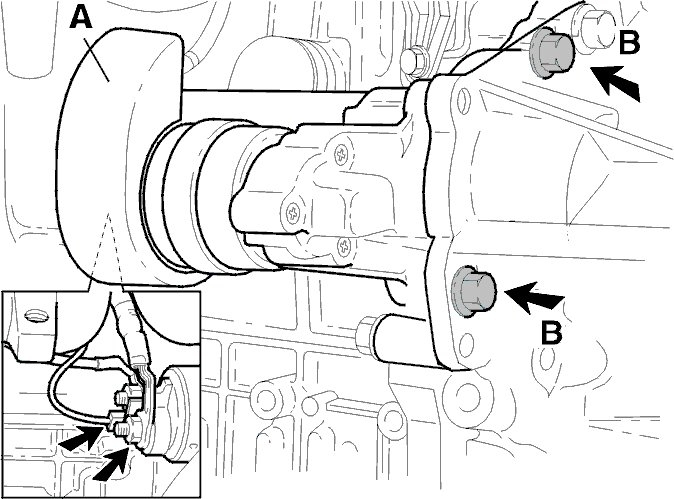
Removing the starter motor
pic 5
Remove:
- the splash guard (A)
- the power cable and the connector from the starter motor
- the two screws (B)
- the starter motor.
Installing the starter motor
Clean the mating surfaces.
pic 6
Install:
- the starter motor using the two screws. Tighten the screws (B) by hand. Tighten to 50 Nm
- the connector and the power cable for the starter motor. Tighten the screw for the power cable. Tighten to 13 Nm
- the splash guard (A).
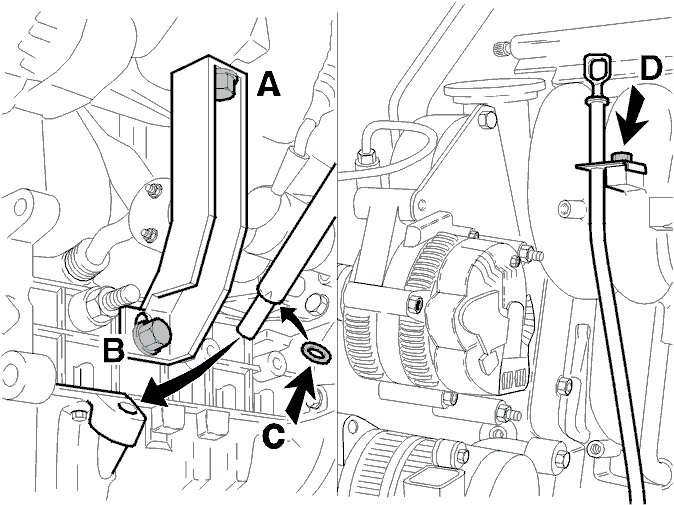
Installing the pipe for the dip stick
pic 7
Install:
- the bracket for the manifold using two screws. First install screw (A) and then (B). Tighten to 25 Nm
- a new O-ring (C) on the pipe for the dip stick, first remove the plug
- the pipe
- Tighten the screw (D). Tighten to 10 Nm.
Installing the hose and pipe for the charge air cooler (CAC)
pic 8
Reinstall:
- the charge air cooler pipe
- the mounting for the charge air cooler pipe (C)
- the vacuum hose (B)
- the hose clamp (A). Tighten to 6 Nm.
pic 9
Install:
- the hose
- the hose clamps (A). Tighten to 6 Nm
- the nut (B).
Installing the remaining components
Install:
- the air baffle
- the battery lead according to Note when disconnecting and connecting the battery lead See: Battery > Procedures > Battery Disconnecting.
Caution! Always connect the battery lead according to Note when disconnecting and connecting the battery lead See: Battery > Procedures > Battery Disconnecting.
___________________________________
Let me know what you find or if you have other questions.
Take care,
Joe
Images (Click to make bigger)
Friday, December 25th, 2020 AT 10:25 PM