Hi and thanks for using 2CarPros.com.
Since this happens when it is hot, the first thing I suspect is the crankshaft position sensor. It is not uncommon for them to fail and not set a code. Take a look at this link:
https://www.2carpros.com/articles/symptoms-of-a-bad-crankshaft-sensor
What you really need to do is check for spark and fuel when the engine refuses to start. Here are general directions for both:
https://www.2carpros.com/articles/how-to-check-fuel-system-pressure-and-regulator
https://www.2carpros.com/articles/how-to-test-an-ignition-system
The fuel pump pressure should be right around 50psi.
If you find the pump is bad, here are the directions for tank removal The attached pictures correlate with these directions.
________________________________
Fuel Tank - REMOVAL
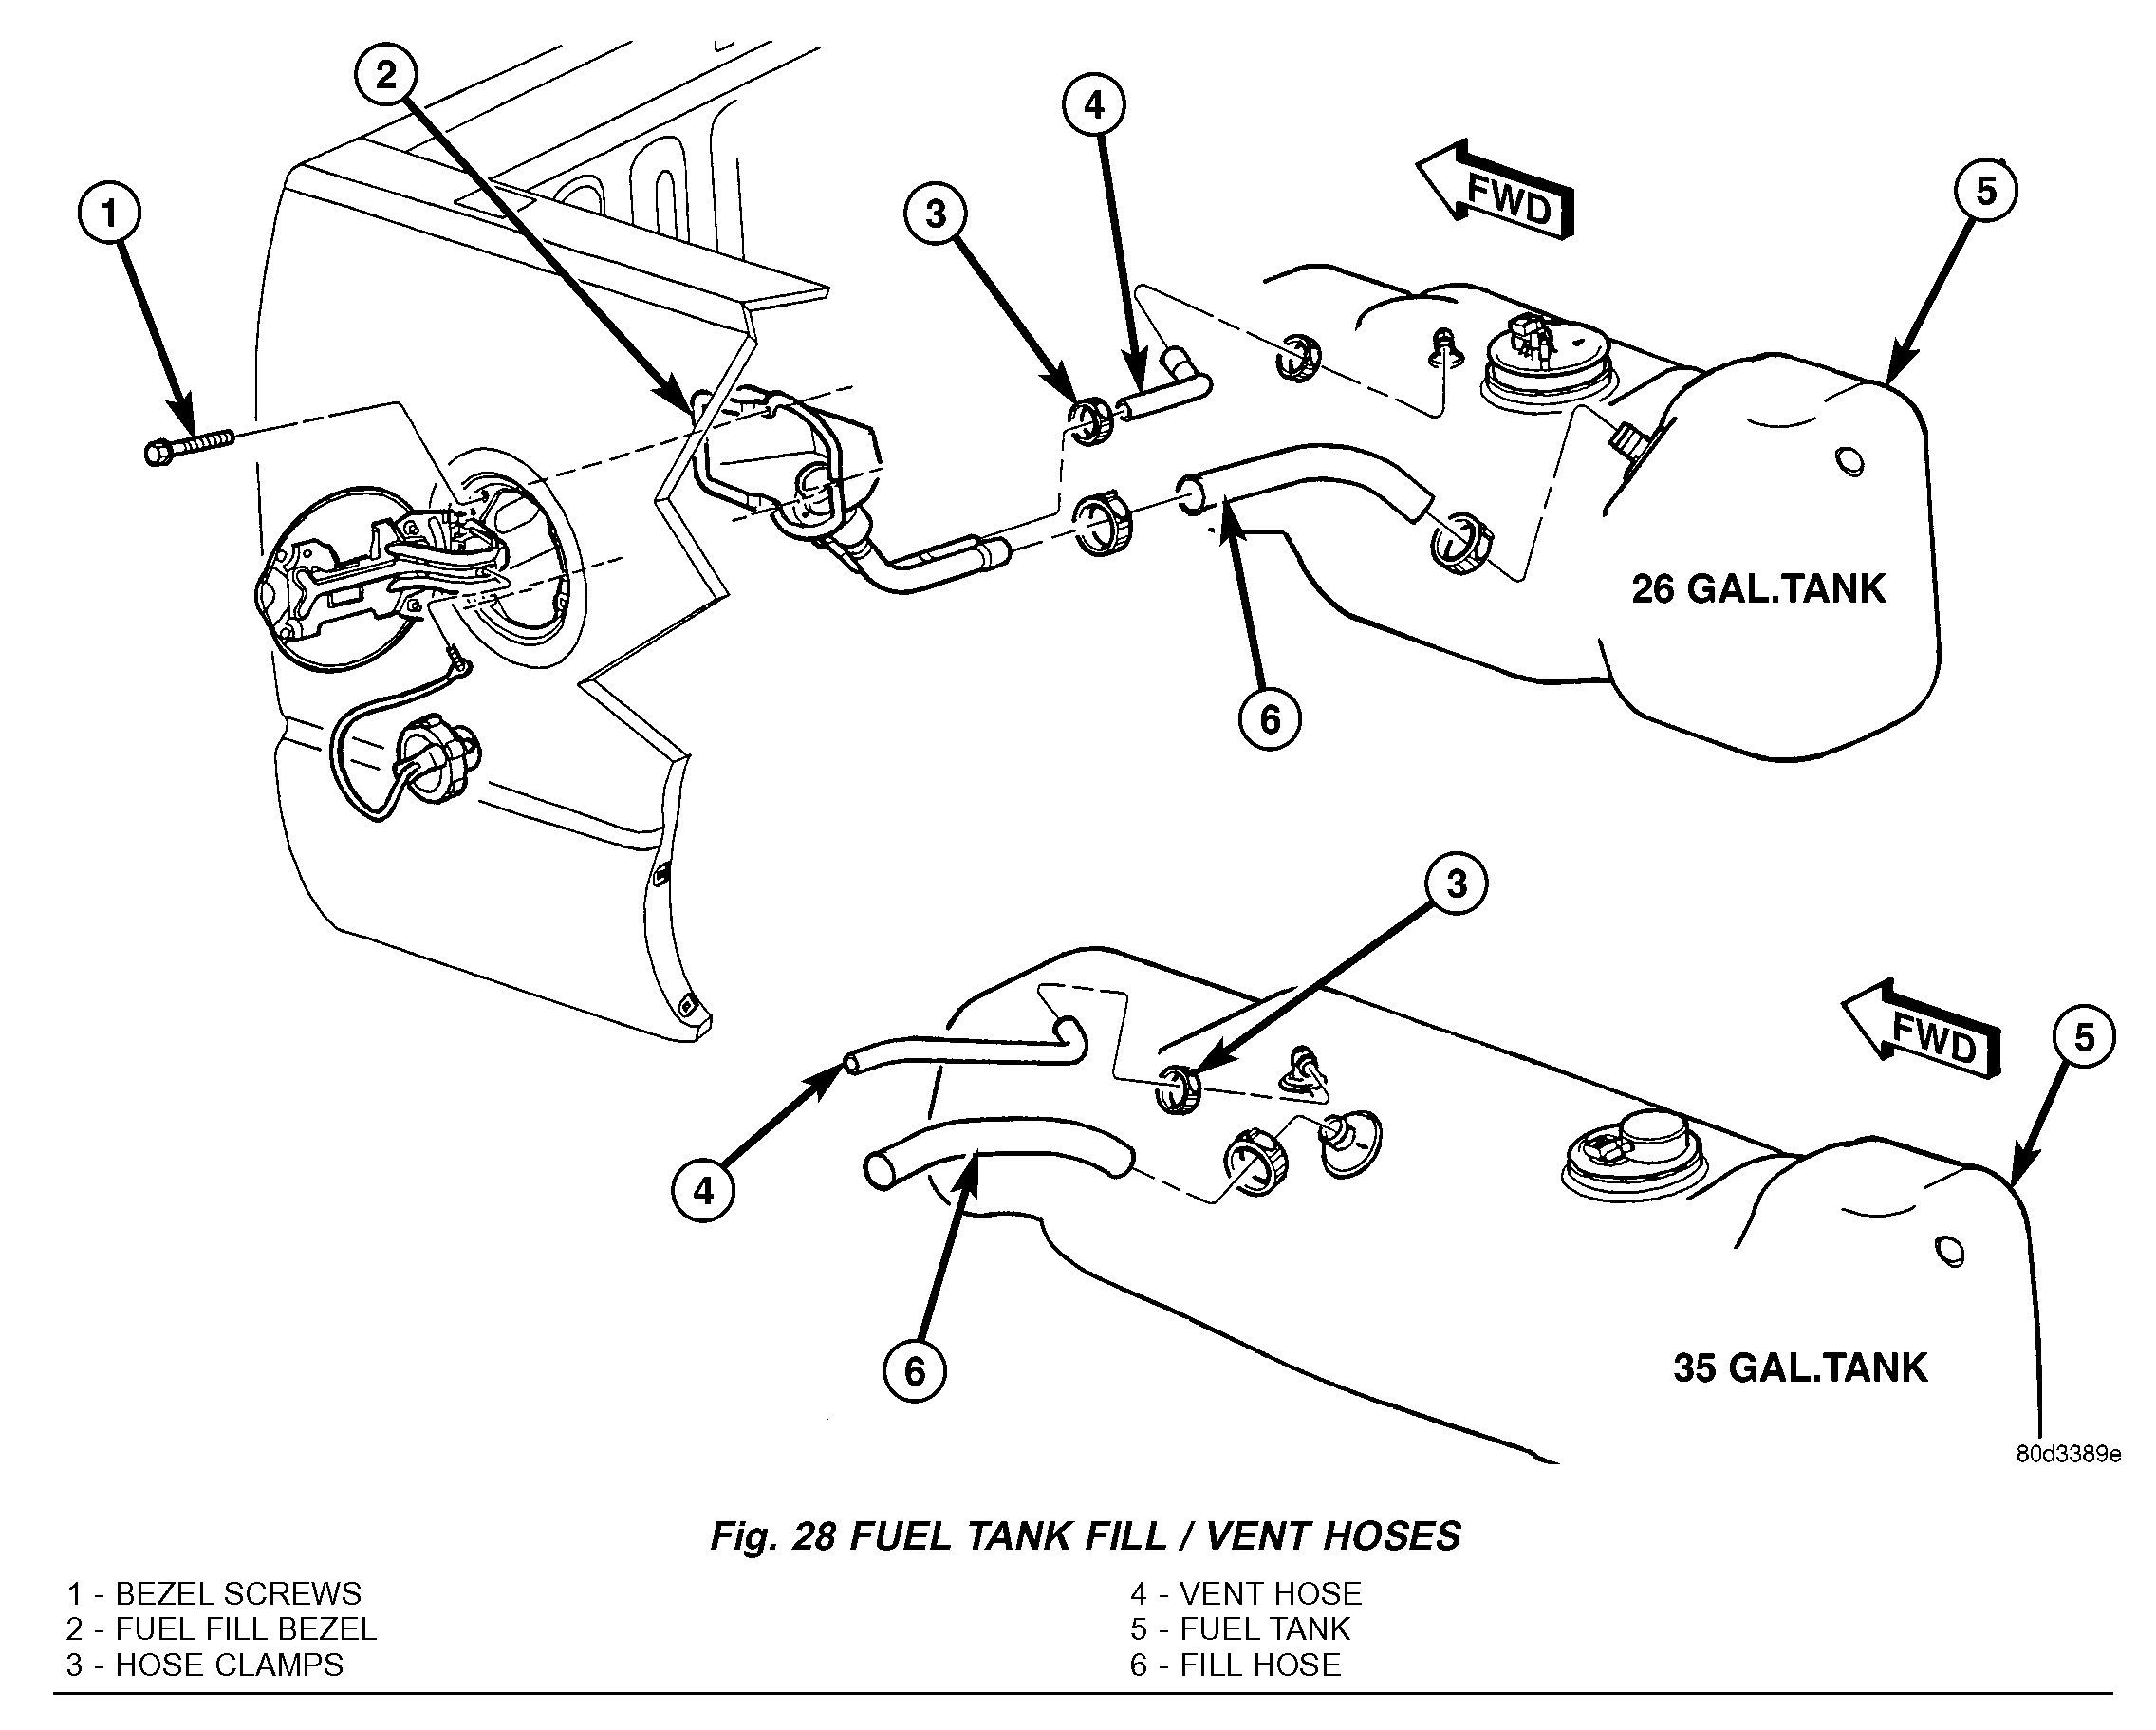
Fig.28 Fuel Tank Fill/Vent Hoses
1. Loosen clamp and disconnect rubber fuel vent hose (Fig. 28) at tank fitting.
2. Support tank with a hydraulic jack.
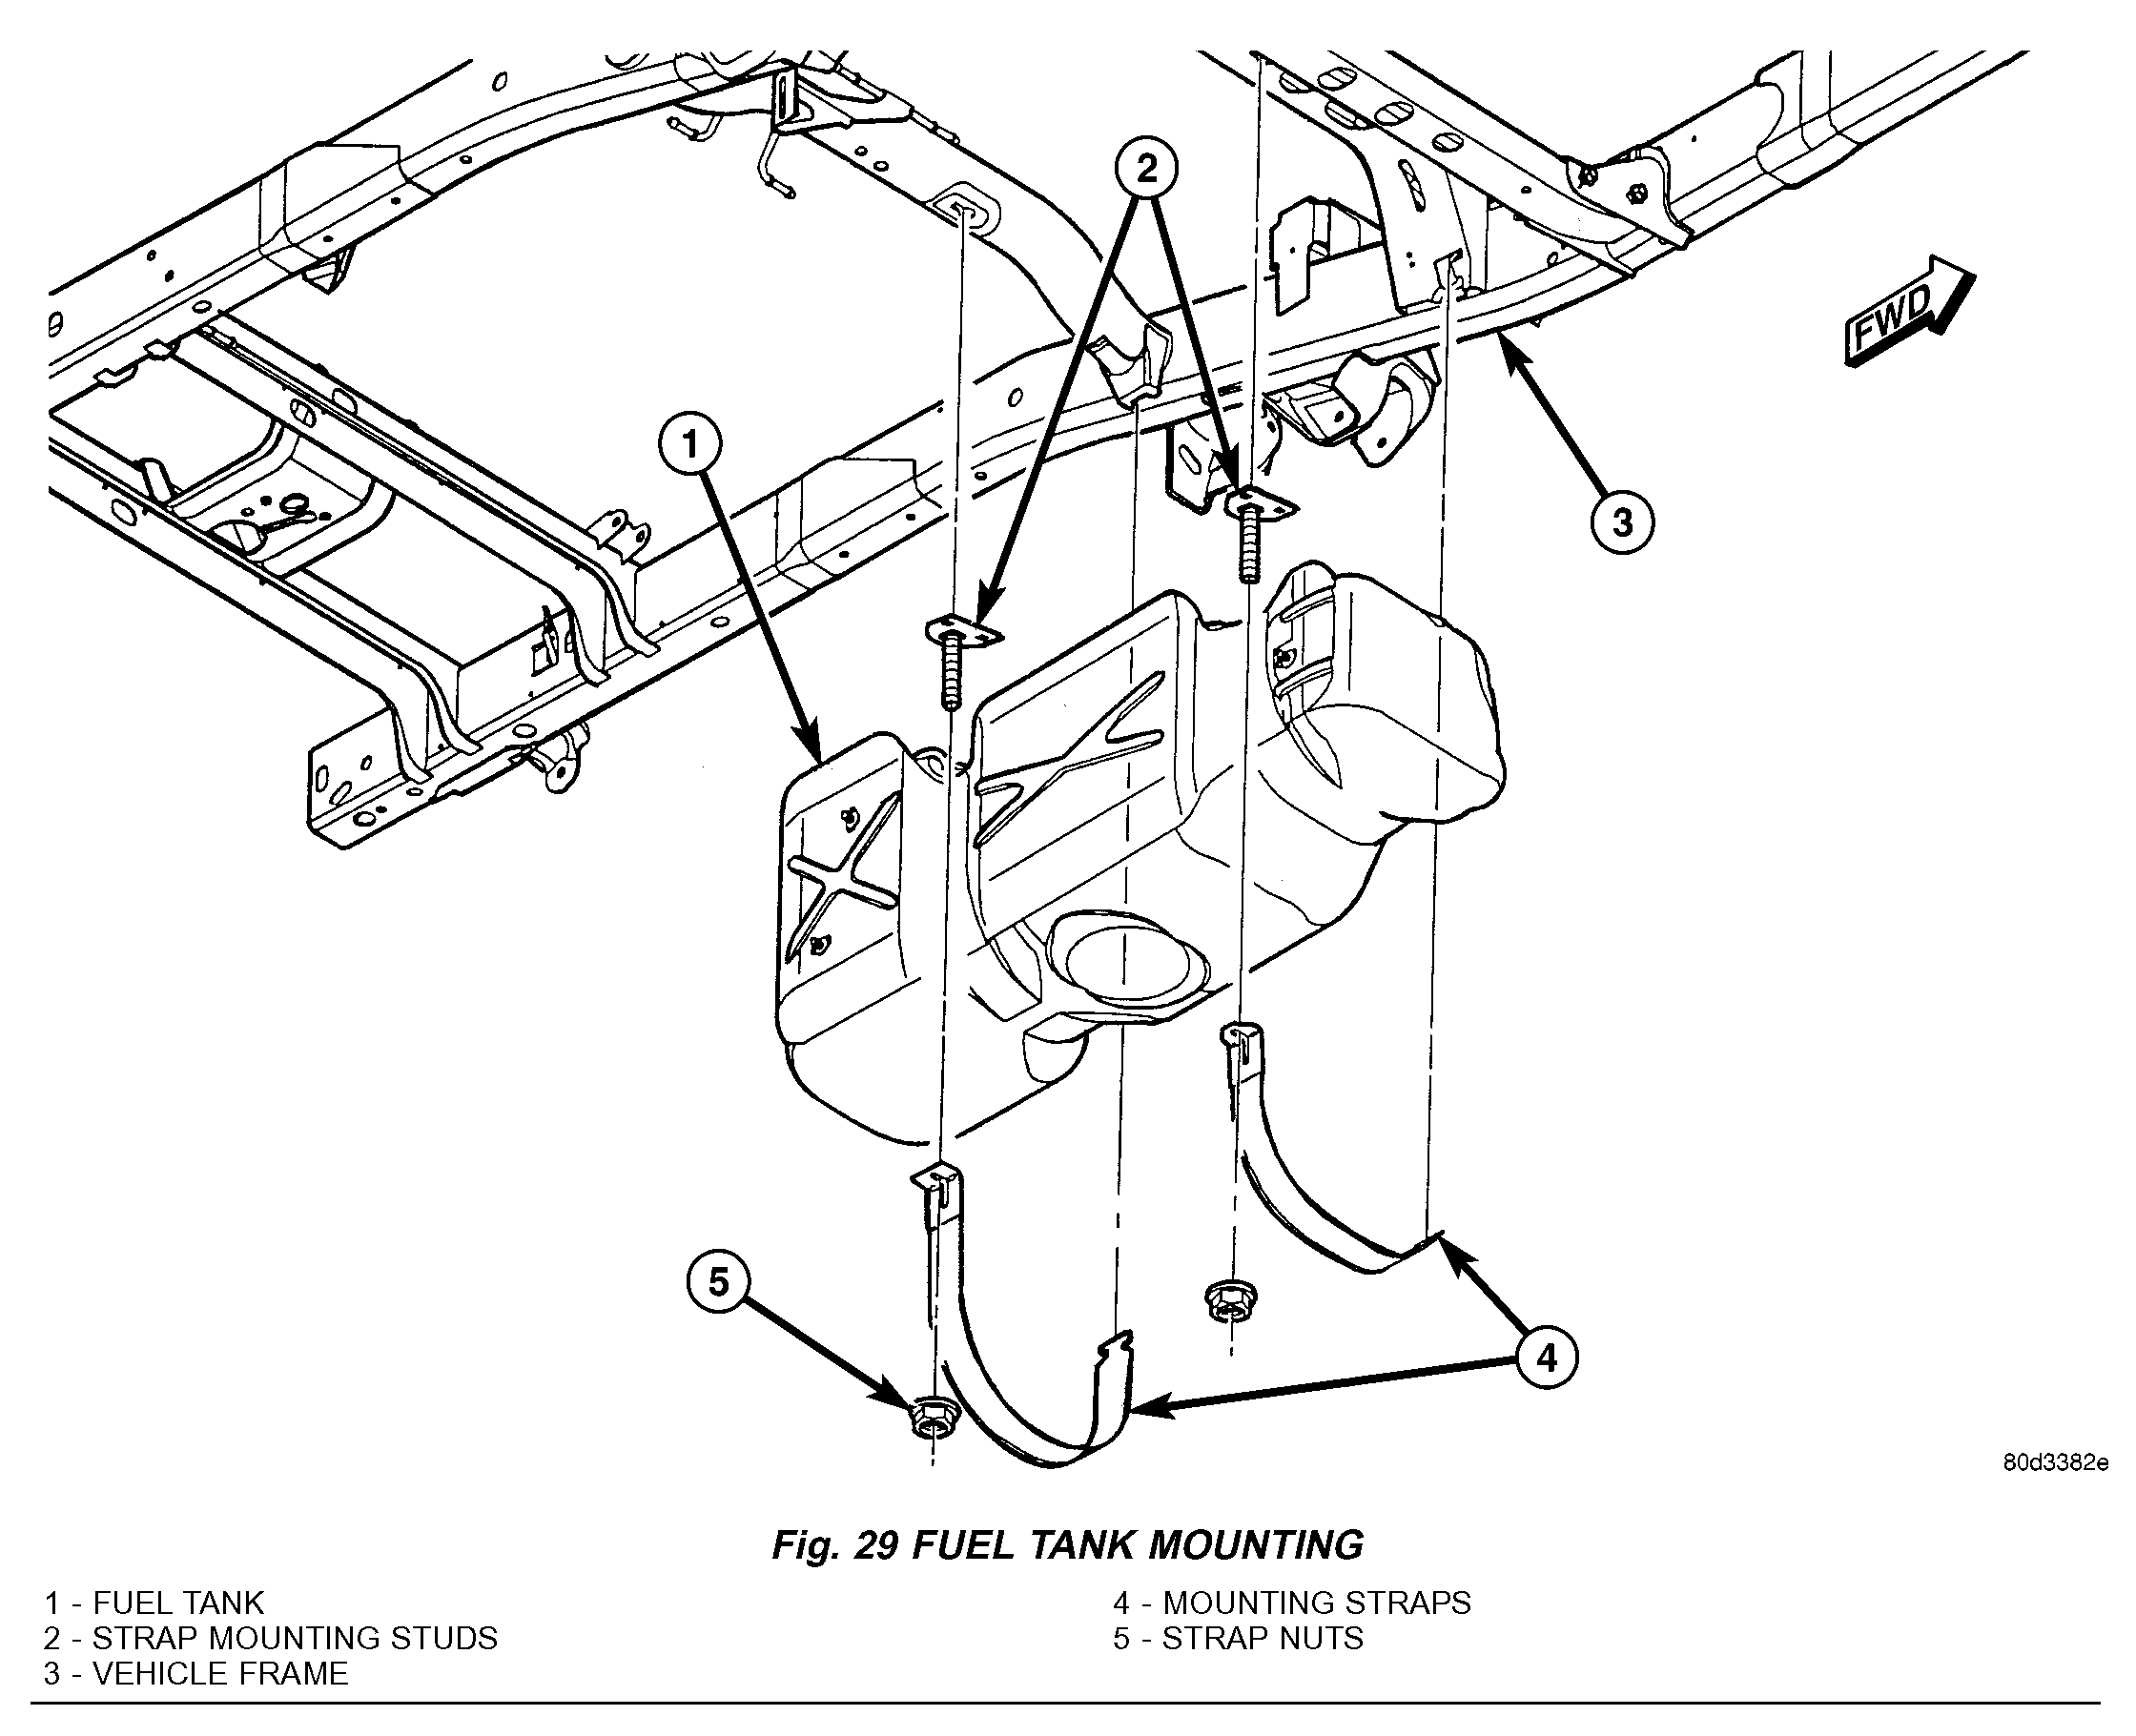
Fig.29 Fuel Tank Mounting
3. Remove 2 fuel tank strap nuts (Fig. 29) and remove both tank support straps.
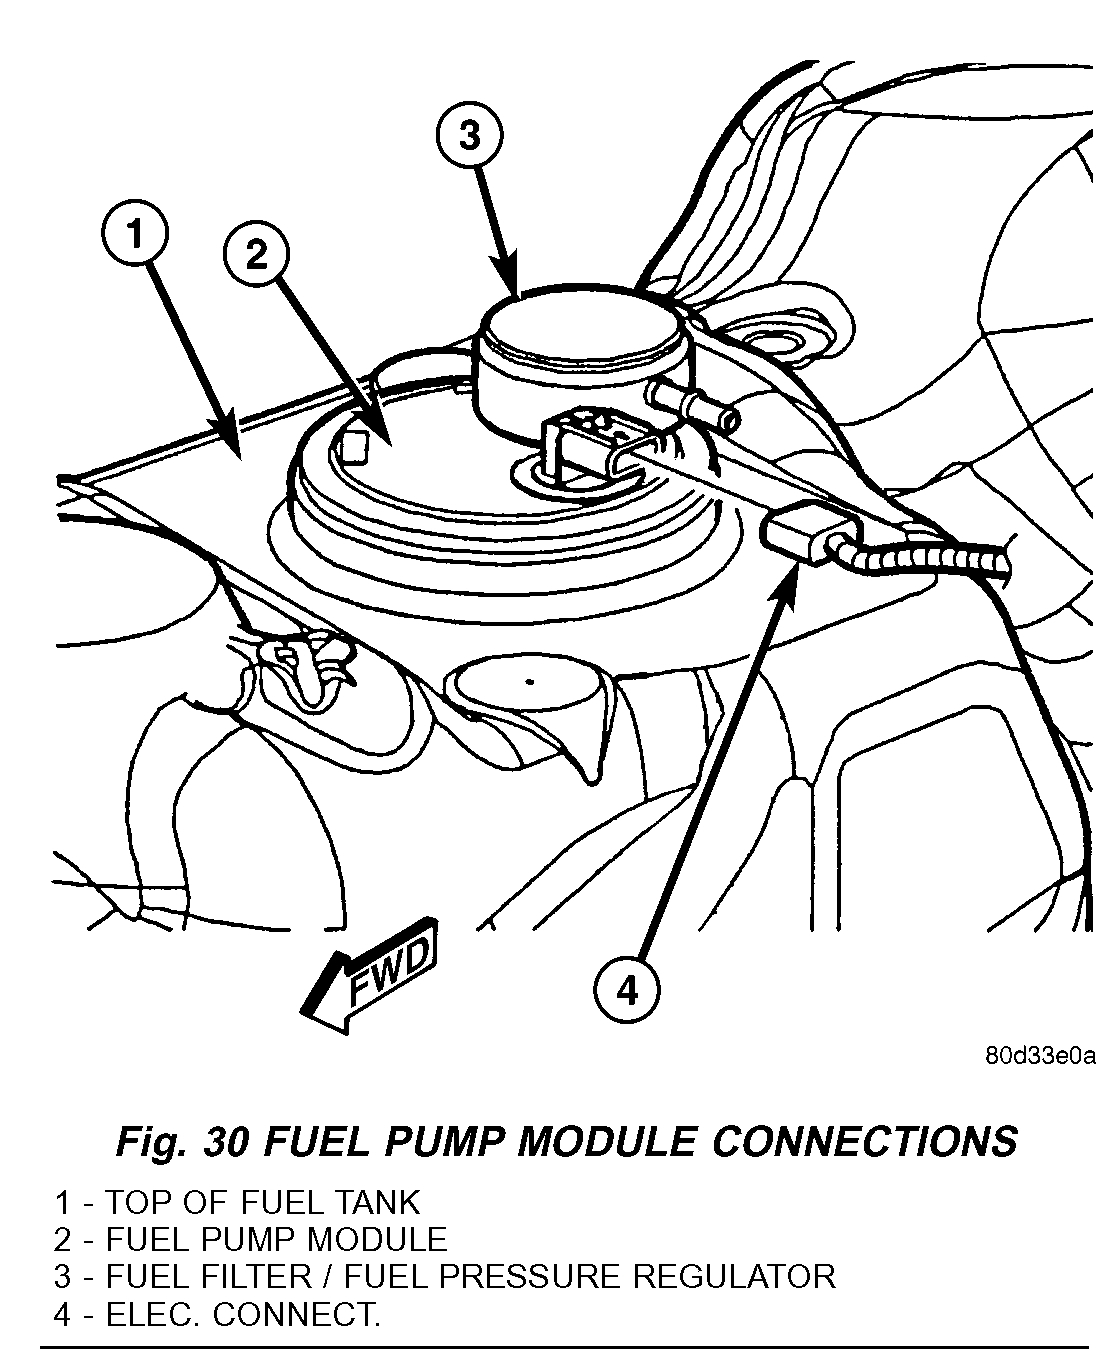
Fig.30 Fuel Pump Module Connections
4. Carefully lower tank a few inches and disconnect fuel pump module electrical connector (Fig. 30) at top of tank. To disconnect electrical connector: Push upward on red colored tab to unlock. Push on black colored tab while removing connector.
5. Disconnect fuel line at fuel filter I fuel pressure regulator (Fig. 30) by pressing on tabs at side of quick-connect fitting.
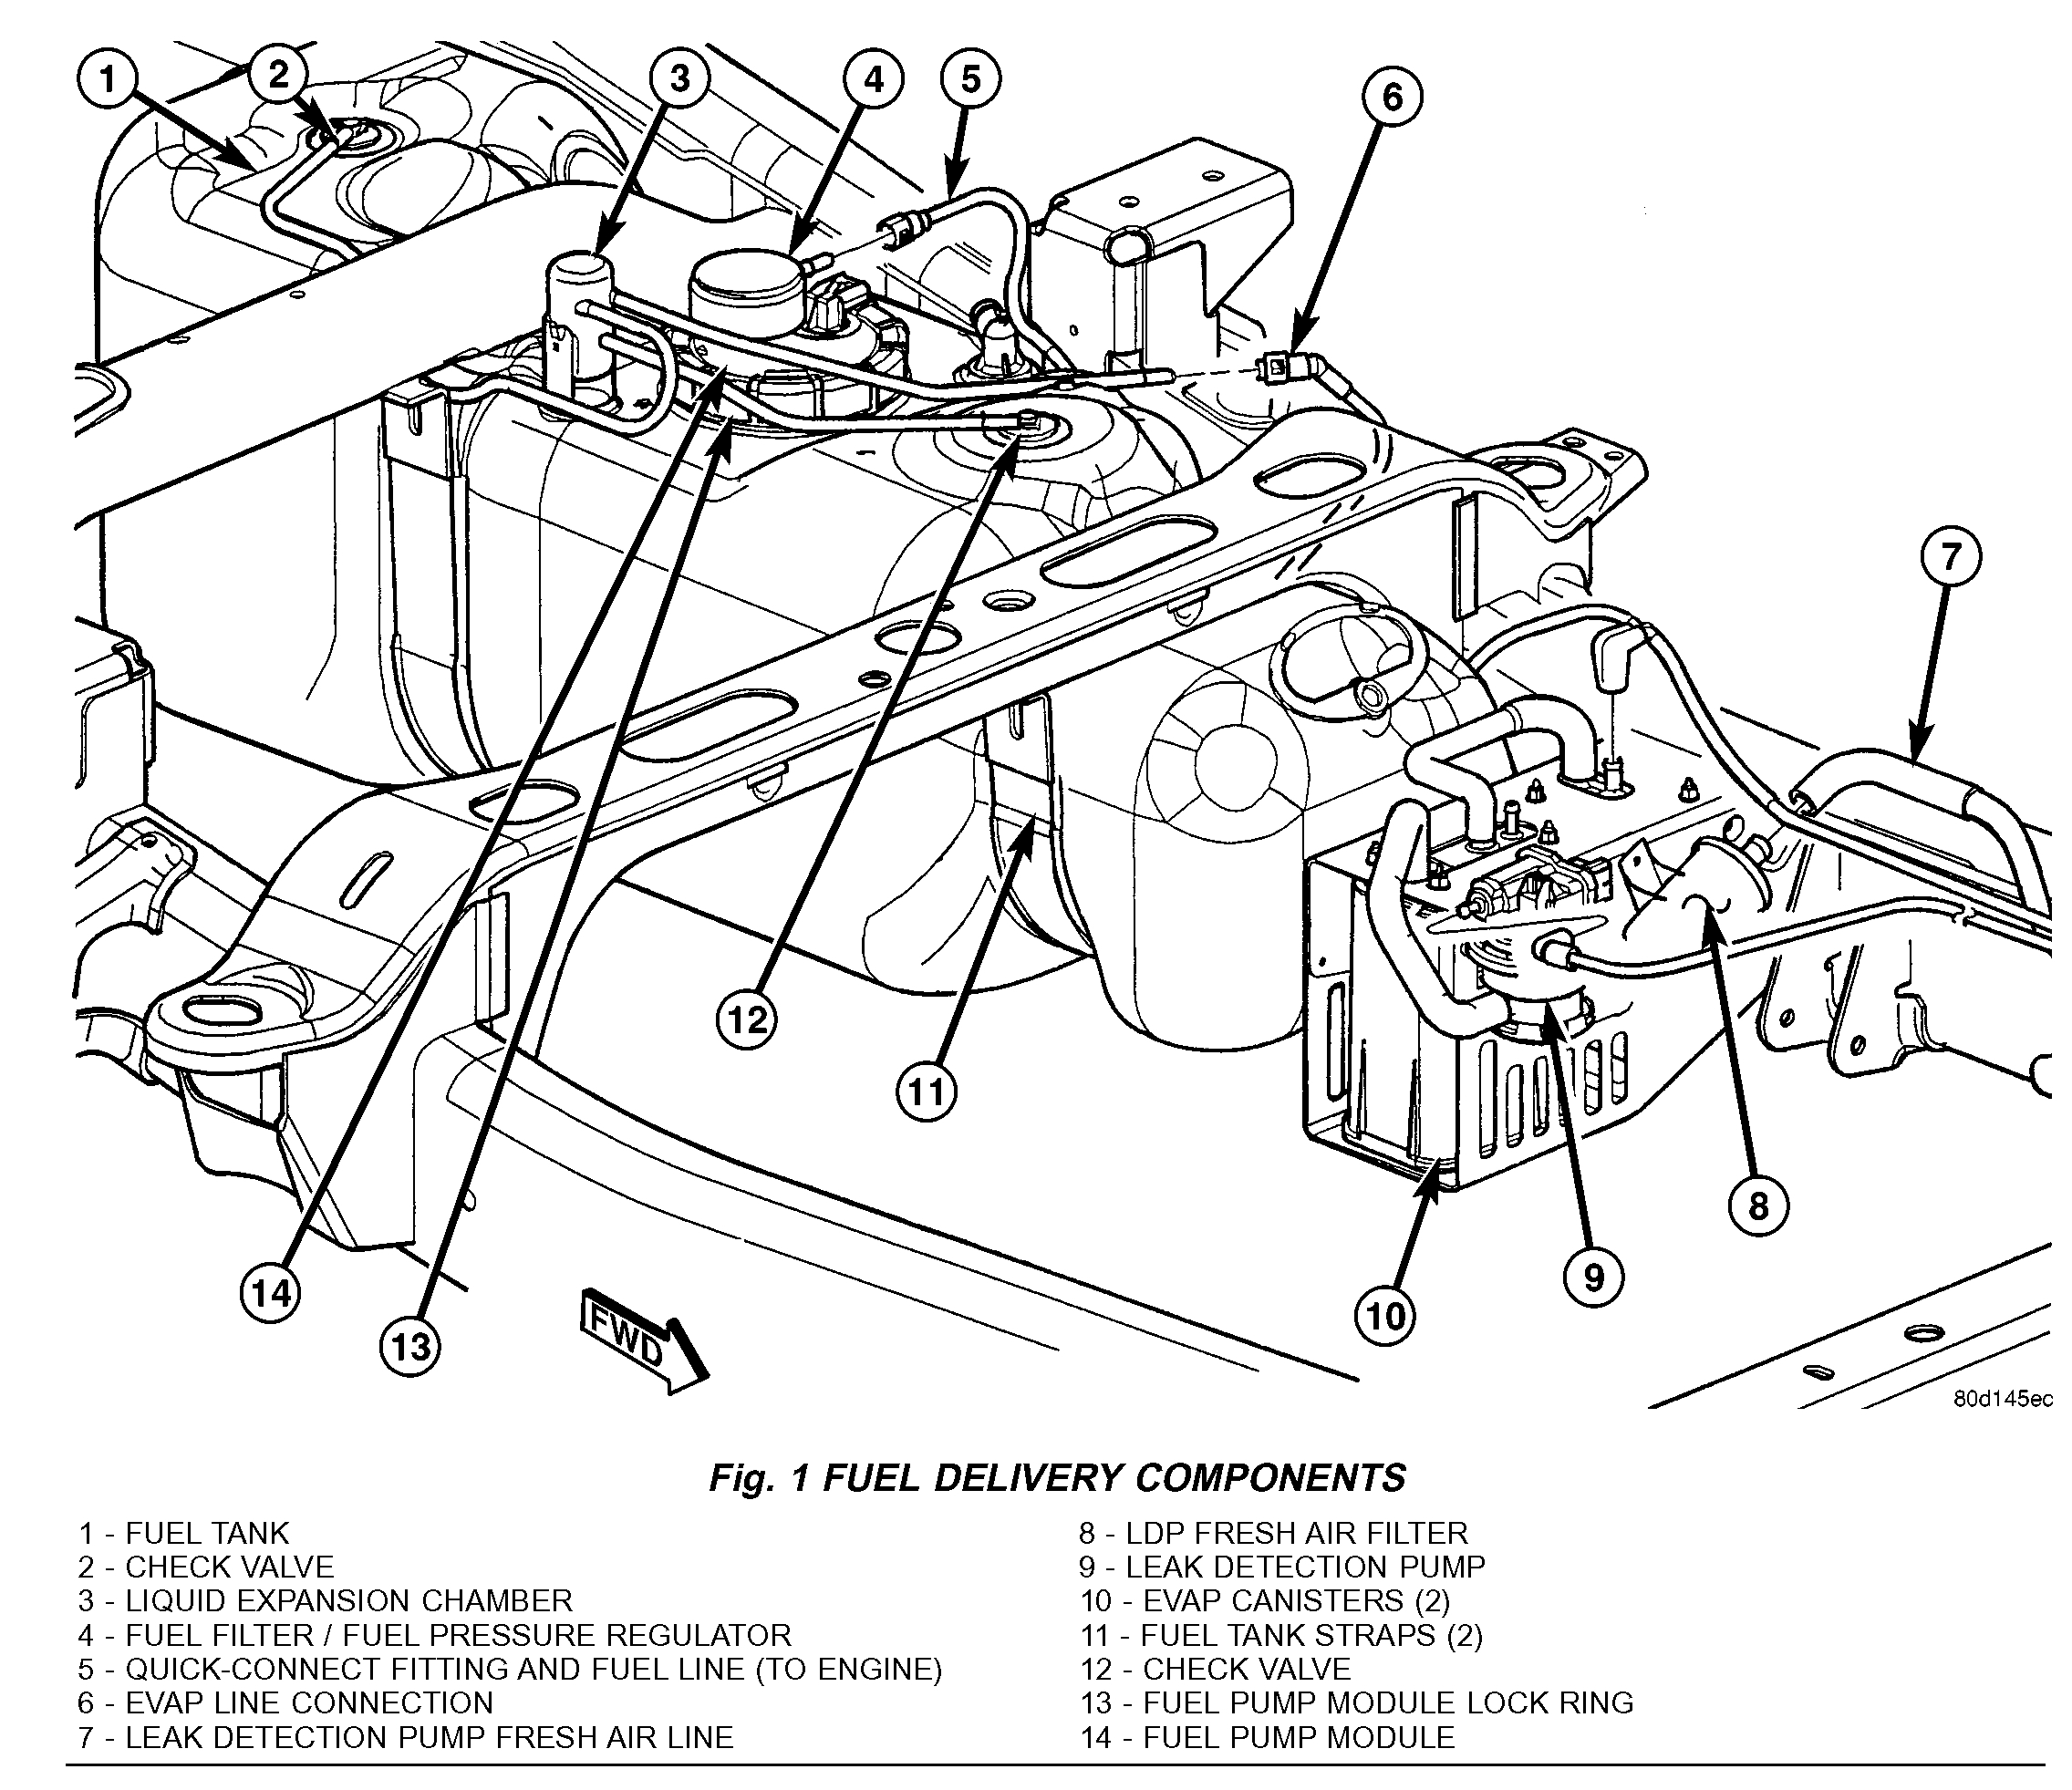
Fig.1 Fuel Delivery Components
6. Disconnect EVAP line at top of tank (Fig. 1).
7. Continue to lower tank for removal.
8. If fuel tank is to be replaced, remove fuel pump module from tank. Refer to Fuel Pump Module Removal/Installation procedures.
INSTALLATION
1. If fuel tank is to be replaced, install fuel pump module into tank. Refer to Fuel Pump Module Removal/Installation procedures.
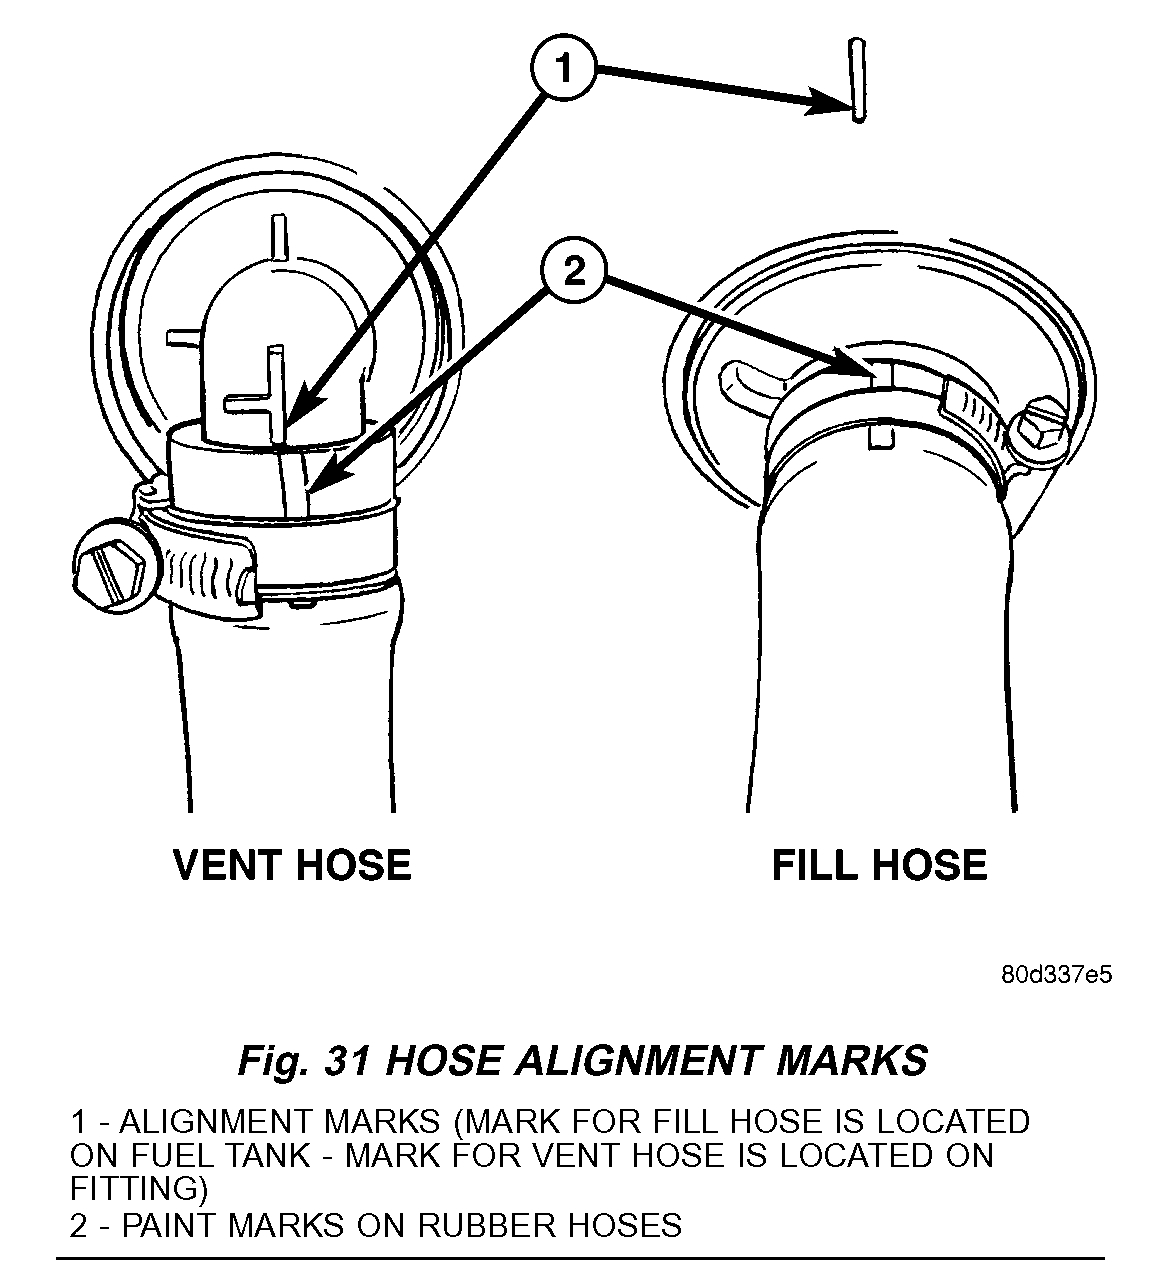
Fig.31 Hose Alignment Marks
2. Disconnect clamps and remove rubber fuel fill hose and fuel vent hose at fuel fill tube. Install these 2 hoses to 2 fuel tank fittings. Rotate hoses until paint marks on hoses line up with alignment marks (Fig. 31). Tighten both clamps.
3. Position fuel tank to hydraulic jack.
4. Raise tank until positioned near body.
5. Connect EVAP line at tank (Fig. 1).
6. Connect fuel pump module electrical connector (Fig. 30) at top of tank.
7. Connect fuel line quick-connect fitting to fuel filter / fuel pressure regulator (Fig. 1) or (Fig. 30).
8. Continue raising tank until positioned snug to body
9. Install and position both tank support straps. Install 2 fuel tank strap nuts (Fig. 29) and tighten.Tighten rear strap nut first. Refer to Torque Specifications.
10. Connect rubber fill and vent hoses to fuel fill tube and tighten clamps.
11. Lower vehicle.
12. Fill fuel tank with fuel.
13. Start engine and check for fuel leaks near top of module.
________________________________
When you remove the tank, make sure the fuel pump strainer isn't plugged. When sitting, dirt may settle and the pump work. After running, the pump may draw the dirt back into the strainer causing it to plug again. When checking pump pressure, that should cause it to drop too low to run the engine.
_______________________________
If you find there is no spark, here are the directions for replacing the sensor. If you have a live data scanner, check for an RPM reading while cranking in a no start situation. If there is no reading, chances are good the sensor is the problem. The last picture shows its location.
______________________________
REMOVAL
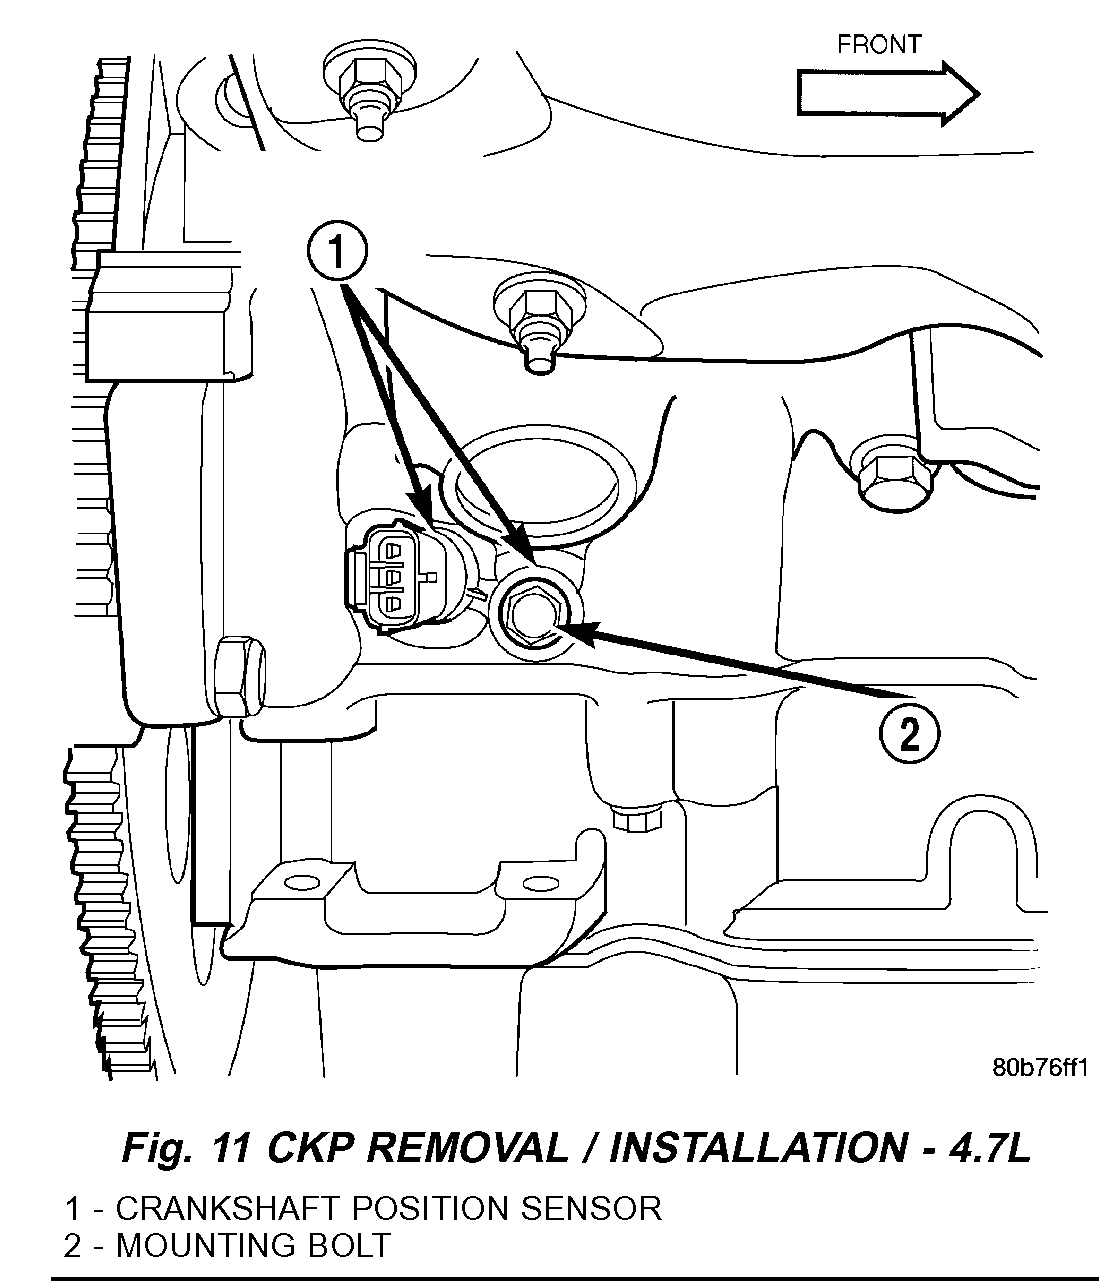
Fig.11 CKP Removal/Installation - 4.7L
The Crankshaft Position (CKP) sensor is located at the right-rear side of the engine cylinder block. It is positioned and bolted into a machined hole in the engine block.
1. Raise vehicle.
2. Disconnect CKP electrical connector at sensor.
3. Remove CKP mounting bolt.
4. Carefully twist sensor from cylinder block.
5. Remove sensor from vehicle.
6. Check condition of sensor O-ring.
INSTALLATION
1. Clean out machined hole in engine block.
2. Apply a small amount of engine oil to sensor O-ring.
3. Install sensor into engine block with a slight rocking and twisting action.
CAUTION: Before tightening sensor mounting bolt, be sure sensor is completely flush to cylinder block. If sensor is not flush, damage to sensor mounting tang may result.
4. Install mounting bolt and tighten to 28 Nm (21 ft.lbs.) torque.
5. Connect electrical connector to sensor.
6. Lower vehicle.
______________________________
Honestly, you need to check these things when the engine will not start so we know on which components to focus.
Let me know if this helps or if you have other questions.
Take care,
Joe
Images (Click to make bigger)
Friday, September 7th, 2018 AT 7:30 PM