Well I was talking about setting the timing, not installing belts. But here it is
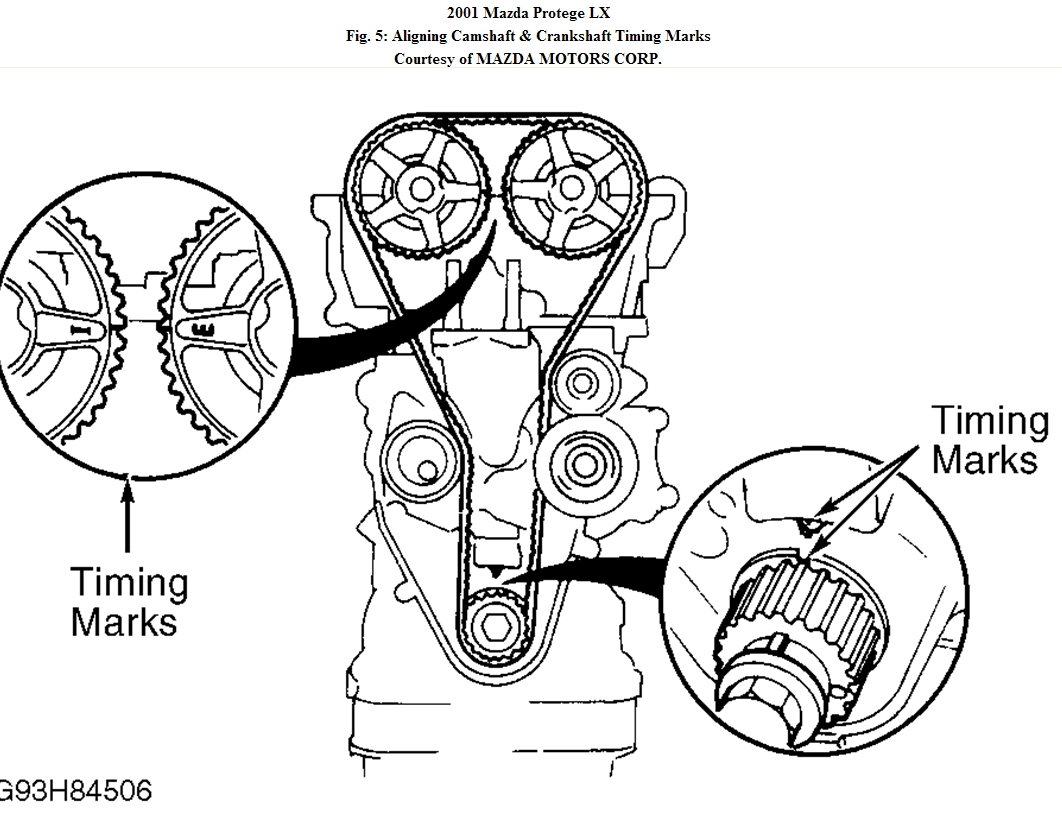
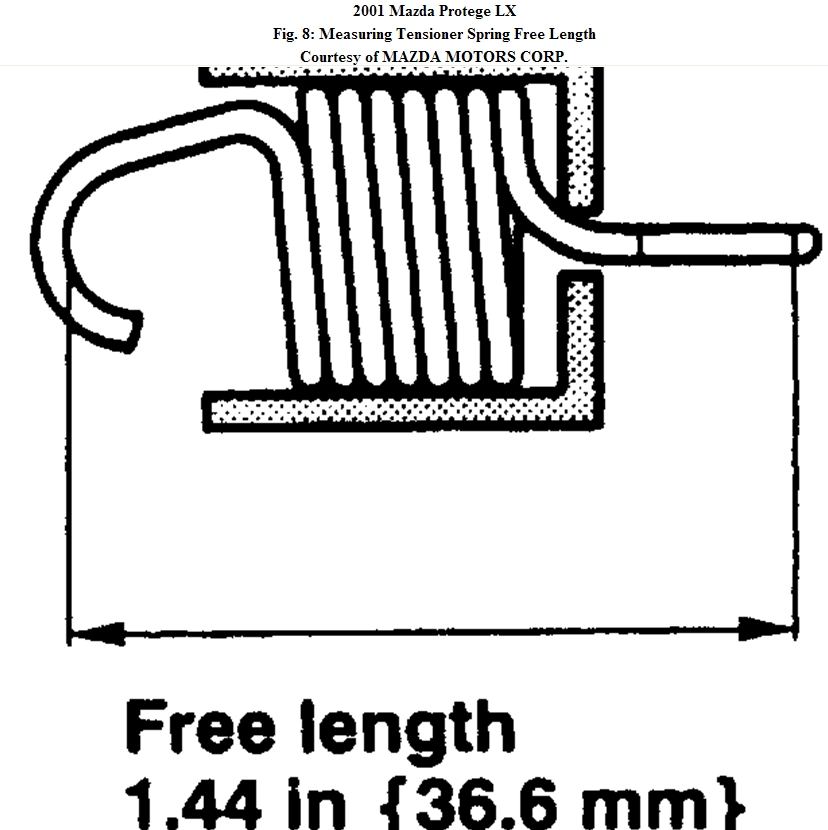
Put #1 cylinder at top dead center, then the marks should align this way. ALWAYS install a new tensioner the spring gets cut cover time and WILL FAIL, MAzd has an upgraded spring now.
1. Ensure all timing marks are aligned. See Fig. 10.
2. Install timing belt around crankshaft sprocket, water pump sprocket, idler pulley, and camshaft
sprockets. Ensure slack does not exist on idler pulley side of timing belt.
3. Complete timing belt installation on slack (tensioner) side. With tensioner spring removed,
allow tensioner to ride against timing belt. Turn crankshaft 2 revolutions in normal direction of
rotation (clockwise). Ensure camshaft and crankshaft timing marks are still correctly aligned.
See Fig. 5. If not correctly aligned, timing belt will have to be removed and repositioned.
4. If all timing marks are okay, turn tensioner clockwise using an Allen wrench. Connect
tensioner spring to pin on engine block. See Fig. 11. Turn crankshaft 2 revolutions. Ensure
camshaft and crankshaft timing marks are still aligned. See Fig. 5.
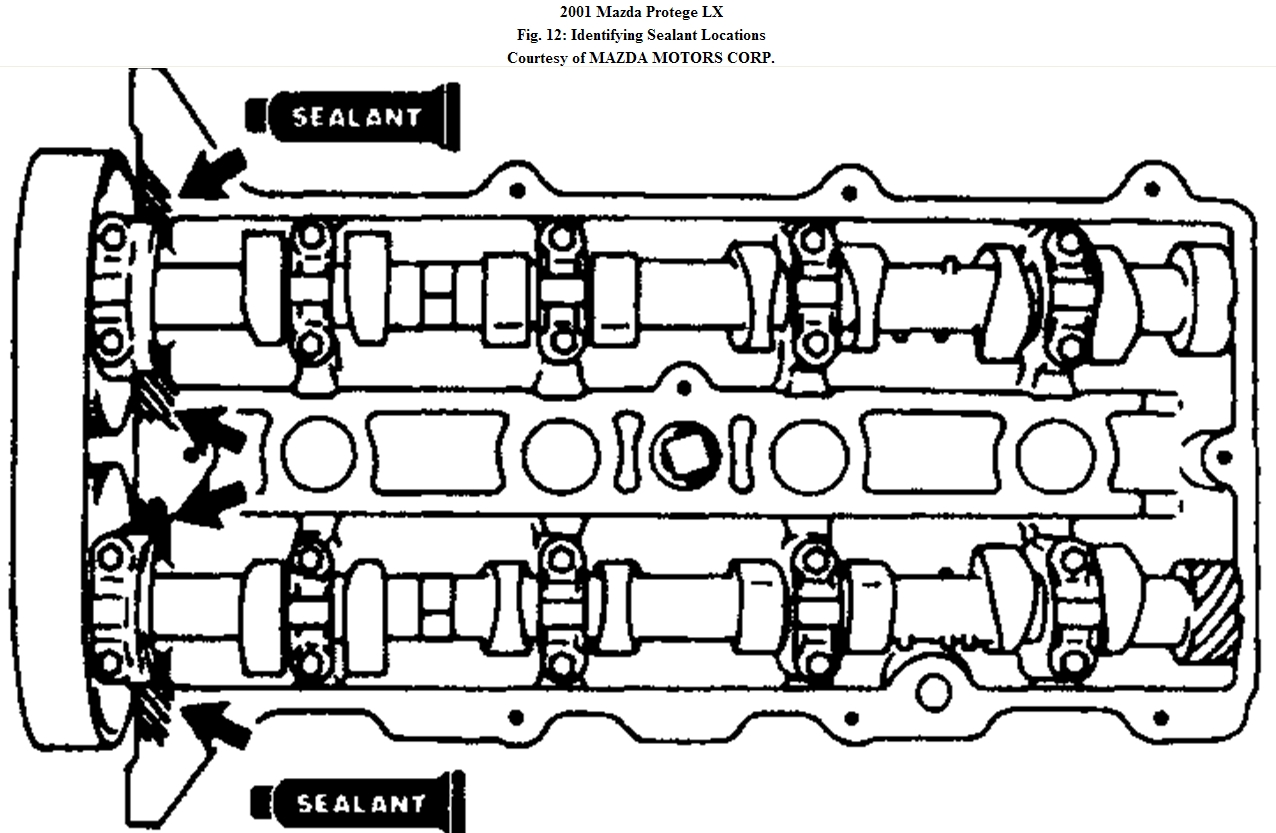
5. To install remaining components, reverse removal procedure. When installing valve cover
gasket, apply small amount of silicone sealer to 4 corners of gasket where the front of both
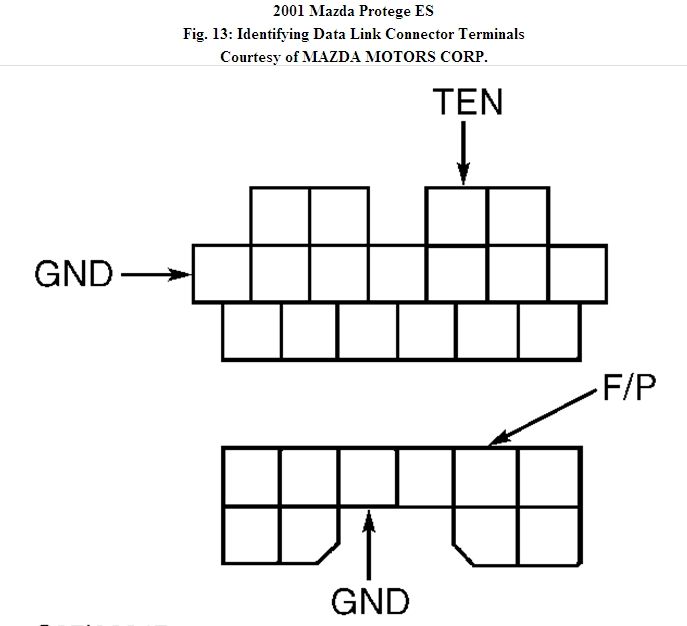
camshafts go through cylinder head. See Fig. 12. Tighten valve cover bolts to specification in
correct sequence. See Fig. 13. Adjust drive belts to proper tension.
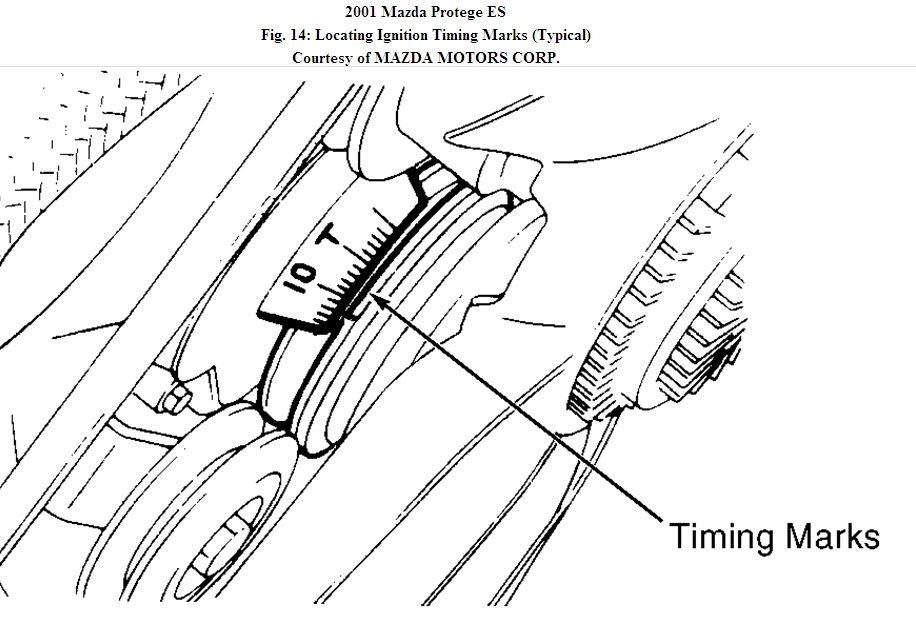
6. Inspect crankshaft position sensor air gap. Air gap between outer edge of crankshaft pulley
rotor tooth and center of CKP sensor should be 0.029-0.059" (0.5-1.5 mm). See Fig. 14. Air
gap is not adjustable. If gap is incorrect, check for damaged parts.
Image (Click to make bigger)
Tuesday, April 14th, 2020 AT 6:55 PM
(Merged)