Hi:
You are very welcome. Here is what I suggest. If the van runs good and is still in good condition, think of the cost of replacing it and then compare it to the repair. This is something you can do at home if you want. You need some basic tools, some time, and a little mechanical ability.
As far as cost, honestly the gaskets are under 20 bucks if you do it yourself. Other than that, you need a small amount of RTV and coolant.
Labor for the part shows 2.9 hours, so multiply that by the shop's hourly rate. As far as the parts, they will mark them up, so I can't answer what they will do with that.
If you want to try it yourself, I suspect you can do it for under 50 to 100 dollars. Here are the directions for doing it, and the attached pictures correlate with the directions.. Take a look through them and see if you feel comfortable doing it. If you do, I can help from here if you run into trouble.
______________________________
2005 Dodge or Ram Truck Grand Caravan V6-3.8L VIN L
Lower Intake Manifold
Vehicle Engine, Cooling and Exhaust Engine Intake Manifold Service and Repair Procedures Lower Intake Manifold
LOWER INTAKE MANIFOLD
REMOVAL- LOWER INTAKE MANIFOLD
1. Perform fuel system pressure release procedure (before attempting any repairs).
2. Drain the cooling system.
3. Remove the upper intake manifold.
4. Remove the fuel line.
Fig.125
pic 1
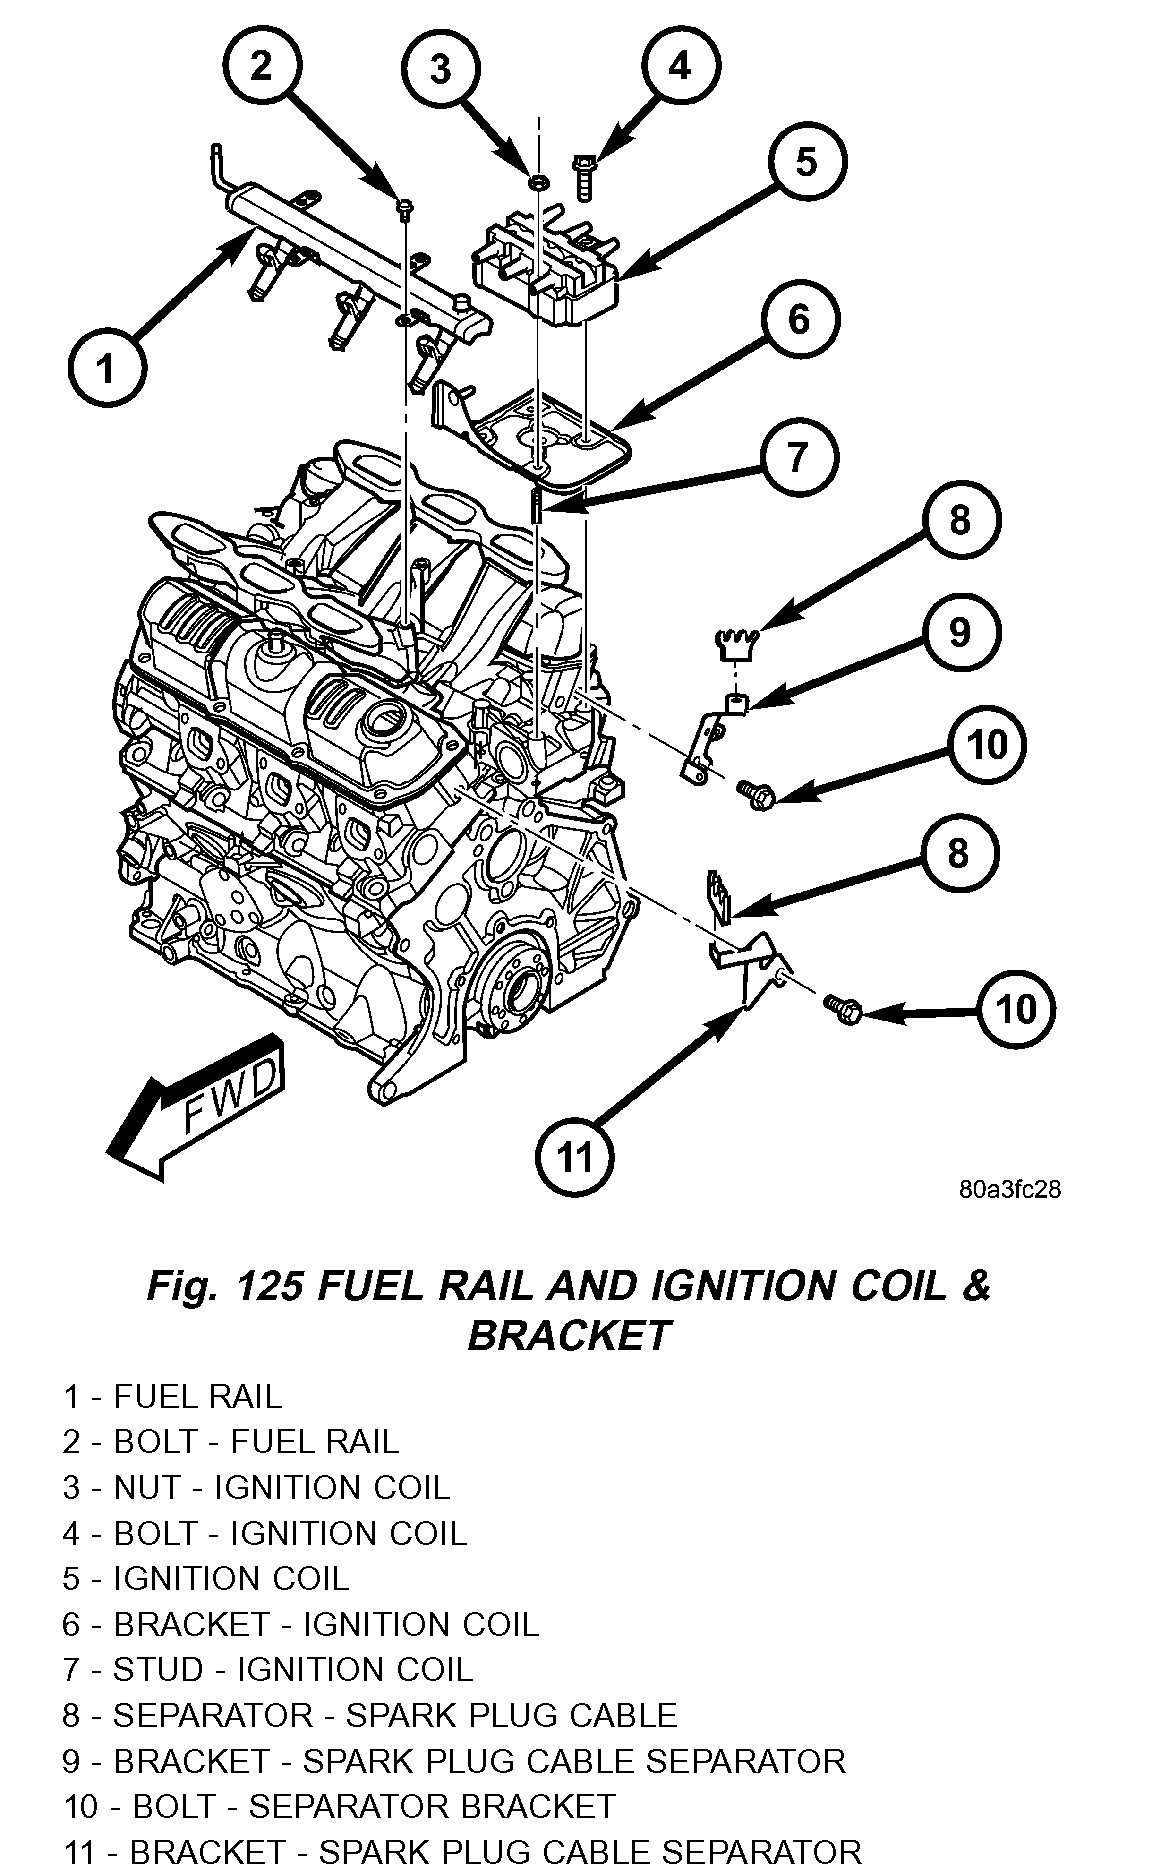
5. Remove ignition coil and bracket (Fig. 125).
Fig.126
pic 2
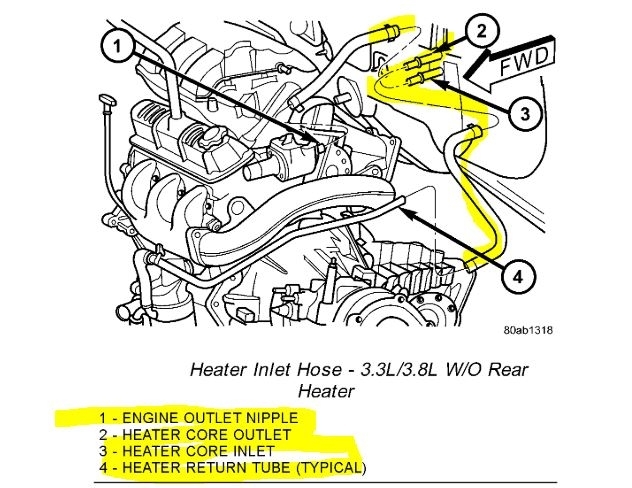
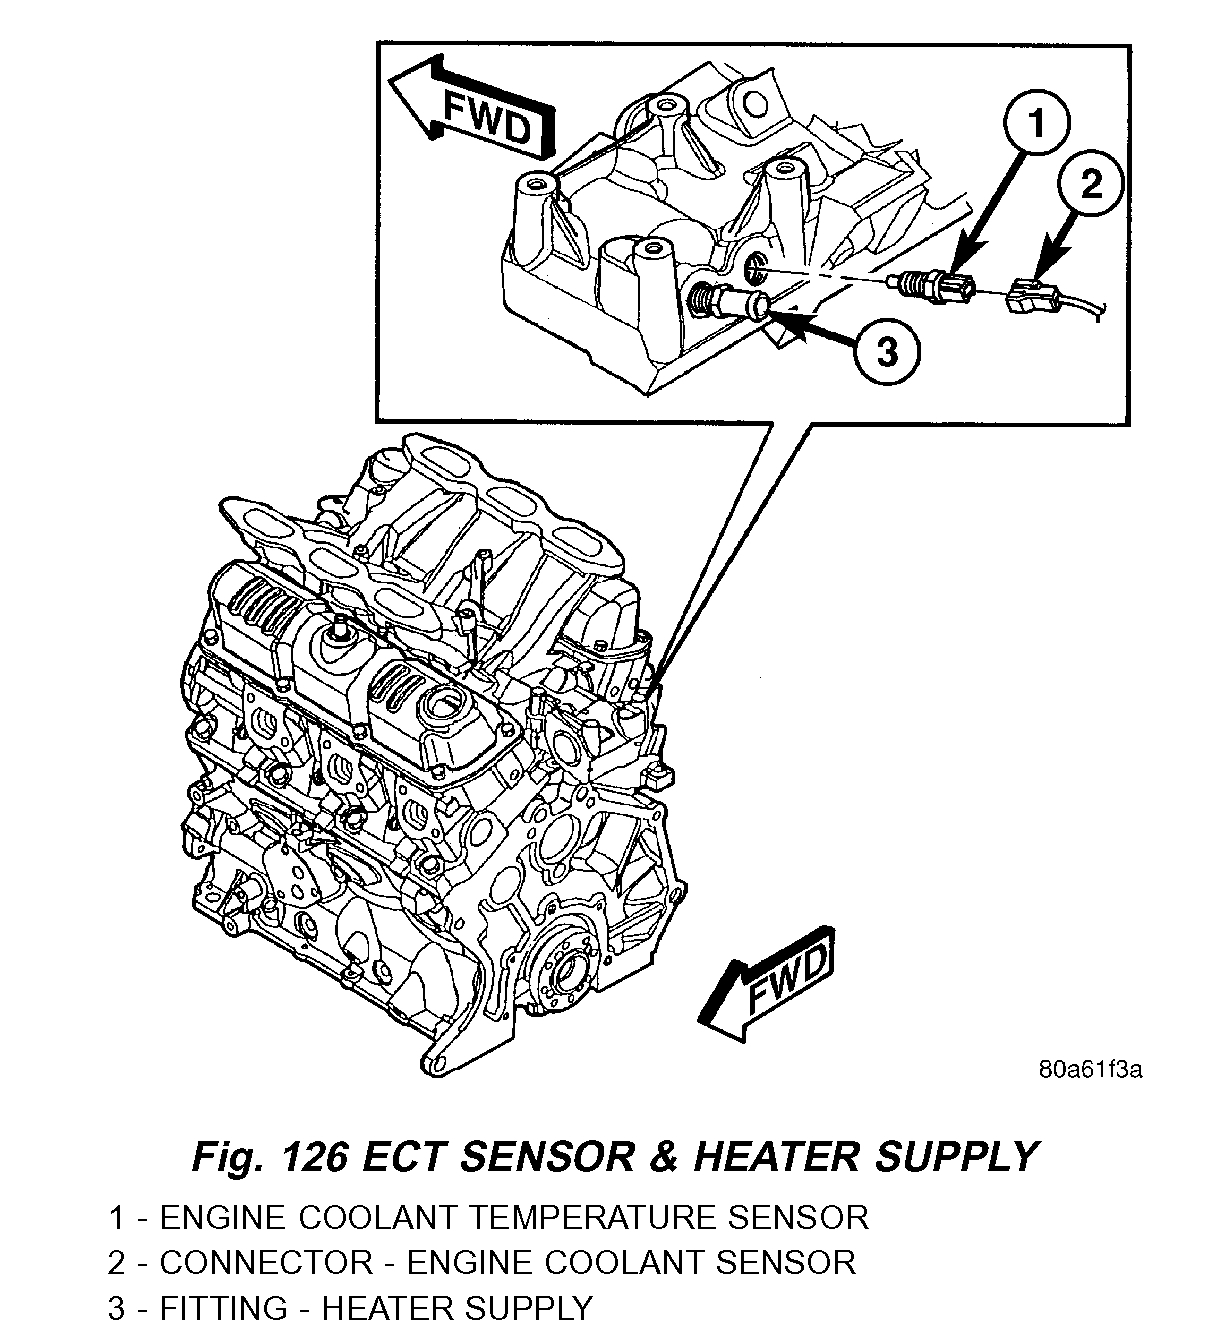
6. Disconnect heater supply hose and engine coolant temperature sensor (Fig. 126).
7. Disconnect the fuel injector wire harness.
8. Remove the fuel injectors and rail assembly (Fig. 125).
9. Remove radiator upper hose.
10. Remove the intake manifold bolts.
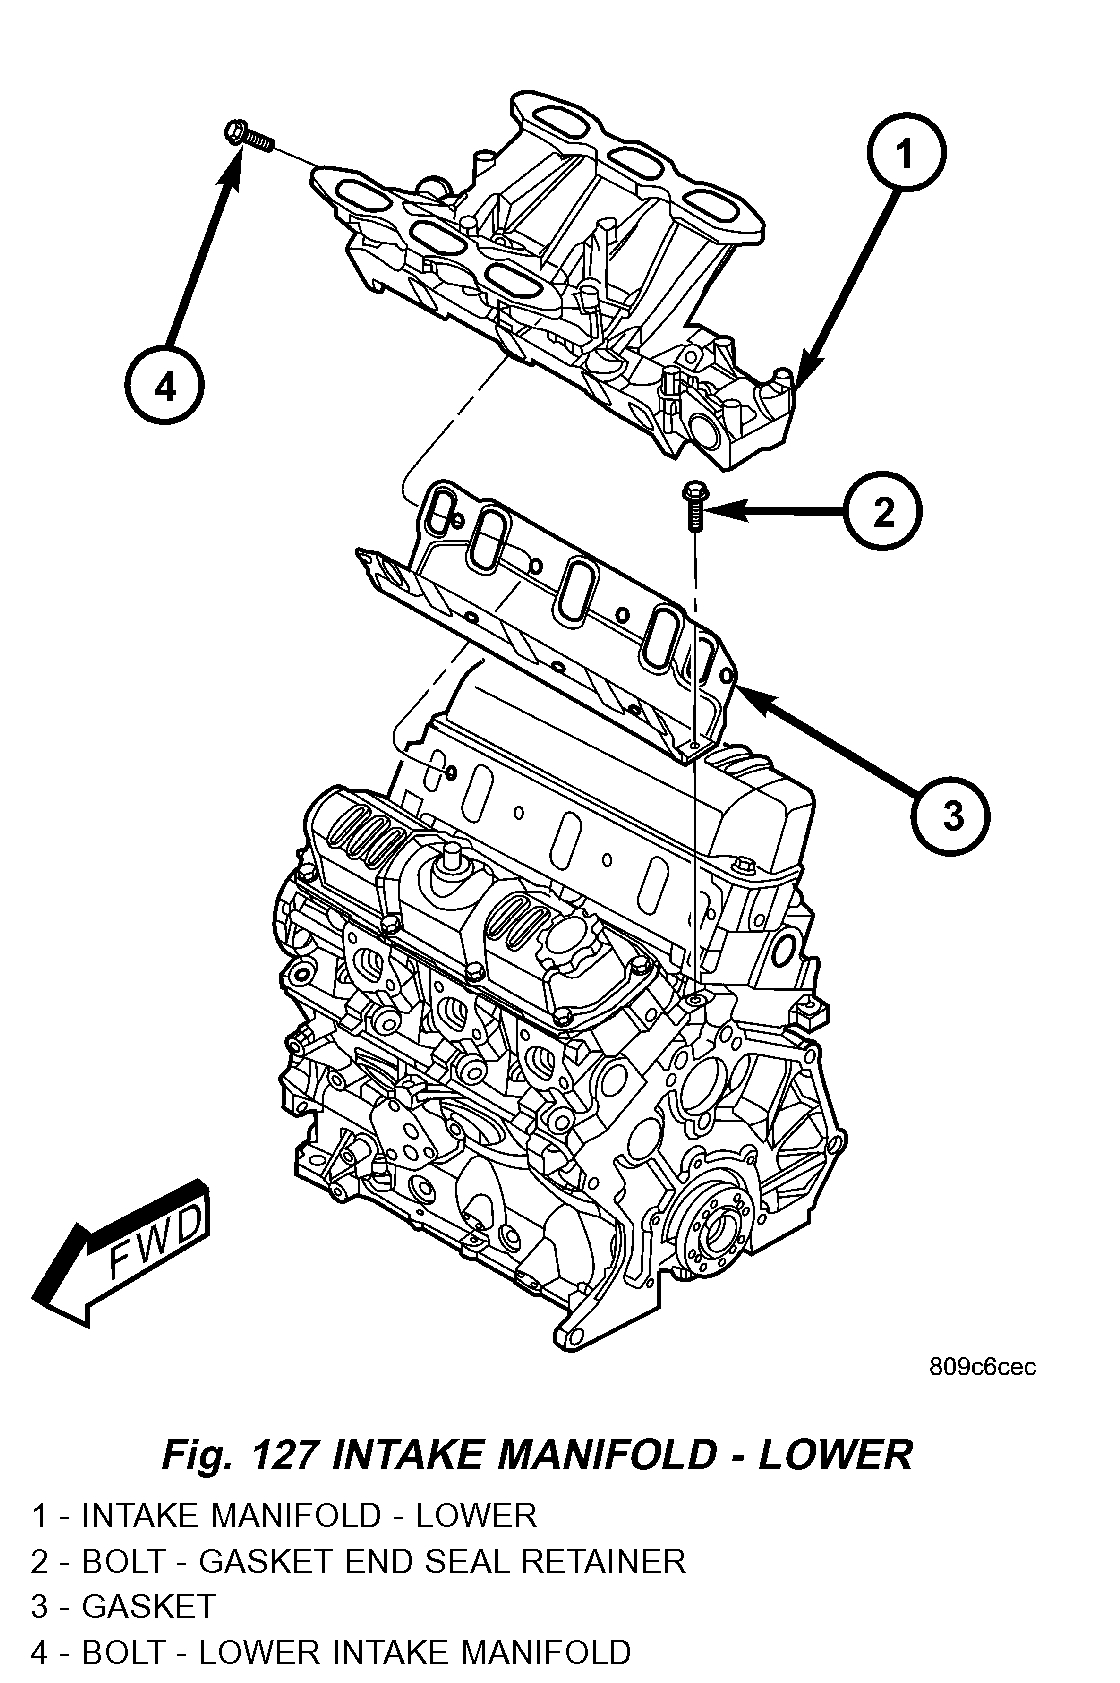
Fig.127
pic 3
11. Remove lower intake manifold (Fig. 127).
WARNING: INTAKE MANIFOLD GASKET IS MADE OF VERY THIN METAL AND MAY CAUSE PERSONAL INJURY, HANDLE WITH CARE.
12. Remove intake manifold seal retainers screws (Fig. 127). Remove intake manifold gasket.
13. Inspect and clean manifold.
CLEANING
1. Discard gasket(s).
2. Clean all sealing surfaces.
INSPECTION
Check for:
- Damage and cracks of each section.
- Clogged water passages in end cross-overs (if equipped).
- Check for cylinder head mounting surface distortion using a straightedge and thickness gauge.
INSTALLATION - LOWER INTAKE MANIFOLD
Fig.128
pic 4
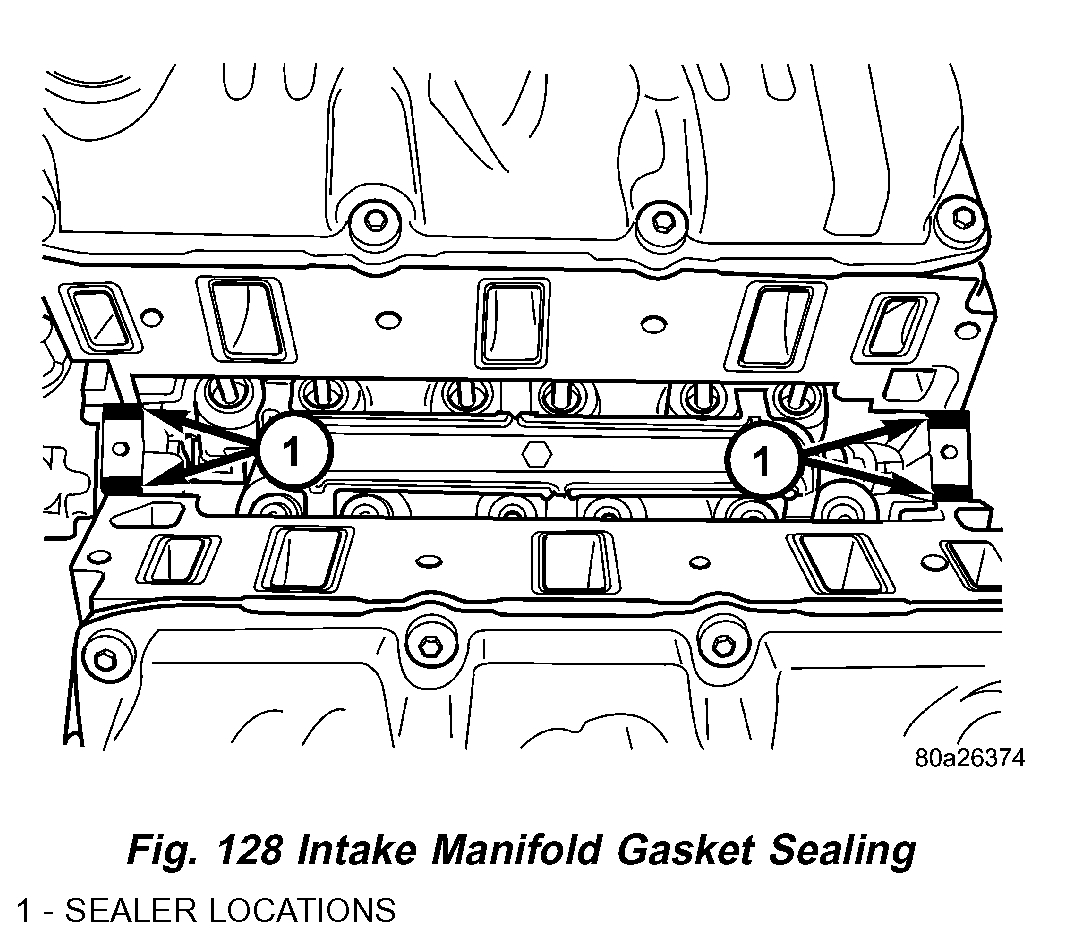
1. Place a bead (approximately 1/4 inch diameter) of Mopar Engine RTV GEN II onto each of the four manifold to cylinder head gasket corners (Fig. 128).
2. Carefully install the new intake manifold gasket (Fig. 127). Tighten end seal retainer screws to 12 Nm (105 in. lbs.).
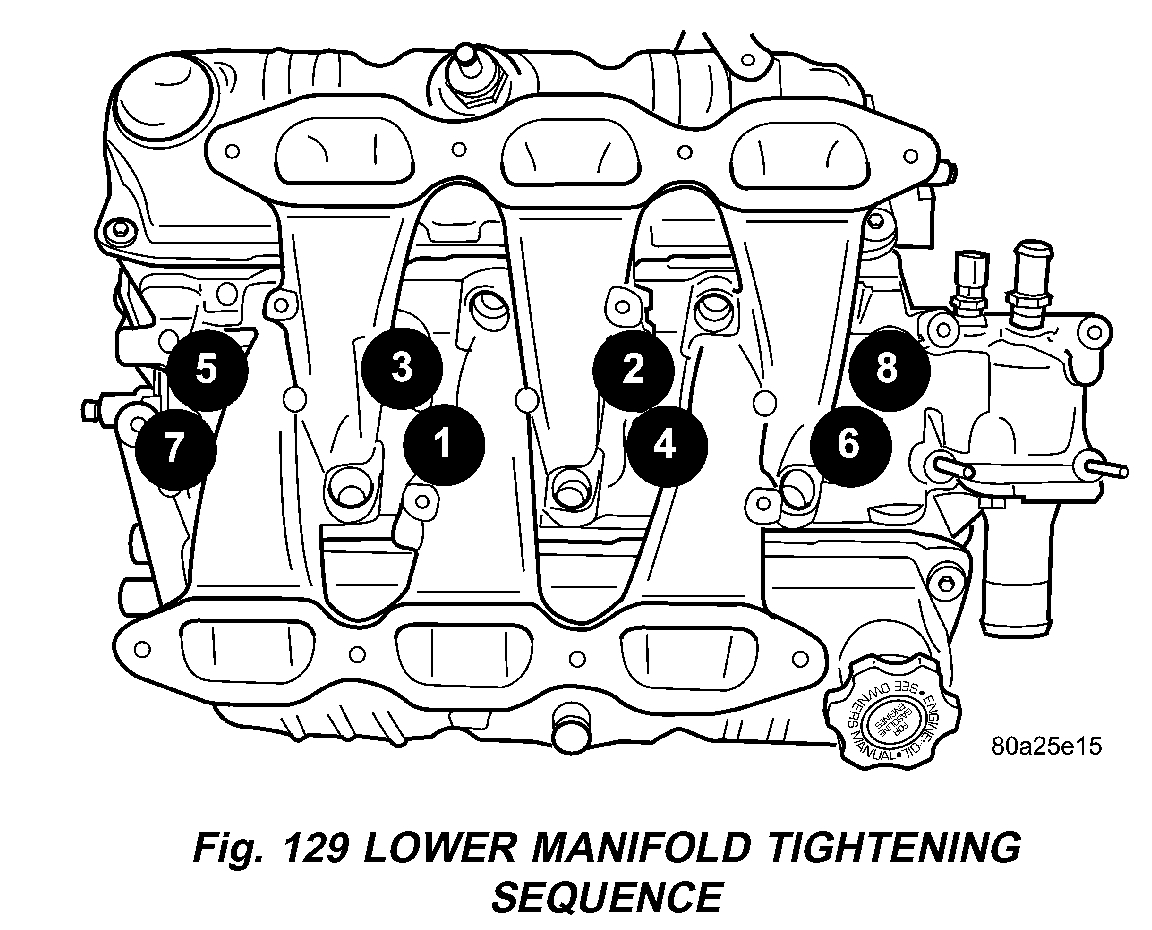
Fig.129
pic 5
3. Install lower intake manifold (Fig. 127). Install the bolts and torque to 1 Nm (10 in. lbs.). Then torque bolts to 22 Nm (200 in. lbs.) in sequence shown in (Fig. 129). Then torque again to 22 Nm (200 in. lbs.). After intake manifold is in place, inspect to make sure seals are in place.
4. Install the fuel injectors and rail assembly.
5. Connect fuel injector electrical harness.
6. Connect the engine coolant temperature sensor (Fig. 126).
7. Connect the heater supply (Fig. 126) and radiator upper hoses to manifold.
8. Connect the fuel line.
9. Install the upper intake manifold.
10. Connect negative battery cable.
11. Fill the cooling system.
_______________________________________________
Let me know what you decide or if you have questions.
Take care,
Joe
Images (Click to enlarge)
Nov 14, 2019 at 8:52 PM