Hi and thanks for using 2CarPros.
Often times when a water pump is going bad, it will make a noise. First, check to make sure the coolant level is full. If it isn't, you will need to look for leaks and since you heard a noise, my first suspect is the water pump. Take a look through this link.
https://www.2carpros.com/articles/symptoms-of-a-bad-water-pump
As you see in the link, there is a bearing that can go bad in the pump. Once that happens, often times the pump will leak at a weep hole. If the coolant level gets low, then the engine will over heat. If the coolant is full and there are no leaks, see the following comments.
Here is a link that shows how a pump is replaced if you find that is the problem:
https://www.2carpros.com/articles/water-pump-replacement
Now, on your vehicle, the water pump is run by the timing belt, which requires much more work to replace. Actually, I am go to provide direction for timing belt which will be required for pump to access the pump.
First, very basic directions for the pump itself. It will be a small part of the total operation.
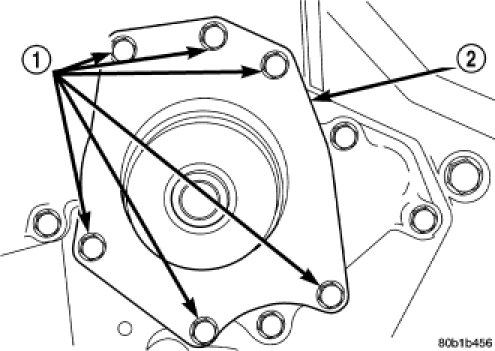
Picture 1 shows the pump
__________
1. Drain cooling system.
NOTE: The water pump is driven by the timing belt.
2. Remove engine timing belt.
3. Remove water pump mounting bolts. Note position of longer bolt for proper re-installation.
4. Remove water pump body from engine.
______________________________________________
Removal:
REMOVAL - TIMING BELT
TIMING VERIFICATION
See picture 2
Remove the outer timing covers. Rotate the crankshaft until the pointer on the crankshaft sprocket aligns the TDC mark on the oil pump. Check to determine if the camshaft sprocket timing marks are aligned with the marks on the inner timing cover. It may take an additional full revolution of the crankshaft before the camshaft sprocket marks are aligned.
CAUTION: The 4.0L is NOT a freewheeling engine. Therefore, loosen the valve train rocker assemblies before servicing the timing drive.
1. Perform fuel pressure release procedure.
2. Disconnect negative battery cable.
3. Remove both cylinder head covers and loosen the rocker arm assemblies.
4. Remove the front timing belt cover.
5. Mark belt running direction, if timing belt is to be reused.
CAUTION: When aligning timing marks, always rotate engine by turning the crankshaft. Failure to do so will result in valve and/or piston damage.
6. Rotate engine clockwise until crankshaft mark aligns with the TDC mark on oil pump housing and the camshaft sprocket timing marks are aligned with the marks on the rear cover
7. Remove the timing belt tensioner and remove timing belt.
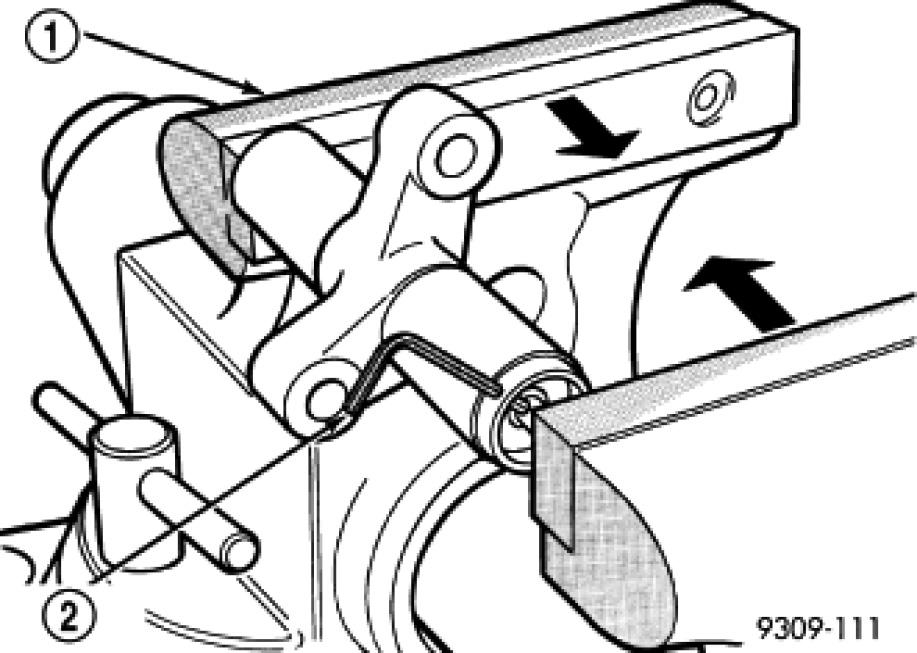
See picture 3
8. Inspect the tensioner for fluid leakage.
9. Inspect the pivot and bolt for free movement, bearing grease leakage, and smooth rotation. If not rotating freely, replace the arm and pulley assembly.
10. When tensioner is removed from the engine it is necessary to compress the plunger into the tensioner body.
CAUTION: Index the tensioner in the vise the same way it is installed on the engine. This ensures proper pin orientation when tensioner is installed on the engine.
a. Place the tensioner into a vise and SLOWLY compress the plunger. Total bleed down of tensioner should take about 5 minutes.
b. When plunger is compressed into the tensioner body install a pin through the body and plunger to retain plunger in place until tensioner is installed.
______________
Belt install see picture 4
TIMING BELT
CAUTION: If camshafts have moved from the timing marks, always rotate camshaft towards the direction nearest to the timing marks (DO NOT TURN CAMSHAFTS A FULL REVOLUTION OR DAMAGE to valves and/or pistons could result).
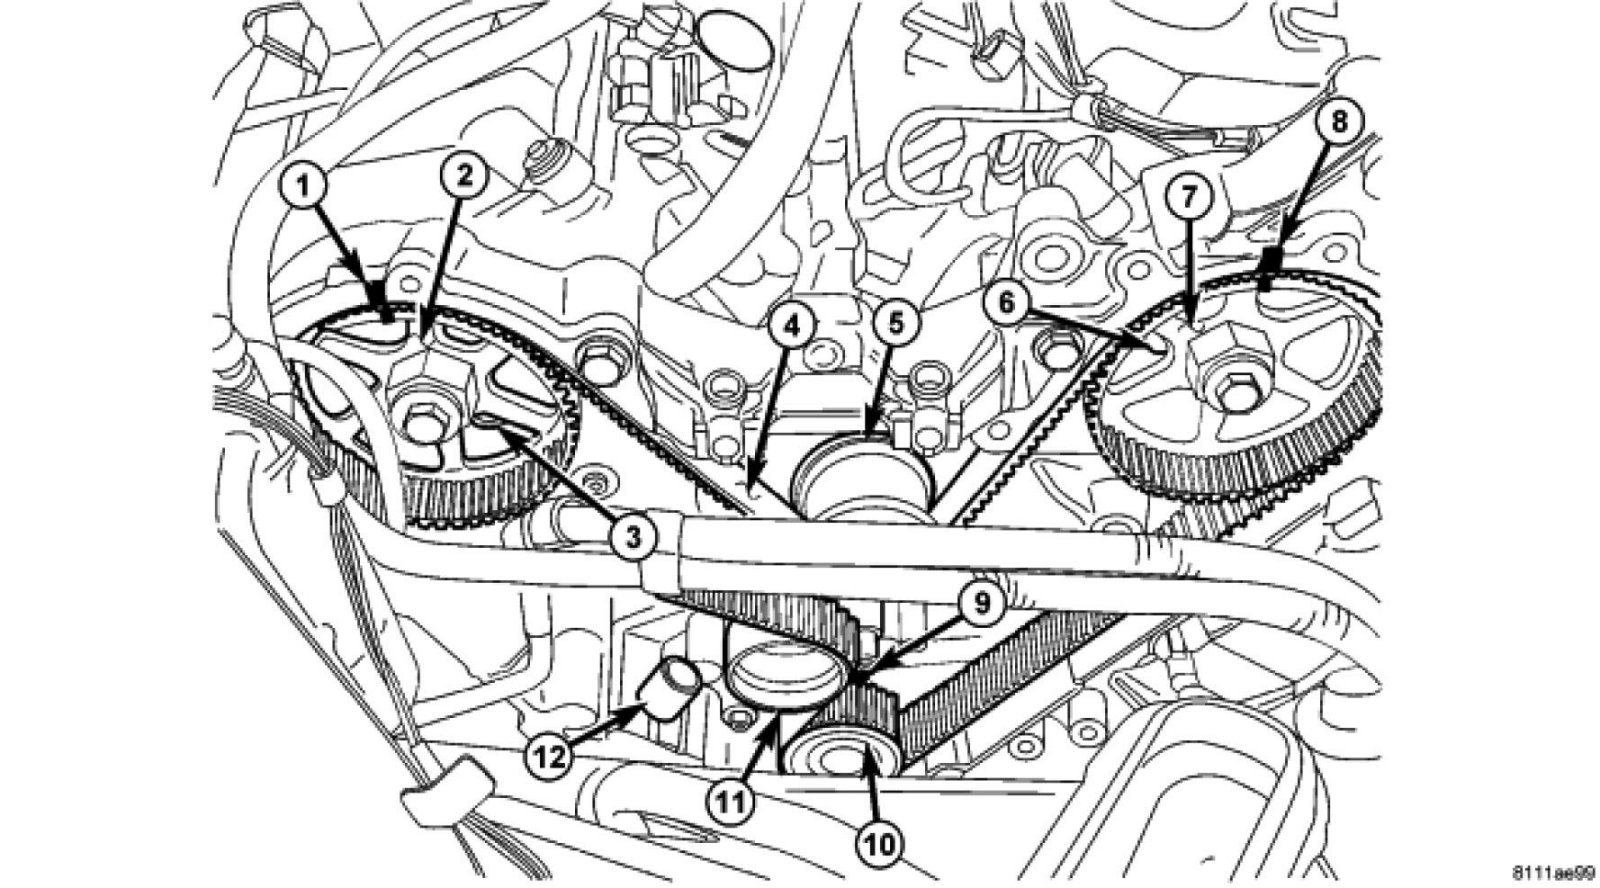
Pic 4
1. Align the crankshaft sprocket (10) with the TDC mark (9) on oil pump cover.
2. Align the camshaft sprockets (2, 7) timing reference marks (1, 8) with the marks on the rear cover.
3. Install the timing belt starting at the crankshaft sprocket (10) going in a counterclockwise direction. Install the belt around the last sprocket. Maintain tension on the belt as it is positioned around the tensioner pulley (11).
NOTE: If the camshaft gears have been removed it is only necessary to have the camshaft gear retaining bolts installed to a snug torque at this time.
4. Holding the tensioner pulley (11) against the belt, install the tensioner into the housing and tighten to 28 Nm (250 in. lbs.). Each camshaft sprocket mark should remain aligned the cover marks.
5. When tensioner is in place pull retaining pin to allow the tensioner to extend to the pulley bracket.
6. Rotate crankshaft sprocket 2 revolutions and check the timing marks on the camshafts and crankshaft. The marks should line up within their respective locations. If marks do not line up, repeat procedure.
NOTE: If camshaft gears have been removed and timing is correct, counterhold and tighten the camshaft gears to final torque specification Refer to BELT/CHAIN AND SPROCKETS - INSTALLATION.
7. Install the front timing belt cover.
8. Tighten the rocker arm assemblies and install the cylinder head covers.
9. Connect negative battery cable.
_____________________________________________________________________________________
If the coolant level isn't low, I suspect there is an issue with the cooling fan. They can bake noise when bad. If they are no longer turning on, the motor will make noise. Allow the engine to run until it starts getting hot and see if the fans turn on.
https://www.2carpros.com/articles/how-an-electric-cooling-fan-works
Here is a link that shows in general how one is replaced:
https://www.2carpros.com/articles/replace-electric-fan-motor
If the fans don't turn on, it could be a relay, a fuse, or a bad motor. With the engine cool and off, spin the fan blade to see if it spins freely. IF it doesn't, replace the motor.
Here are the directions:
___________
REMOVAL
REMOVAL
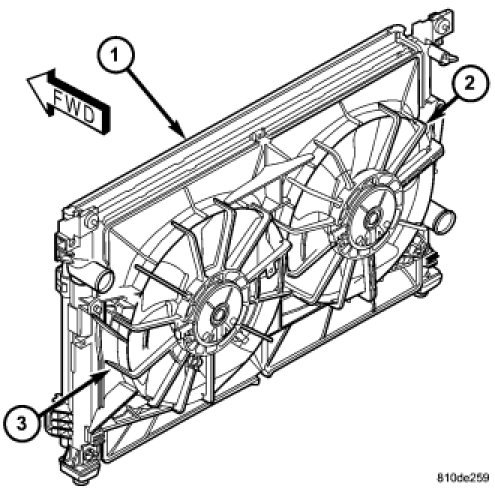
See picture 5
There are no repairs to be made to the fan or shroud assembly. If the fan is warped, cracked, or otherwise damaged, it must be replaced as an assembly.
1. Remove the front fascia.
2. Disconnect the radiator fan electrical connectors.
3. Remove radiator fan(s) retaining screw.
4. Remove the radiator fan(s) by lifting upward to release from mounts.
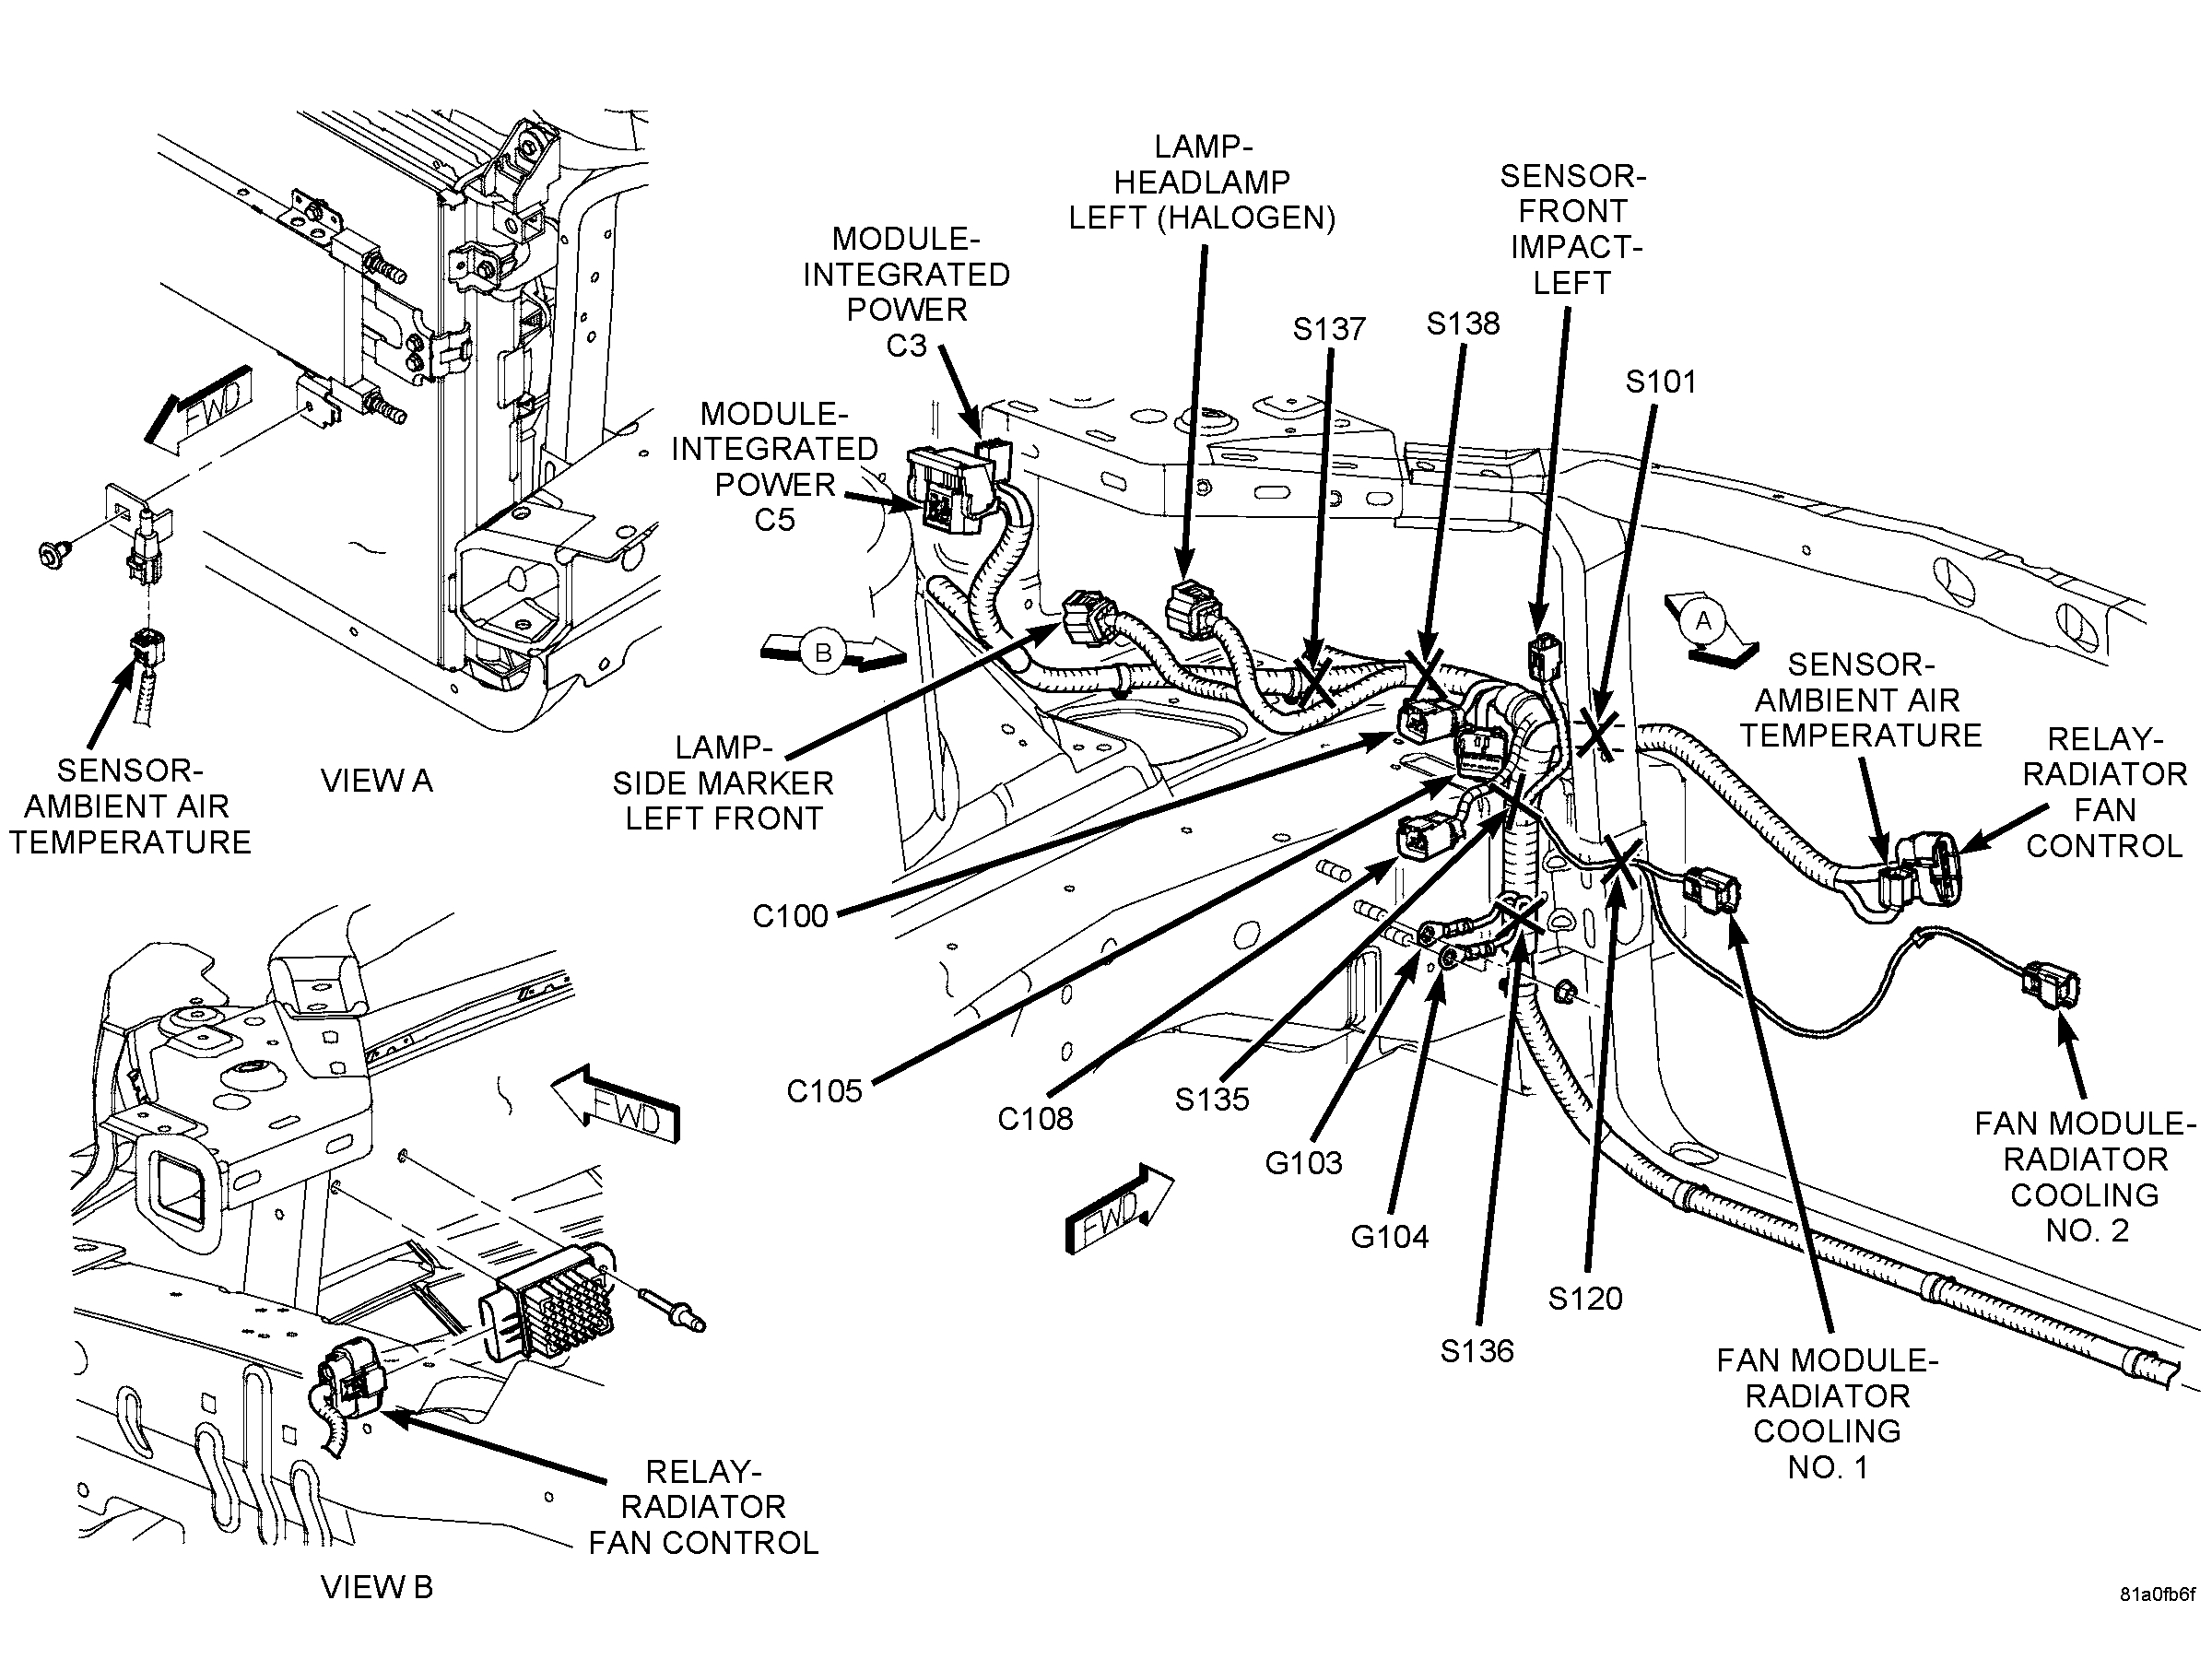
I honestly don't feel a bad relay or fuse would cause a noise. However, a bad fan motor can cause a fuse to blow. The last picture shows the module and wiring for the fans. Again, I don't feel that is the cause because of the noise you heard. I just wanted to add it in case you wanted to look for it to check connections.
Let me know if any of this helps or if you have other questions.
Take care,
Joe
Images (Click to make bigger)
Monday, December 24th, 2018 AT 6:29 PM