I think I had previously mentioned that I purchased a relay tester and two new relays. The relay tester was used on the old relay and the new relays for functionality. They all gave the same response that they were good. I think I also mentioned earlier the name of the relay so maybe you could look it up.
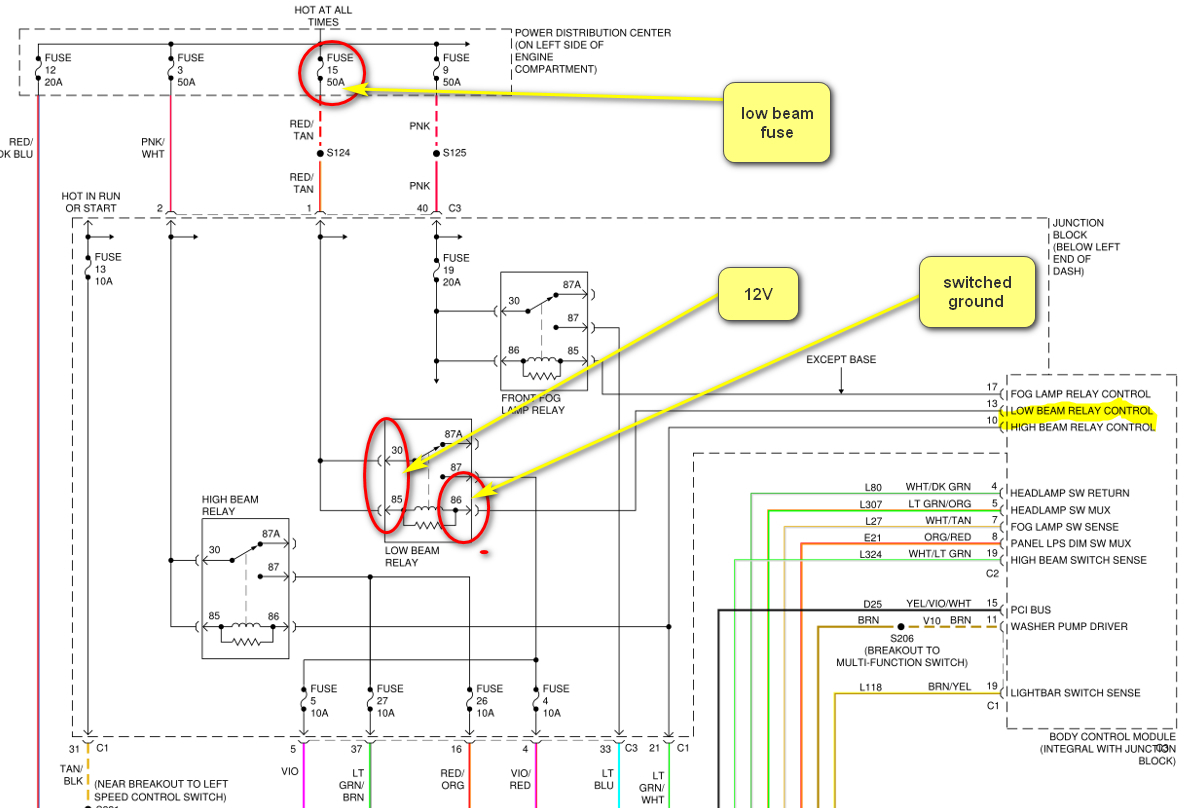
what you mentioned in your post above was done with instructions by Boris, Randy, Kenny and your other coworker. The only thing I haven't done yet is to jump the terminals. I will get a wire with alligator clips and insert them into terminals 30 and 87, turn the car key to the on position and turn the light on and see what happens.
Sep 21, 2022 at 8:33 AM