Good morning,
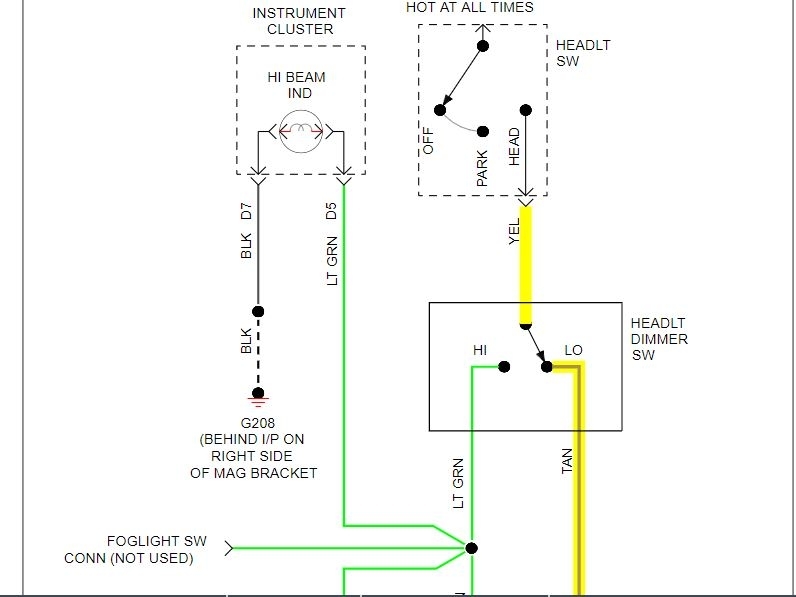
There is a dimmer switch that controls low and high beams. You need to test and see if power is coming out of the switch for the low beams.
https://www.2carpros.com/articles/no-tail-lights-exterior-running-lights-tail-lights-out
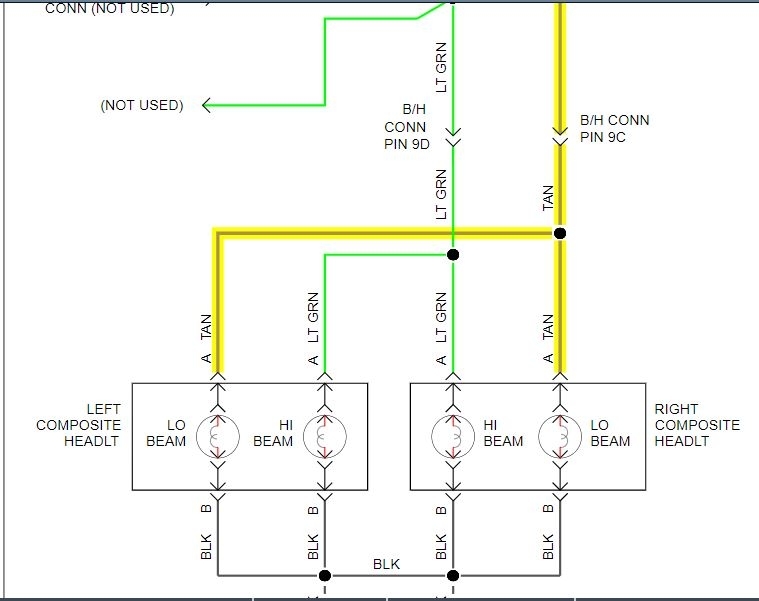
I attached a wiring diagram for you to view and see the color of the wire you need to test.
https://www.2carpros.com/articles/how-to-check-wiring
https://www.2carpros.com/articles/how-to-use-a-voltmeter
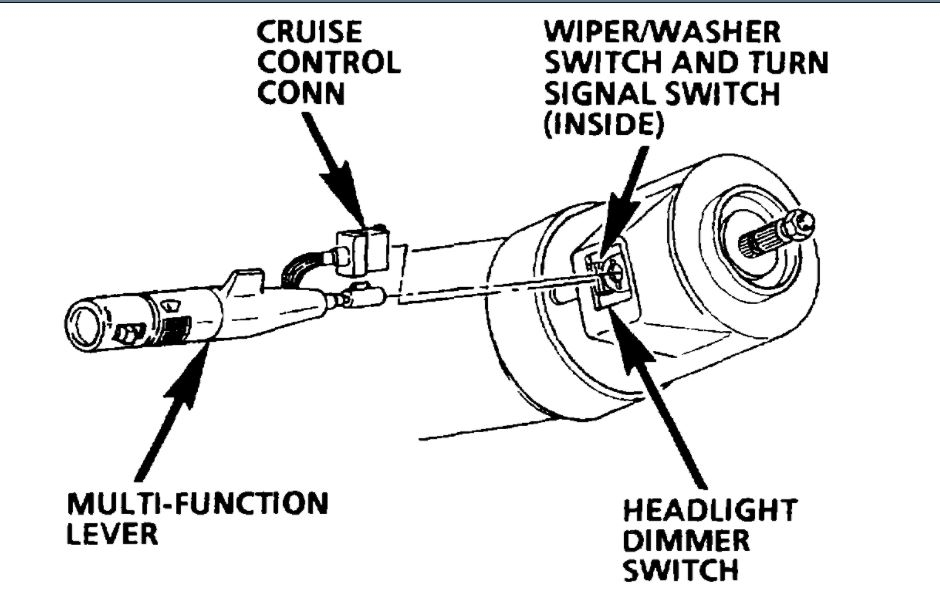
The switch is located at the bottom of the steering column with the ignition switch.
Roy
REMOVAL
1. Place shift lever in P position and lock cylinder in Off-Lock position.
2. Disconnect battery ground cable.
3. Remove steering column from vehicle.
4. Disconnect turn signal switch connector from ignition and dimmer switch assembly connector.
5. Disconnect pivot and pulse switch connector from ignition and dimmer switch connector.
6. Remove bowl shield screw, bowl shield nut and bowl shield.
7. Remove dimmer and ignition switch assembly as follows:
a. Remove dimmer switch nut, then the upper mounting stud.
b. Remove dimmer switch, then the dimmer switch actuator rod.
c. Remove lower mounting stud, then the ignition switch from ignition switch actuator rod.
INSTALLATION
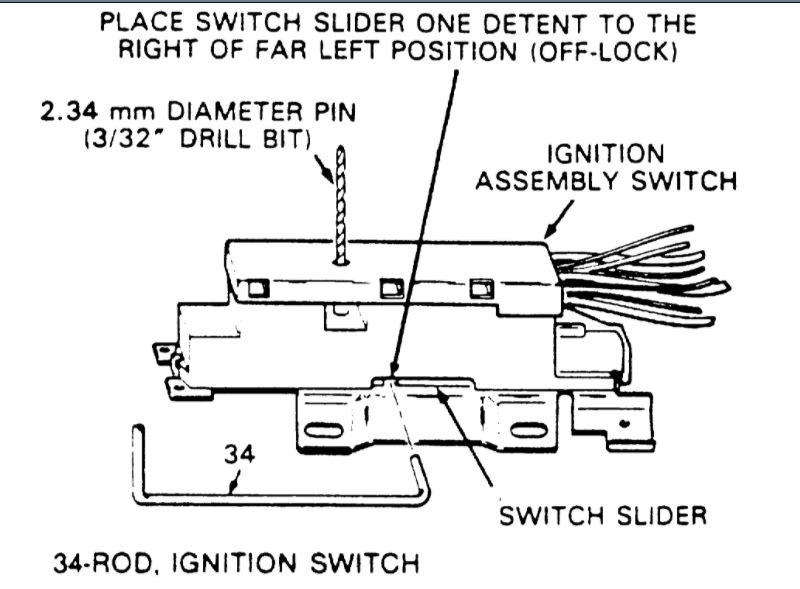
Lock cylinder set must be in the Off-Lock position when installing ignition switch to ensure proper switch slider positioning.
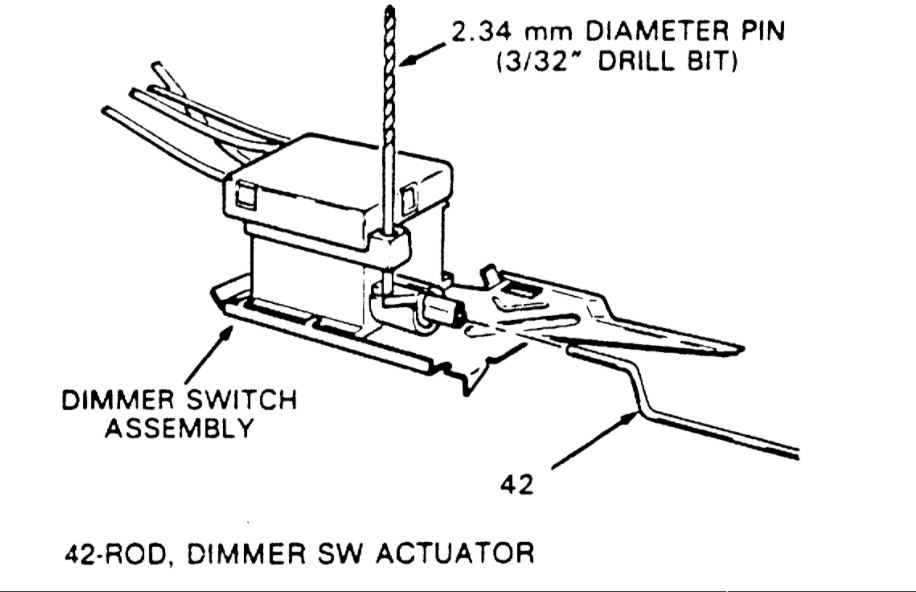
1. Place ignition switch slider in far left position and move back one detent to right, then insert a 3/32 inch drill bit in adjustment hole on ignition switch to hold switch slider in proper position during installation.
2. Install ignition switch to switch rod.
3. Install ignition switch to steering column jacket assembly with lower mounting stud. Torque to 35 in lb.
4. Remove adjustment tool from ignition switch.
5. Install dimmer switch actuator rod through hole in instrument panel bracket and into hole in dimmer switch rod cap.
6. Install dimmer switch assembly on lower mounting stud with dimmer switch nut and upper mounting stud but do not tighten.
7. To adjust dimmer switch, insert a 3/32 inch drill bit and push switch against actuator rod to remove all lash.
8. Torque dimmer switch nut and upper mounting stud to 35 in lb., then remove adjustment tool from dimmer switch.
9. Install bowl shield to column bowl and upper mounting stud, then install shield screw. Torque to 35 in lb.
10. Install bowl shield nut. Torque to 35 in lb.
11. Connect turn signal switch connector to ignition and dimmer switch assembly connector and snap in place.
12. Connect pivot and pulse switch connector to ignition and dimmer switch connector.
13. Install steering column and connect battery ground cable.
Images (Click to enlarge)
Mar 30, 2021 at 5:21 AM