Cool air is coming out from behind glove box while driving

Tiny
HEATH01
  • MEMBER
  • 2002 CHEVROLET AVALANCHE
  • 5.3L
  • V8
  • 4WD
  • AUTOMATIC
  • 215,000 MILES
During cold months when heater is running, cool air is coming out from behind glove box while driving. Have plenty of heat just got a draft that's chilling for passenger in winter.
Sunday, March 28th, 2021 AT 1:30 PM

11 Replies

Tiny
STEVE W.
  • MECHANIC
  • 12,949 POSTS
Try putting you hand there and changing the blower speeds, does the amount of air change as the speeds change? Now try switching from hot/cold and see if anything changes, next try that on the recirculate setting as well, It sounds like there is an air leak around the blower housing. It could be the housing or possibly the cabin air filter door is open or loose.
The air filter is located between the blower fan and the HVAC case. To access it you remove the under dash insulator panel, then remove the door over the filter. The filter will slide out in two pieces. If it hasn't been changed in a while I have a vacuum handy, they can dump quite a bit up junk out. Clean up the area, slide a new filter into place and put the door back on. If the door has warped or shifted you can replace it or apply some sealing foam like you use for weather strips. Or you can add extra screws if needed, just be careful not to damage the evaporator core as it's next to the filter. If you can find them the filters with activated carbon in them are a good upgrade. They cut down on exterior odors getting into the cabin.
Was this
answer
helpful?
Yes
No
Sunday, March 28th, 2021 AT 2:55 PM
Tiny
HEATH01
  • MEMBER
  • 16 POSTS
Steve W,

The cool air is not coming from the cabin filter door. It comes from the upper right corner behind the glove box. While truck is moving and warmed up, no fan on I can feel it with my hand. When I turn on the fan the volume of cold air decreases and is almost nil at full fan speed. Returning the fan speed to off and pushing the recirculation button the cool air increases. Adjusting the temperature does not effect the cool air amount. Pushing the outside air button does not effect the cool air volume. Turning on the A/C does not effect it either. Nor does switching the mode button from floor vent through defrost vent settings.
Was this
answer
helpful?
Yes
No
Tuesday, March 30th, 2021 AT 5:16 PM
Tiny
STEVE W.
  • MECHANIC
  • 12,949 POSTS
Okay. That sounds like the housing seals are failing, they are a foam type seal and deteriorate over time. The repair process is not fun as it involves removing the HVAC case to get to the area the seals are. To do that you need to strip out most of the interior to remove the dash and then the HVAC case. It is the same process as changing the heater or evaporator core. Which if you are going to do the seals I would suggest rebuilding the entire case just to avoid needing to take it apart again when one of those starts leaking.

This is the book process for the case:

1. Drain the engine coolant.
2. Reposition the inlet heater hose clamp from the heater core.
3. Remove the inlet heater hose from the heater core.
4. Reposition the outlet heater hose clamp from the heater core.
5. Remove the outlet heater hose from the heater core.
6. Remove the accumulator.
7. Remove the IP carrier. (This means the dash assembly and console)
8. Remove the heater/vent module drain hose.
9. Disconnect the electrical harnesses and the ground connections.
10. Remove the heater/vent module mounting nuts and the screws.
11. Remove the heater/vent module assembly from the vehicle.

What they don't mention is that the A/C system also has to be recovered and disconnected as well.
Was this
answer
helpful?
Yes
No
Tuesday, March 30th, 2021 AT 6:38 PM
Tiny
HEATH01
  • MEMBER
  • 16 POSTS
Steve W,

Okay, that does not sound like fun. I found a GM tech document # 01-01-37-008 (ID # 791061) a couple months ago. It appears to point in the same direction as your thoughts but does it without totally removing the HVAC unit. Are you able to access this document and see if it is fixing the same seal you mention?
Was this
answer
helpful?
Yes
No
Wednesday, March 31st, 2021 AT 1:35 PM
Tiny
STEVE W.
  • MECHANIC
  • 12,949 POSTS
It is the same type of seal but that was on the earlier design of trucks before the 2002 redesign. However it's possible you could gain access there.

Bulletin No: 01-01-37-008

Passenger Side of Vehicle Colder/Warmer Than Driver's Side
(Repair HVAC Case to Cowl Seal)

Models
1999-2001 Chevrolet and GMC C/K Pickup (Silverado, Sierra) and Utility (Suburban, Tahoe, Yukon, Yukon XL) Models
2002 Cadillac Escalade

Condition

Some customers may comment that the passenger side of the vehicle may be
1. Colder than the driver's side when the heat mode is on.
2. Warmer than the driver's side when the air conditioning (A/C) mode is on.
3. There may be dampness on the vehicle dash assembly when the A/C mode is on.

Cause
Condition may be due to poor sealing of the HVAC air inlet case to the front of dash or the recirculation mode door actuator may not hold the recirculation door closed while driving.

Correction

Replace the recirculation door actuator (if necessary) and repair the HVAC case to cowl seal using the following procedures
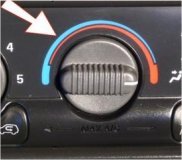
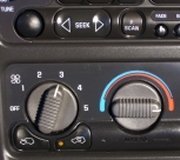
1. Place the A/C control in the manual heat mode.
2. Remove the fixed mast radio antenna.
3. Open the hood and install fender covers.

4. Remove both wiper arm assemblies using the following procedure
4.1. Disconnect the washer solvent hose from the air inlet grille panel nozzle.
4.2. Remove the cover from the wiper arm retainer. Remove the retainer. Rock the wiper arm back and forth in order to loosen the arm from the drive shaft. Remove the wiper arm.
5. Lower the hood.

6. Remove the air inlet grille panel using the following procedure
6.1. On each end of the air inlet grille panel is a rubber flap for the hood hinge cutout. Lift this flap and remove the air inlet grille panel attaching screw.
6.2. Remove the air inlet grille panel center top push pin.
6.3. Remove the clips that position the forward edge of the grille panel to the top of the cowl.
6.4. Disconnect the windshield washer supply hose from the bottom of the grille panel.
6.5. Remove the air inlet grille panel by sliding the panel rearward up the windshield and out.

This is the part that is likely different. I'm not sure if they used the same cowl stamping on your 2002 as they did on the earlier trucks. However it's not that difficult to remove the cowl cover as above and look to see if it might work. The thing is that normally a TSB that applies to later vehicles will carry over and this one doesn't it stops at the 2001 trucks.

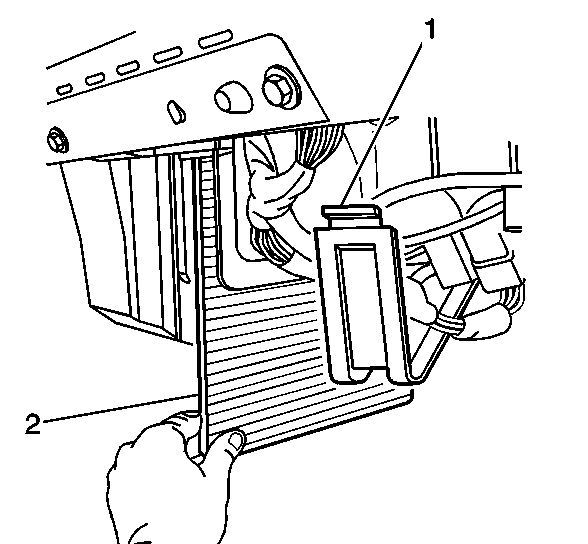
7. Just to the left of the right hood hinge, on the horizontal surface of the cowl, locate a cover that is sealed in place. The cover has TRW stamped into it.
8. With a sharp knife, cut out the panel following the panel impression in the sealer tape.
9. Place a lifting device between the cover and the dash. Lift the cover enough to allow another tool to depress and release the front retaining tabs by pushing rearward on them. Remove the cover.
10. Look through the opening where you just removed the cover. You will see what looks like a piece of foam about 76 x 127 mm (3 x 5 in). This is the A/C recirculation door that is within the HVAC module.
11. Reach into the opening and carefully pull on the air inlet recirculation door. If the recirculation door moves with very little effort, replace the air inlet (recirculation) door actuator (Manual systems only). For systems with the Automatic Temperature control, initialize the system using published Service procedures.
12. Between the top of the HVAC air inlet module (appears as a 6 mm (1/4 inch) black strip) and the cowl sheet metal is a foam seal. This foam seal may be improperly positioned or damaged in some way (insufficient crush/sealing). This may allow outside ambient air to enter the passenger compartment incorrectly (under driving conditions). This can be corrected using the following procedure

Important
It is imperative that a good seal be achieved over the entire surface areas (no voids or skips), especially around the rear and sides of the HVAC case to cowl areas.

12.1. Seal the area between the cowl and HVAC case with RTV Silicone Rubber Sealant, P/N 12345739.
12.2. Using your finger, from the engine side of the cowl, ensure that the foam is stuck nicely to the HVAC module and does not have any distortions.
12.3. From the engine side of the cowl, working through the opening in the horizontal surface of the cowl, place a shop cloth into the opening and cover the blower fan. This keeps silicone from dripping onto the motor and causing an imbalance condition.
12.4. From the engine side of the cowl, working through the opening in the horizontal surface of the cowl, apply the RTV silicone to bridge the gap and cover the foam between the cowl sheet metal and the HVAC module case. Inspect your work with a light and a mirror. Ensure that no gaps or skips are present in the RTV seal.
12.5. Inspect your work for potential drips, runs, etc. If no problem is seen, remove the shop cloth covering the blower motor.

13. Apply a 3 mm (1/8 in) bead of weather-strip adhesive, P/N 12345097 around the opening in the horizontal surface of the cowl, where the cover fits into the cowl.
14. Place the cover on the workbench, top on the surface, and apply a 3 mm (1/8 in) bead of weather-strip adhesive on the edge of the cover.
15. Place the cover into the cowl opening and snap into place.
16. Apply another bead of weather-strip adhesive around the joint between the cover and the top of the cowl. Smooth this bead into a smooth surface with a finger or tool of some kind.
17. Place the leaf screen to the cowl. Attach the washer supply hose to the bottom of the air inlet grille panel. Do not place the fasteners in at this time.
18. Install the radio fixed mast antenna. Tighten 1/4 turn after contact is made with the base.
19. Lower but do not close the hood.
20. Center the opening in the air inlet grille panel around the antenna mast and then install the air inlet grille panel retaining screws.
Tighten the screws to 2 Nm (18 lb in).

21. Raise the hood.
22. Reinstall the air inlet grille panel center retainer and front edge retaining clips.
23. Cycle the wipers to ensure the wiper system is in the parked position.

Important-
Inspect the windshield lower edge on each side. About 51-76 mm (2-3 in) from the bottom, you will find a 13 mm (1/2 in) long black mark embedded in the glass. The black line is the position for the wiper blade to be in when the wiper system is in the parked position.

24. Install the wiper arm assemblies. Position the wiper blades just below the black marks in the windshield.

25. Install the retaining nuts.
Tighten the retainers to 25 Nm (18 lb ft).

26. Reconnect the washer hoses.
27. Remove the fender covers.
28. Close the hood.
Was this
answer
helpful?
Yes
No
+1
Wednesday, March 31st, 2021 AT 5:38 PM
Tiny
HEATH01
  • MEMBER
  • 16 POSTS
Steve W,

Okay, the owners manual does say that there is outside air entering truck in either heat or A/C mode with fan off.
So the question is, how much is normal?
I have the automatic temperature control version, how many actuators are there and where are they located?
Is there a manual for HVAC unit or prints that shows all the components?
One thing I forgot to mention is after truck is warmed up and I park it, I turn down the fan and temperature control from max hot to say 72 degrees I hear a sound like a thud. Like something is sticking. Is this part of the problem too? The tech document states replacing the recirculation mode door actuator.
Was this
answer
helpful?
Yes
No
Thursday, April 1st, 2021 AT 2:43 PM
Tiny
STEVE W.
  • MECHANIC
  • 12,949 POSTS
When the system is not in recirculation mode all of the air that comes into the vehicle is from outside air. It is pulled from the cowl area through the HVAC case. Fan on/off, temperature or mode makes no difference in that.

The only difference in the auto vs manual control system is that yours has more control over what the actuators do to maintain a set temperature, in the manual version the person will turn the heat up/down or fan speeds to control the temperature. In yours, you set a temp of say 80 and it reads the interior temperature through the aspirator and controls the fan, blend door and AC to maintain that temperature.

The thud sound you hear is the blend door, in max heat it will be fully open, when you turn the temperature down it will close to reduce the air temperature. The recirculation actuator is going to put the door in the normally closed position. In that position the air from outside the vehicle is what you get inside. That was why I had you turn the controls on and off and feel the airflow earlier. It showed there was no difference in the air you felt, if the temperature of the air changed or the amount changed I would suspect one of the actuators, in this case your testing points only at the case seals. The problem then is how to repair them.
The TSB applies to the earlier trucks, the one you own uses a different design in the case and body of the truck so it likely doesn't apply at all. However it might be possible to access the upper case seal through the cowl panel, I've never tried it on that particular truck, on the regular P/U version you need to pull the case to get to the seals, not an issue when the truck is on the assembly line, but once built it's not fun.

Service information shows the images I attached earlier, The only thing that would show better would be the build manual, but you won't find that outside of GM.
Was this
answer
helpful?
Yes
No
Thursday, April 1st, 2021 AT 10:28 PM
Tiny
HEATH01
  • MEMBER
  • 16 POSTS
Steve W,

Thanks for all the help and information. I may try opening up the cowl access door and have a look. Or have my better half keep using the blanket during the winter.
Was this
answer
helpful?
Yes
No
Saturday, April 3rd, 2021 AT 3:45 PM
Tiny
STEVE W.
  • MECHANIC
  • 12,949 POSTS
I would maybe hit a you pull it yard and see if you can get in on a vehicle that you don't own. Would allow you to try different things. It might be possible to add something under the dash to block the air if you can't get in another way.
Was this
answer
helpful?
Yes
No
Saturday, April 3rd, 2021 AT 6:34 PM
Tiny
HEATH01
  • MEMBER
  • 16 POSTS
Steve W,

I did some more investigating, got AC/heater module, air distribution system exploded views from local GM dealer. I also took another drive. With fan, AC/heater off the air comes in right at the recirculation door. Pushing the recirculation button on, the cool air increases when door moves then slows down to the level it started with after it opens. And visa versa pushing it off. Also the foam on the door crumbles when I touched it, yikes. So, I am thinking the door is the issue. How bad of an ordeal is that to replace?
Was this
answer
helpful?
Yes
No
Saturday, April 10th, 2021 AT 1:39 PM
Tiny
STEVE W.
  • MECHANIC
  • 12,949 POSTS
Same as replacing the other seals, unless you can come up with a way to sneak it into the housing around the door and get it to stick. If it were my vehicle I might think about using something like a dremel tool to cut an access hole in the case where I could get to the door, maybe even make it where I could get to the outer seal and use some of the minimal expanding foam to seal the outer case to the cowl area, then glue the cut out section back in once I was done, if it were mine that is. But I'm lazy and don't like pulling the dash out.
Was this
answer
helpful?
Yes
No
Saturday, April 10th, 2021 AT 2:17 PM

Please login or register to post a reply.

Sponsored links