Hello -
Thanks for the info................
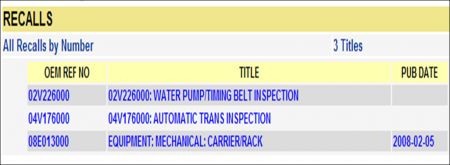
Okay........here is what I got..........you do have several recalls on y our vehicle......I would give the VIN to the dealer and have them check to see what applies and they should be fixed for free. The recalls are below.
Next...the one is on the transmissions. I have put that below.......Lord willing they will check your transmission and there is overheating and it is replaced. That would be what we hope for.
04V176000: AUTOMATIC TRANS INSPECTION
NHTSA RECALL BULLETIN
Reference Number(s): 04V176000
Related Ref Number(s): 04V176000
ARTICLE BEGINNING
VEHICLE DESCRIPTION
Model(s): 2000 Acura 3.2TL
2001 Acura 3.2TL
2001 Acura 3.2CL
2001 Acura MDX
2002 Acura 3.2TL
2002 Acura 3.2CL
2002 Acura MDX
2002 Honda Odyssey
2003 Acura 3.2TL
2003 Acura 3.2CL
2003 Honda Accord
2003 Honda Odyssey
2003 Honda Pilot
2004 Acura TL
2004 Honda Accord
2004 Honda Odyssey
2004 Honda Pilot
Campaign No: 04V176000
Mfg. Campaign No: P30/P31
Number of Affected Vehicles: 1099796
Beginning Date of Manufacture: 2001 07 31
Ending Date of Manufacture: 2002 08 23
DEFECT SUMMARY
On some mini vans, sport utility and passenger vehicles, certain operating conditions can result in heat build-up between the countershaft and secondary shaft second gears in the automatic transmission, eventually leading to gear tooth chipping or gear breakage.
CONSEQUENCE SUMMARY
Gear failure could result in transmission lockup, which could result in a crash.
CORRECTIVE SUMMARY
On vehicles with 15,000 miles or less, the dealer will update the transmission with a simple revision to the oil cooler return line to increase lubrication to the second gear. On vehicles with more than 15,000 miles, the dealer will inspect the transmission to identify gears that have already experienced discoloration due to overheating. If discoloration exists, the transmission will be replaced, if discoloration is not present, the dealer will perform the revision to the oil cooler return line. The recall began on April 21, 2004, for Pilot, Odyssey, and MDX owners.
OWNER NOTIFICATION
Owners of the Accord vehicles will start receiving letters on June 28, 2004, and on June 29, 2004, for owners of the TL and CL vehicles. Owners should contact Honda at 1-800-999-1009 or Acura at 1-800-382-2238.
ADDITIONAL INFORMATION
The National Highway Traffic Safety Administration operates Monday through Friday from 8:00 AM to 4:00 PM, Eastern Time. For more information call (800) 424-9393 or (202) 366-0123. For the hearing impaired, call (800) 424-9153.
Now although the numbers are different this one may be similar to the one above but it talks about 2nd gear failure. According to the Vehicles Affected yours is one that may be.
I have attached it below..........there are phone numbers and addresses with it if you feel they are not being straight with you.
SAFETY RECALL: AUTOMATIC TRANSMISSION 2ND GEAR INSPECTION
SERVICE CAMPAIGN BULLETIN
Reference Number(s): 04-021, Date of Issue: April 8, 2005
HONDA: 2002-2004 Odyssey, 2003-2004 Pilot
CATEGORY: Clutch, Transmission, Differential
APPLIES TO: See VEHICLES AFFECTED
Superceded Bulletin(s): 04-021, Date of Issue: November 16, 2004
Related Ref Number(s): 04-021
ARTICLE BEGINNING
BACKGROUND
NOTE: Supersedes 04-021, Safety Recall: Automatic Transmission Second Gear Inspection, dated November 16, 2004
Certain operating conditions can result in heat buildup between the countershaft and secondary shaft 2nd gears in the A/T. Without enough oil flow to dissipate heat, prolonged operation under these conditions can eventually result in decreased material strength. In higher mileage vehicles, this can result in gear tooth chipping or, in very rare cases, gear breakage.
In most cases, A/T noise will indicate a problem, however it is possible for the A/T to become locked without warning. A locked A/T could result in a crash.
VEHICLES AFFECTED
2002-03 Odyssey: ALL
2004 Odyssey: From VIN 5FNRL18..4B000001 thru 5FNRL18..4B051620
2003 Pilot: ALL
2004 Pilot: From VIN 2HKYF18..4H500001 thru 2HKYF18..4H546877
CUSTOMER NOTIFICATION
All owners of affected vehicles will be sent a notification of this recall. There is a customer letter example at the end of this bulletin.
Not all vehicles within the VIN ranges are affected by this recall. Before starting work on a vehicle, make sure it is eligible by checking for one or more of these items:
"¢ The customer has a notification letter.
"¢ The vehicle is listed on your campaign responsibility report.
"¢ The vehicle is noted as eligible when you do a VIN status inquiry on the interactive network (i N).
Besides checking these items, also check for a punch mark above the 11th character of the engine
compartment VIN. A punch mark there means the A/T has already been inspected and repaired. Some vehicles affected by this recall may be in your new or used vehicle inventory. According to federal law, these vehicles cannot be sold or leased until they are repaired. Before selling a vehicle, do a VIN status inquiry to check if it is affected by this recall.
CORRECTIVE ACTION
Do a VIN status inquiry on the i N. If there is a C to the right of S/B: 04-021 on the VIN STATUS INQUIRY screen, return the vehicle to your client. The vehicle has an updated, remanufactured A/T from a previous repair. These A/T's have been internally modified to provide sufficient lubrication for 2nd gear. From the outside, they look the same as other remanufactured A/T's. Doing a VIN status inquiry is the only way to tell if the A/T has this modification. If there is no C shown, do this corrective action based on the vehicle's mileage:
Vehicles with 15,000 miles or less:
1. Install an A/T Oil Jet Kit.
Vehicles with more than 15,000 miles:
Do a photographic inspection of 2nd gear, not a visual one:
"¢ Use the digital camera and camera mount in the A/T Gear Inspection Kit to take five clear photos of 2nd gear through the countershaft speed sensor hole.
"¢ Load your photos onto an i N workstation, then view them on the workstation monitor.
"¢ Compare the gear color in the photos with the gear colors in the Automatic Transmission Gear Inspection Guide packaged with the camera.
"¢ If you decide that the gear color in your photos matches condition level #1 in the inspection guide, then install an A/T Oil Jet Kit.
"¢ If you decide that the gear color in your photos matches any condition level other than #1 in the inspection guide, then submit a completed A/T order form, with your digital photos attached, to the RPO Tech Line. They will either cancel your order and direct you to install an A/T Oil Jet Kit, or will process your order so you can install a remanufactured A/T.
"¢ If you order a remanufactured A/T for a '02-03 Odyssey or a '04 Odyssey from VIN 5FNRL1...4B000001 thru 5FNRL1...4B024896, you may also get an updated PCM (shipped separately). Make sure you complete the repair by installing the updated PCM and the remanufactured A/T at the same time.
PARTS INFORMATION
A/T Oil Jet Kit:
1. P/N 06250-PGH-305, H/C 7758931
2. (Includes an oil jet, oil jet line with bracket, oil jet hose, ATF filler plug adapter and sealing washer, two O-rings, and three hose clamps)
TOOL INFORMATION
A/T Gear Inspection Kit:
1. The kit contains these items:
"¢ Canon Powershot A75 Digital Camera: P/N CNUA75
(Includes Canon Digital Camera Solution Disk Version 17.1 software, USB interface cable, four AA batteries, Compact Flash card, user guide, and quick start guide)
"¢ Two Streamlight flexible white LED flashlights: P/N STL65618
NOTE: Order additional cameras and flashlights through the Honda Tool and Equipment Program.
"¢ Numbering stamp (order by description)
"¢ Ink pad (order by description)
NOTE: Order additional numbering stamps and ink pads through the Honda Tool and Equipment program or from other commercial sources.
"¢ Camera mount with bracket, spacer, and storage case: P/N 07AAB-PGHA100, H/C 7754286
"¢ Color bar stickers:
P/N 07AAB-PGHA200, H/C 7767643
NOTE: Order additional camera mounts and color bar stickers through normal parts ordering channels.
"¢ Automatic Transmission Gear Inspection Guide: Helm Reorder Number Y0680
This guide is packaged in the camera mount storage case. Use it to help you decide the gear condition. It includes comparison photos and descriptions of 2nd gear in six condition levels. The gear color determines whether or not you need to replace the A/T. If you need additional guides, call Helm at 800-782-4356 .
WARRANTY CLAIM INFORMATION
WARRANTY CLAIM INFORMATION
OP# Description FRT Template ID
222106 Vehicles with 15,000 miles or less: Install A/T oil jet kit 0.8 04-021A
222107 Vehicles with more than 15,000 miles: Inspect A/T; install A/Toil jet kit 1.2 04-021B
222108 2004 Odyssey after VIN 5FNRL1...4B024896 with more than 15,000 miles: Inspect A/T; install remanufactured A/ T 7.2 Use a regular claim format
A Align front wheels 0.6
222112 All 2002-03 Odysseys and 2004 Odysseys up to VIN 5FNRL1...4B024896 with more than 15,000 miles: Inspect A/T; install PCM and remanufactured A/T 7.6 Use a regular claim format
A Align front wheels 0.6
222108 Pilots with more than 15,000 miles: Inspect A/T; install remanufactured A/T 7.7 Use a regular claim format
A Align front wheels 0.6
Failed Part: P/N 23441-P7W-000
H/C 6274872
Defect Code: 5CS
Symptom Code: P30
Skill Level: Repair Technician
INSPECTION PROCEDURE
NOTE: "¢ If you are working on a vehicle with 15,000 miles or less, go directly to A/T OIL JET KIT INSTALLATION.
"¢ For questions about camera adjustment, camera mounting, or gear condition, call the RPO Tech Line at 888-997-7278, and select option #2. Do not call the Automobile Tech Line.
"¢ For questions about camera warranty and camera software, call Canon Technical Support at 800-828-4040. Do not call the Special Tools Hotline.
"¢ The system requirements for using the Canon Digital Camera Solution Disk Version 17.1 software are Microsoft Windows 98, Me, 2000, or XP on a PC with built-in USB ports; PC with Pentium 150MHz or higher (Windows 98, Me, or 2000), or Pentium 300 MHz or higher (Windows XP). This software cannot be used on systems running Windows NT.
"¢ For a complete description of the inspection procedure, CLICK HERE for an online animated version.
1. Remove the intake manifold cover and the ignition coil cover.
Fig. 1: Removing Intake Manifold Cover And Ignition Coil Cover
2. Remove the vacuum hoses and the breather pipe, then remove the intake air duct.
Fig. 2: Removing Vacuum Hoses And Breather Pipe, Then Removing Intake Air Duct
3. Clean the area around the ATF filler bolt, the countershaft speed sensor, and the ATF filter line.
Fig. 3: Identifying ATF Filler Bolt Countershaft Speed Sensor & Mounting Bolt
4. Unplug the countershaft speed sensor 3P connector, and remove the sensor mounting bolt. Gently twist the sensor left and right until it loosens, then remove the sensor and its O-ring.
NOTE: Do not use a screwdriver or pry tool to remove the countershaft speed sensor; you could damage the housing.
5. Connect an air nozzle to the shop air supply. Insert the nozzle into the countershaft speed sensor hole, and blow air onto the top of 2nd gear for at least
15 seconds.
NOTE: This step is very important; it removes residual ATF from the gear so you can see it more clearly. Make sure you blow air over the entire top of the gear. Do not use anything but compressed air for this step.
Fig. 4: Inserting Nozzle Into Countershaft Speed Sensor Hole
6. Use a clean shop towel to wipe the sensor hole bore.
7. Point the LED flashlight at the sensor hole to light up 2nd gear. Use a small, flat-tip screwdriver to scrape across the top of the gear teeth. This will help you get a clearer photo of the gear.
NOTE: "¢ If the gear teeth are brighter where you scraped them, it is a first sign of gear overheating.
"¢ The angle cuts near the top of the gear teeth are not a defect in the gear; they are used to identify gears during A/T assembly.
Fig. 5: Scraping Across Top Of Gear Teeth Using Small Flat-Tip Screwdriver
8. Ready the digital camera for use. Refer to these sources as needed:
"¢ The online animated version of the inspection procedure
"¢ Setting the Digital Camera in the Automatic Transmission Gear Inspection Guide
"¢ Powershot A75 Digital Camera User Guide
"¢ Powershot A75 Digital Camera Quick Start Guide
9. Apply a color bar sticker on the base of the camera mount. Set the last six digits of the VIN on the numbering stamp, ink the stamp with the stamp pad, and then stamp the VIN onto the color bar sticker.
NOTE: For verification purposes, you'll need to use a new color bar sticker and the correct last six digits of the VIN for each vehicle you inspect.
10. Fig. 6: Applying Color Bar Sticker On Base Of Camera Mount
11. On the camera mount, position the spacer above the bracket.
12. Remove the ATF filler bolt.
13. Odyssey models: Remove the junction connector from the bracket.
14. Use the ATF filler bolt to attach the camera mount to the A/T.
Fig. 7: Attaching Camera Mount To A/T Using ATF Filler Bolt
15. Attach the camera to the camera mount. Be careful not to damage the plastic threads in the bottom of the camera.
16. Turn on the camera. Select Manual mode (M), turn on the macro (the flower icon appears in the lower right corner of the display), and set the digital zoom to 6.0x. Make sure the flash is turned on.
NOTE: The digital zoom turns off after 1 minute if you do not press any buttons
17. Point the LED flashlight at the countershaft speed sensor hole to light up 2nd gear. Keep the tip of the flashlight out of the image area.
18. Center the rectangular box in the camera display on the sensor hole, then press and hold the shutter button half way down until the box color changes from white to green. If the box color does not change to green, release the shutter button, and try again.
NOTE: The image in the display will not look as good as the actual photo.
19. While continuing to hold the shutter button half way down, turn off the flashlight, and remove it from the area.
20. Gently squeeze the shutter button until the camera flash goes off and the image appears on the camera display.
21. Repeat steps 16 thru 19 to take five clear photos of the gear. If needed, reposition the camera mount to center your photos.
22. Remove the camera from the camera mount.
23. Remove the camera mount from the A/T.
24. Reinstall the countershaft speed sensor. Torque the bolt to 12 N.m (8.7 lb-ft). Plug in the 3P connector.
25. Slide the switch on the back of the camera to > (Play mode). Turn off the camera.
26. Load the camera software (Canon Digital Camera Solution Disk Version 17.1) onto an iN workstation. For loading instructions, refer to the Powershot A75 Quick Start Guide , step 6.
NOTE: If you have any software-related problems, call Canon Technical Support at 800-828-4040.
27. Plug the USB interface cable into a USB port on the back of the iN workstation and into the digital terminal on the left side of the camera.
28. Turn on the camera.
NOTE: The rest of the photo downloading steps are done at the workstation, not from the camera.
29. When you see the Camera Window Download Images screen on the workstation monitor, click on List Images .
30. Click on the images you want to download to the workstation.
31. Click on Download Image . The Download Setting menu comes up.
32. Click on Create New Folder . Name the new folder the 17-digit VIN you are currently working on. Click on Set as new, then click on OK.
33. To view a photo, double-click on it. Delete any photos you do not intend to use.
NOTE: All digital photos used for this inspection must be retained at your dealership until further notice. If not, the warranty claim will be rejected. You need at least one good photo per VIN.
34. Use the Automatic Transmission Gear Inspection Guide (Reorder Number Y0680) to match the gear color in your photos with one of the gear condition levels in the guide. To ensure a good match, hold the guide next to the monitor. Also, try getting a second opinion from at least one other person.
NOTE: The gear color in your photos should be similar to the inspection guide photos. If your photo colors are not similar, try viewing your photos on a different monitor.
"¢ If you decide that the gear color in your photos matches condition level #1 in the inspection guide, then install an A/T Oil Jet Kit. Go to step 4 (Odyssey models ) or step 5 (Pilot models) of A/T OIL JET KIT INSTALLATION.
"¢ If you decide that the gear color in your photos matches any condition level other than #1 in the inspection guide, you must send your photos to the RPO Tech Line for review. Go to step 34.
35. Bring up the Warranty Automatic Transmission Order form on the i N:
"¢ From the iN main menu, click on SERVICE .
"¢ Click on Warranty A/T Order .
"¢ Enter the model and year of the vehicle you are working on, and then click on Search .
"¢ Click on Warranty Automatic Transmission Order to bring up the Warranty Automatic Transmission Order form.
36. Fill out all required fields on the form. Required fields have a red dot next to them.
NOTE: For additional information on filling out this form and uploading images to the iN, refer to Quick Start Warranty A/T Order Images, listed under Job Aids in ISIS.
37. In the form's Service Bulletin 04-021/04-037 field, click on Yes .
38. Click on Image Upload , and browse for the VIN file you are want to upload. Preview the photo if needed by double-clicking on it. If the photo is not clear, select another one. Do this step for each photo you are submitting.
NOTE: You must upload you photos one at a time.
39. Click on Submit to send the A/T order form and your photos to the RPO Tech Line. They will review your photos and determine whether the A/T needs an A/T Oil Jet Kit or if it needs to be replaced.
"¢ If the gear color is normal, the RPO Tech Line will cancel your order and direct you to install an A/T Oil Jet Kit. Go to step 4 (Odyssey models) or step 5 (Pilot models) of A/T OIL JET KIT INSTALLATION.
"¢ If the gear color indicates an overheating condition, your order will be processed and a remanufactured A/T will be sent to you as soon as possible. To check on the status of your order, go to the iN main menu, click on PARTS, Parts Ordering, and then Warranty A/T VIN Inquiry. Enter a date in the All Orders Accepted Since box, and then click on Submit. From the WARRANTY A/T VIN INQUIRY
ACKNOWLEDGMENT screen, find the VIN you want, and look across at the STAT column to determine your order status.
"¢ When you get the remanufactured A/T, go to A/T REPLACEMENT.
NOTE: If you ordered a remanufactured A/T for a '02-03 Odyssey or a '04 Odyssey from VIN 5FNRL1...4B000001 thru 5FNRL1...4B024896, you may also get an updated PCM (shipped separately). Make sure you complete the repair by installing the updated PCM and the remanufactured A/T at the same time.
A/T OIL JET KIT INSTALLATION
NOTE: For a complete description of the installation procedure, CLICK HERE for an online animated version.
1. Remove the intake manifold cover and the ignition coil cover.
Fig. 8: Removing Intake Manifold Cover And Ignition Coil Cover
2. Remove the vacuum hoses and the breather pipe, then remove the intake air duct.
Fig. 9: Removing Vacuum Hoses And Breather Pipe, Then Removing Intake Air Duct
3. Clean the top of the A/T around the ATF filler bolt, the countershaft speed sensor, and the ATF filter line.
Fig. 10: Identifying ATF Filler Bolt, And Countershaft Speed Sensor
4. Odyssey models: For easier access to the ATF filter line, unplug the ABS modulator connector, and move it out of the way.
5. Pilot models: For easier access to the ATF filter line, unbolt the ABS modulator from its mounting bracket, and move the modulator up slightly.
6. Disconnect the ATF hose from the ATF filter line, and discard the hose clamp.
Fig. 11: A/T BEFORE INSTALLATION OF A/T OIL JET KIT
7. Detach the wire harness from the ATF filter line bracket.
8. Remove the ATF filter line bracket bolts, then remove and discard the ATF filter line.
9. Assemble the A/T Oil Jet Kit outside the vehicle, but do not attach the oil jet to the oil jet hose yet.
NOTE: "¢ Each hose clamp has a retainer to hold it in its spread position. To install a hose clamp, slide it into position (7 mm from the end of the hose), then pull off the retainer with pliers
"¢ Use clean ATF to assemble all metal-to-rubber lines and hoses. Do not use grease or any other lubricants.
"¢ Make sure you slide the oil jet hose onto the T-fitting on the oil jet line.
Fig. 12: Exploded View Of A/T Oil Jet Kit
10. Install the oil jet line onto the ATF hose with a new hose clamp.
NOTE: "¢ Use clean ATF to lubricate the oil jet O-ring and the ATF filter O-ring before installation.
"¢ Make sure there are no kinks in the oil jet hose when you install it onto the A/T.
Fig. 13: A/T AFTER INSTALLATION OF A/T OIL JET KIT
11. Install the other end of the oil jet line onto the ATF filter. Torque the ATF filter line bracket bolts to 12 N.m (8.7 lb-ft).
12. Remove the harness bracket bolt.
13. If not already done, remove and discard the ATF filler bolt.
14. Install the ATF filler plug adapter with a new sealing washer. Torque the adapter to 44 N.m (33 lb-ft).
15. Insert the oil jet into the filler plug adapter, making sure the oil jet is flush. Position the oil jet bracket over the harness bracket bolt hole. Reinstall the harness bracket bolt. Torque the bolt to 27 N.m (20 lb-ft).
16. Check if the oil jet has a white mark 34 mm from the end of the pipe. If it does not have this mark, measure 34 mm from the end of the pipe, and use a paint pen or marker to mark the spot.
Fig. 14: Locating White Mark On Oil Jet
17. Slide the new hose clamp onto the oil jet hose, and then slide the oil jet hose onto the oil jet tube up to the mark on the tube. Make sure the hose is not kinked. Position the clamp 7 mm from the end of the hose, and release the clamp retainer.
18. Attach the oil jet line bracket. Torque the bolt to 12 N.m (8.7 lb-ft).
19. Attach the wire harness to the oil jet line bracket.
20. Wipe up any residual ATF that spilled when you installed the kit.
21. Odyssey models: Plug in the ABS modulator connector.
22. Pilot models: Reinstall the ABS modulator.
23. Start the engine. Move the shift lever to D, and then to R. Move the shift lever to D and then to P. Raise the idle speed to 1,500 rpm, keep it there for several minutes, then turn off the engine.
24. Check for leaks where you installed the kit. If you find any leaks, make sure the ATF filler plug adapter, the oil jet, and all hose clamps are correctly installed.
25. Check the ATF level, and add ATF if needed.
26. When topping off or refilling ATF on vehicles that have an A/T Oil Jet Kit, do this:
"¢ Remove the oil jet hose. Avoid kinking or pulling on the oil jet hose.
"¢ Remove the oil jet.
"¢ Add the ATF through the ATF filler plug.
"¢ Replace the oil jet O-ring (P/N 91301-P7W-003, H/C 6276539). Use clean ATF to lubricate the O-ring.
"¢ Install the oil jet. Torque the harness bracket bolt to 27 N.m (20 lb-ft).
"¢ Slide the oil jet hose onto the oil jet tube up to the 34 mm mark, and then install the clamp 7 mm from the end of the hose.
27. Reinstall all removed parts, then go to COMPLETION PROCEDURE.
A/T REPLACEMENT
Follow the IN-WARRANTY EXCHANGE steps in S/B 98-061 , Automatic Transmission In-Warranty Exchange Program, to order a remanufactured A/T, replace the failed A/T, and return the failed A/T core.
"¢ If you order a remanufactured A/T for a '02-03 Odyssey or a '04 Odyssey from VIN 5FNRL1...4B000001 thru 5FNRL1...4B024896, you may also get an updated PCM (shipped separately). Make sure you complete the repair by installing the PCM and the remanufactured A/T at the same time.
"¢ ATF cooler cleaning is not needed because failure of the A/T was heat-related only.
"¢ Remanufactured A/T's do not need an A/T Oil Jet Kit; they have been updated internally.
"¢ When refilling the A/T, always use Honda ATF-Z1.
"¢ Odyssey models: Make sure you do the idle learn procedure and a front wheel alignment check/adjustment.
"¢ During the road test, you do not need to check the shift points with the HDS.
"¢ After the road test, recheck the ATF level, add ATF if needed, and check for leaks.
COMPLETION PROCEDURE
Center-punch a completion mark above the 11th character of the engine compartment VIN.
Fig. 15: Identifying Completion Mark
EXAMPLE OF CUSTOMER LETTER
Spring/Summer 2004
Safety Recall: Automatic Transmission Second Gear Inspection
Dear Honda Owner:
This notice is sent to you in accordance with the requirements of the National Traffic and Motor Vehicle Safety Act.
What is the reason for this notice?
Honda Motor Co., Ltd., has decided that a defect relating to motor vehicle safety exists in certain 2002-04 Odysseys and 2003-04 Pilots. Certain operating conditions can result in heat buildup in the transmission second gear set and may lead to gear tooth chipping. In very rare cases, gear breakage can occur. Gear failure could result in transmission lock-up, and a crash could occur without warning.
What should you do?
Call any authorized Honda dealer and make an appointment to have your vehicle repaired. For vehicles with less than 15,000 miles, the dealer will install an oil jet kit to provide additional lubrication to the gears. For vehicles with more than 15,000 miles, the dealer will inspect the affected gear for heat discoloration, which indicates possible damage. If heat discoloration exists, the dealer will replace the transmission. If heat discoloration is not found, the dealer will install an oil jet kit. This work will be done free of charge. Please plan to leave your vehicle all day to allow the dealer flexibility in scheduling the inspection and installing the oil jet kit. If transmission replacement is needed, the work will take more than one day.
Who to contact if you experience problems.
If you are not satisfied with the service you receive from your Honda dealer, you may write to:
1. American Honda Motor Co., Inc.
2. Honda Automobile Customer Service
3. Mail Stop 500-2N-7A
4. 1919 Torrance Blvd.
5. Torrance, CA 90501-2746
If you believe that American Honda or the dealer has failed or is unable to remedy the defect in your vehicle, without charge, within a reasonable period of time (60 days from the date you first contact the dealer for a repair appointment), you may submit a complaint to:
1. Administrator
2. National Highway Traffic Safety Administration
3. 400 Seventh Street, SW
4. Washington, DC 20590
Or call the toll-free Safety Hotline at (888) 327-4236.
What to do if you feel this notice is in error.
Our records show that you are the current owner or lessee of a 2002-04 Odyssey or 2003-04 Pilot involved in this campaign. If this is not the case, or the name/address information is not correct, please fill out and return the enclosed, postage-paid Information Change Card. We will then update our records.
If you paid to have the transmission replaced, you may be eligible for reimbursement. Refer to the attached instructions for eligibility requirements and the reimbursement procedure.
Lessor Information.
Federal law requires that any vehicle lessor receiving this recall notice must forward a copy of this notice to the lessee within 10 days.
If you have questions.
If you have any questions about this notice, or need assistance with contacting a Honda dealer, please call Honda Automobile Customer Service at
(800) 999-1009, and select menu option #2.
I would first go to 3 different transmission places and have them check to see if they thing the transmission has overheated. The fluid will be discolored and smell burnt. You also can check that. DON'T LET THEM CHANGE THE FLUID OR DO ANY WORK ON IT. JUST GET FREE ESTIMATES.
Lord willing they all say it is burnt. Then I would go to the dealer and have them check the recalls and be explicit on the transmission one above. Tell them you have quotes from 3 transmission places and they say the fluid is burnt. Or if it is only 2 then 2. I think you get what I mean. Or....you could just ask them and Lord willing they come back and say yes it is burnt. If not then ask why the other 1, 2, or 3 places say it is and show the paperwork. Then I would suspect they are not being up front with you and asked to talk to the manager.
Now - if nobody says it is burnt then the sad part is this may not apply to you.
Next you have the other one to possible go by............I agree - 56K is not that many miles on a transmission but please remember....things do happen........so it may not be their fault.
Cost........my information doesn't give me a cost.......sorry.........but I again refer back to getting those 3 estimates.........if they are close to the dealer and you have to get it replaced...then go with the one that offers the best warranty.
I sure hope this helps.
Thanks for the kind words about the website. There are lots of great folks at 2CarPros.
Thanks again........Good luck
Feb 28, 2009 at 12:23 PM