Good morning,
Verify the coolant level is correct.
https://www.2carpros.com/articles/car-heater-not-working
If the thermostat is stuck open, it will not give you heat.
https://www.2carpros.com/articles/replace-thermostat
Check the hoses when the engine is hot. If they are equal in temperature, it could be a clogged heater core. You would need to remove the hoses from the core and use a garden hose to flush the core side to side until you get a even clean flow of water.
https://www.2carpros.com/articles/replace-heater-hoses
The other thing is a blend door motor which is common. If it is not moving, it will not allow heat.
https://www.2carpros.com/articles/replace-blend-door-motor
Roy
Thermostat Replacement
Removal Procedure
1. Partially drain the cooling system.
2. Remove the air cleaner outlet duct.
imageOpen In New TabZoom/Print
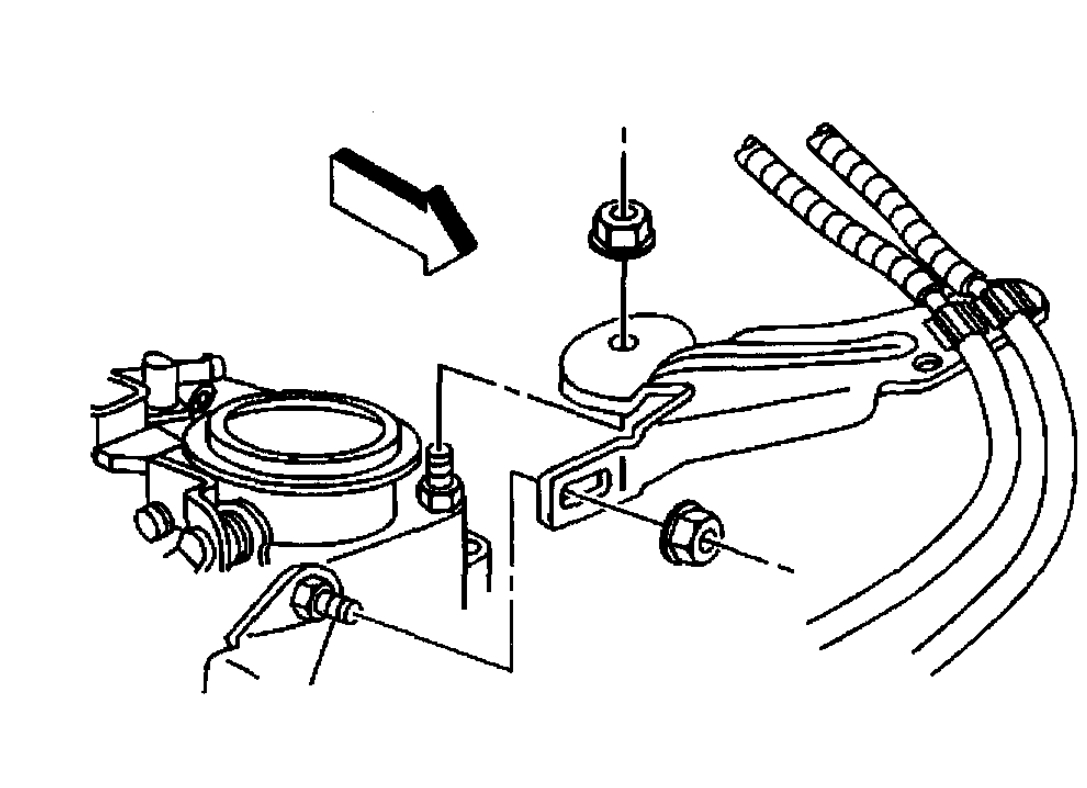
3. Remove the throttle body bracket nuts and reposition the bracket.
imageOpen In New TabZoom/Print
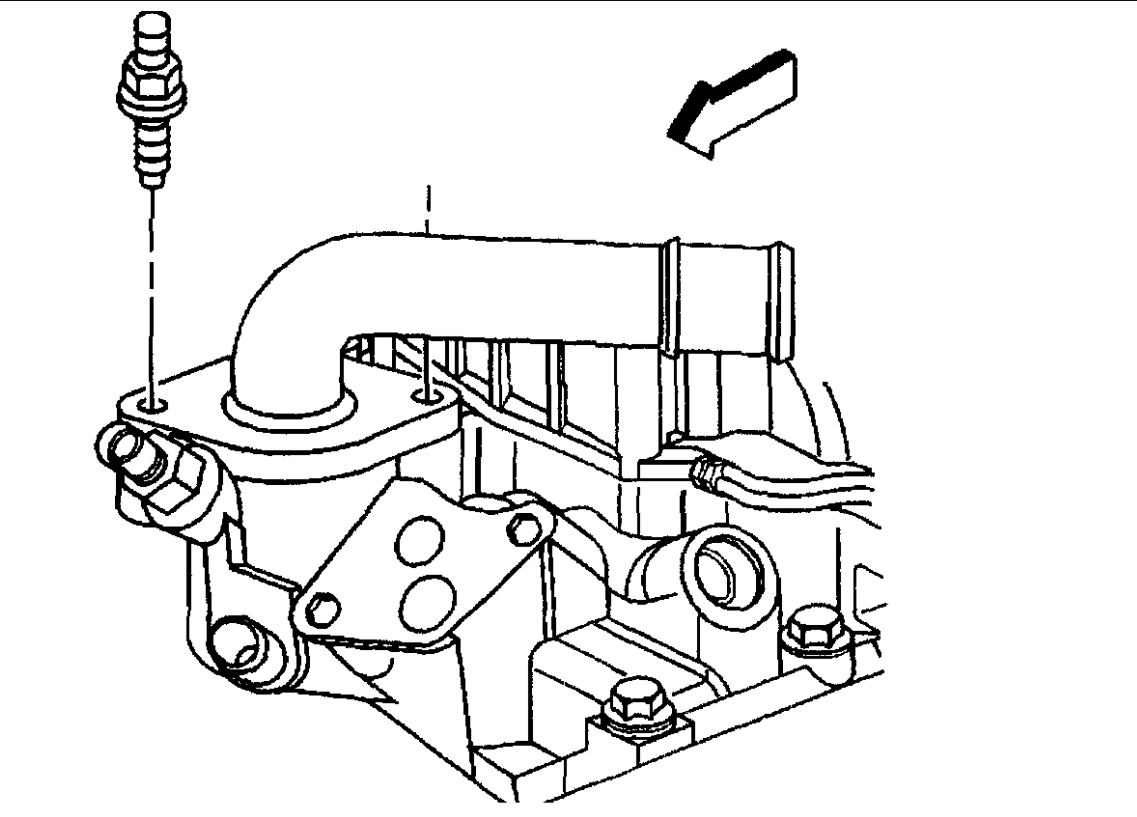
4. Remove the water outlet housing mounting bolts.
imageOpen In New TabZoom/Print
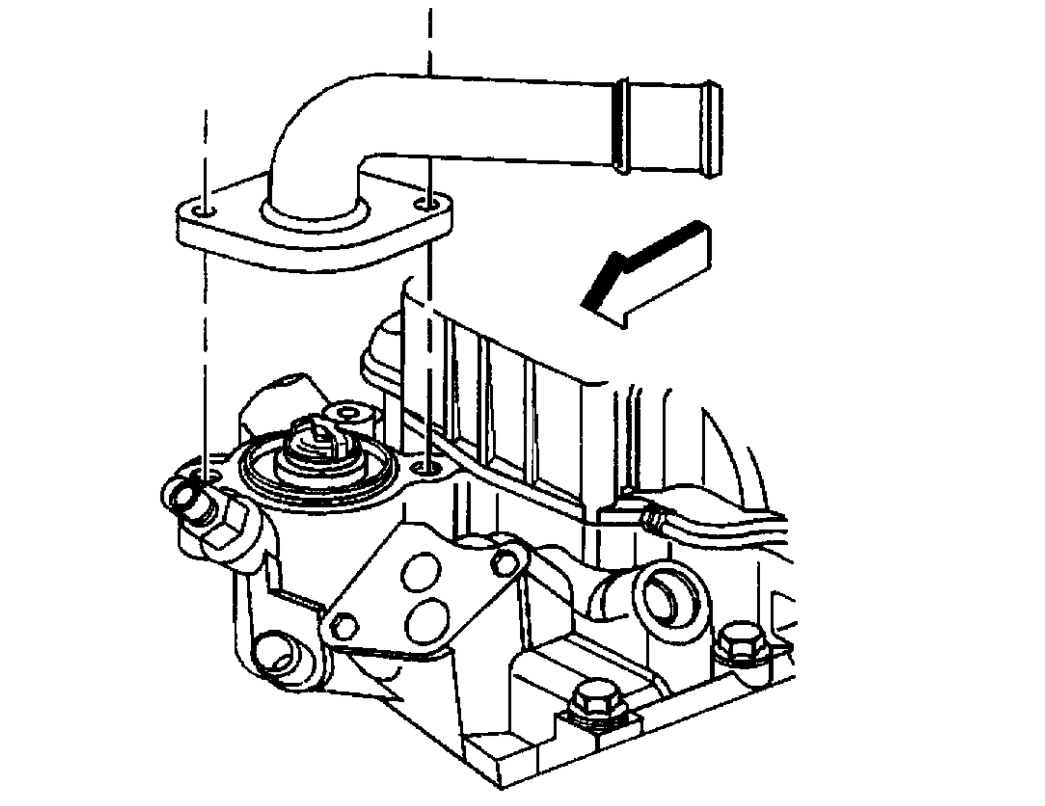
5. Remove the water outlet housing from the lower intake manifold and set aside.
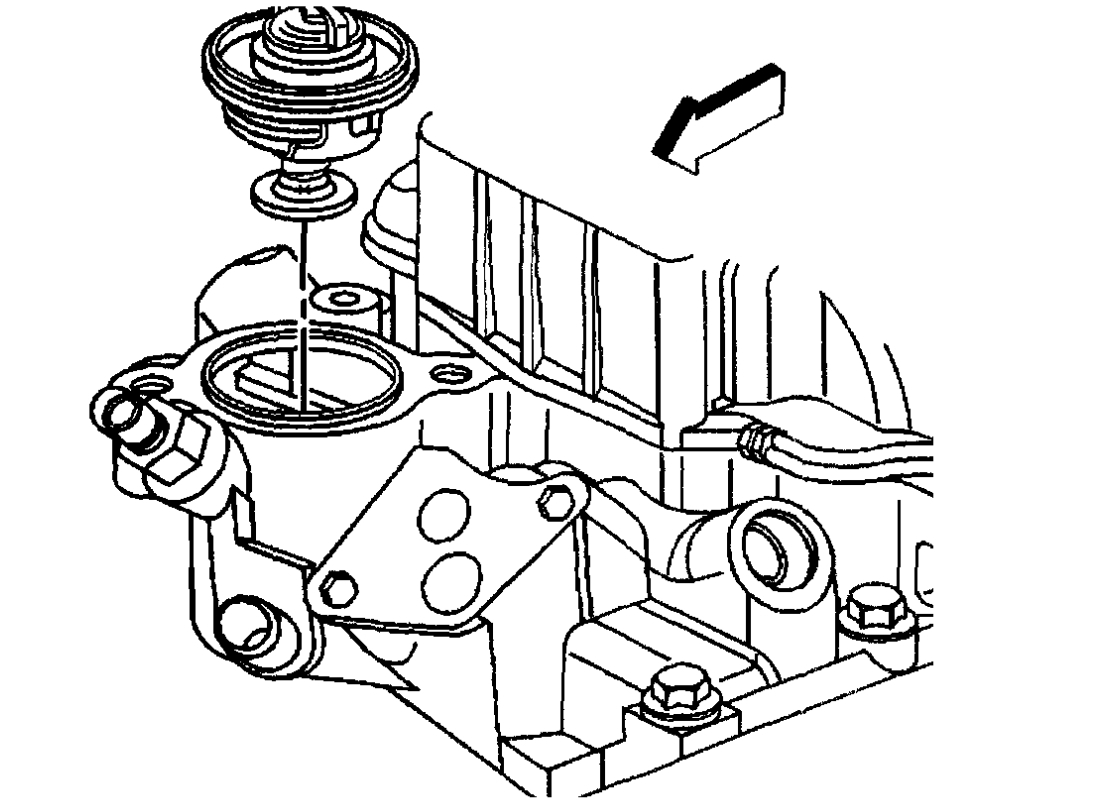
6. Remove the gasket or O-ring.
imageOpen In New TabZoom/Print
7. Remove the thermostat.
8. Clean all the sealing surfaces of the water outlet housing.
9. Clean the sealing surface on the lower intake manifold.
REMOVAL PROCEDURE
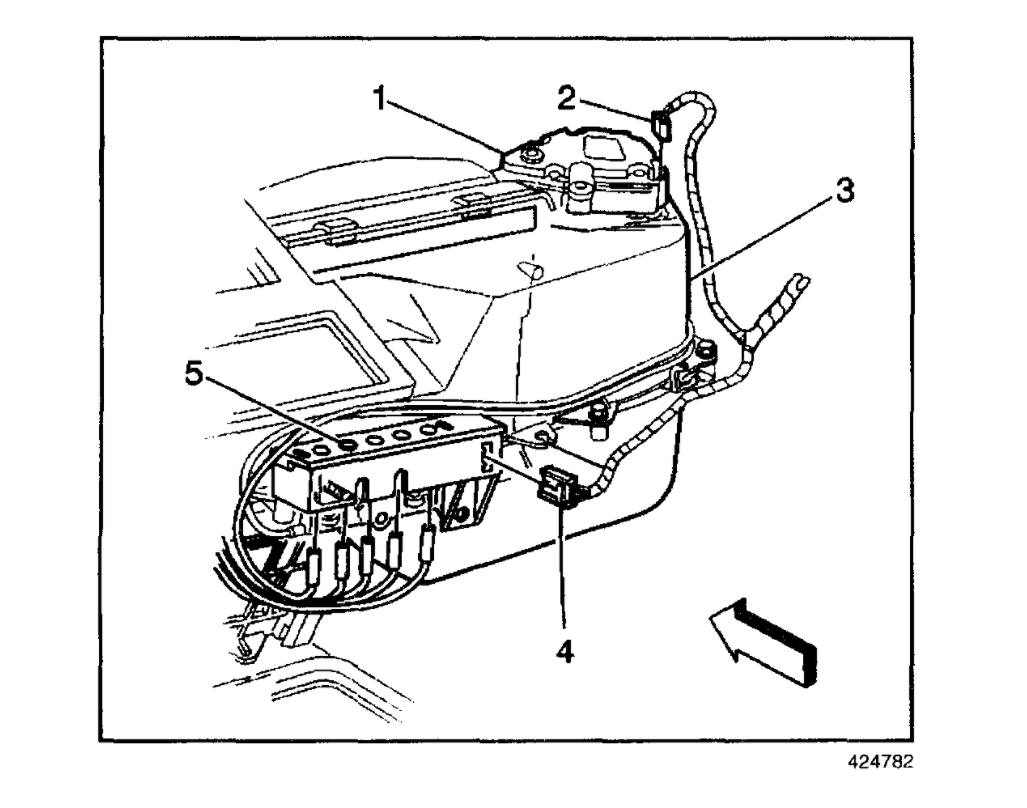
The air temperature actuator is located on the top right hand side of the HVAC module.
imageOpen In New TabZoom/Print
1. Remove the instrument panel carrier.
2. Disconnect the electrical connector (2).
imageOpen In New TabZoom/Print
3. Remove the air temperature actuator retaining screws.
4. Remove the air temperature actuator from the HVAC module.
IP Carrier Replacement
Removal Procedure
1. On vehicles equipped with a manual transmission, remove the shift lever. Refer to Control Lever and/or Boot Replacement in Manual Transmission - NV 1500.
2. On vehicles equipped with an automatic transmission, perform the following steps:
1. Apply the park brake.
2. Insert the ignition key and turn the ignition switch to the RUN position.
3. Depress the brake pedal and shift the transmission to the 1 position.
4. Turn the ignition switch to the OFF position.
imageOpen In New TabZoom/Print
Caution: Refer to Battery Disconnect Caution in Service Precautions.
3. Disconnect the battery negative cable.
Caution: Refer to SIR Caution in Service Precautions.
4. Disable the passenger side SIR system. Refer to Disabling the SIR System in SIR.
5. Remove the left sound insulator.
6. Remove the right instrument panel sound insulator.
7. If the vehicle is equipped with a multiple CD changer located in the center console, remove the center console. Refer to Console Replacement - Front Floor (Full Length (Auto Trans)) Console Replacement - Front Floor (Non-Full Length) Console Replacement - Front Floor (Full Length (Manual Trans)).
8. Remove the lower sound insulator.
9. Remove the lower left instrument panel mounting bolt.
10. Remove and retain the instrument panel storage compartment.
11. Remove the lower right instrument panel mounting bolt.
imageOpen In New TabZoom/Print
12. Remove and retain the left and right speakers and the speaker grilles.
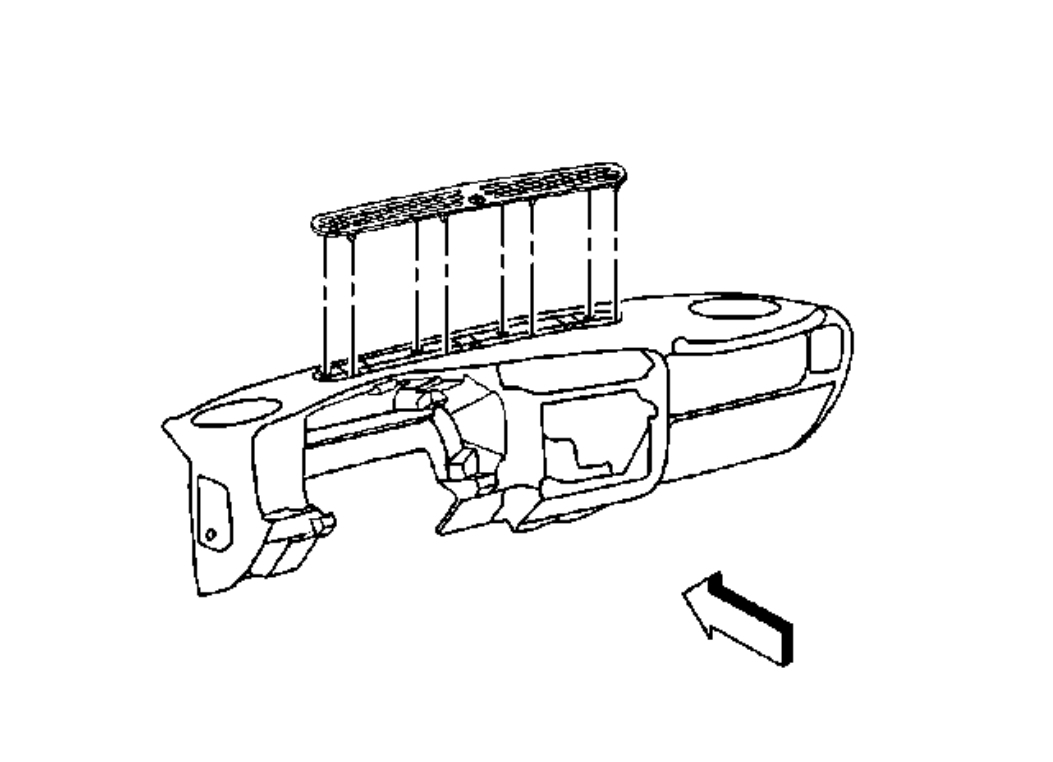
13. Use a flat-bladed tool to remove the windshield defroster grille. Retain the windshield defroster grille for use on the replacement IP carrier.
imageOpen In New TabZoom/Print
14. If the vehicle is equipped with a sunload sensor, twist the sunload sensor 1/4 turn counterclockwise in order to detach it from the windshield defroster grille. Retain the sunload sensor for use on the replacement IP carrier.
Important: Always disconnect the brown electrical connector from the BCM before disconnecting the purple electrical connector from the BCM.
15. Disconnect the brown electrical connector from the body control module (BCM).
16. Disconnect the purple electrical connector from the body control module (BCM).
17. Remove the knee bolster.
18. Remove and retain the instrument panel cluster.
19. Remove and retain the radio.
20. Remove and retain the HVAC control assembly.
imageOpen In New TabZoom/Print
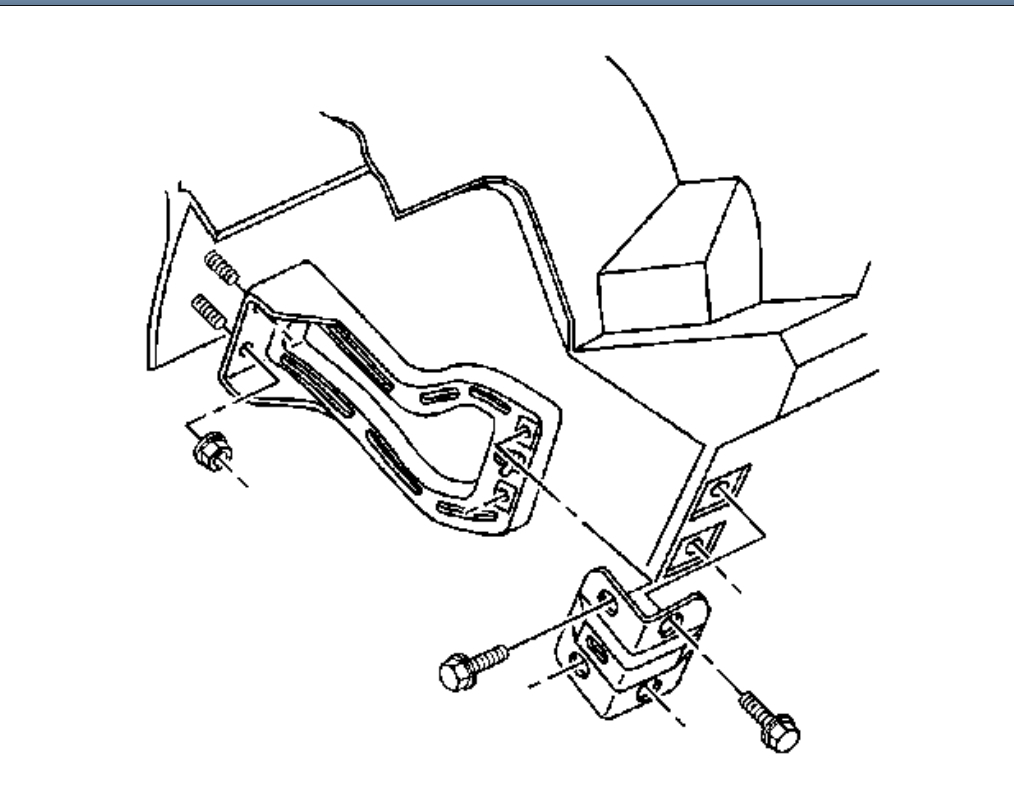
21. Remove the left and right instrument panel driver knee bolster brackets.
22. Lower the steering column for clearance. Refer to Steering Column Replacement in Steering Wheel and Column.
imageOpen In New TabZoom/Print
Important: Label all of the connections in order to avoid improper installation.
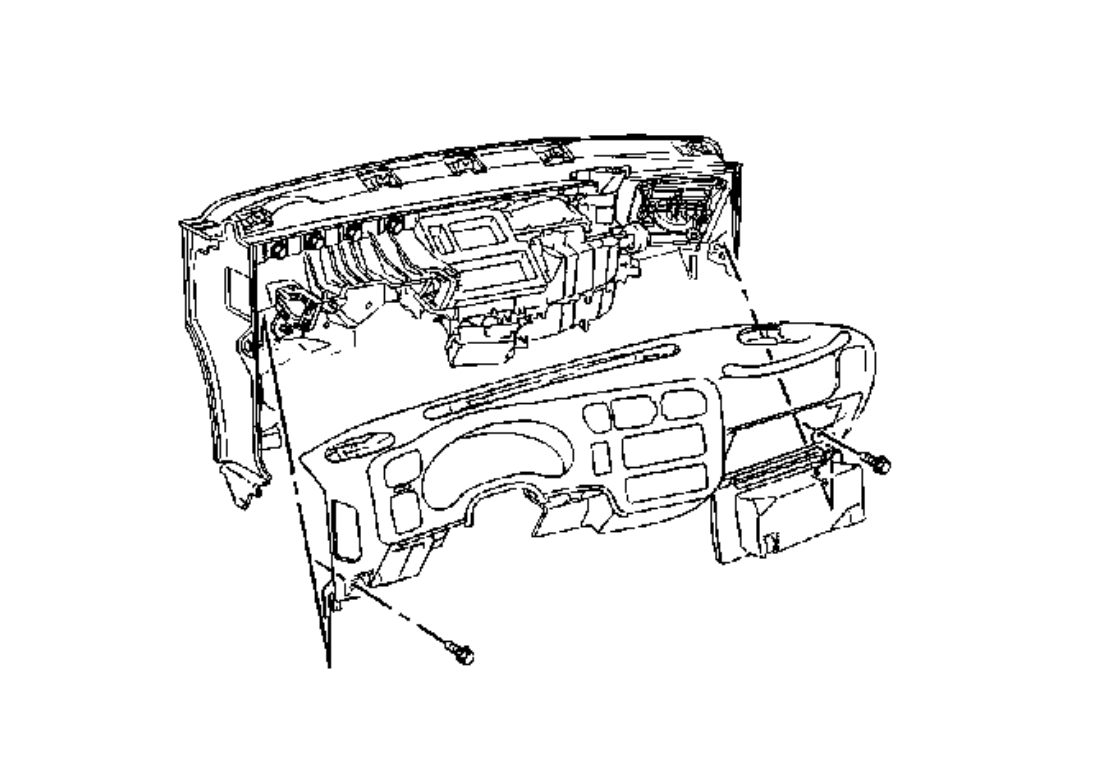
23. Remove the top instrument panel screws.
24. Roll the instrument panel down.
25. Disconnect the electrical connections, as needed.
26. Remove the fastener that retains the radio antenna cable to the instrument panel.
27. Remove the instrument panel from the vehicle.
28. If replacing the instrument panel carrier, retain parts for assembly onto the new instrument panel carrier.
Images (Click to enlarge)
Dec 1, 2020 at 2:45 AM