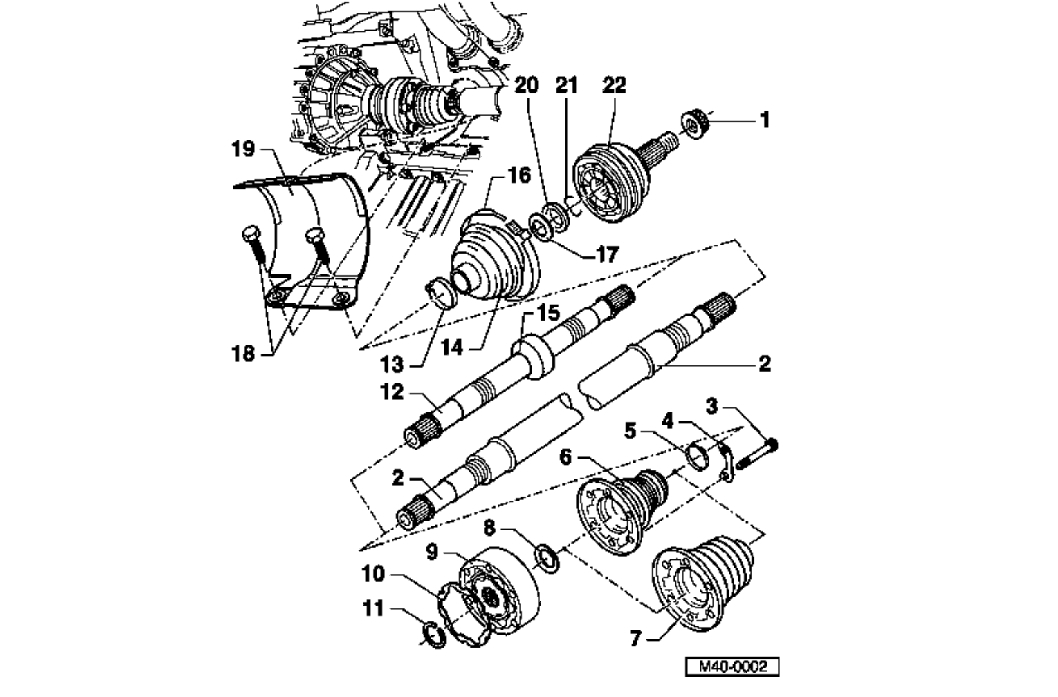
The axle assembly needs pried from the transmission. There is a clip that helps hold it in, but you can't remove it because it is inside.
I assume your vehicle doesn't have the flanged mount. If you look at the last pic, I circled the clip that is helping hold it in. When you reinstall it, make sure that the axle is fully installed otherwise, the vehicle won't move and you won't have park.
Here are the directions specific to your vehicle. All attached pics correlate with the directions.
__________________________________________
2004 Volkswagen New Beetle (1C1) L4-2.0L (BEV)
Drive Axles, Removing and Installing
Vehicle Transmission and Drivetrain Drive Axles, Bearings and Joints Axle Shaft Assembly Service and Repair Procedures Front Drive Axles, Removing and Installing
DRIVE AXLES, REMOVING AND INSTALLING
Drive axles, removing and installing
pic 1
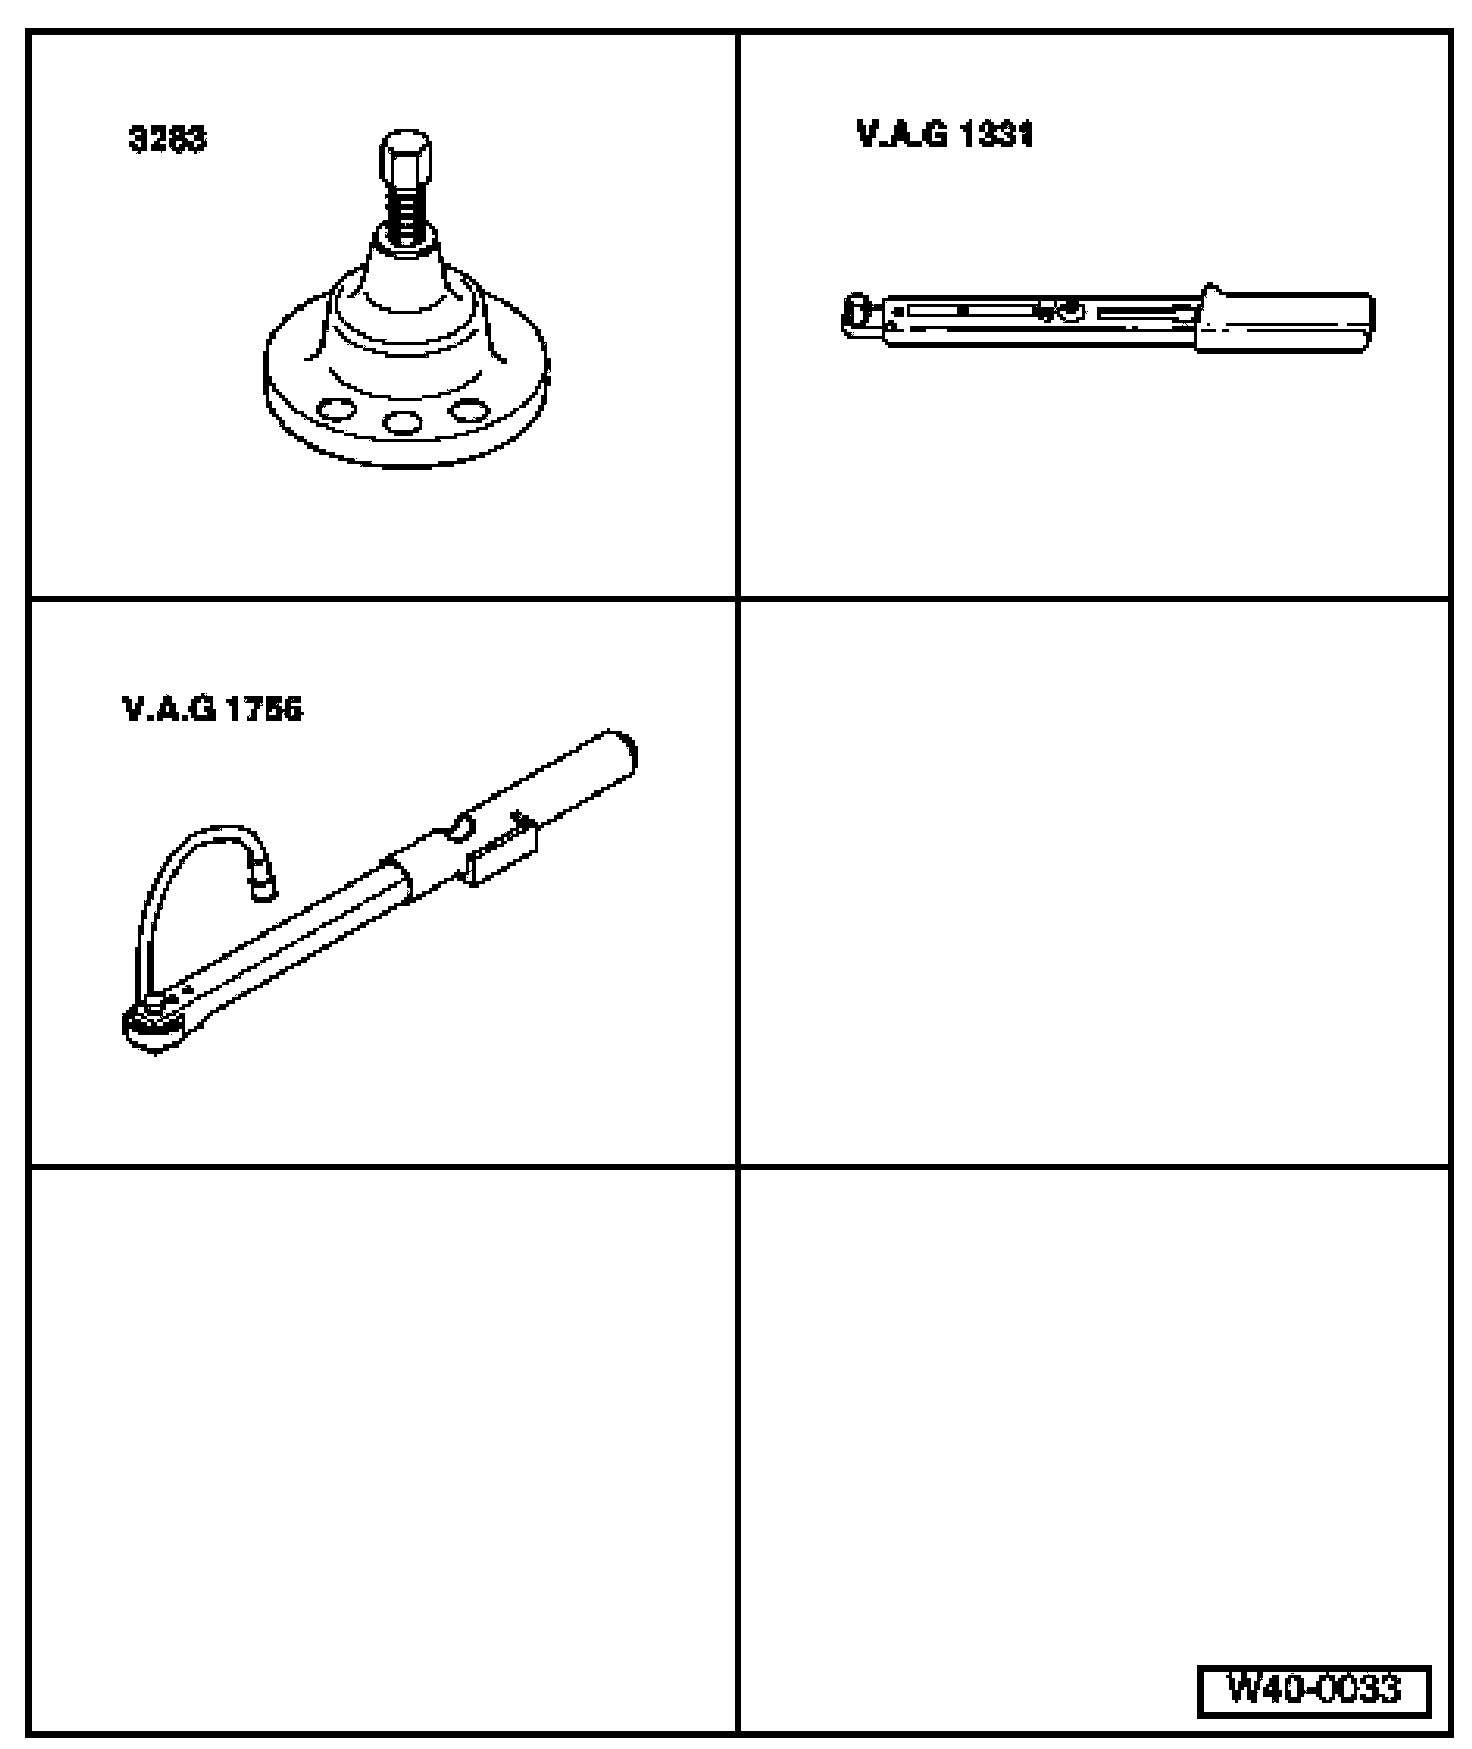
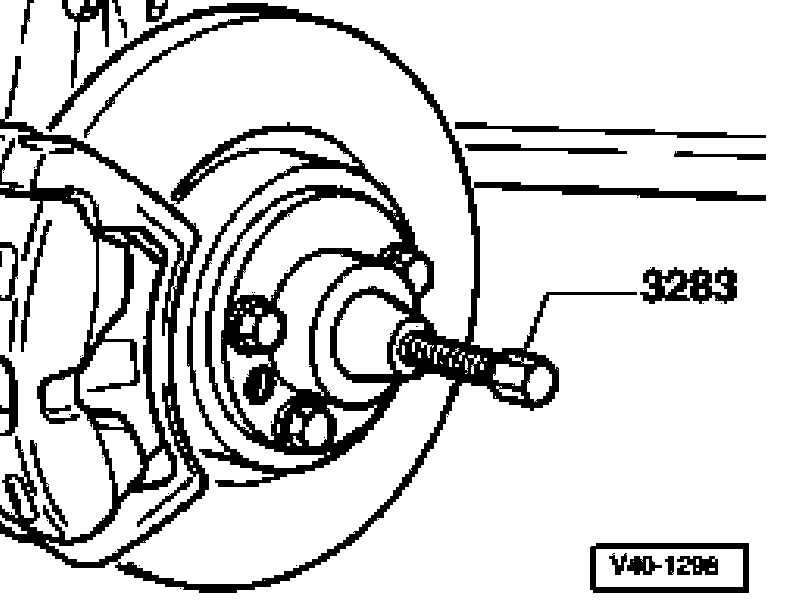
Special tools and equipment
^ 3283 Hub puller
^ VAG 1331 Torque wrench
- VAG 1756 Angle measuring wrench
WARNING:
^ Do not re-use fasteners that are worn or deformed in normal use.
^ Some fasteners are designed to be used only once, and are unreliable and may fail if used a second time. This includes, but is not limited to, nuts, bolts, washers, circlips and cotter pins. Always follow recommendations in this manual-replace these fasteners with new parts where indicated, and any other time it is deemed necessary by inspection.
Removing
CAUTION:
^ The wheel bearings must not be loaded when the 12-point nuts are loose.
^ If the wheel bearings are loaded by the vehicle's weight, the bearings will be stressed and their service life reduced.
^ If a vehicle has to be moved after removing the drive axle, first install the outer CV joint and tighten to 50 Nm (37 ft. lbs.) otherwise the wheel bearing will be damaged.
- Lift vehicle until load on front axle is relieved.
- Loosen 12-point nut.
- Raise vehicle.
- Remove wheel.
pic 2
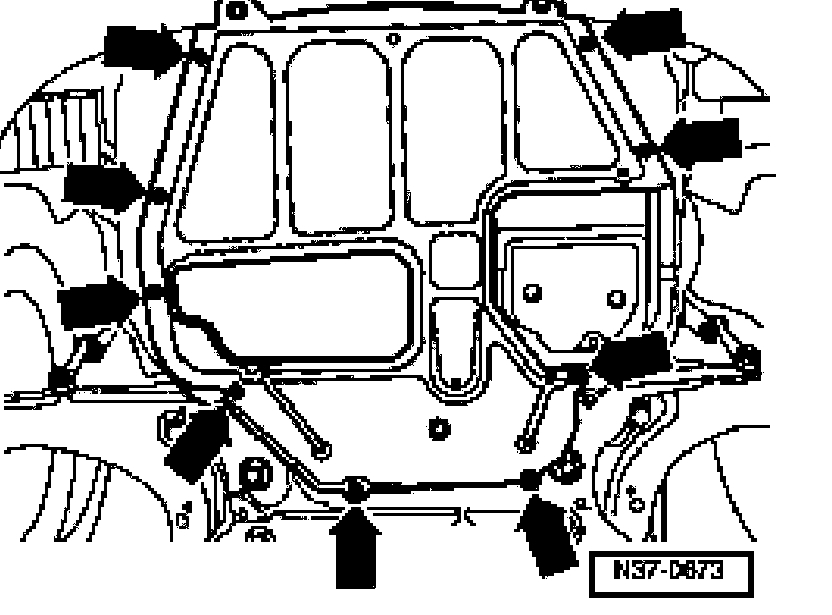
- Remove noise insulation panel -arrows-.
pic 3
- Remove left-side noise insulation -arrows-.
Vehicles with TDI engine
- Remove intake air duct between charge air cooler and turbocharger.
Continued for all vehicles
- Remove right-side noise insulation.
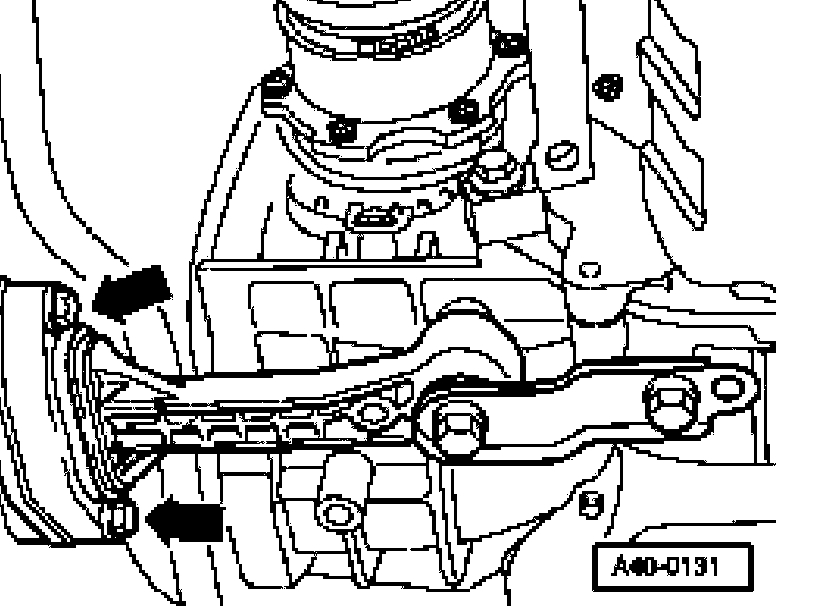
- Disconnect drive axle from transmission drive flange.
- Mark installation position of ball joint bolts on control arm.
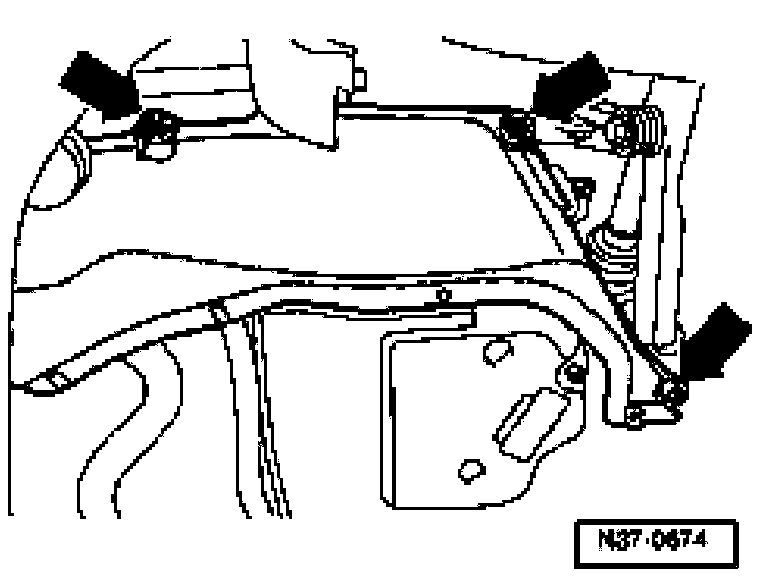
pic 4
- Remove bolts -arrows-.
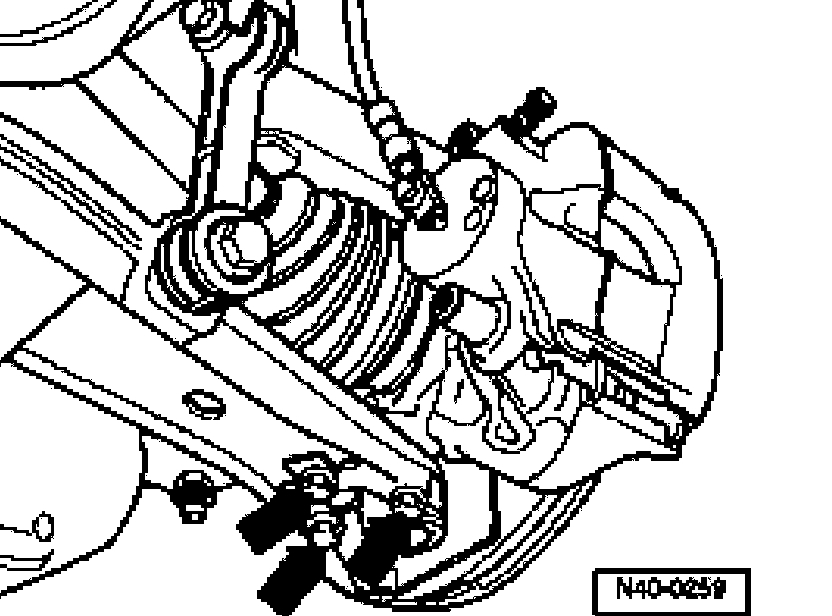
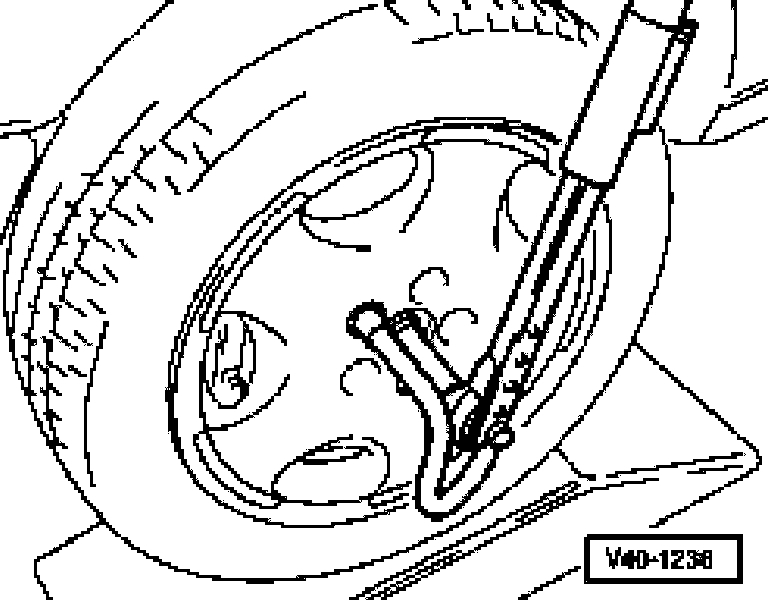
pic 5
- Press drive axle out.
Note:
^ When pressing the drive axle out make sure that sufficient clearance is available.
^ Do not allow axle shaft to hang by inner CV or triple-rotor joint to avoid damaging bearing surfaces. Tie drive axle to stabilizer bar or other suspension component if it is to remain attached to axle flange.
^ Do not flex inner CV or triple-rotor joint more than 25 ° from its original angle.
- Remove drive axle.
pic 6
Vehicles with automatic transmission
- Remove bolts -arrows-.
pic 7
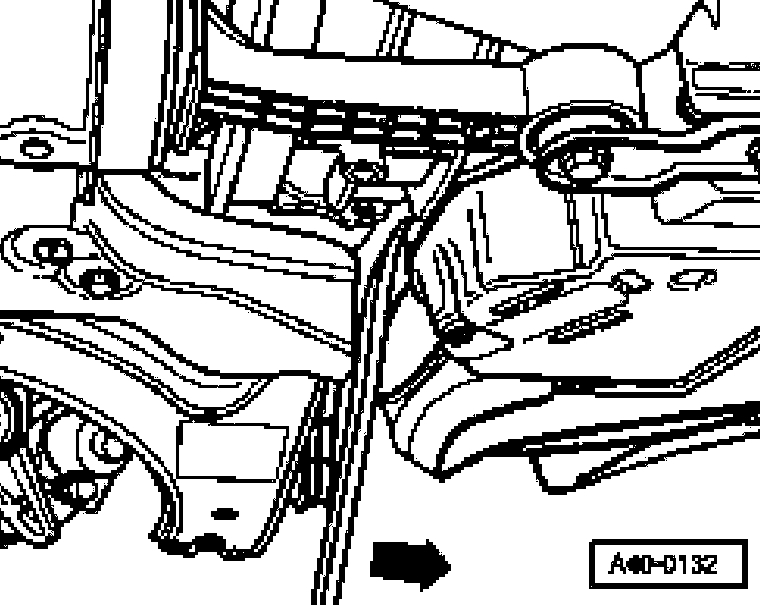
- Push engine/transmission assembly forward (i.e. using lever).
Now the triple roller joint drive axle can be removed
(The arrow in the illustration points forward)
Installing
Remove any paint residue and/or corrosion on thread/splines of outer joint.
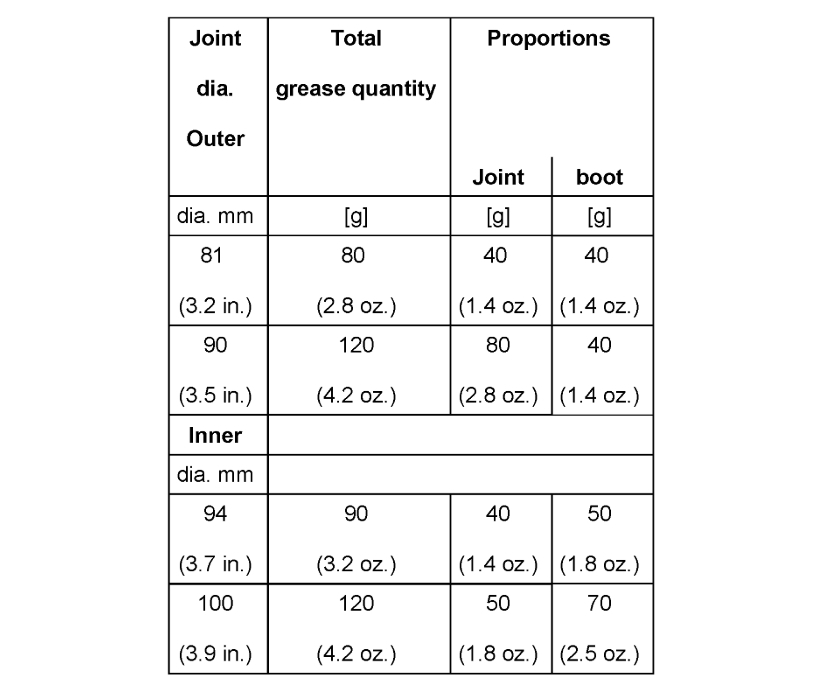
Before installing the drive axle lubricate the following points with oil:
^ The splines of the outer joint,
^ The threads of the outer joint
^ The splines in the hub,
- The contact surface and thread of the twelve-point nut
- Install drive axle.
- Guide outer joint into wheel hub splines as far as possible.
- Connect ball joint to control arm using new bolts on old marks.
- Pull outer joint into wheel hub until outer joint is in position.
- Install inner joint to drive axle and tighten bolts.
- Bolt pendulum support to subframe.
pic 8
- Tighten 12-point nut to 300 Nm (221.3 ft. lbs.) and then loosen one turn.
pic 9
- Tightening 12-point nut.
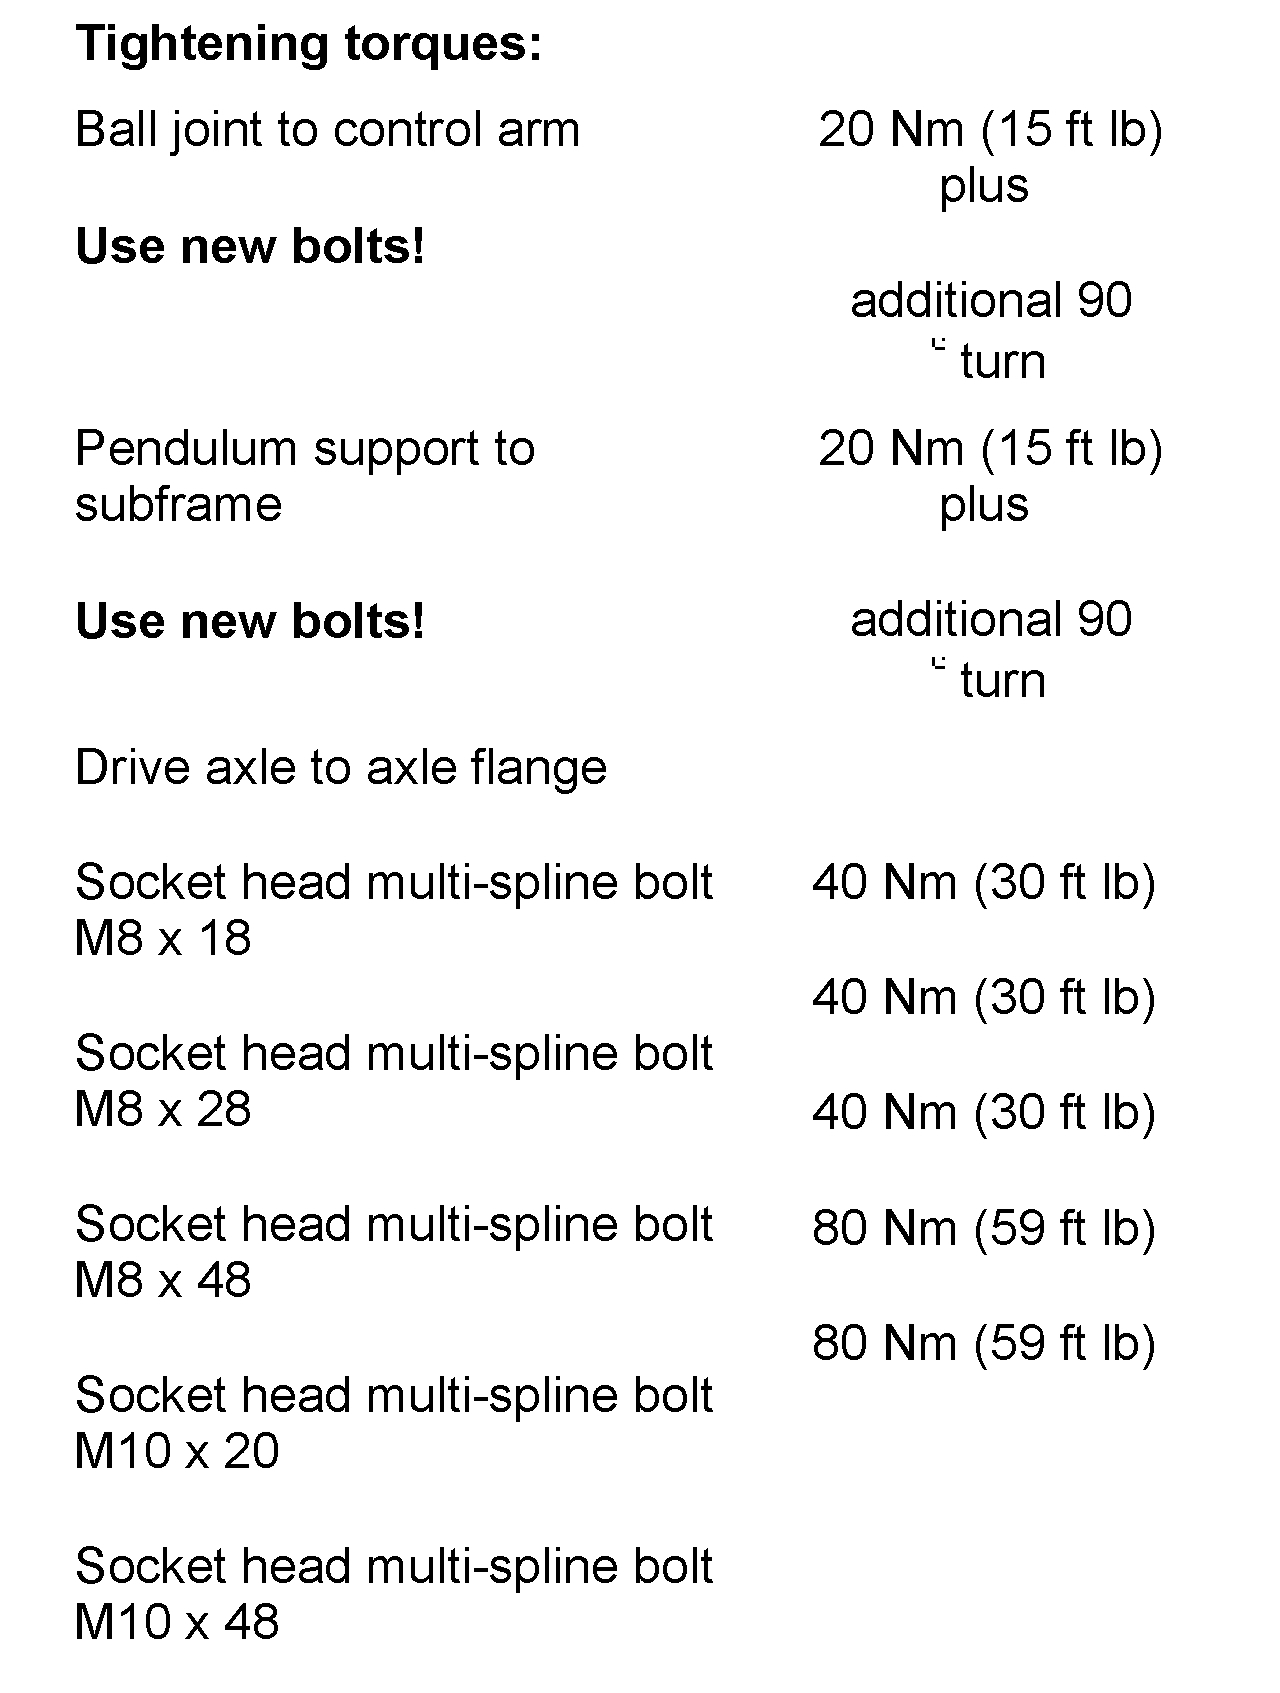
Tightening torque:
50 Nm (37 ft. lbs.) plus additional 45° turn
Note:
To tighten 12-point nut use VAG 1756.
Alternate final tightening of 12-point nut (if angle measuring wrench is not available):
- Lower vehicle until the wheels touch ground.
CAUTION:
The vehicle must be standing on its wheels when loosening or tightening the 12-point nut. Otherwise there is risk of an accident.
- Tighten 12-point nut to 300 Nm (221.3 ft. lbs.) and then loosen one turn.
- Tighten 12-point nut to 50 Nm (37 ft. lbs.).
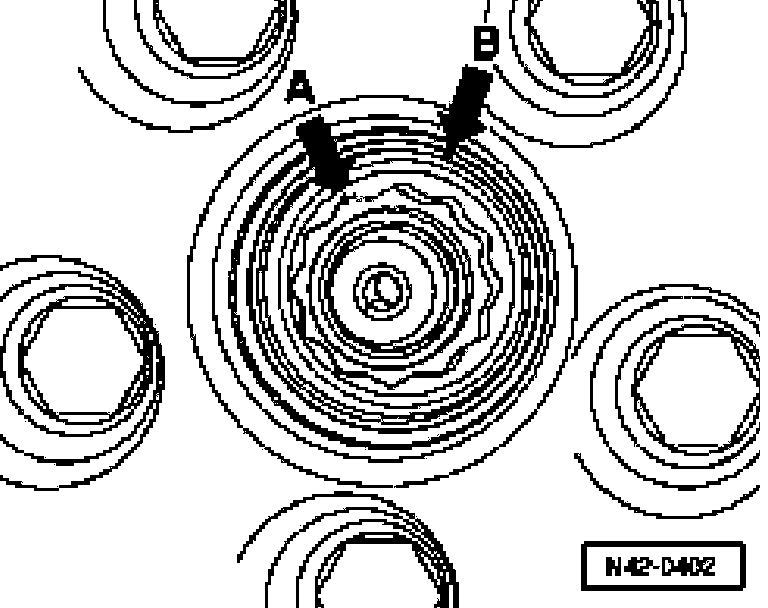
pic 10
- Mark point on nut with line -arrow A-.
- Mark a 2nd. line (arrow B) on the edge of the wheel hub above next point.
- Turn 12-point nut further until both lines align.
_______________
Let me know if this helps or if you have other questions. Also, if it isn't the flanged type, they can be a bear to go out.
Joe
Images (Click to enlarge)
Feb 7, 2020 at 2:30 PM