We are a team of ASE certified mechanics that have created this guide to help you save money while doing the job yourself, or at least see what you are paying for when having the job done at a shop. In this guide we show you how to change out front axle bearing and races, you can get replacement part at the local auto parts store or Amazon.
Why Does a Front Axle Bearing Fail?
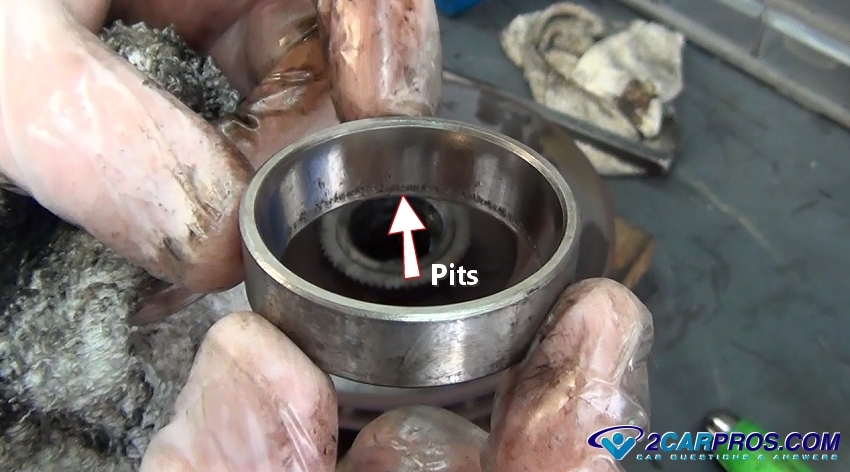
A bearing is made of high grade steel which has a super hard coating over the rollers, inner and outer races. A bearing goes bad when this coating is worn away due to mileage or extreme load which just leaves the normal steel which then degrades and destroys the bearing components. Also, failures can occur when moisture combined with salt from roads penetrate the seal and contaminate the bearing, or over time the grease used to lubricate the bearing can liquefy leaving it dry causing a failure. This is what a failed axle bearing looks like. You can see the roller cage is broken and there are pits on parts of the rollers themselves. Parts of metal get caught up in-between the rollers and the upper and lower bearing race while under high pressure. This creates a grinding action which can be felt while driving the vehicle. These bearings are used in the front hubs and rear axles of all vehicles. Some CV axle bearings are actually two sets of ball bearings put together but fail the same way. Here is a close up of the bad bearing roller.

This is what happens to the bearing race once the bearing goes bad. Here is an example of what happens when the metal particles from the bad roller is pressed against the race under high pressure.
Before We Begin
Before you begin, park your car on level ground with the transmission in park. You will need to raise up your car with a floor jack and secure it using jack stands for safety and then remove and reinstall the wheel. Remember safety first, never get under the vehicle unless jack stands are in place. We want you to use safety as a normal practice anytime repairs need to be done as you learn automotive repair. The brake caliper will need to be removed along with the caliper mount and the brake pads.
Let's Get Started!
If you are not replacing the brake pads then you don't need to open the bleeder or push the piston back into the caliper for this job.
Step 1
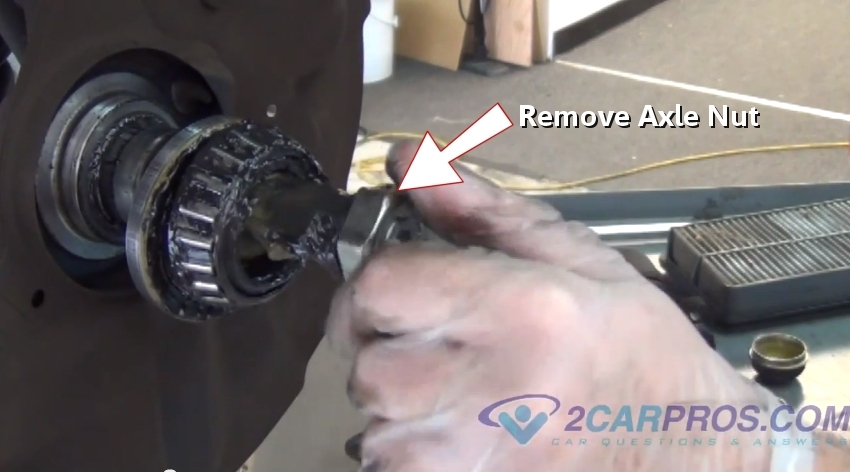
Remove the Spindle Nut
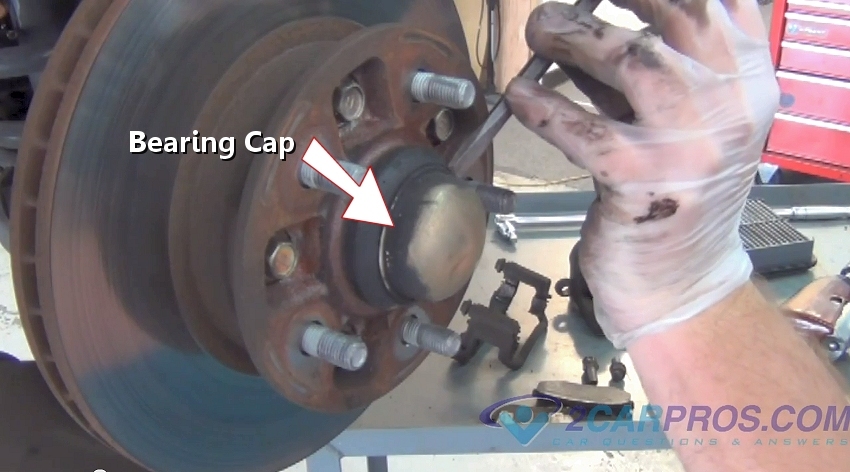
The first part of doing a brake job on a serviceable wheel bearing vehicle is pretty much like one performed on a non serviceable bearing hub style of car. The guide below will show you how to remove the rotor and replace the wheel bearings, also how to repack and the bearings with fresh grease and install a new grease seal. We will start with removing the rotor, please follow the guide below. Place a small chisel between the dust cap and outer bearing boss of the rotor, then use a hammer to knock the bearing dust cap loose from the rotor. You can also use a large pair of channel locks and grasp the cap and rock it back and forth to remove.
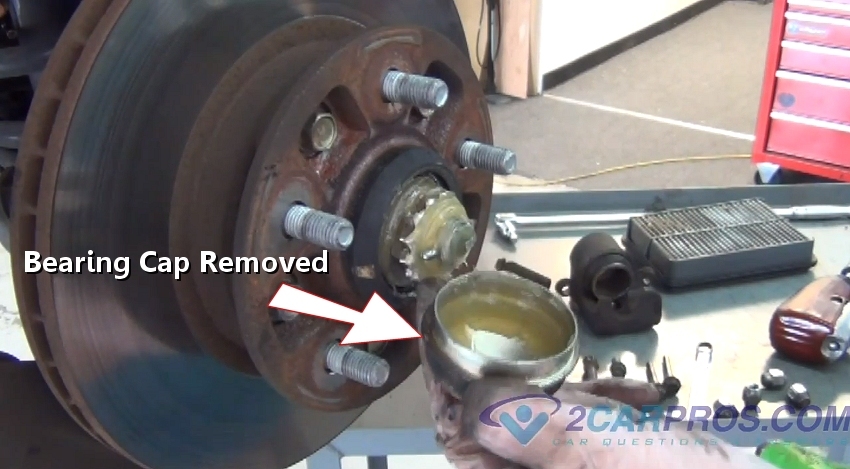
Reverse the direction of the chisel to remove the bearing cap completely.
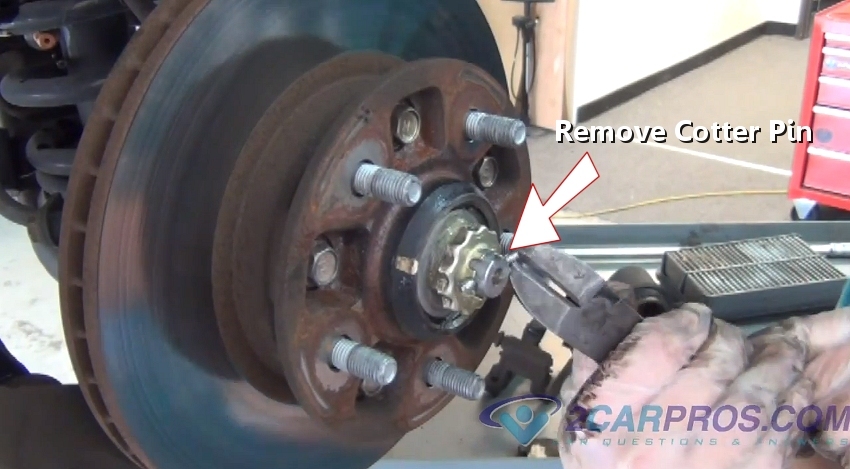
Once the cap has been removed it will expose the outer bearing, retainer, nut or castle nut, and cotter pin. There will be grease present which is used to lubricate the bearings.
Use a shop towel to clean the cotter pin area free from grease.
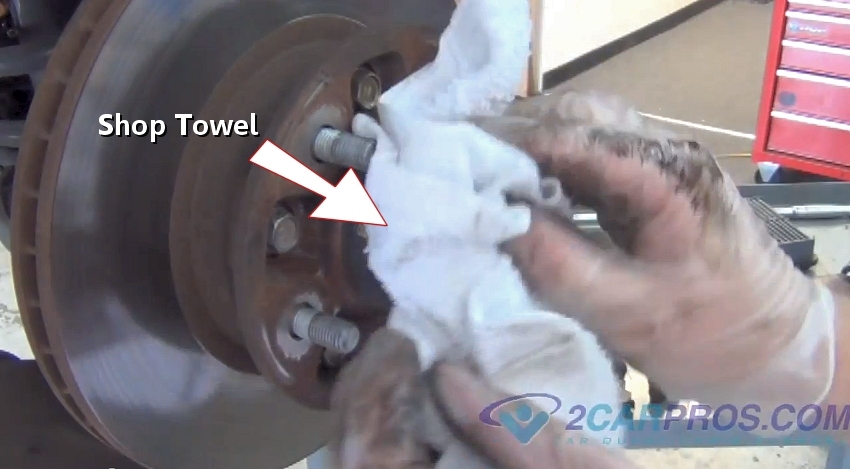
Next, use a pair of dikes to remove the cotter pin from the spindle. This will take a little doing, don't worry about damaging the pin because you will be installing a new one. Use a pair of side cutters (dikes) to help remove the cotter pin which is used to keep the castle nut in place.
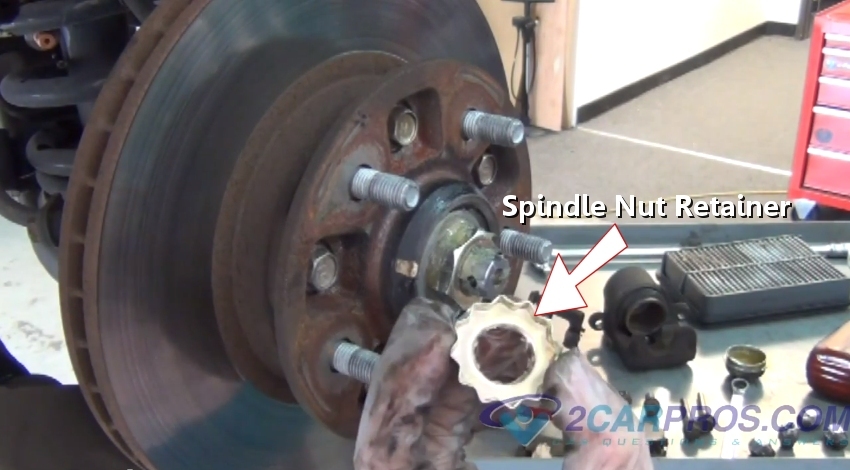
After the cotter pin has been removed, lift off the spindle nut retainer and place it in a container this is so none of following pieces get lost.
Use a wrench or channel locks to remove the spindle nut, this nut should be loose when removing it because this style of bearing is a non-tension set up and the nut sits loosely on the spindle while the retainer and cotter pin holds it in place.
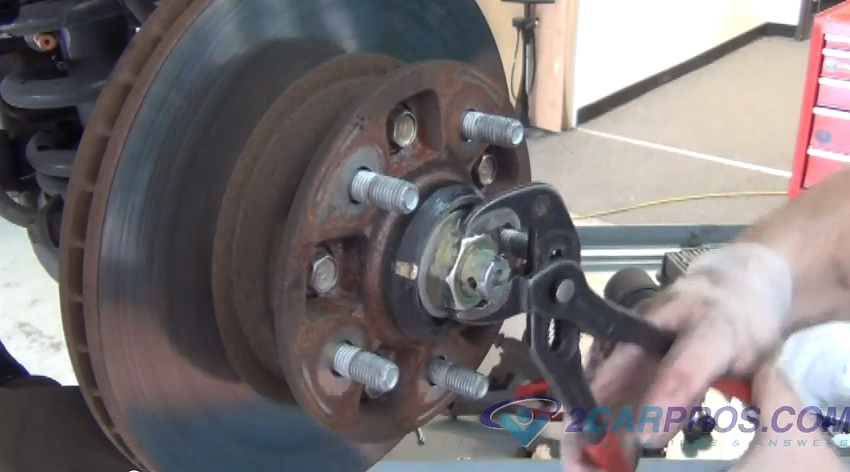
Once the nut has been fully loosened, lift the nut from the spindle threads and set it to the side for now, you will be using it to remove the inner bearing in a few steps.

Step 2
Remove the Outer Wheel Bearing
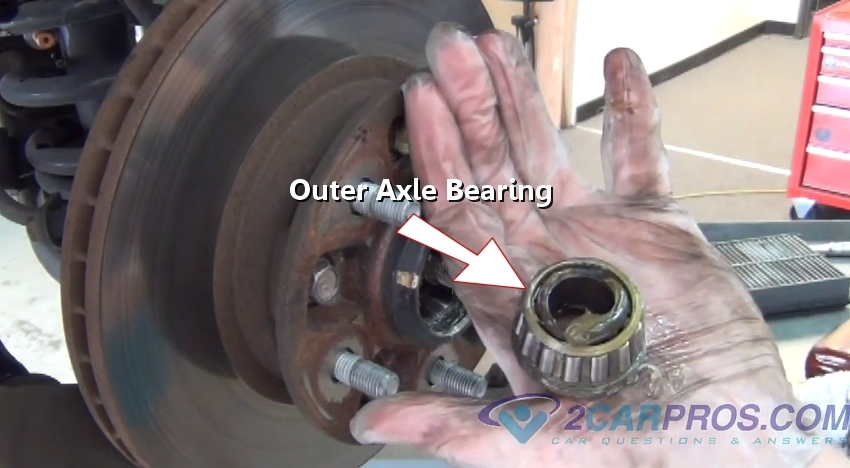
Use one hand and push your palm to one side of the rotor while holding your other hand under the outer bearing. This force will pop the outer axle bearing and washer outward, be ready to catch the bearing.
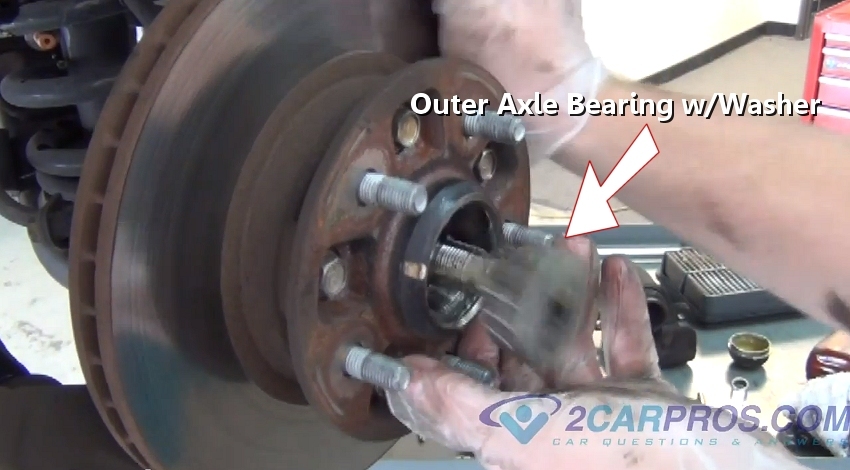
After the outer axle bearing has been released, inspect it for metal shavings which indicates the bearing has failed and needs replacement. Sometime they can get caught up in which case you must use a flat blade (standard) screwdriver to help remove the washer.
Step 3
Remove the Inner Axle Bearing
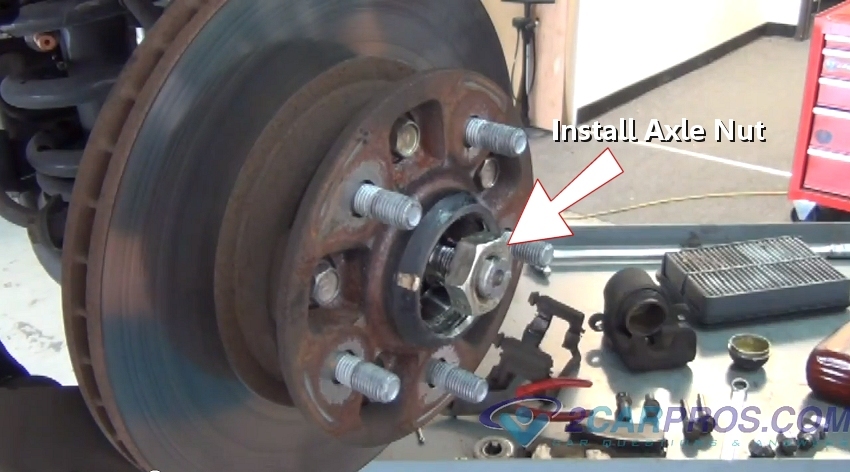
To remove the inner bearing and seal from the rotor hub for service, remount the axle nut onto the spindle, and tighten the nut about four turns.
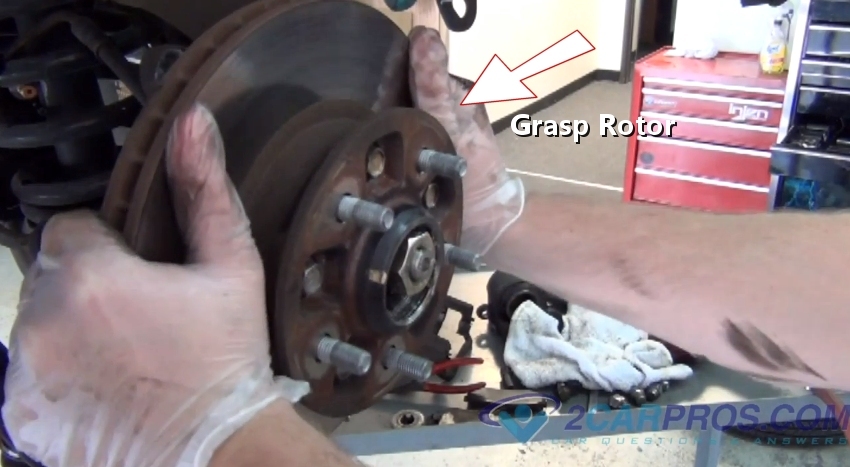
Grasp both sides of the rotor and with a thrusting motion pull outward. This will cause the nut to contact the inner bearing and force it from the hub along with the grease seal. Be careful not to drop the rotor.
After thrusting the rotor outward, the bearing and grease seal will release and remain on the spindle behind the nut. The bearing will be pulled from the rotor and will be stopped by the spindle nut. This will leave the bearing and seal on the spindle for easy removal.
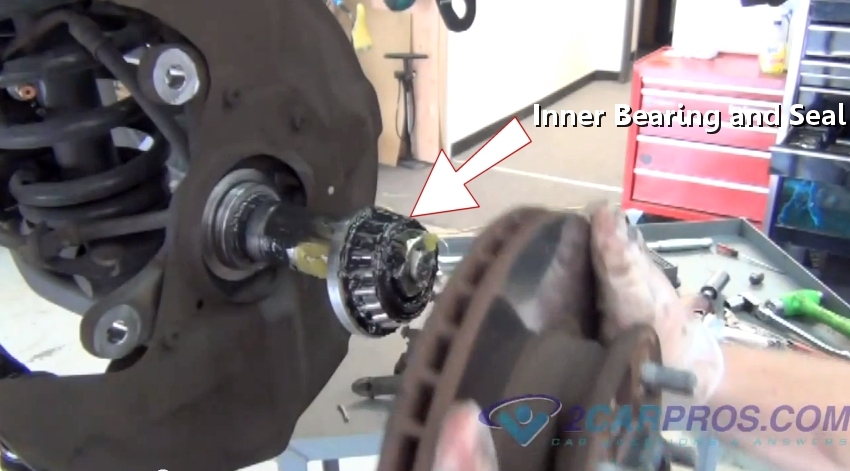
Remove the nut completely to remove the bearing and seal to clean thoroughly.
Watch the Video!
How to replace an axle bearing for an older style vehicles that have a serviceable axle bearing set up in the front brake rotor. This video includes the bearing grease pack.
Step 4
Inspect and Replace Bearings and Races
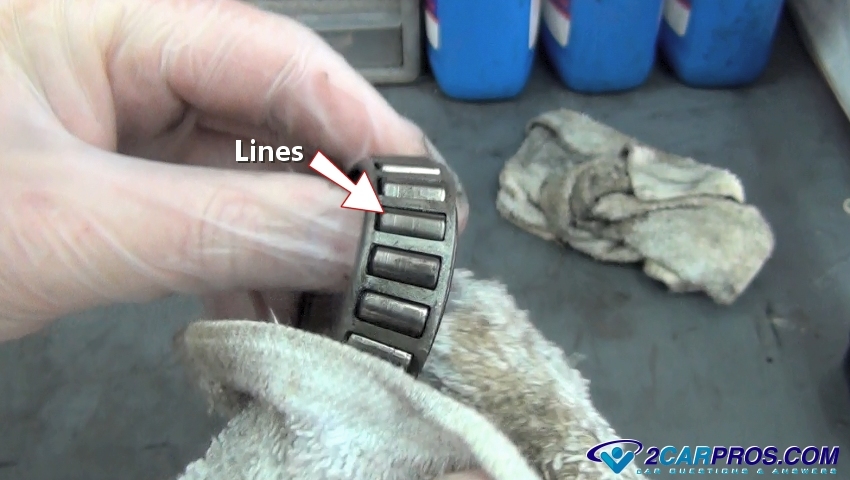
Use a shop towel to wipe the bearings and races clean. Look for a metallic pieces in the towel after cleaning which is an indication for a bad bearing even if you cant see it on any of the rollers. Also lines can be present on the rollers as well. This is a sign of normal wear and may not be an indication of failure.
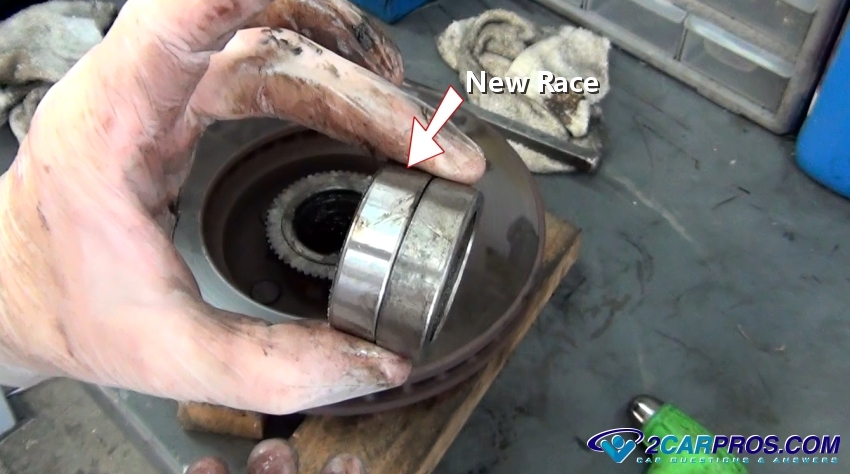
Remove the new bearing from the box. Smaller bearings have their races supplies with the replacement unit while larger bearings must have the races purchased separately. The bearing below has the race included.
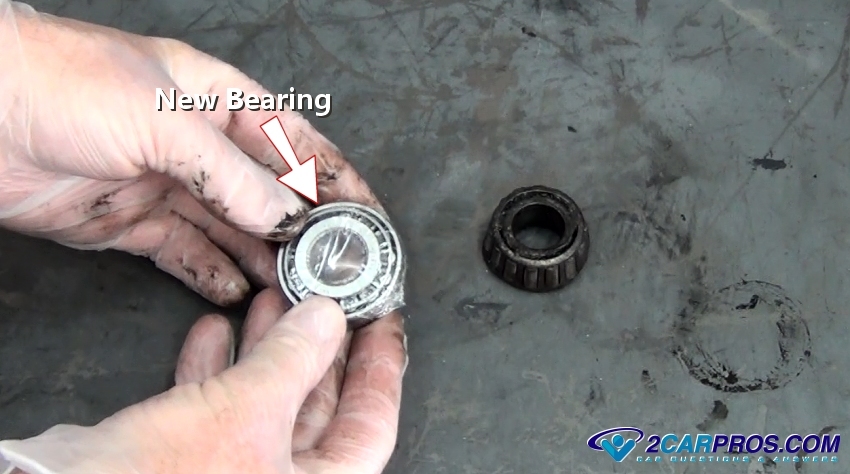
These bearings are matched to the race they are supplied with. Use extra care to not mix them up if you are replacing more than one bearing at a time. Match the old bearings to the new bearings to make sure the inner and outer diameters are the same.

Use wood blocks to prop the rotor hub up from the table or ground to allow clearance for the bearing race to be removed.
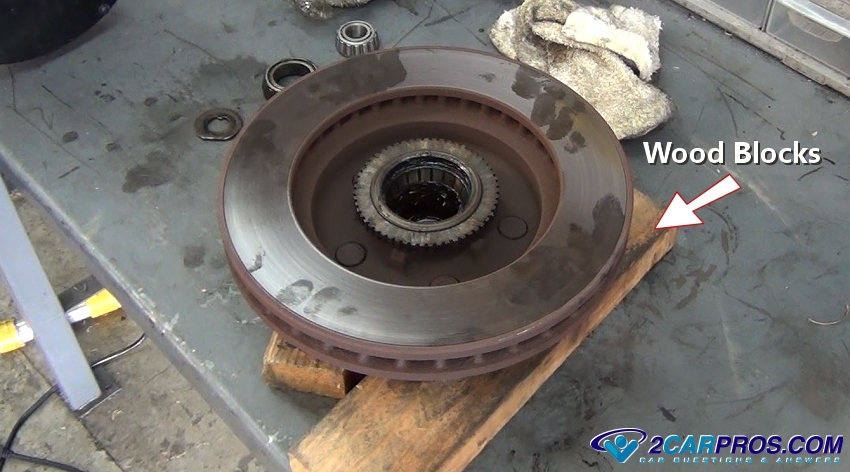
Using a large punch with a freshly ground tip that is flat, locate the outer race lip which will stick out inside the rotor hub. Place the punch against the race lip to drive it outward while working around the race in a circular motion. Continue until the race falls from the bottom of the hub.

Step 5
Install New Bearing Race
Match the new race to the old unit they should match identically in inner and outer diameters.
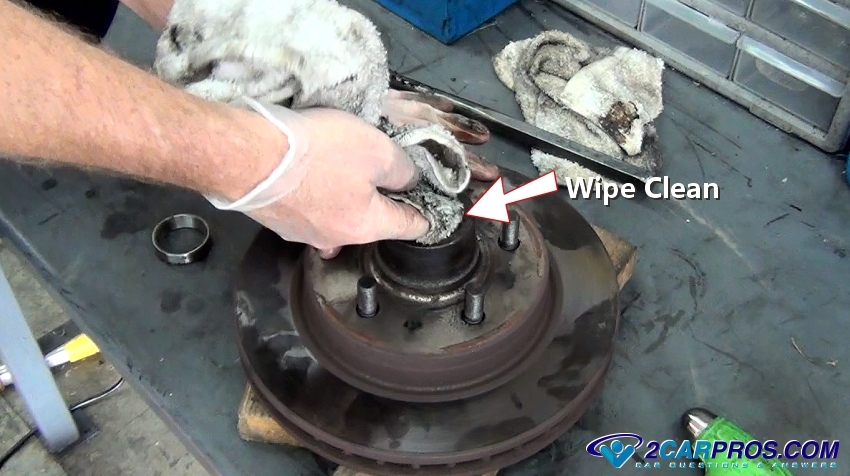
Turn the rotor hub over and use a shop towel to wiper the race mounting surface clean from grease. You don't want grease to be between the race and the hub surface because it will lubricate the race which is a press fit. This will cause the race to become lose and ruin the rotor.
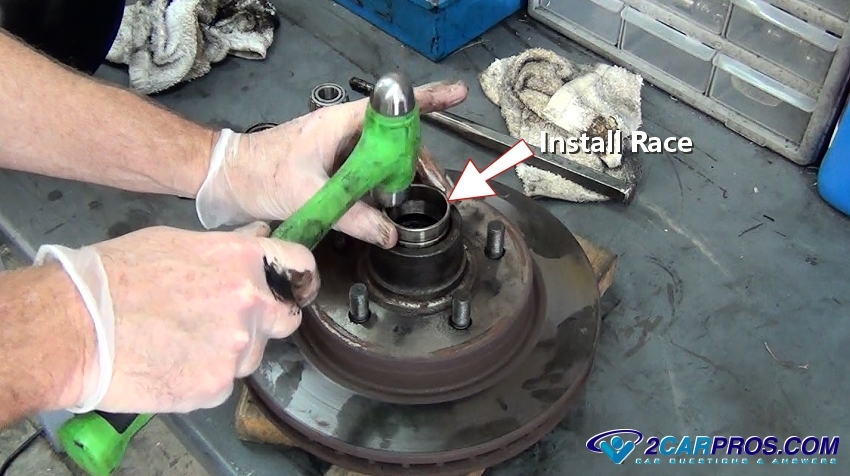
Set the new bearing race cone facing outward squarely into the rotor hub. Next, position the old bearing race on top off the new race. Use a hammer to install the new race into the hub. Once the old race gets close to the bearing hub stop the installation so the old race doesn't get stuck.
Complete the race installation by used the large punch. A race driver can also be used for this as well. The hammer will create a distinct hardened noise once the race is completely in place as the race sits against the hub shoulder.
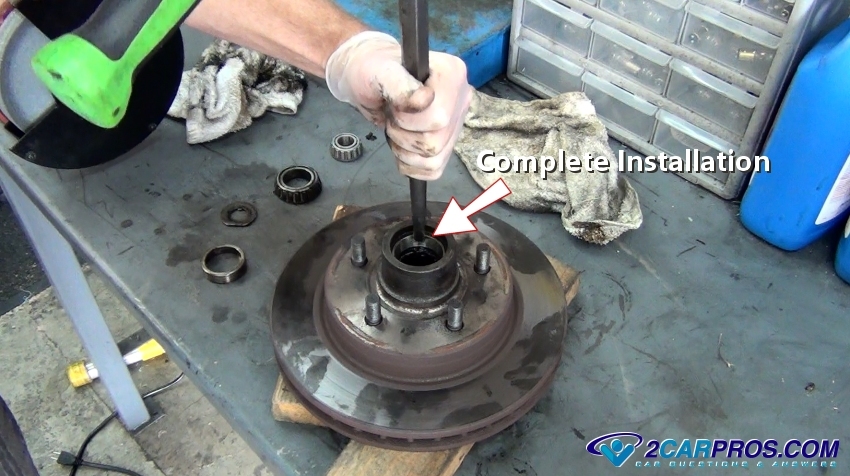
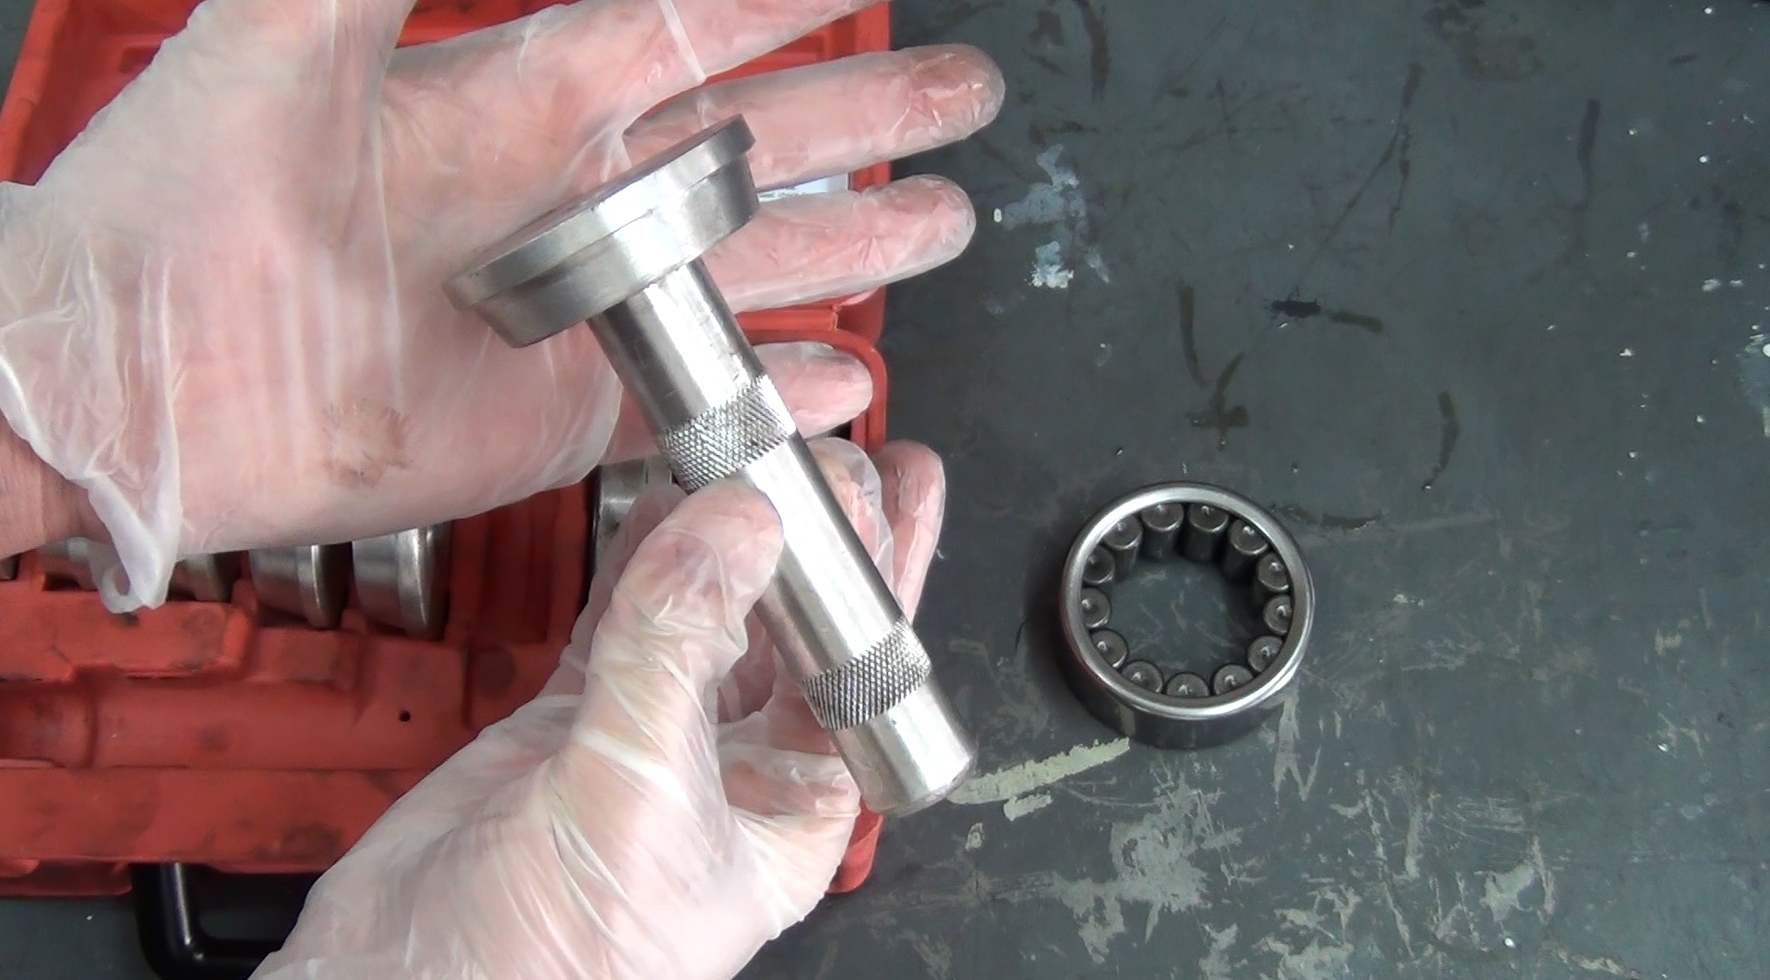
This is what a bearing race driver looks like. Choose the size that just is just a little smaller than the race. Once the new bearing has been installed they must be repacked with new grease and installed before the rotor can be reinserted onto the spindle.
Step 7
Reinstall the Rotor Hub
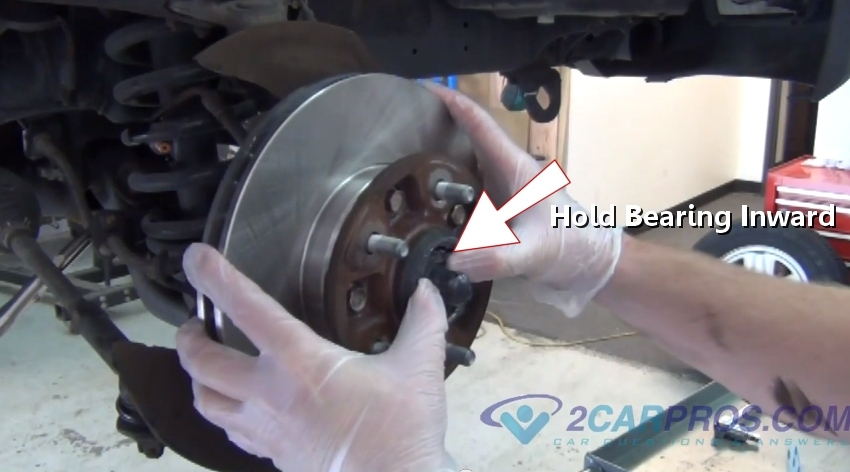
Lift the hub and rotor while using both thumbs to hold the outer bearing in place, slide it back into position. Some resistance may be experienced, a slight jostling may be required. Spin while installing until you feel the bearing and seal set back into place.
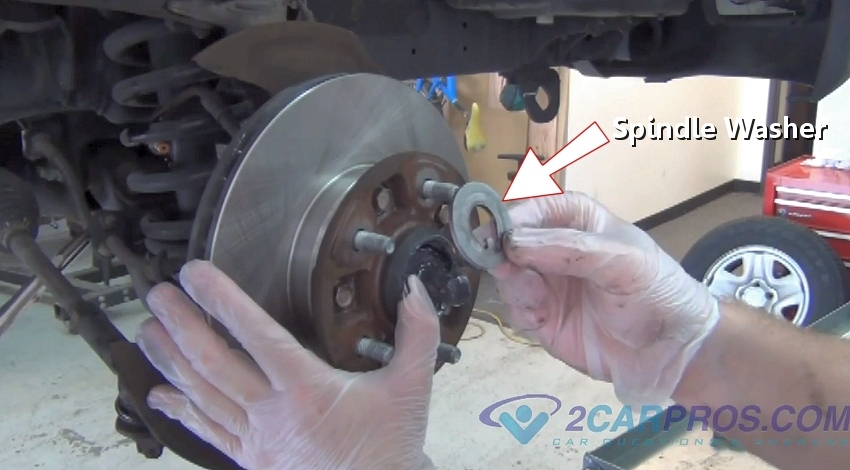
Once the bearing hub rotor assembly is back into place, install the spindle washer which will have a tang on it that matches the groove in the spindle.
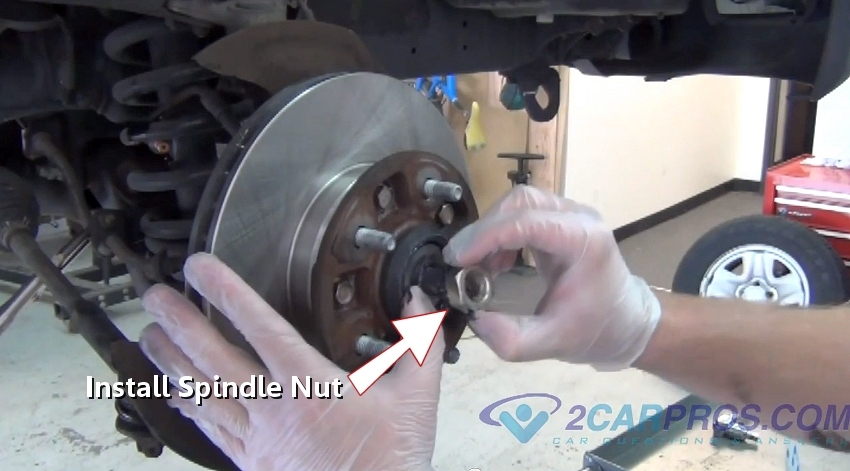
After installing the spindle washer, install the nut and tighten to take away the free play but do not tighten.
Step 8
Setting the Axle Bearing Preload
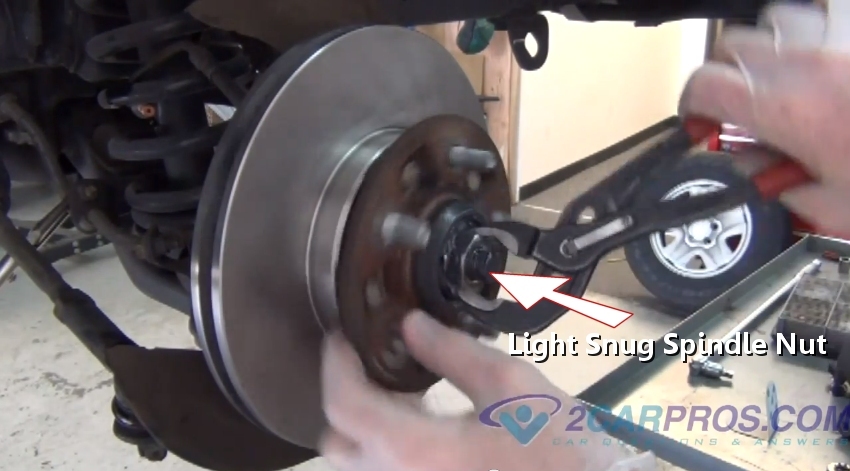
This part is important, if not done correctly you can ruin the bearings. Spin the brake rotor several times while tightening the nut just enough to remove the slack, remember this nut is not to be tight, and when set, just a little loose. This action sets the bearing into their races and allows the correct bearing play and preload. The axle nut should end up almost loose, allowing the bearing lash or play to be at the minimum. Do not over tighten, you can see the preload being set on the video in this guide.
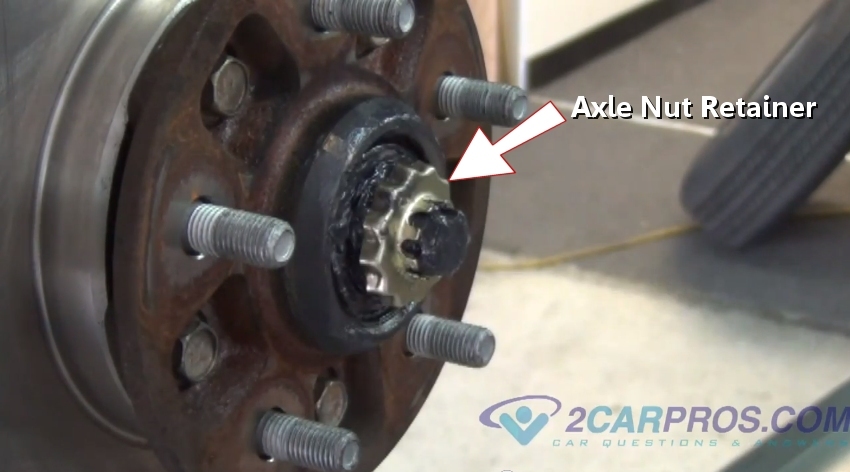
Next, install the axle nut retainer onto the axle nut, align the retainer with the cotter pin hole in the spindle. Some vehicles use a castle nut in which case the nut becomes the retainer as well.
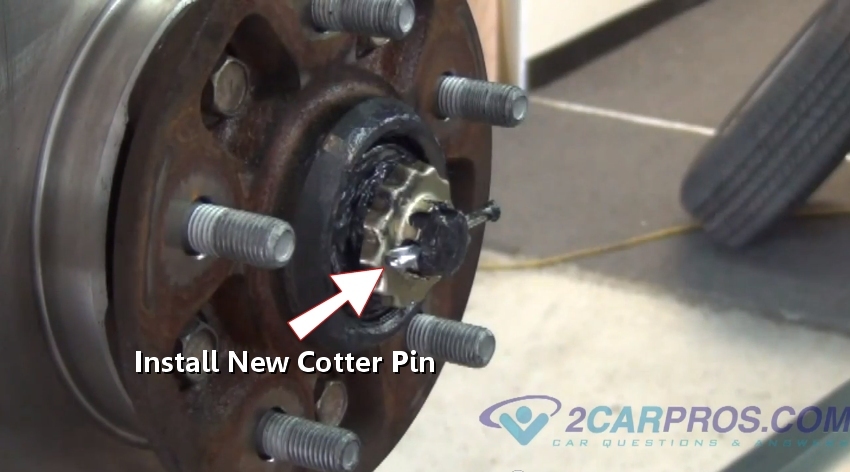
Next, install a new cotter pin and avoid using the old one. Locate the through hole and push the cotter pin into place.
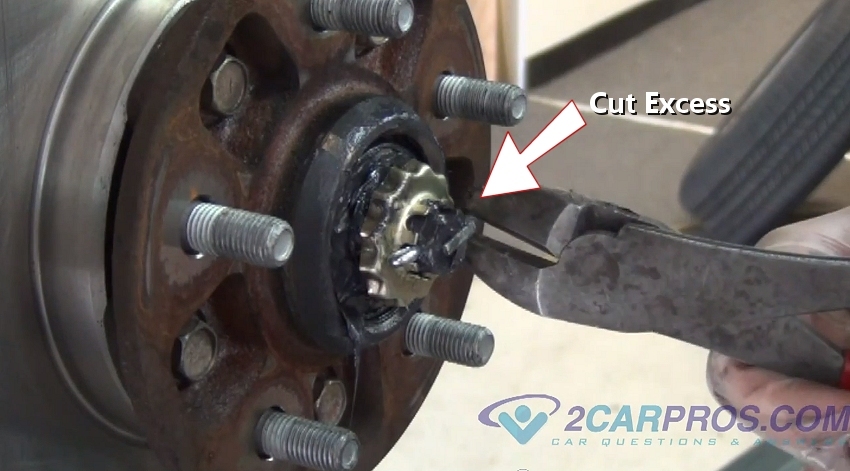
Once the cotter pin is installed, use a pair of dikes to bend the long end of the cotter pin over the spindle, cut off the excess cotter pin material.
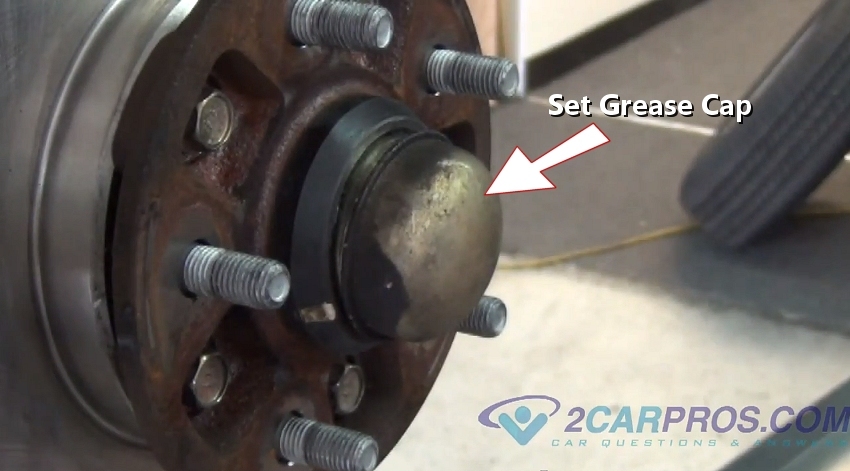
After the cotter pin has been installed, set the grease cap with a gap at the top.
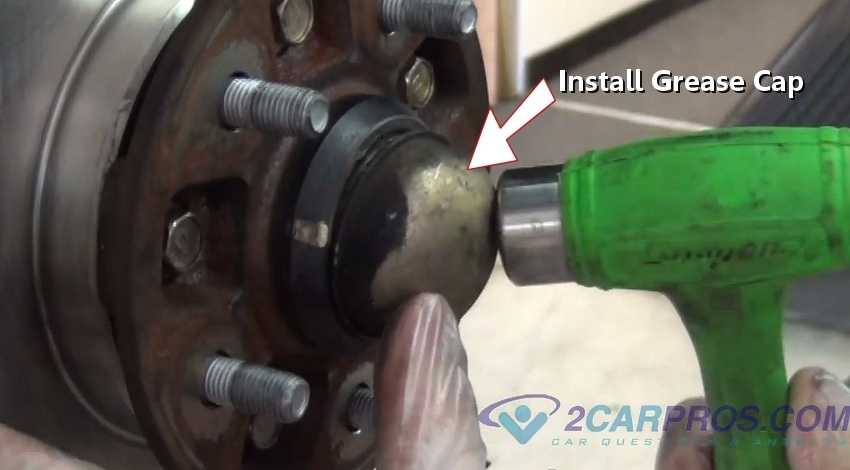
Using a hammer, install the grease cap evenly onto the bearing hub, wipe when finished with a shop towel.
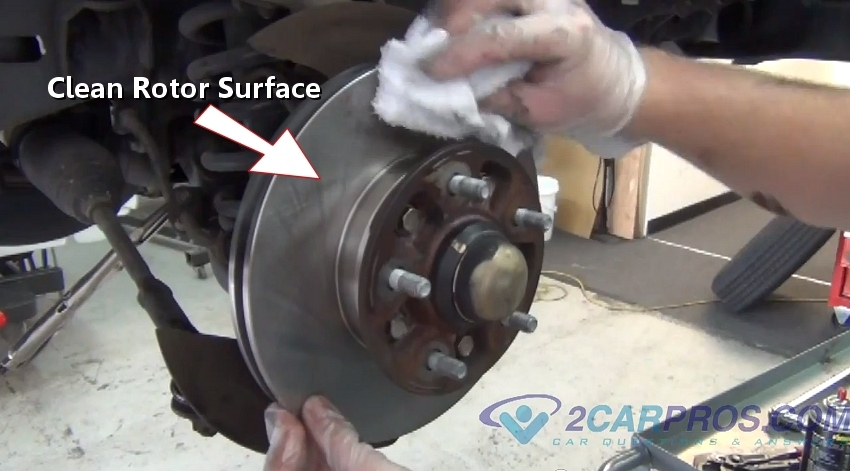
After the cap is installed, use a towel and clean the rotor pad surface and reinstall the caliper, then finish the brake job.
Questions?
If you have any questions about a wheel bearing, please visit our forum. If you need car repair advice, please ask our community of mechanics who are happy to help. Our service is always 100% free.