Welcome to 2CarPros.
No, it doesn't need removed. Since it is 2wd, it's not that bad of a job. Here are the directions. The attached pictures correlate with the directions.
+++++++++++++++++++++++++++++++++++++++
2003 Chevy Truck S10/T10 P/U 2WD L4-2.2L VIN H
Procedures
Vehicle Transmission and Drivetrain Clutch Service and Repair Procedures
PROCEDURES
Clutch Assembly Replacement
Tools Required
- J 33169 Clutch Alignment Tool
Removal Procedure
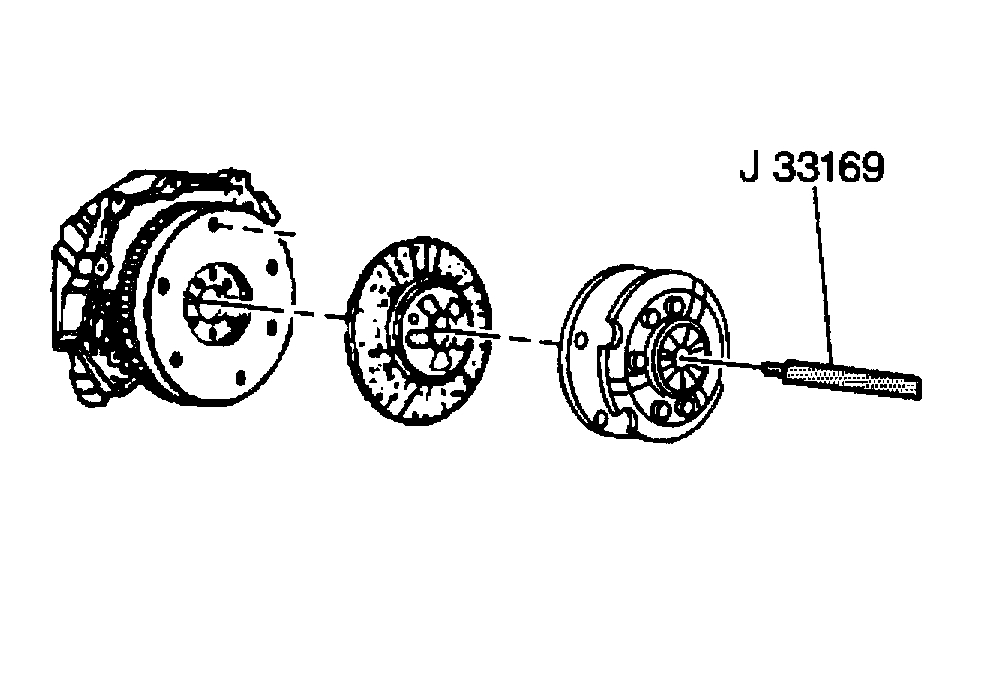
pic 1
1. Raise and support the vehicle.
2. Remove the transmission.
3. Mark the flywheel, cover plate, and pressure plate for installation alignment.
4. Install J 33169 through the cover plate, pressure plate, and into the flywheel for support during plate removal.
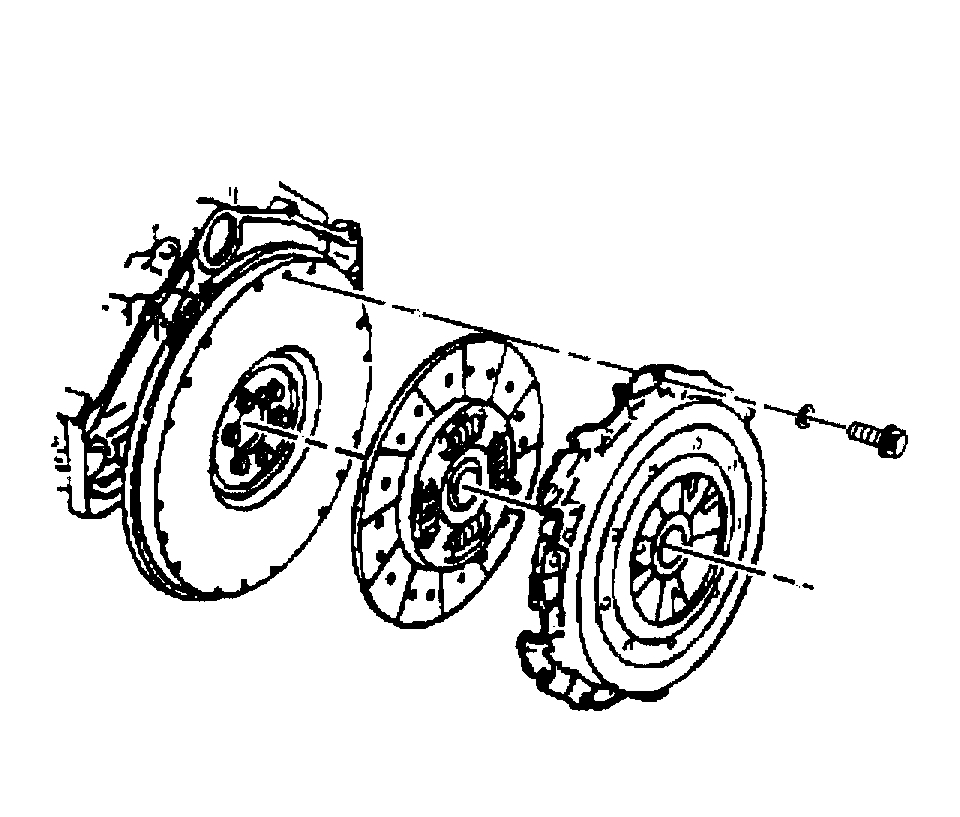
Pic 2
5. Remove the bolts and washers securing the clutch pressure plate and cover plate to the flywheel.
6. Remove J 33169 from the plates.
7. Clean all the clutch parts with a clean, water dampened cloth in order to remove any fibers.
8. Inspect all of the clutch parts for the following conditions:
Wear and damage
Scoring and flatness with a straight edge
Driven plate runout
The runout must not be more than 0.508 mm (0.020 inch).
Scoring, gouges, and loose rivets on the friction pads
Oil soaked friction pads
Nicks, burrs, and sliding fit on all splines
Bending and breaks in the clutch pressure plate cover spring
Installation Procedure
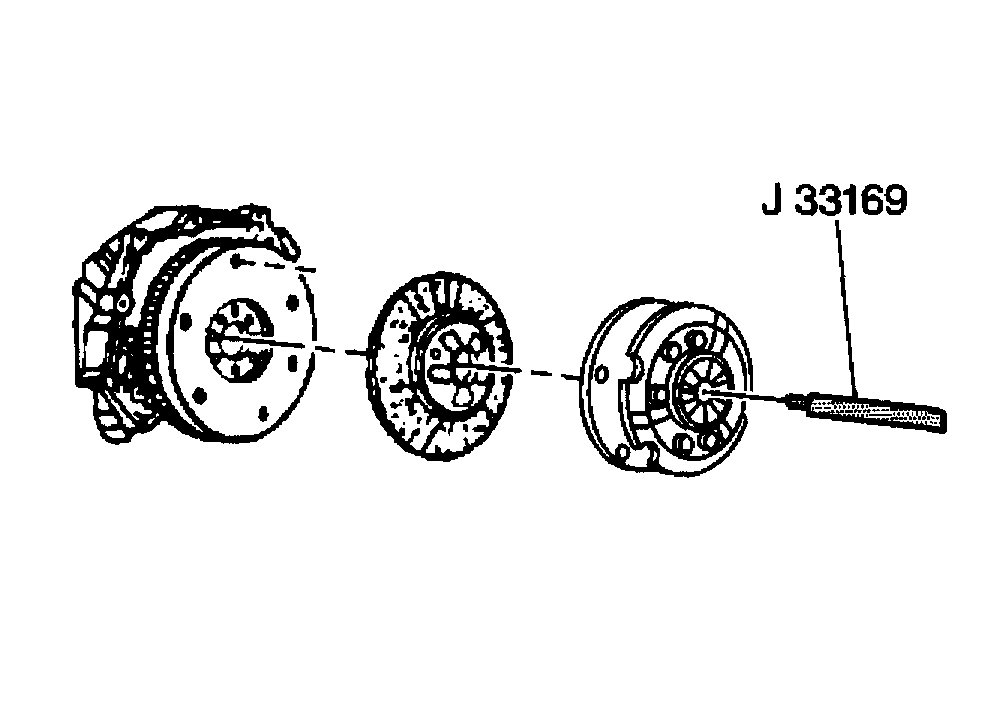
pic 3
1. Using J 33169 for installation alignment, position the pressure plate and cover plate to the flywheel.
Notice: Refer to Fastener Notice in Service Precautions.
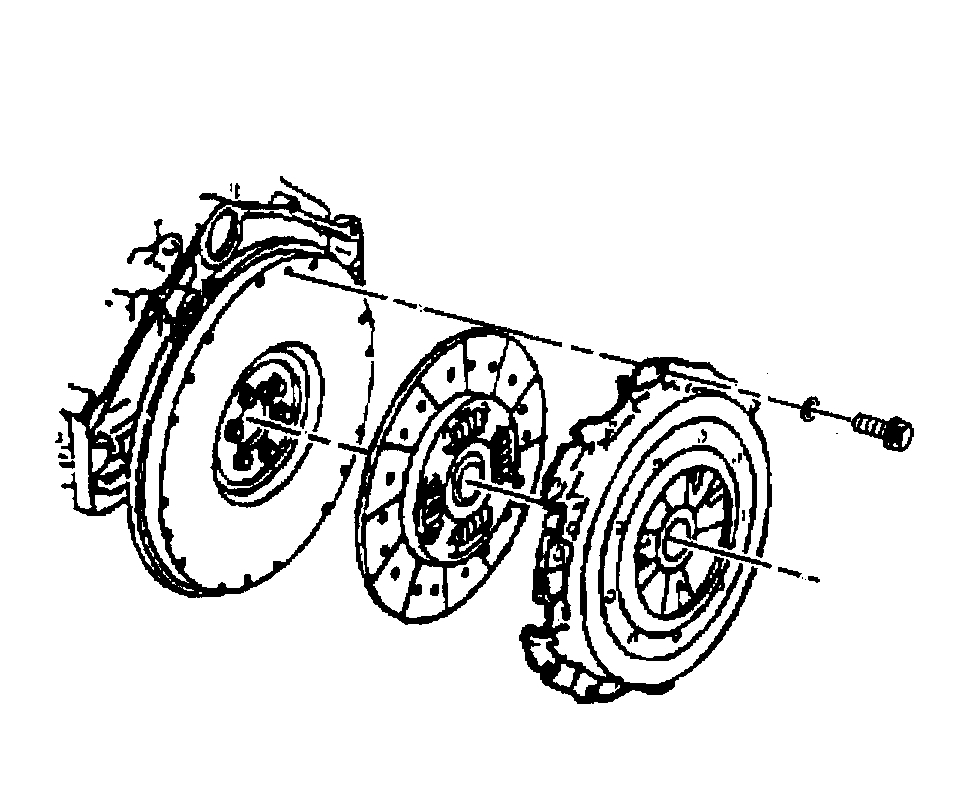
Pic 4
2. Secure the plates to the flywheel with bolts and washers.
Use the marks made during removal to align the plates if using the old clutch assembly.
Tighten each bolt one turn at a time in order to avoid warping the clutch pressure plate cover.
Use a cries-cross pattern for tightening the bolts.
- Tighten the pressure and cover plate bolts for the NV1500 transmission to 44 Nm (33 ft. Lbs.).
- Tighten the pressure and cover plate bolts for the NV3500 to 40 Nm (29 ft. Lbs.).
3. Remove J 33169 from the clutch plates.
4. Install the transmission.
5. Lower the vehicle.
6. Test the transmission and clutch system for proper operation.
_________________________________________
Here are the directions for transmission removal.
Transmission Replacement
Tools Required
- J 42371 Clutch Line Removal Tool
Removal Procedure
pic 5
1. Shift the transmission into the 3rd or 4th mechanical gear position.
2. Remove the shift tower.
3. Raise and support the vehicle.
4. Drain the transmission fluid.
5. Remove the rear propeller shaft.
6. Disconnect the vehicle speed sensor electrical connector.
7. Disconnect the back up switch electrical connector.
8. Remove the wiring harness retainers from the right side of the transmission.
9. Remove the catalytic converter.
10. Remove the transfer case, if equipped.
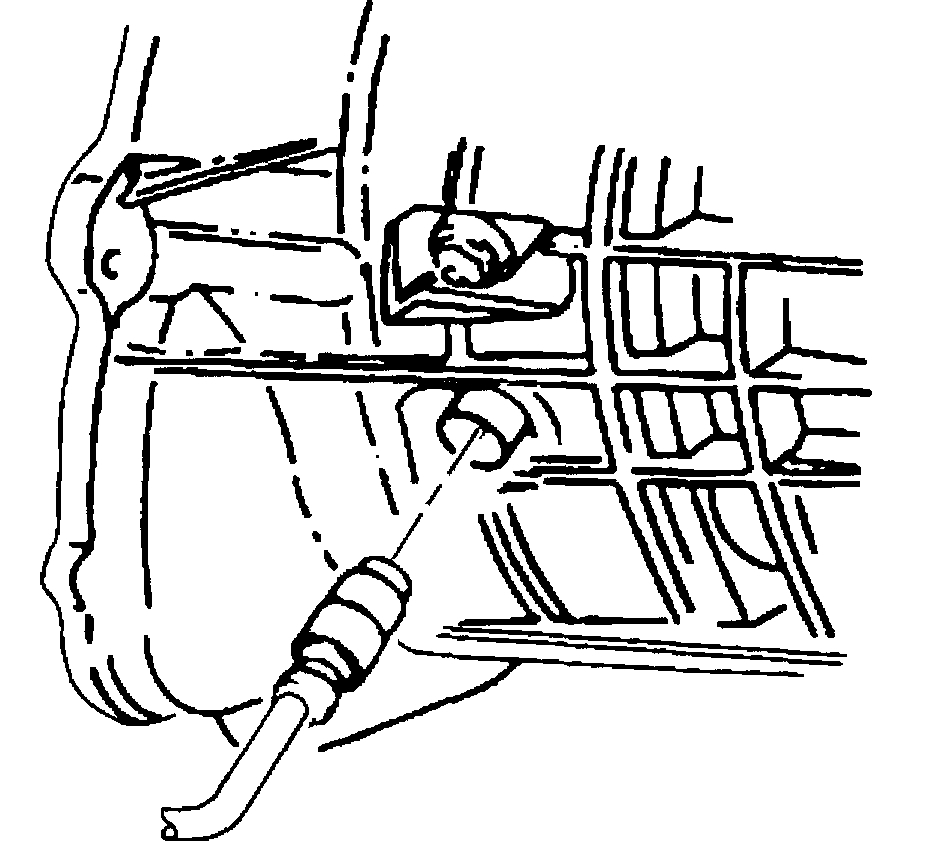
Pic 6
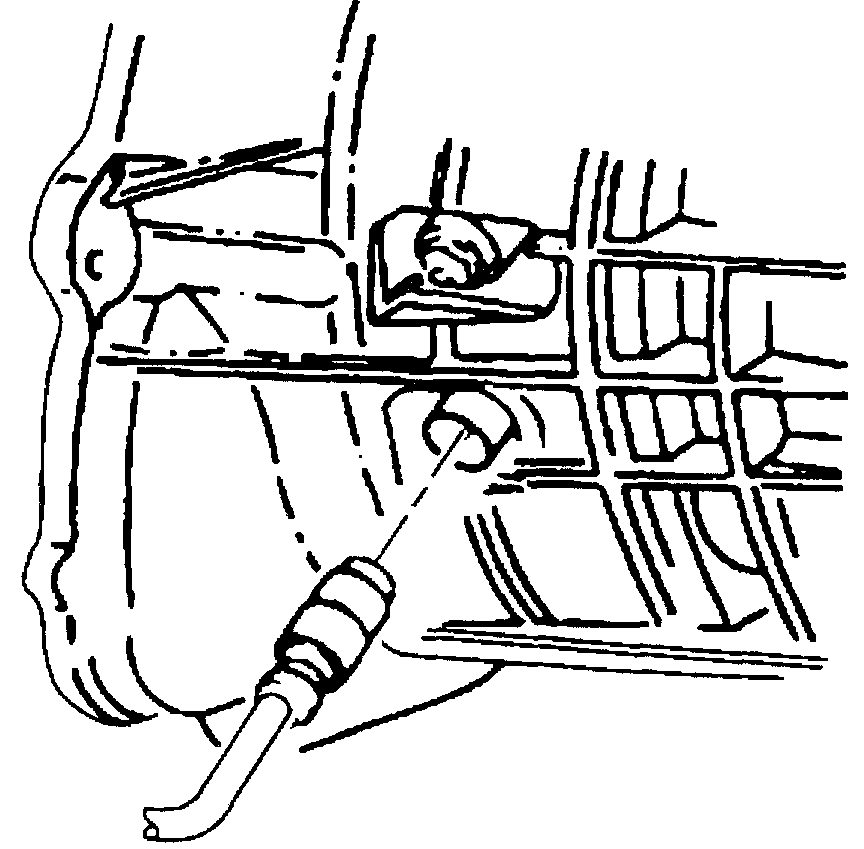
11. Use the J 42371 to depress the white plastic sleeve on the quick connect and separate the clutch line from the concentric slave cylinder quick connect.
12. Support the transmission with a transmission jack.
13. Remove the transmission support.
14. Remove the clutch housing cover bolts.
15. Remove the clutch housing cover from the transmission.
16. Remove the wiring harness from the front crossmember.
17. Lower the transmission enough to gain access to the top of the transmission.
18. Remove the fuel line retainers from the top of the transmission.
Pic 7
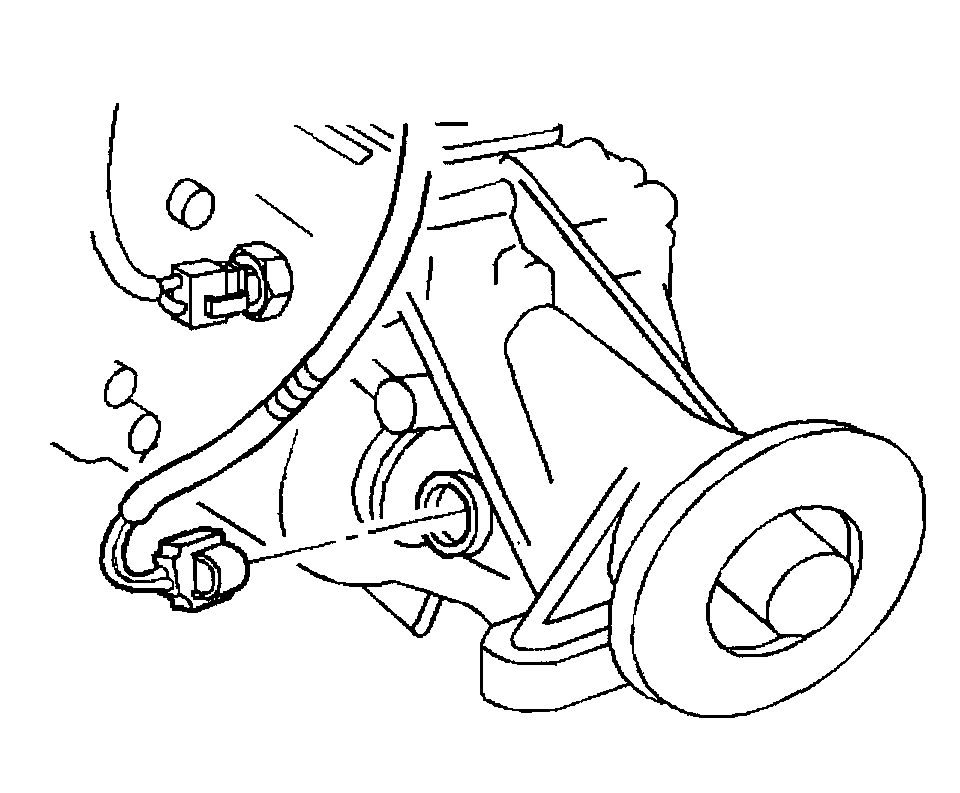
19. Remove the bolt, the washer, and the nut securing the wiring harness ground wires to the engine block.
20. Remove the transmission to engine bolts.
21. Lower the transmission using the transmission jack.
Installation Procedure
pic 8
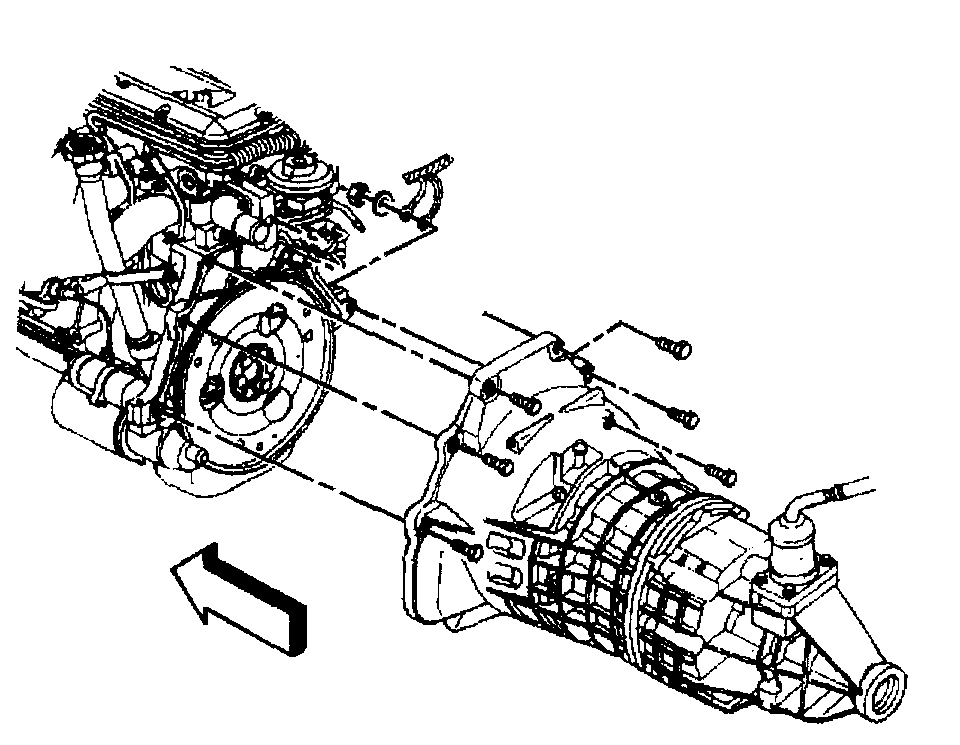
1. Raise the transmission using the transmission jack.
2. Place the fuel line retainers on top of the transmission.
3. Install the transmission to the engine.
Notice: Refer to Fastener Notice in Service Precautions.
4. Install the transmission to engine bolts.
Tighten the transmission to engine bolts to 47 Nm (35 ft. Lbs.).
5. Install the bolt, the washer and the nut securing the wiring harness ground wires to the engine block.
Tighten the ground wire nut and bolt to 47 Nm (35 ft. Lbs.).
6. Install the wiring harness to the front crossmember.
7. Install the clutch housing cover to the transmission.
8. Install the clutch housing cover bolts.
Tighten the clutch housing cover bolts to 10 Nm (89 inch lbs.).
9. Install the transmission support.
10. Remove the transmission jack from the transmission.
Pic 9
11. Install the hydraulic clutch line to the concentric slave cylinder quick connect.
12. Install the transfer case if equipped.
Pic 10
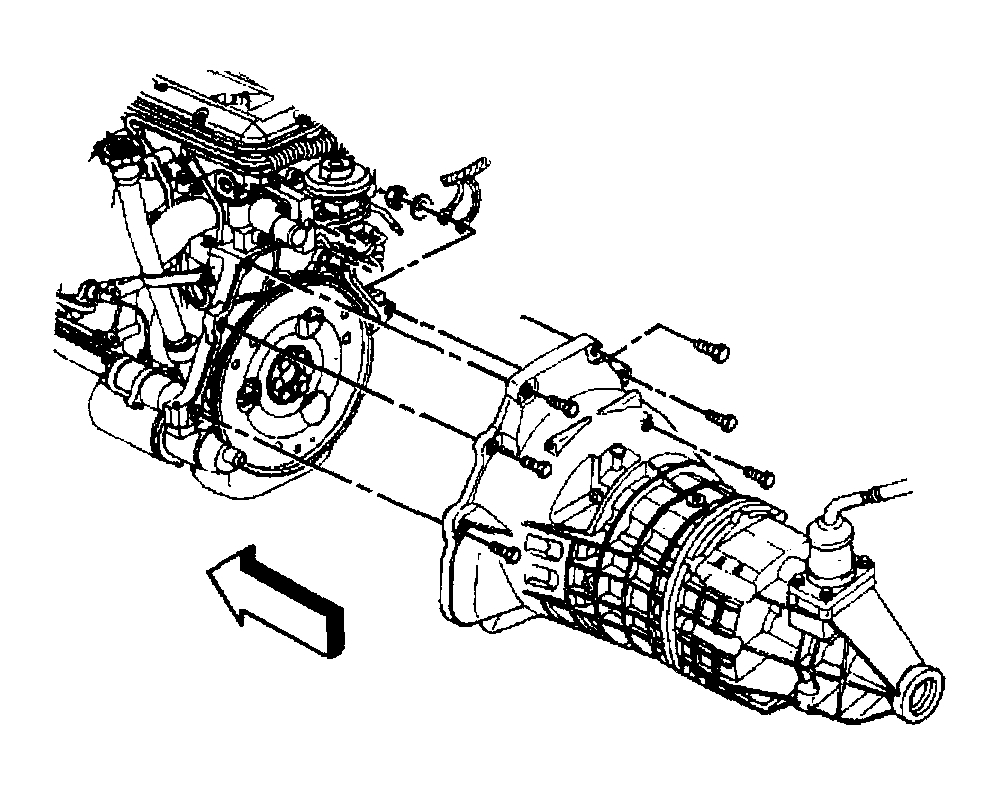
14. Install the wiring harness retainers to the right side of the transmission.
15. Connect the back up switch electrical connector.
16. Connect the vehicle speed sensor electrical connector.
17. Install the propeller shaft.
18. Fill the transmission fluid.
19. Lower the vehicle.
20. Install the shift tower.
21. Bleed the clutch system.
____________________________________
Let me know if this helps or if you have other questions.
Take care,
Joe
Images (Click to make bigger)
Saturday, August 10th, 2019 AT 9:28 PM