Welcome to 2CarPros.
If you are running it very low, it could be picking up dirt from the bottom of the tank. Have you ever replaced the fuel filter? Have you ever checked fuel pressure? If you haven't, that is where I would start unless it starts running normally after a bit. Also, let me know if the fuel gauge eventually begins working.
Here is a link that shows how in general to check fuel pump pressure:
https://www.2carpros.com/articles/how-to-check-fuel-system-pressure-and-regulator
Here are directions for testing fuel pressure specific to your vehicle. You can do this without a scanner but the directions include one. Also, the attached pictures correlate with the directions and the manufacturer's specs are included in the directions.
____________________________
ON-VEHICLE INSPECTION
1. CHECK FOR FUEL PUMP OPERATION AND FUEL LEAK
pic 1
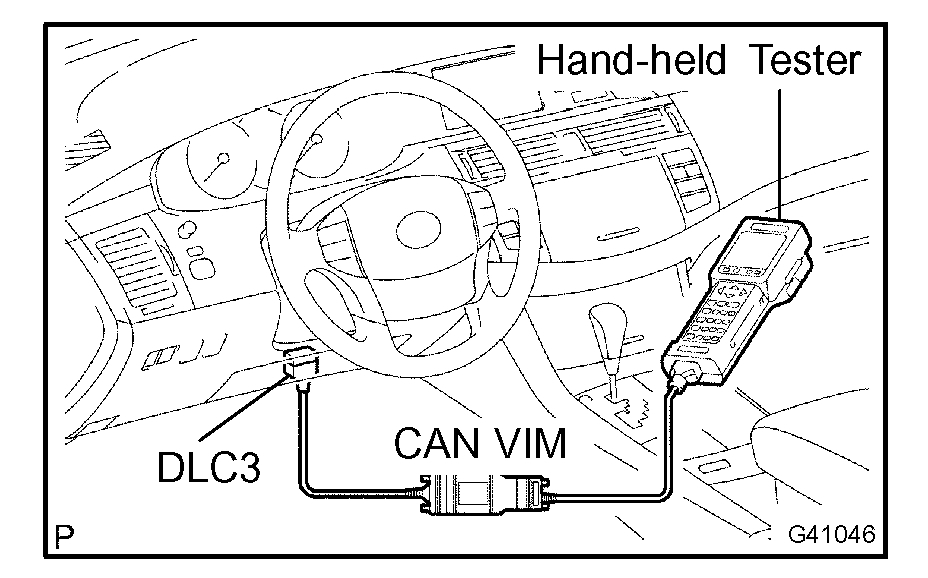
a. Connect the hand-held tester to the DLC3.
b. Turn the ignition switch on (IG).
NOTE: Do not start the engine.
c. Turn the hand-held tester on.
d. On the hand-held tester, select following the items: Powertrain / Engine and ETC / Active Test / Control the Fuel Pump / speed.
e. Check fuel pump operation while operating it with the hand-held tester.
f. Check that there is pressure in the fuel inlet hose.
If the fuel pump does not operate, replace it.
g. Check that there are no fuel leaks from any part of the fuel system.
h. Turn the ignition switch off.
i. Disconnect the hand-held tester from the DLC3.
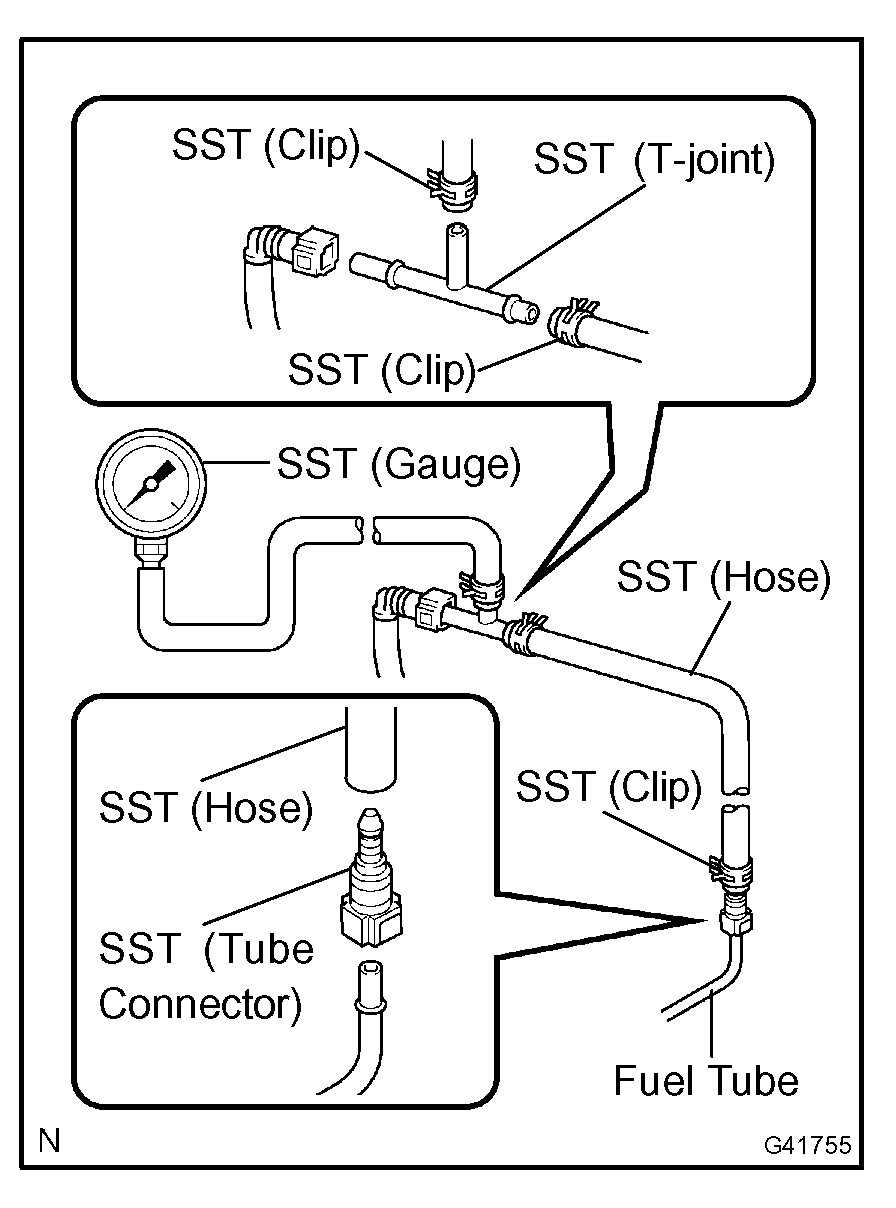
2. CHECK FUEL PRESSURE
a. Discharge fuel system pressure.
b. Using a voltmeter, measure the battery voltage.
Standard: 11 to 14 V
c. Disconnect the negative (-) battery cable.
d. Disconnect the fuel hose from the fuel main tube.
pic 2
e. Install SST (pressure gauge) using SST and a fuel tube connector as shown in the illustration.
SST 09268- 41048 (90467- 13001, 95336- 08070, 09268-41500), 09268-45014 (09268-41200, 09268-41220, 09268-41250, 90467-13001)
f. Wipe up any gasoline.
g. Connect the negative (-) battery cable.
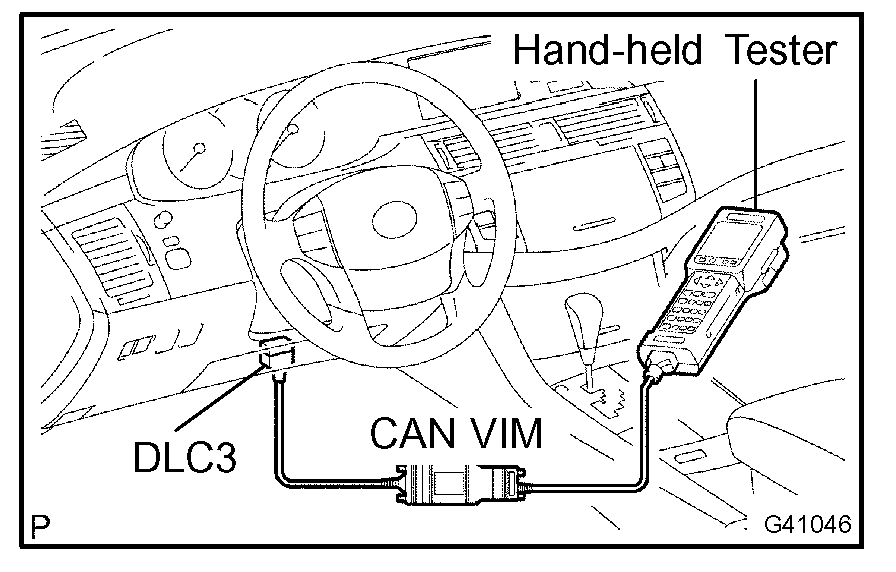
pic 3
h. Connect the hand-held tester to the DLC3.
i. Start the engine.
j. Measure the fuel pressure at idle.
Fuel pressure:
304 to 343 kPa (3.1 to 3.5 kgf.sq.cm, 44.1 to 49.7 psi)
- If the fuel pressure is greater than the standard value, replace the fuel pump.
- If the fuel pressure is less than the standard value, check the connection of the fuel hose and the fuel pump.
k. Stop the engine.
l. Check that the fuel pressure remains as specified for 5 minutes after the engine stops.
Fuel pressure:
147 kPa (1.5 kgf.sq.cm, 21 psi) or more
If the fuel pressure is not as specified, check the fuel pump or fuel injector.
m. After checking the fuel pressure, carefully disconnect the negative (-) battery cable, and remove the SST and fuel tube connector to prevent gasoline from splashing.
n. Reconnect the fuel tube to the main fuel tube.
o. Check for fuel leaks.
__________________________________________
If you find the pressure is low, I would first replace the fuel filter to see if that changes things. Here is a link that shows in general how to replace a fuel filter.
https://www.2carpros.com/articles/how-to-change-a-fuel-filter
__________________________________________
Here are the directions specific to your vehicle for fuel filter replacement. Now, you will need to remove the fuel pump on this vehicle to access the pump. However, there is an access port to the pump so you will not need to drop the tank. While you have the pump out, check and make sure the float leveler is free and not stuck on anything. All of the remaining pics correlate with these directions. Also, these directions are for fuel pump replacement, but you need to remove the pump to access the filter, so it is relevant.
___________________________________________
PROCEDURES
Removal & Installation and Disassembly & Reassembly
1. PREVENT GASOLINE FROM SPILLING OUT
2. DISCONNECT CABLE FROM NEGATIVE BATTERY TERMINAL
3. REMOVE REAR SEAT CUSHION ASSEMBLY
4. REMOVE REAR FLOOR SERVICE HOLE COVER
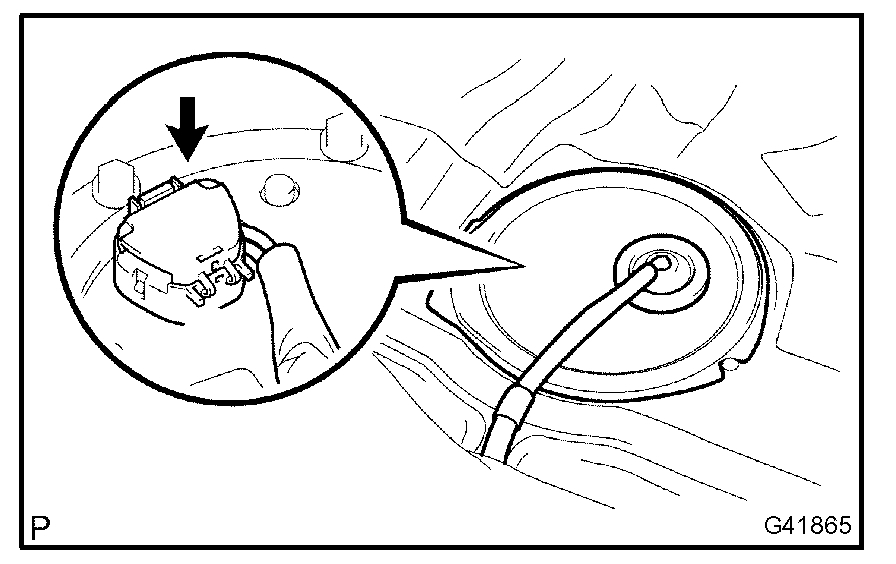
pic 4
a. Remove the rear floor service hole cover.
b. Disconnect the fuel pump connector.
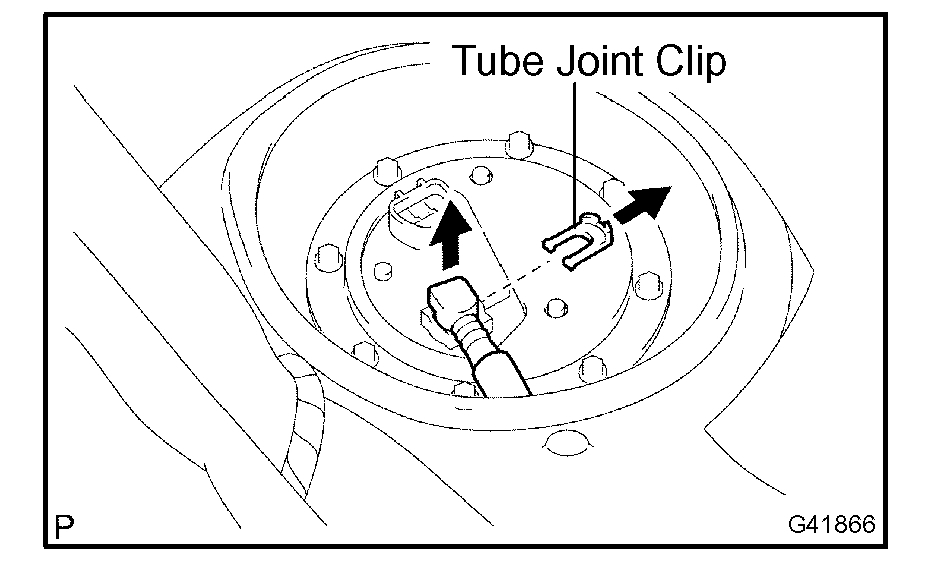
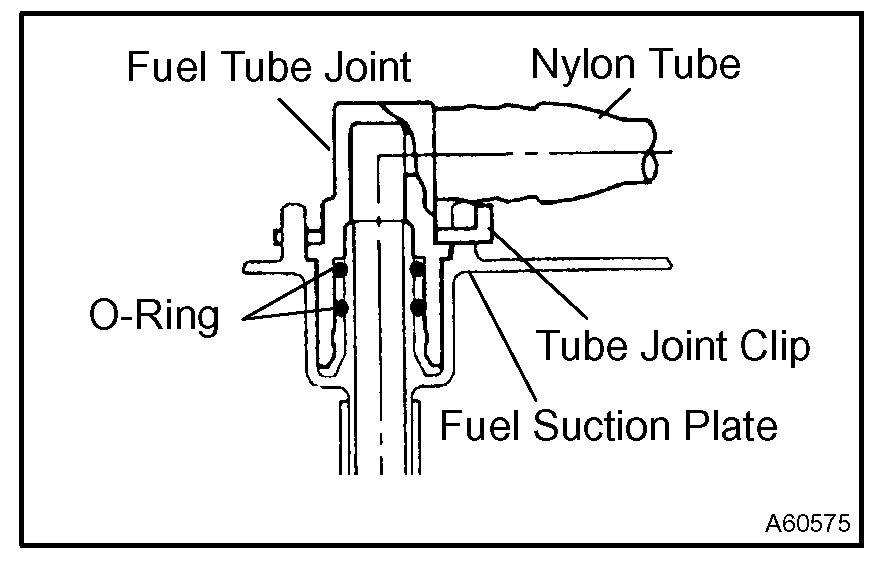
5. SEPARATE FUEL PUMP TUBE SUB-ASSEMBLY
pic 5
pic 6
a. Remove the tube joint clip, and pull out the fuel pump tube.
NOTE:
- Check that there is no dirt around the fuel tube joint before this work and clean the dirt away.
- Be careful of dirt like mud because the fuel tube joint has O-rings to seal the fuel tube connector and fuel suction plate.
- Do not use any tools in this work.
- Do not bend or twist the nylon tube by force.
- After disconnecting, cover the fuel tube joint with a plastic bag.
- When the fuel tube joint and fuel suction plate are stuck, pinch the fuel tank tube between fingers, and turn it carefully to release. Disconnect the fuel tank tube.
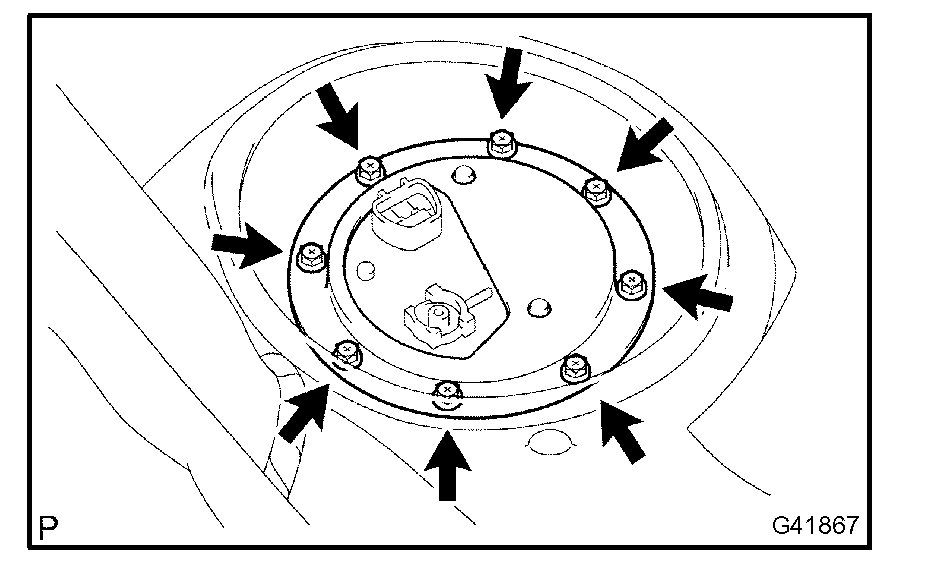
6. REMOVE FUEL TANK VENT TUBE SET PLATE
pic 7
a. Remove the 8 bolts and set plate.
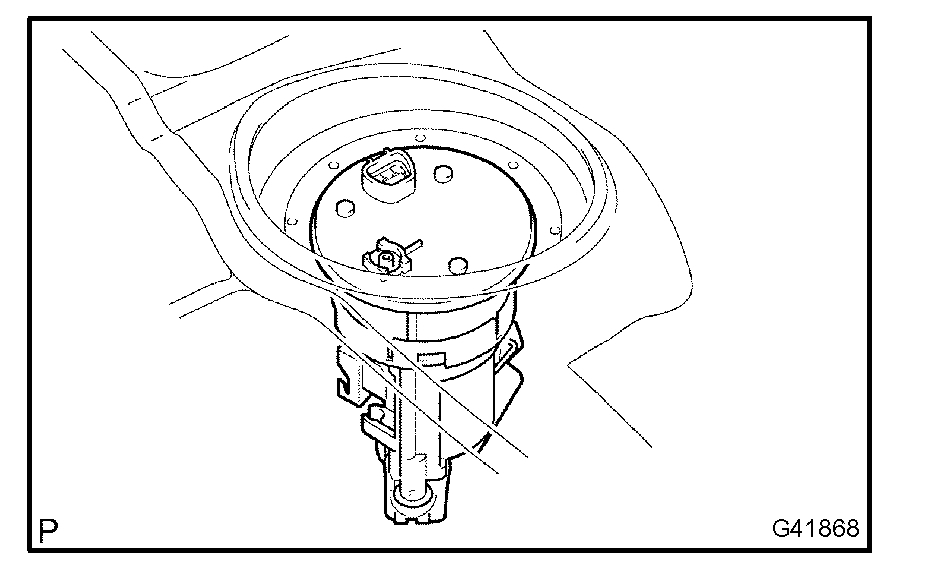
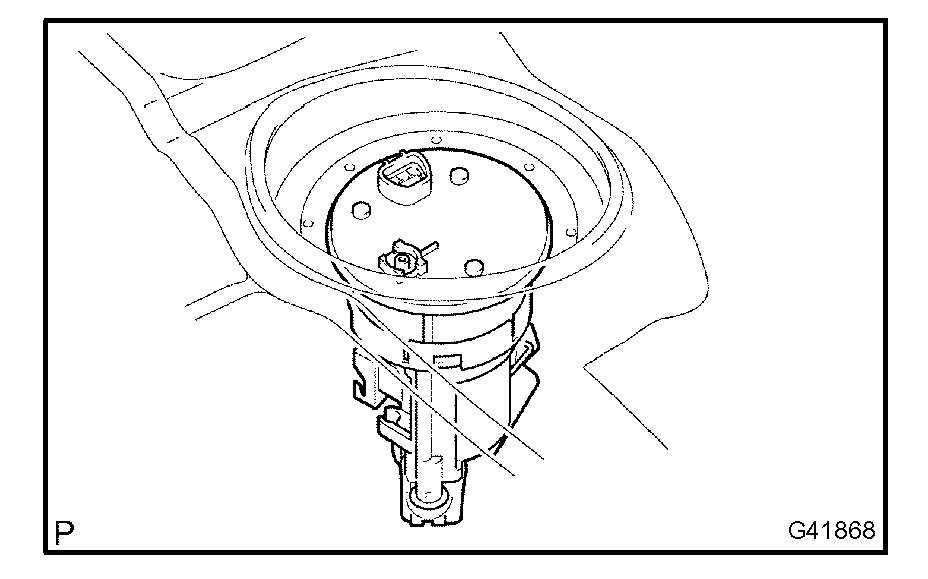
7. REMOVE FUEL SUCTION TUBE ASSEMBLY W/ PUMP & GAUGE
pic 8
a. Pull out the fuel suction tube from the fuel tank.
NOTE:
- Do not damage the fuel pump filter.
- Be careful that the arm of the sender gauge should not bend.
b. Remove the gasket from the fuel suction tube.
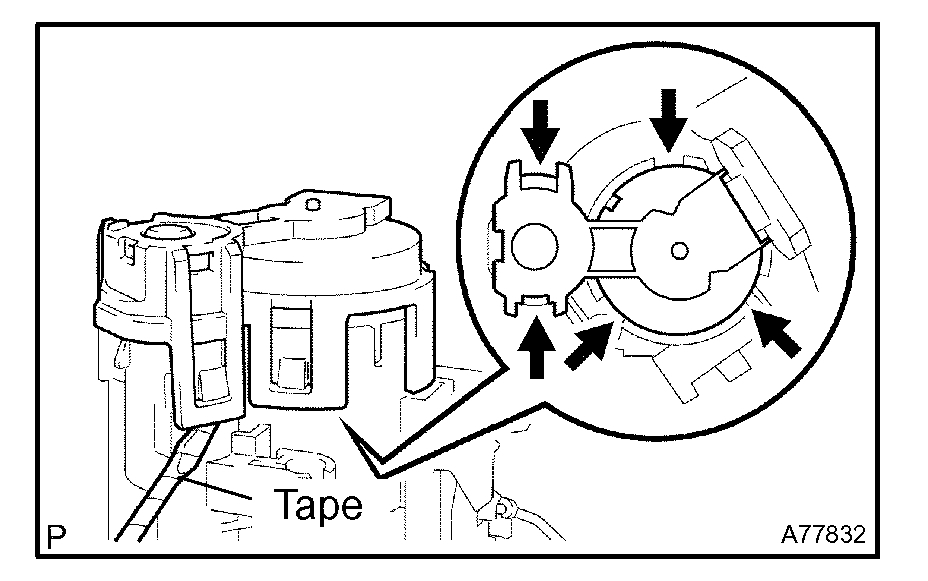
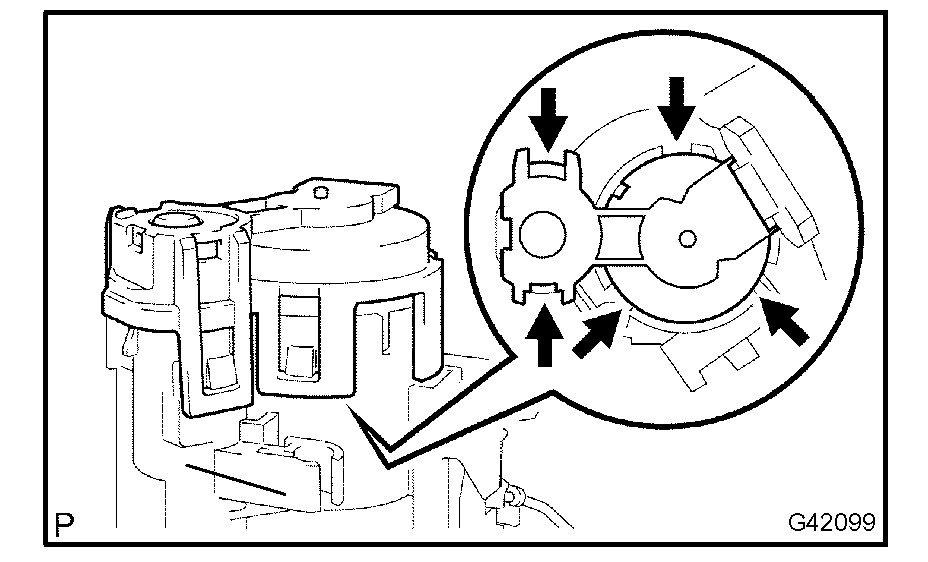
8. REMOVE FUEL SUCTION SUPPORT NO.2
pic 9
a. Using a screwdriver with its tip wrapped with tape, disengage the 5 snap claws from the claw holes, and remove the fuel suction support.
NOTE: Do not damage the fuel suction support.
9. REMOVE FUEL PUMP CUSHION RUBBER
pic 10
a. Remove the fuel pump cushion rubber from the fuel pump.
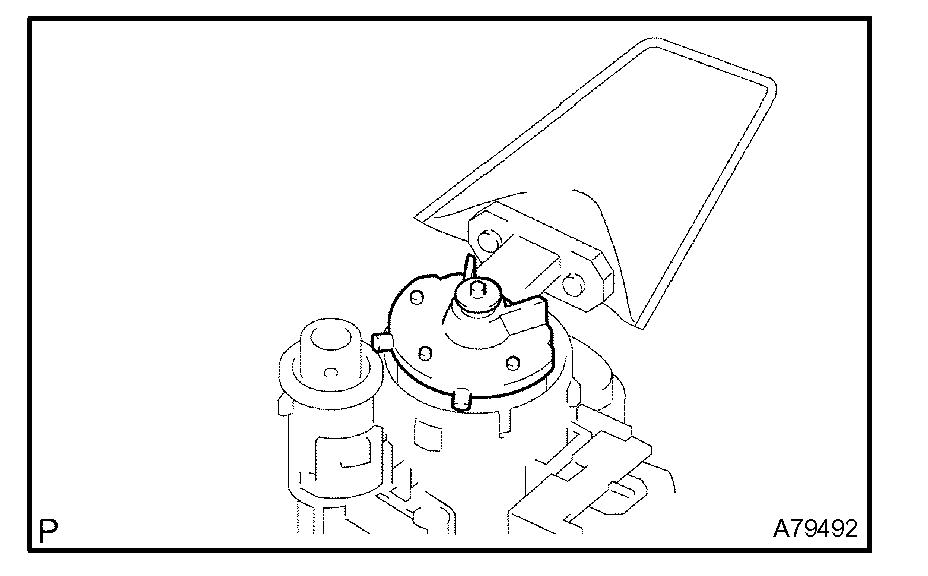
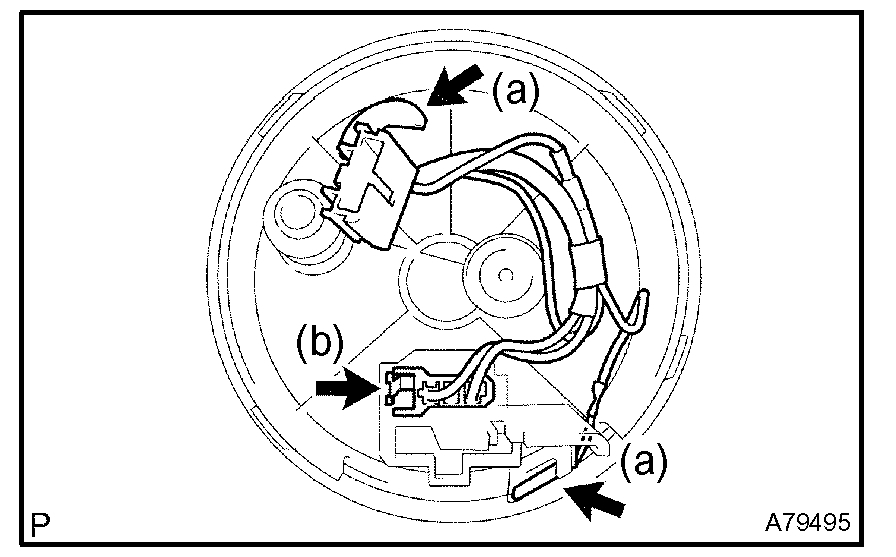
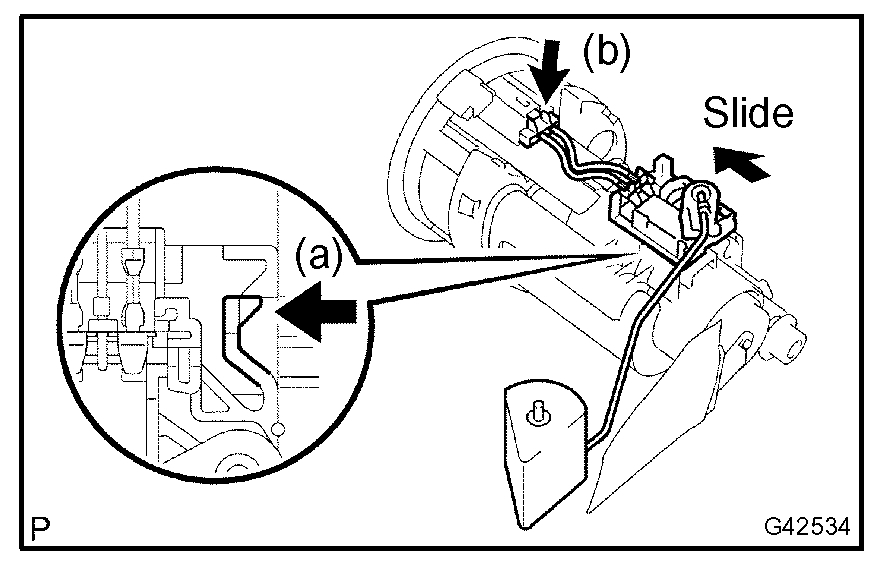
10. REMOVE FUEL SENDER GAUGE ASSEMBLY
pic 11
a. Disconnect the fuel sender gauge connector.
b. Unlock the fuel sender gauge, and slide it to remove.
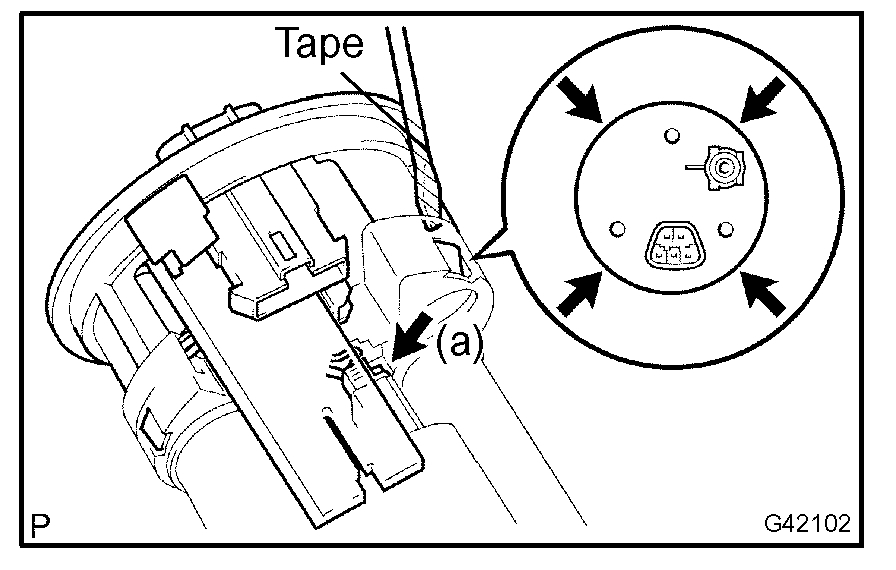
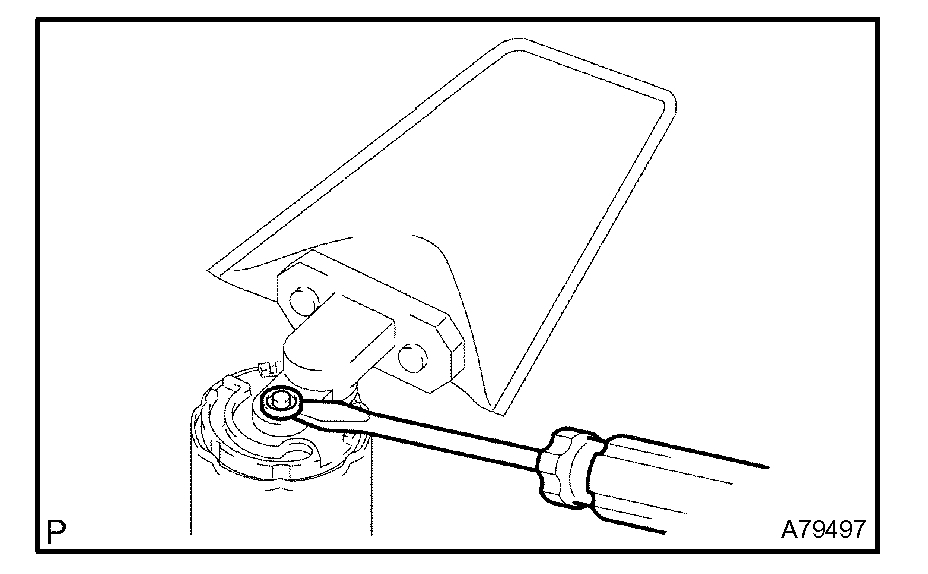
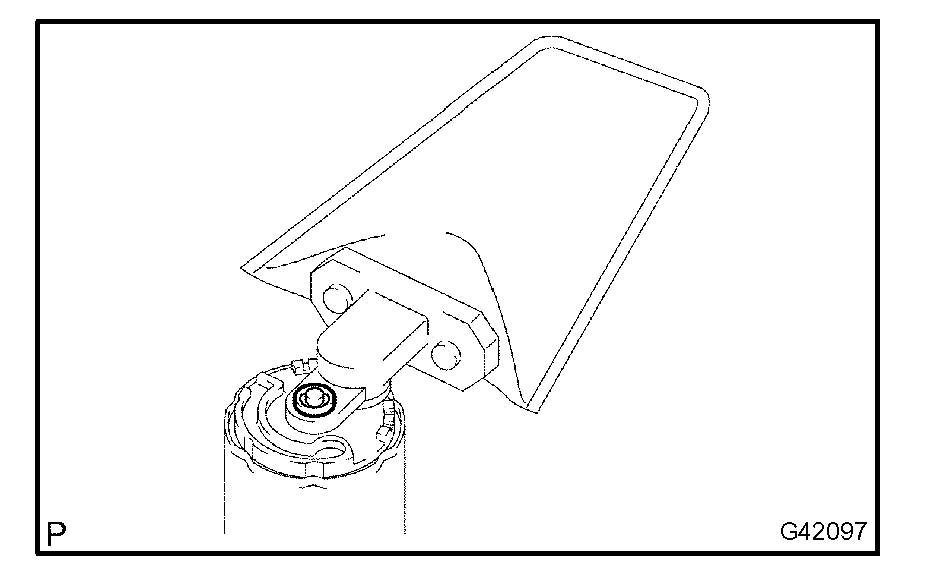
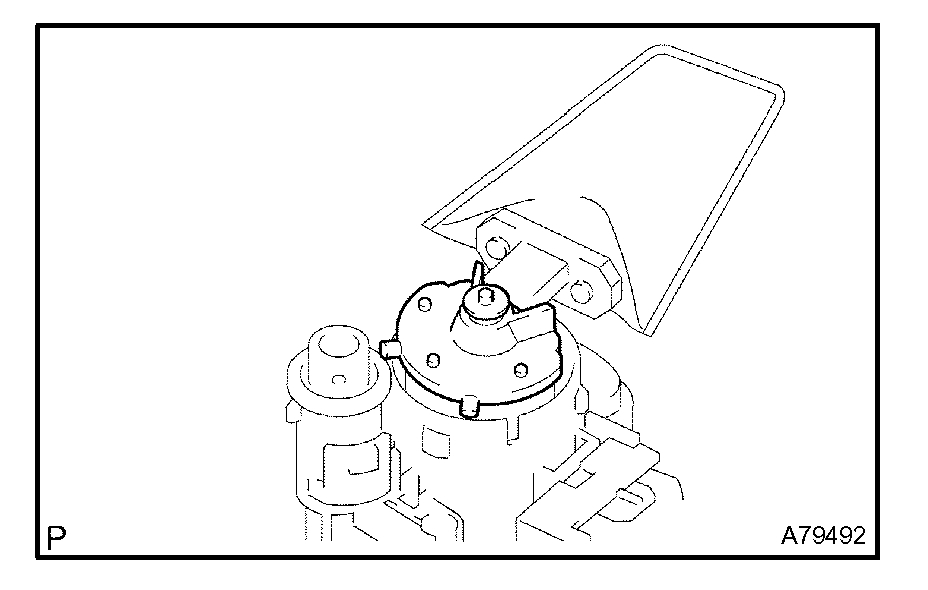
11. REMOVE FUEL SUCTION PLATE SUB-ASSEMBLY
pic 12
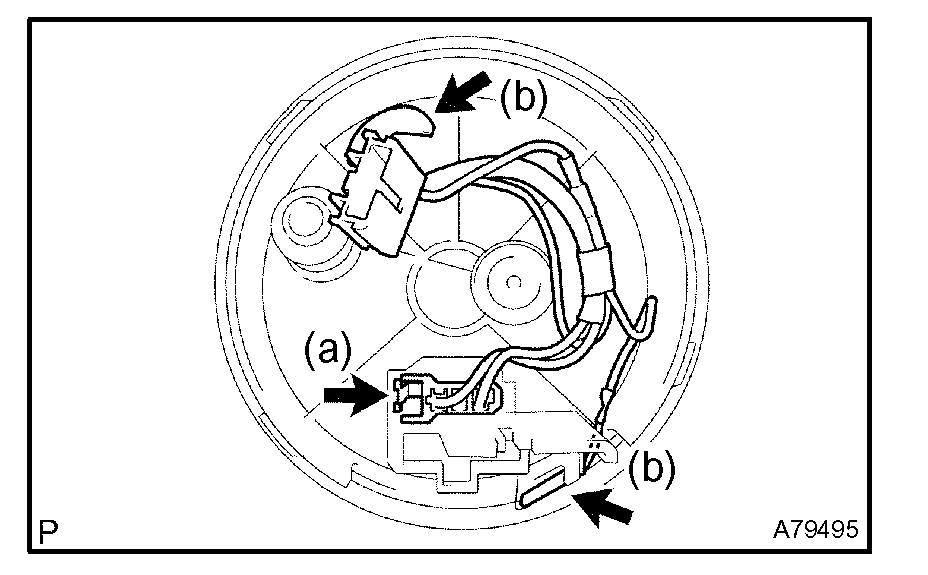
a. Disconnect the fuel pump connector.
b. Using a screwdriver with its tip wrapped with tape, disengage the 4 snap claws from the claw holes, and pull out the fuel suction plate.
NOTE: Do not damage the fuel suction support.
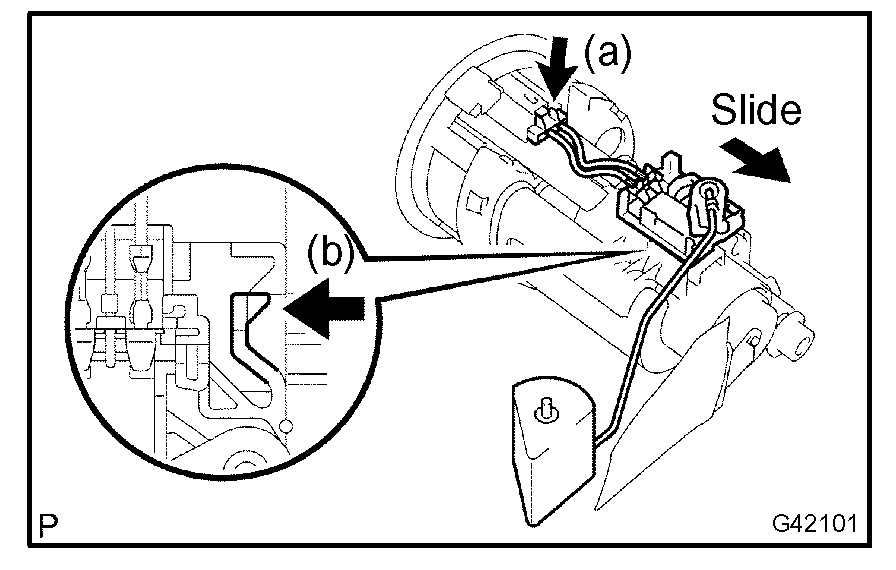
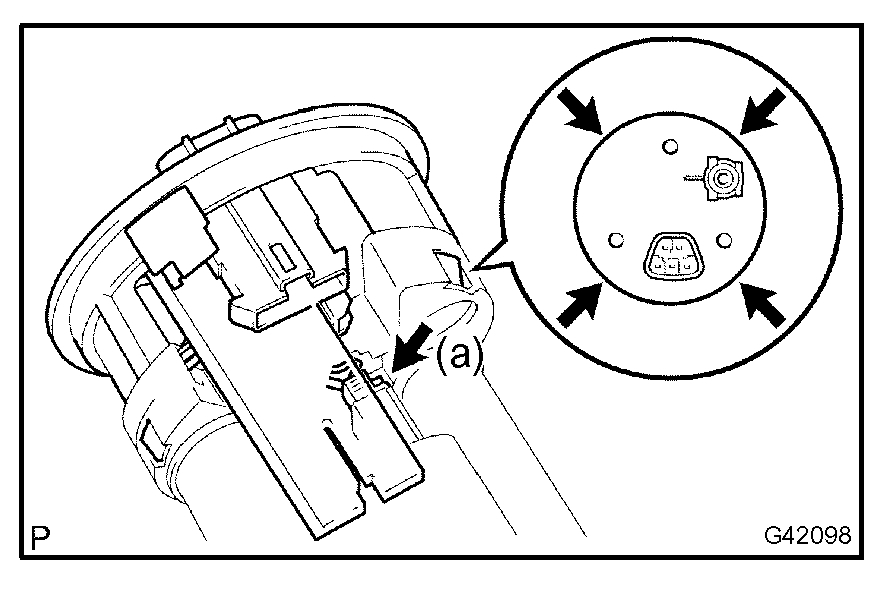
12. REMOVE FUEL PUMP HARNESS
pic 13
a. Disconnect the connector.
b. Using a screwdriver, pry out the fuel pump harness.
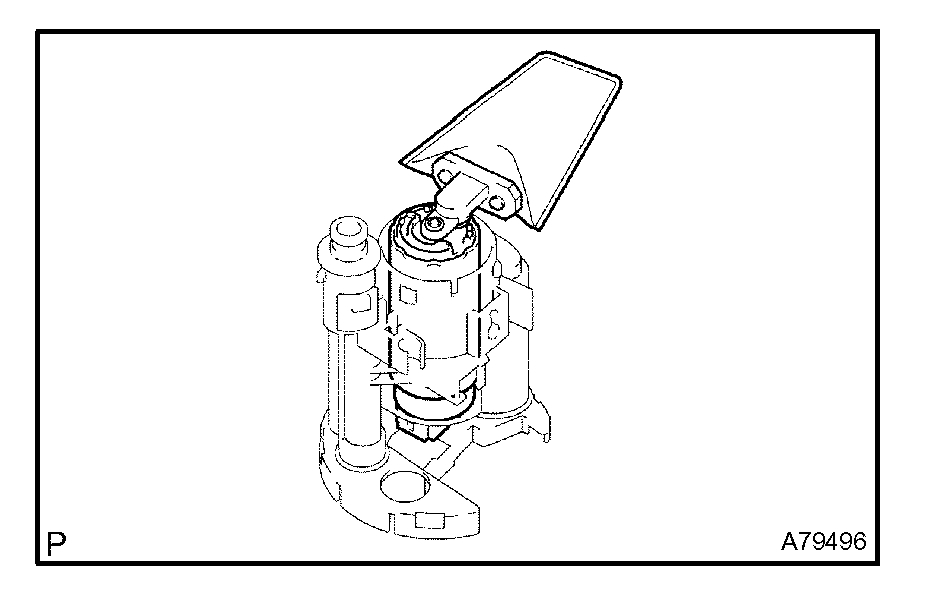
13. REMOVE FUEL PUMP
pic 14
a. Pull out the fuel pump from the fuel tank fuel filter.
14. REMOVE FUEL PUMP FILTER
pic 15
a. Using a screwdriver, pry out the clip.
b. Pull out the fuel pump filter from the fuel pump.
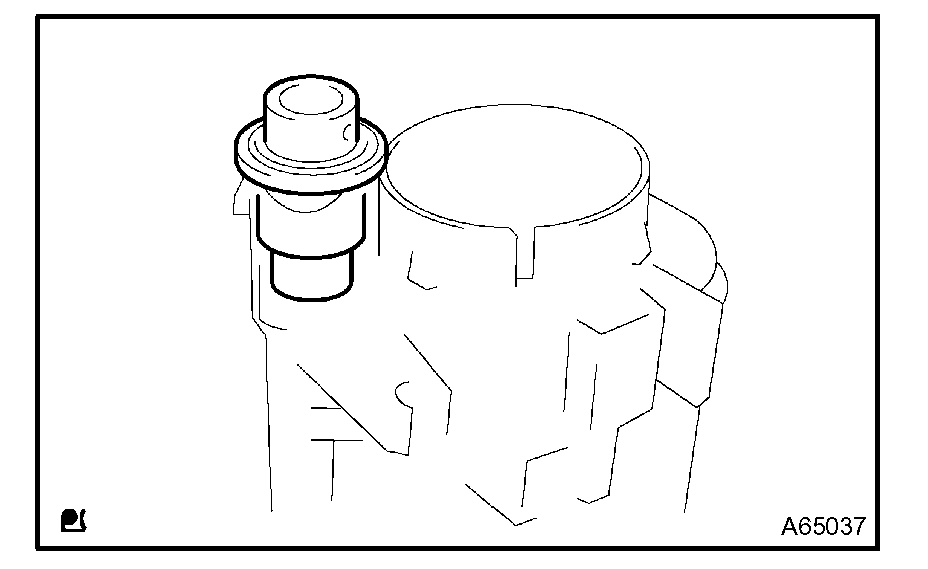
15. REMOVE FUEL PRESSURE REGULATOR ASSEMBLY
pic 16
a. Pull out the fuel pressure regulator from the fuel tank fuel filter.
b. Remove the O-ring from the fuel pressure regulator.
16. INSTALL FUEL PRESSURE REGULATOR ASSEMBLY
pic 17
a. Apply a light coat of spindle oil or gasoline to a new Oring, and install it to the fuel pressure regulator.
b. Push in the fuel pressure regulator to the fuel tank fuel filter.
17. INSTALL FUEL PUMP FILTER
pic 18
a. Install the fuel pump filter with a new clip.
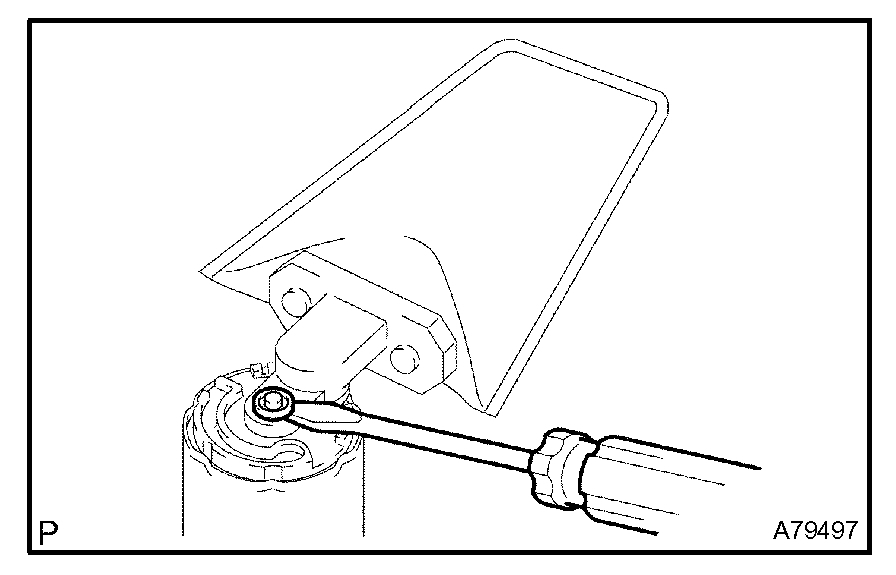
18. INSTALL FUEL PUMP
pic 19
a. Apply a light coat of gasoline or grease to the O-ring of the fuel pump.
b. Push in the fuel pump to the fuel tank fuel filter.
19. INSTALL FUEL PUMP HARNESS
pic 20
a. Install the fuel pump harness.
b. Connect the connector.
20. INSTALL FUEL SUCTION PLATE SUB-ASSEMBLY
pic 21
a. Install the fuel suction plate.
b. Connect the fuel pump connector.
21. INSTALL FUEL SENDER GAUGE ASSEMBLY
pic 22
a. Slide the fuel sender gauge to engage with the claw.
b. Connect the fuel sender gauge connector.
22. INSTALL FUEL PUMP CUSHION RUBBER
pic 23
a. Install the fuel pump cushion rubber to the fuel pump.
23. INSTALL FUEL SUCTION SUPPORT NO.2
pic 24
a. Install the fuel suction support No.2.
24. INSTALL FUEL SUCTION TUBE ASSEMBLY W/ PUMP & GAUGE
pic 25
a. Install a new gasket to the fuel suction tube.
b. Install the fuel suction tube.
NOTE:
- Do not damage the fuel pump filter.
- Be careful that the arm of the sender gauge should not bend.
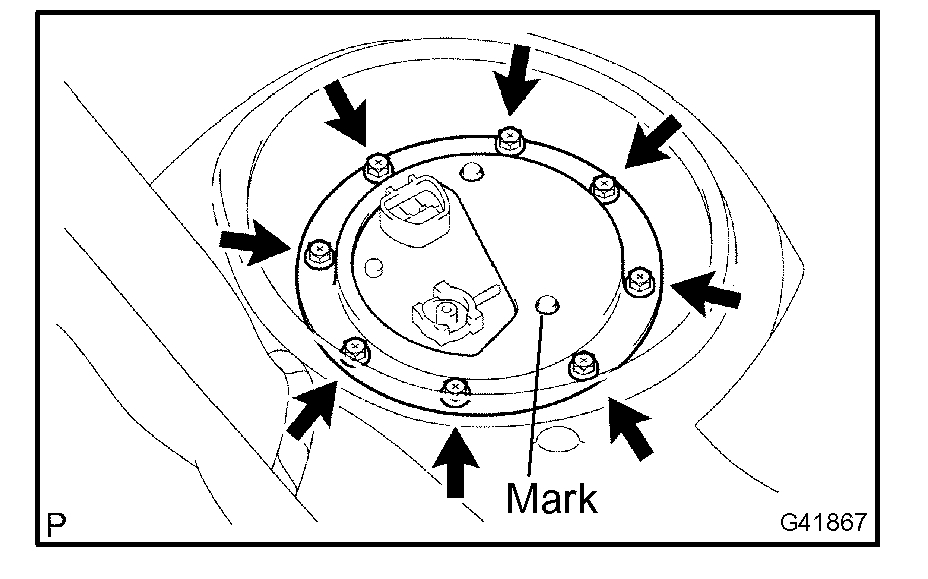
25. INSTALL FUEL TANK VENT TUBE SET PLATE
pic 26
a. Align the mark of the set plate with the fuel suction tube.
b. Install the set plate with the 8 bolts.
Torque: 5.9 N.m (60 kgf.cm, 52 in.lbf)
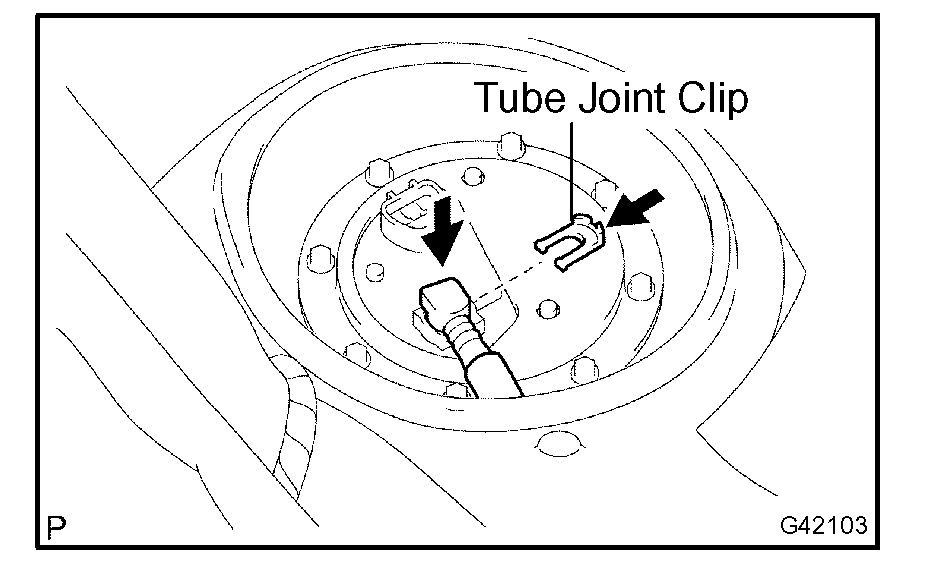
26. CONNECT FUEL PUMP TUBE SUB-ASSEMBLY
pic 27
a. Install the fuel pump tube with the tube joint clip.
NOTE:
- Check that there is no scratches or foreign objects on the connecting part.
- Check that the fuel tube joint is inserted securely.
- Check that the tube joint clip is on the collar of the fuel tube joint.
- After installing the tube joint clip, check that the fuel tube joint is pulled off.
27. CONNECT CABLE TO NEGATIVE BATTERY TERMINAL
28. CHECK FOR FUEL LEAKS
29. INSTALL REAR FLOOR SERVICE HOLE COVER
30. INSTALL REAR SEAT CUSHION ASSEMBLY
31. PERFORM INITIALIZATION
Some systems need initialization when disconnecting the battery terminal.
_______________________________
I have a feeling the filter is the problem. Let me know if you have questions or need help.
Take care,
Joe
Images (Click to make bigger)
Saturday, June 8th, 2019 AT 9:37 PM