You will need to lift the engine to replace the water pump. Here are the instructions.
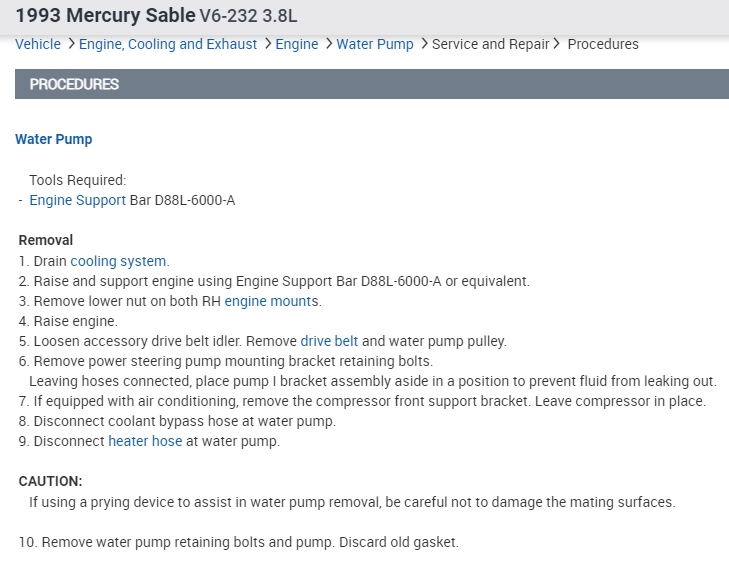
Water Pump
Tools Required:
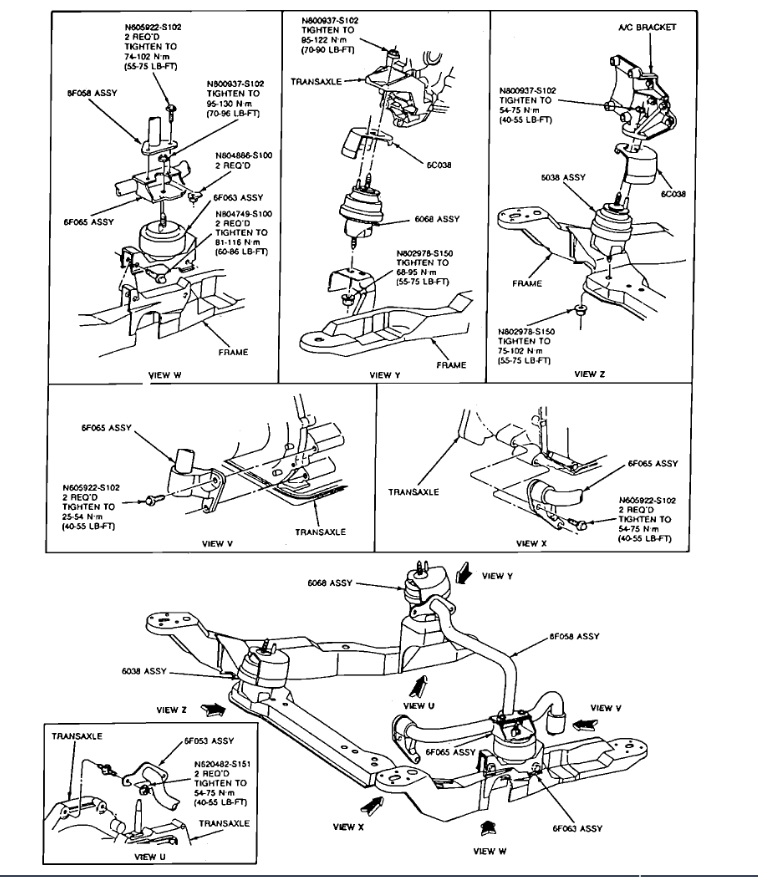
Engine Support Bar D88L-6000-A
Removal
Drain cooling system.
Raise and support engine using Engine Support Bar D88L-6000-A or equivalent.
Remove lower nut on both RH engine mounts.
Raise engine.
Loosen accessory drive belt idler. Remove drive belt and water pump pulley.
Remove power steering pump mounting bracket retaining bolts. Leaving hoses connected, place pump I bracket assembly aside in a position to prevent fluid from leaking out.
If equipped with air conditioning, remove the compressor front support bracket. Leave compressor in place.
Disconnect coolant bypass hose at water pump.
Disconnect heater hose at water pump.
CAUTION:
If using a prying device to assist in water pump removal, be careful not to damage the mating surfaces.
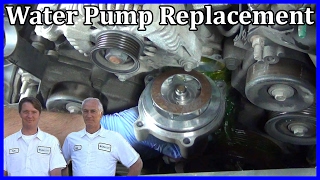
Remove water pump retaining bolts and pump. Discard old gasket.
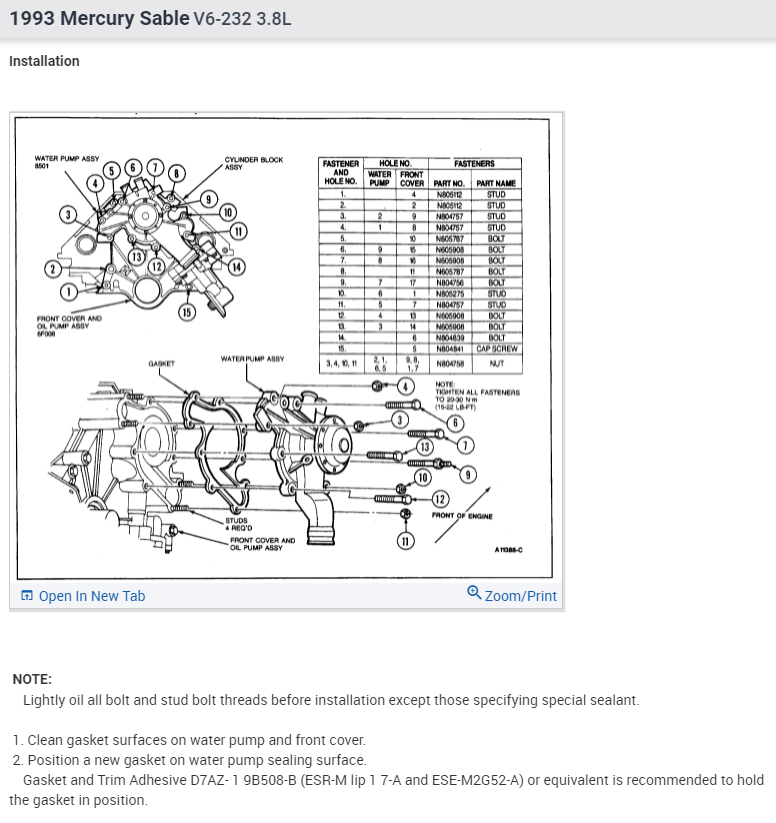
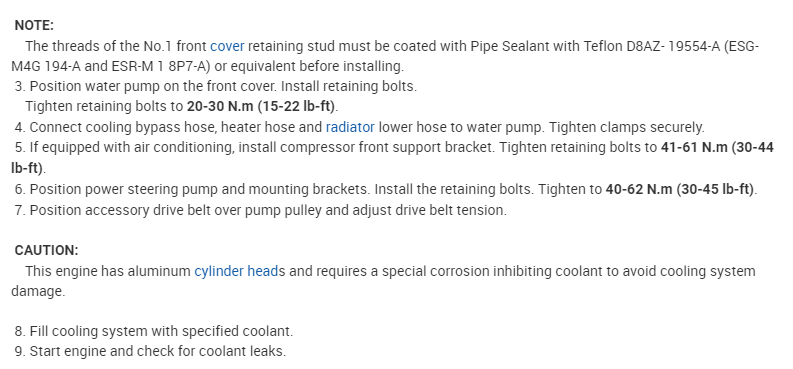
NOTE:
Lightly oil all bolt and stud bolt threads before installation except those specifying special sealant.
Clean gasket surfaces on water pump and front cover.
Position a new gasket on water pump sealing surface. Gasket and Trim Adhesive D7AZ- 1 9B508-B (ESR-M lip 1 7-A and ESE-M2G52-A) or equivalent is recommended to hold the gasket in position.
NOTE:
The threads of the No.1 front cover retaining stud must be coated with Pipe Sealant with Teflon D8AZ- 19554-A (ESG-M4G 194-A and ESR-M 1 8P7-A) or equivalent before installing.
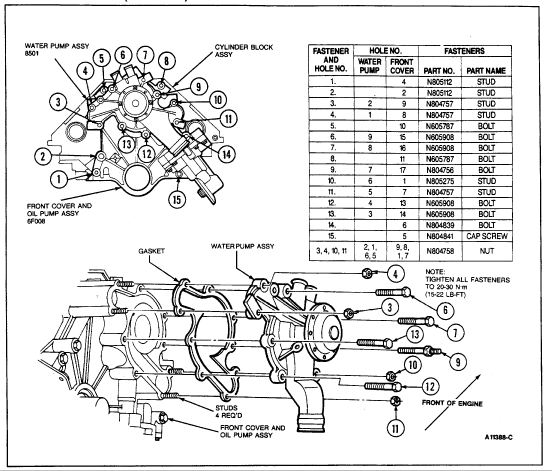
Position water pump on the front cover. Install retaining bolts. Tighten retaining bolts to 20-30 N.M (15-22 lb-ft).
Connect cooling bypass hose, heater hose and radiator lower hose to water pump. Tighten clamps securely.
If equipped with air conditioning, install compressor front support bracket. Tighten retaining bolts to 41-61 N.M (30-44 lb-ft).
Position power steering pump and mounting brackets. Install the retaining bolts. Tighten to 40-62 N.M (30-45 lb-ft).
Position accessory drive belt over pump pulley and adjust drive belt tension.
CAUTION:
This engine has aluminum cylinder heads and requires a special corrosion inhibiting coolant to avoid cooling system damage.
Fill cooling system with specified coolant.
Start engine and check for coolant leaks.
Wshat you can try is removing the engine mount nuts like stated earlier in the instructions and use a floor jack with a piece of 2x4 and jack up the engine to raise the engine up. Do it from the front of the engine (passenger side) and that should give you more clearance to install the bolts. Hope that works for you and keep me posted.
Image (Click to make bigger)
Sunday, April 25th, 2021 AT 12:52 PM