Removal
1. Remove negative battery cable. Remove air cleaner. Remove clutch release cylinder, bracket and starter. Disconnect back-up light switch connector and shift control cables.
2. Remove upper transaxle mounting bolts. Raise and support vehicle. Remove engine splash shield(s). Drain transaxle fluid. Disconnect speedometer cable. Remove suspension lower crossmember and engine mounting centermember (if equipped).
3. Disconnect drive axle shafts from the transaxle. Disconnect left steering knuckle from lower arm, and remove left drive shaft.
4. Raise engine and transaxle slightly using a jack. Disconnect necessary engine mountings. Remove bolts attaching engine to transaxle. Lower engine, and remove transaxle.
NOTE: On Celica 4WD, when removing transaxle from engine, pull transaxle straight away from engine and rotate end of transaxle rearward until transaxle can be removed.
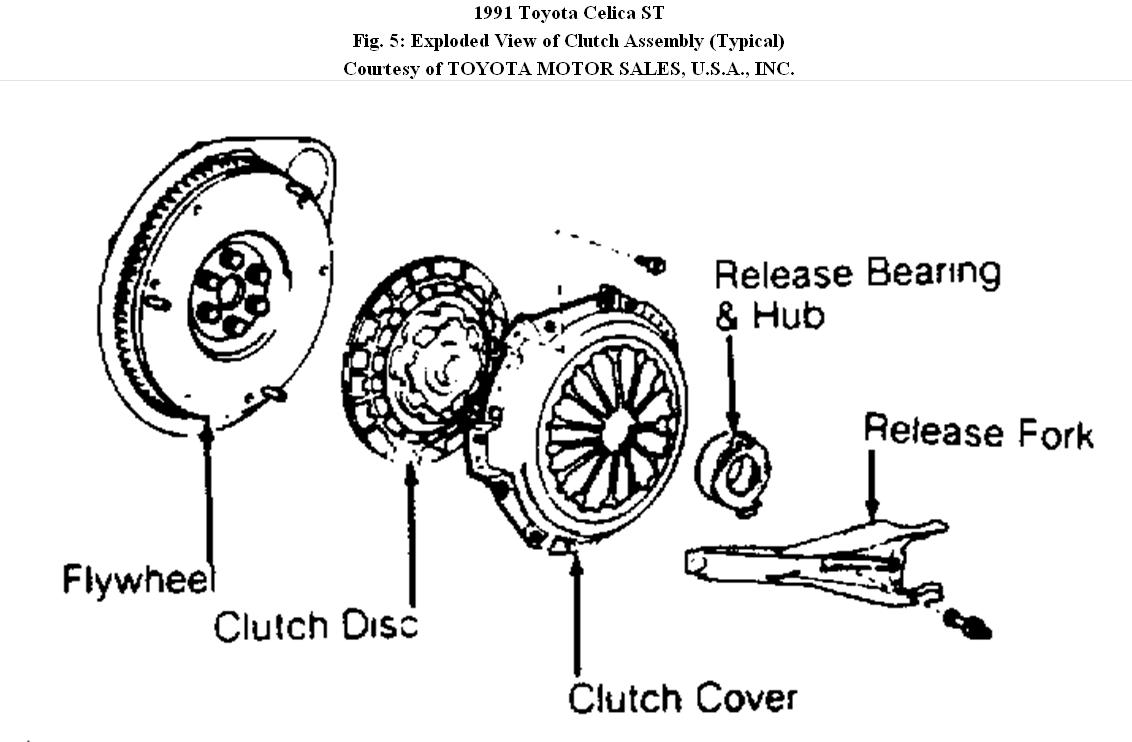
5. Mark pressure plate and flywheel for reassembly reference. See
Fig. 5. Loosen pressure plate attaching bolts alternately until pressure plate is released. Remove clutch disc and pressure plate.
DO NOT drop clutch disc.
Installation
1. Align reference marks, and install clutch disc and pressure plate. Use aligning tool to center clutch disc on flywheel. Tighten pressure plate bolts alternately and evenly in a crisscross pattern to specification.
2. Apply molybdenum disulfide grease to release fork contact surfaces, release bearing and hub, and clutch disc splines. Reverse removal procedure to complete installation.
Image (Click to make bigger)
Wednesday, February 23rd, 2011 AT 8:05 PM