
Replacing the front brake pads on your vehicle is a crucial maintenance task that ensures your brakes perform optimally. This guide includes bearing hub style of vehicles (most common) and will walk you through the process with detailed instructions and helpful tips. Please read completely before beginning!
Tools and Materials Needed
- New front brake pad kit
- Hydraulic Jack and jack stands
- Lug wrench
- Socket set
- Large channel lock or C-clamp
- Torque wrench
- Brake cleaner
- Zip Ties
- Brake grease
- Gloves and safety glasses
Getting Started
You will need to raise the front end of the car up so please park it on level ground, with the parking brake set. Also, you will need to remove the front wheels so loosen the lug nuts one turn before lifting, (do not remove). Also, please do one side of the brake job at a time to avoid confusion and problems when you reset (depress) the brake caliper. Wear gloves and safety glasses to protect yourself during the process.
Front Brake Pad Replacement
1. Once the car is safely lifted and the tires removed, unlock the steering system so you can move the steering wheel, then grasp the caliper and turn it to more easily access the caliper mounting bolts, (Or simply turn the steering wheel).

2. Locate the brake caliper mounting bolts and remove them, these can be tight so use a quality tool, the bolts in this example are 13mm, but yours can be 14mm, 15mm, 18mm, or 10mm hex drive, or a 35 torx bit in most cases, (Some bolts are held in with a thread locker like Lock-Tight). You might need an additional wrench to hold the caliper slide from turning but this is not typical. Some Volkswagen's use their own special 12mm or 14mm ten point torx, you must have this special tool to do the job.

3. Gasp the brake caliper and wiggle it back and fourth, you can also insert a large standard screwdriver as a wedge to help loosen the grip the caliper has on the brake pads. Lift upwards to remove the caliper from the brake pads and caliper mounting bracket, (Do not allow the caliper to hang by the brake hose, zip ties work well for this).

4. This will expose the front brake pads inside the bracket carriage, grasp the brake pads and remove them, you can use a standard screw driver and wedge it between the pads and the rotor to aid in the removal, at this point you can install new brake pads and put the brakes back together, but the braking power and operation will not be optimal, (It is recommended to replace the brake rotor as well.)

5. We have removed the brake caliper mount, (which will need to be done in most cases when replacing the brake rotor) to show you more precisely how to install the new brake pads. Release both brake pads from the bracket.

6. Not all brake pads have anti rattle clips, but if your does a new set should be included in the brake pad kit. Simply remove the clips and install the new ones. These are used to keep the brake pads from ticking or rattling while you drive or when you first apply the brakes.

7. Remove the brake caliper slides (both) by gently remove them by pulling straight out. Use a shop towel to clean the slides and the housing, then apply fresh brake grease which should be included in the new brake pad kit as well. If this is not done the brake pads will wear unevenly and in extreme cases cause the brake pedal to go to the floor.

8. Match the old brake pads to the new ones, they should be identical. Then make sure the orientation of the pads are the same way the old ones were removed and install them into the brake pad carrier.

9. Before the brake caliper can be installed it must be reset (retracted), this can be done with a "C" clamp or a large pair of channel locks as shown. This is a good reason to not remove the opposite side caliper because the piston may pop out of the opposing caliper, which will take the fun out of the brake job. (Note: Brake fluid may overflow from the brake master cylinder reservoir which is normal.)

10. While installing the brake caliper into the brake pads and caliper mounting bracket, make sure the caliper slides are pushed inward.

11. Reinstall the brake caliper mounting bolts and apply thread locker if required, tighten the bolts and torque them to factory specification, in this case it was 21 foot pounds. One arm tight will be good in most cases if you don't have the spec's, now you can duplicate the brake job on the opposing side and reinstall the wheels and lower the car, DO NOT DRIVE.

12. Once the brake job is completed you MUST, pump the brake pedal slowly down, (The brake pedal will go to the floor, which is normal), slowly lift your foot to raise the brake pedal, repeat this procedure until normal brake pedal pressure is obtained, (This can take four to seven cycles). If normal brake pressure is NOT obtained DO NOT DRIVE THE CAR.
This operation is forcing the brake pads to travel to the brake rotors, while taking up the air gap between the pads, rotors and caliper pistons. Do this until normal brake operation has returned (brake pedal is in its normal position). Moving the pedal slowly helps prevent air bubbles being trapped in the system which alleviates bleeding. If the pedal seems spongy, air is trapped and the brake system needs bleeding.
Addition Information for ABS Brake Systems
1. When pushing the piston back into the caliper contaminated fluid may cause problems for the ABS valve, motor and master cylinder which can cause these components to fail. This step is to allow the brake fluid that has entered the brake caliper to be removed safely.
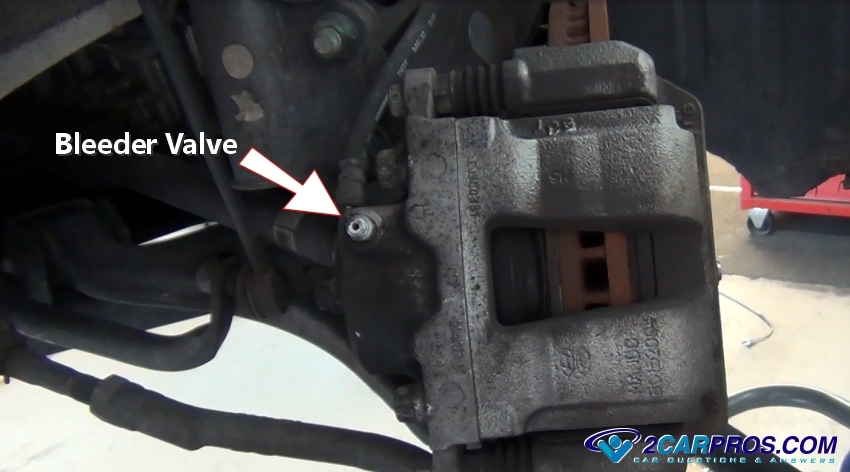
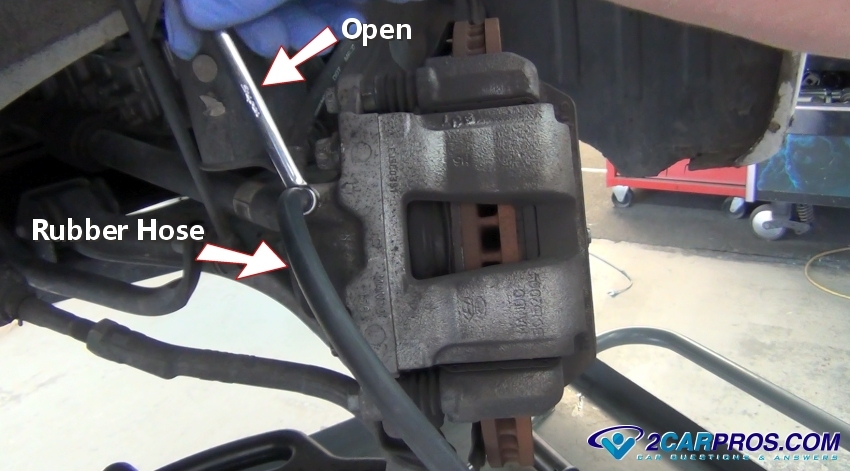
2. Use a small wrench, in most cases an 10mm, and fit it over the bleeder valve. Next, attach a piece of rubber tubing or hose over the bleeder valve while the other end of the hose is sitting in a fluid container. Push the wrench counterclockwise to open the valve (rubber tube optional) while resetting the brake caliper.
Conclusion
Take a moment to inspect the condition of the brake rotor. If it is significantly worn or damaged, you may need to replace or resurface it. The phrase "my brakes are metal to metal" meaning the backing plate of the pad which is made of metal is contacting the rotor which is also metal. When brakes are in this condition the stopping power is greatly compromised. Once the brake job is complete double check your work to make sure all bolts are tight.
Use brake grease sparingly on the rear of the brake pads, this grease can get hot and run onto the brake pads and rotor hindering their performance. Check the brake fluid level in the master cylinder and top it off if necessary. Take the vehicle for a test drive at low speeds to ensure the brakes are functioning correctly. Listen for any unusual noises and ensure the brake pedal feels firm.
If everything checks out, your front brake pad replacement is complete!
Watch the Video!
Please watch this video of the job being done to glean additional helpful information.
Credits
This guide knowledge base was created by the 2CarPros Team, and by Ken Lavacot: Automobile repair shop owner and certified master automobile technician of over 30 years. If you have question or need help please ask one of our experts we are happy to help. Please visit our 2CarPros YouTube Channel for additional car repairs.