Good morning,
White smoke is an indication of burning coolant, not oil.
https://www.2carpros.com/articles/white-smoke-or-steam-coming-from-the-exhaust-pipe
You would have to overfill your oil about 4 quarts before it would smoke but it would be blue, not white.
https://www.2carpros.com/articles/blue-smoke-from-engines-exhaust
The common issue is head gaskets that cause this. You need to have a leak down test done to confirm the head gaskets have failed.
https://www.2carpros.com/articles/head-gasket-blown-test
Roy
Removal
1. Disconnect the battery negative cable.
2. Drain the engine cooling system.
3. Remove the LH exhaust manifold.
4. Remove the lower intake manifold.
5. Remove the push rods.
6. Remove the accessory drive belt.
imageOpen In New TabZoom/Print
7. Using the special tool, remove the power steering pump pulley.
imageOpen In New TabZoom/Print
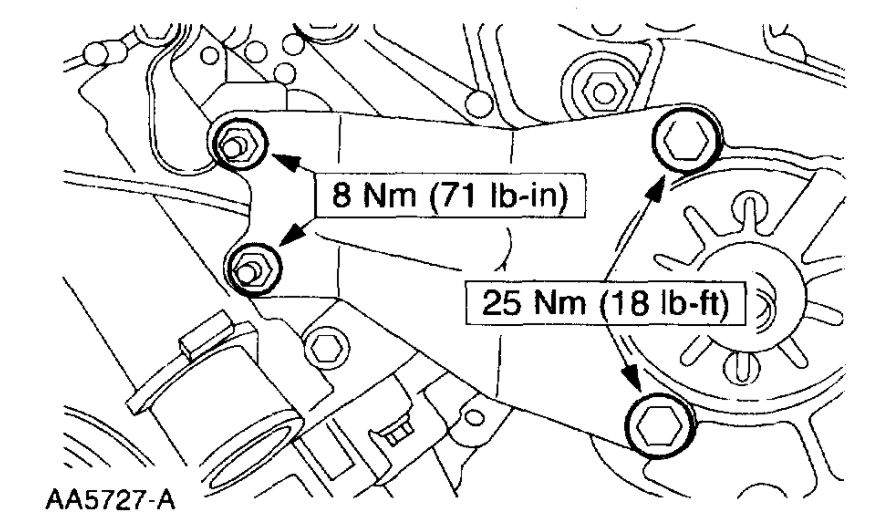
8. Remove the power steering pump bracket.
imageOpen In New TabZoom/Print
9. Remove the generator bracket.
imageOpen In New TabZoom/Print
10. Remove the three exhaust manifold studs.
11. Note: Discard the cylinder head gasket.
Note: Record the location of the long bolts and the short bolts.
imageOpen In New TabZoom/Print
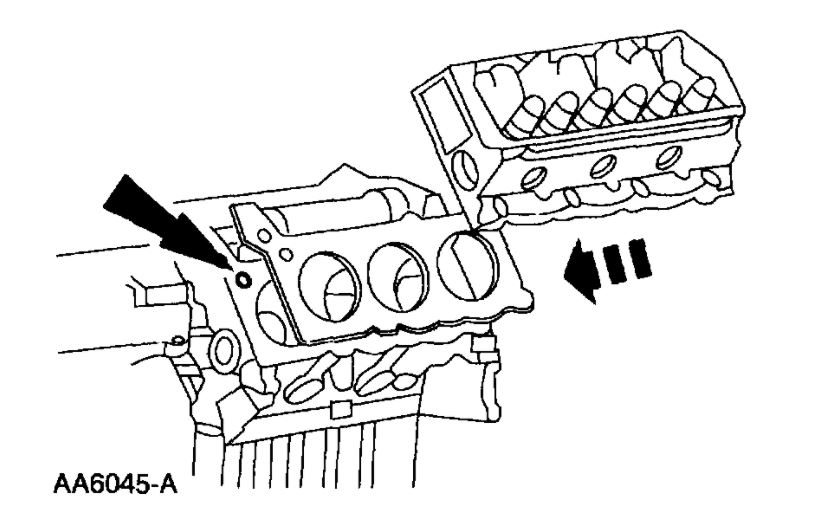
Remove the cylinder head.
Remove and discard the bolts.
Installation
1. Clean and inspect the cylinder head for flatness.
2. Install a new head gasket on the cylinder block with the small hole to the front of the engine.
imageOpen In New TabZoom/Print
3. Position the cylinder head.
4. Caution: Always use new bolts.
Note: Lubricate the bolts with Super Premium SAE 5W30 Motor Oil X0-5W30-QSP or equivalent meeting Ford specification WSS-M2C153-G.
imageOpen In New TabZoom/Print
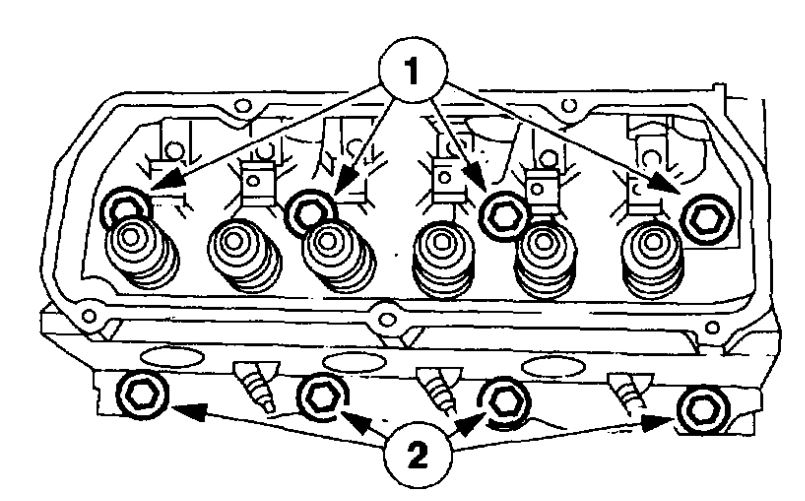
Install new bolts. Refer to the location note made during removal and make sure the bolts are installed the the correct location.
1 Install the new long bolts.
2 Install the new short bolts.
imageOpen In New TabZoom/Print
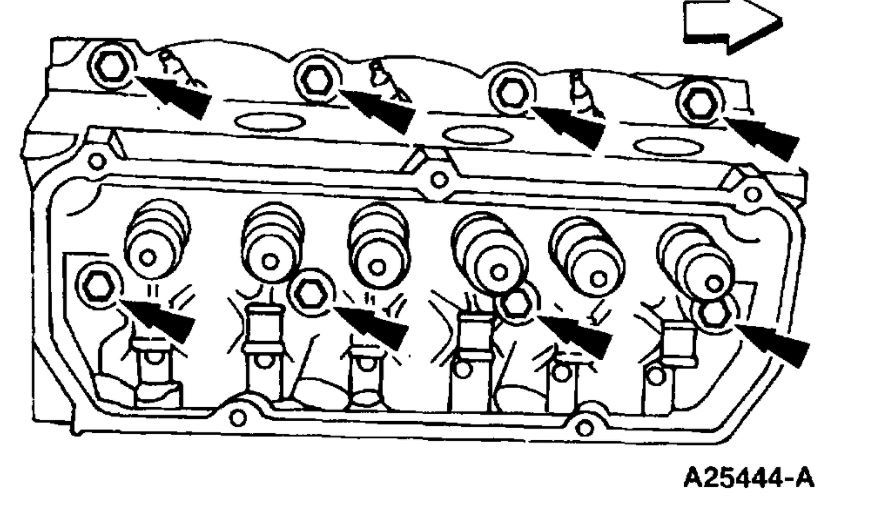
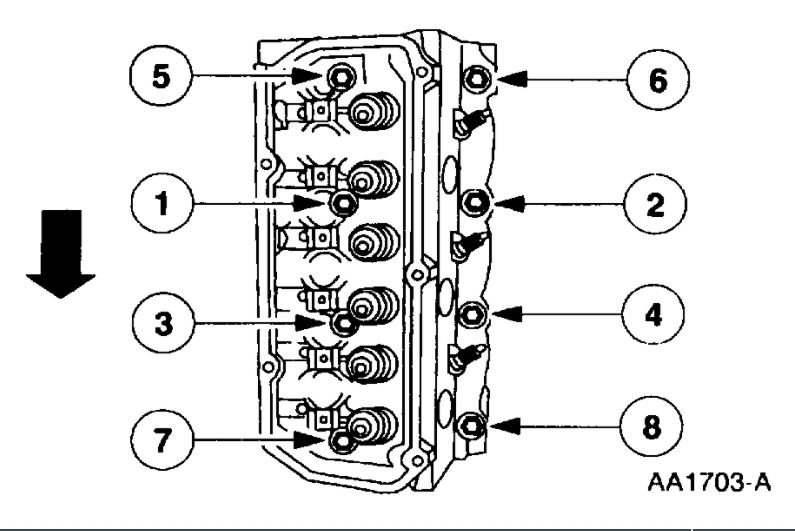
5. Tighten the bolts in the sequence shown in three stages.
Stage 1: Tighten to 20 Nm (15 ft. lbs.).
Stage 2: Tighten to 40 Nm (30 ft. lbs.).
Stage 3: Tighten to 50 Nm (37 ft. lbs.).
6. Caution: Do not loosen all of the bolts at one time. Each bolt must be loosened and final-tightened prior to working on the next bolt in the sequence.
Note: The short bolts are numbered 2, 4, 6 and 8 and the long bolts numbered 1, 3, 5 and 7.
imageOpen In New TabZoom/Print
Loosen, then tighten the bolts in the sequence shown:
Tighten short bolts to 25 Nm (18 ft. lbs.), then tighten an additional 180 degrees.
Tighten long bolts to 45 Nm (33 ft. lbs.), then tighten an additional 180 degrees.
imageOpen In New TabZoom/Print
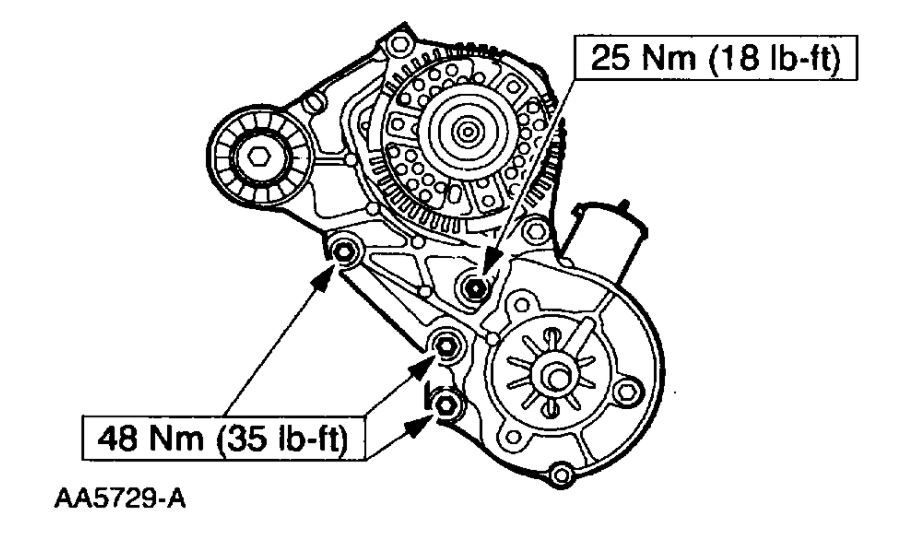
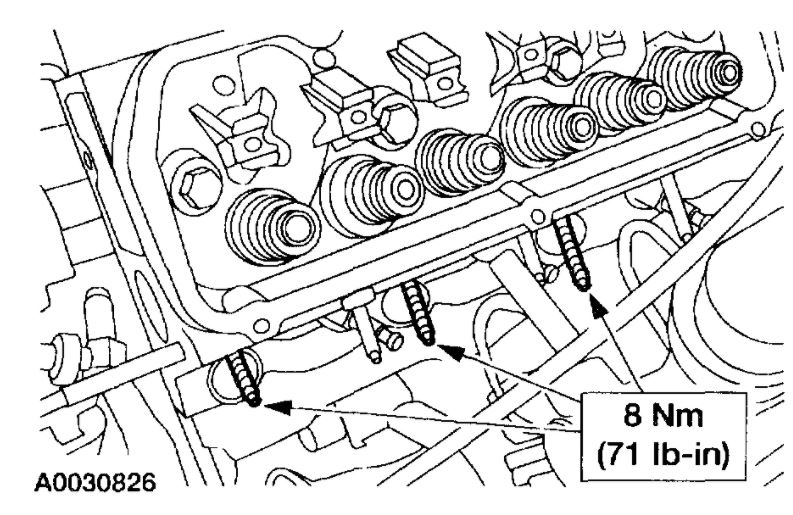
7. Install the bracket and bolts.
imageOpen In New TabZoom/Print
8. Install the support bracket.
imageOpen In New TabZoom/Print
9. Using the special tool, install the power steering pump pulley.
10. Install the accessory drive belt.
11. Install the push rods.
12. Install the lower intake manifold.
13. Install the LH exhaust manifold.
14. Caution: Proper cooling system bleeding is critical for correct engine cooling.
Fill and bleed the engine cooling system.
15. Connect the battery negative cable.
Images (Click to enlarge)
Jan 6, 2021 at 3:34 AM