Hi,
If the system is running too rich, that means it is getting too much fuel. That can be caused by a bad fuel pressure regulator. Now, to confirm what is happening, we need to test fuel pressure. You will need a fuel pressure gauge, but most parts stores will lend / rent one to you. Here is a link that explains how to check pressure in general:
https://www.2carpros.com/articles/how-to-check-fuel-system-pressure-and-regulator
Here are the directions specific to your vehicle for testing pressure. The attached pics correlate with the directions.
_________________________-
2006 Mazda 6 L4-2.3L
Fuel Pressure Test
Vehicle Powertrain Management Fuel Delivery and Air Induction Fuel Pump Fuel Pressure Testing and Inspection Component Tests and General Diagnostics Fuel Pressure Test
FUEL PRESSURE TEST
FUEL LINE PRESSURE INSPECTION
WARNING: FUEL LINE SPILLS AND LEAKAGE ARE DANGEROUS. FUEL CAN IGNITE AND CAUSE SERIOUS INJURIES OR DEATH. FUEL CAN ALSO IRRITATE SKIN AND EYES. TO PREVENT THIS, ALWAYS COMPLETE THE "BEFORE REPAIR PROCEDURE".
CAUTION: Disconnecting/connecting the quick release connector without cleaning it may possibly cause damage to the fuel pipe and quick release connector. Always clean the quick release connector joint area before disconnecting/connecting using cloth or soft brush, and make sure that it is free of foreign material.
1. Complete the "BEFORE REPAIR PROCEDURE".
2. Disconnect the vacuum hose from the intake manifold that connecting to the brake booster.
3. Disconnect the negative battery cable.
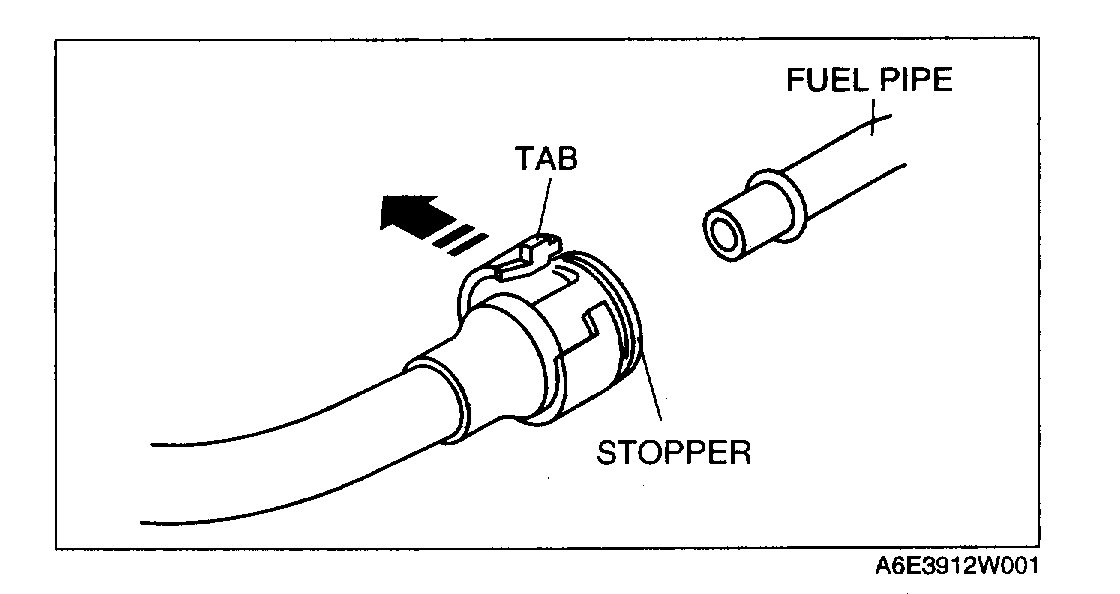
CAUTION: The quick release connector may be damaged if the tab is turned too far. Do not turn the tab over the stopper.
4. Disconnect the quick release connector from the fuel tank as follows:
pic 1
pic 2
1. Push the tab on the locking coupler 90 degrees until it stops.
2. Pull the fuel hose straight back.
NOTE:
- The stopper may be removed from the quick connector. Take care not to loose it. Reinstall it to the quick release connector before reconnecting the fuel line.
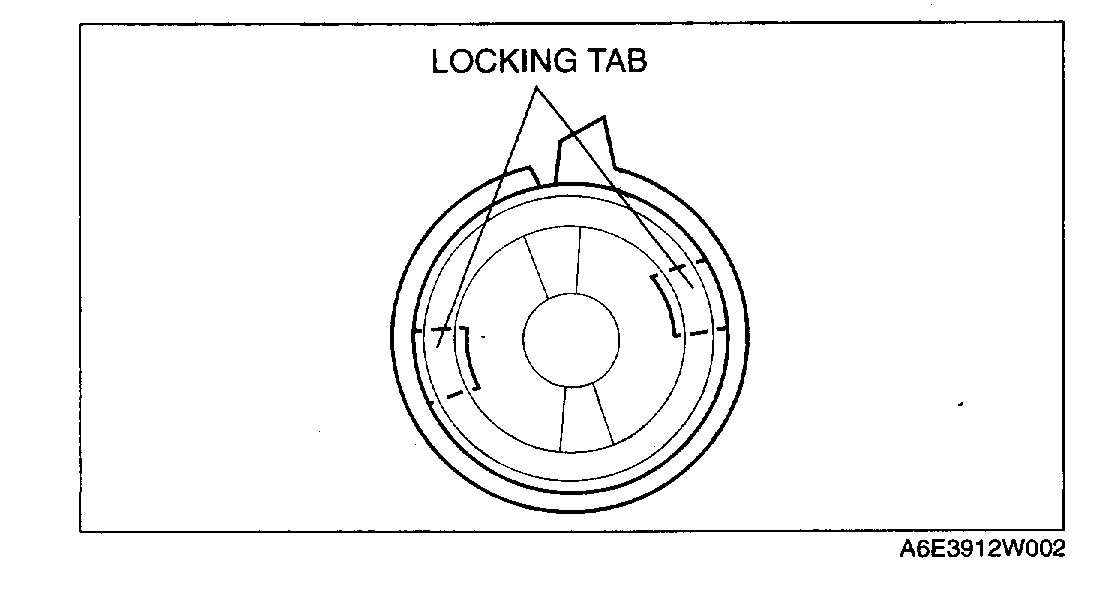
- The locking coupler has two internal locking tabs which distributor pipe. Be sure that the tab on the locking coupler is rotated until it stops to release two internal locking tabs.
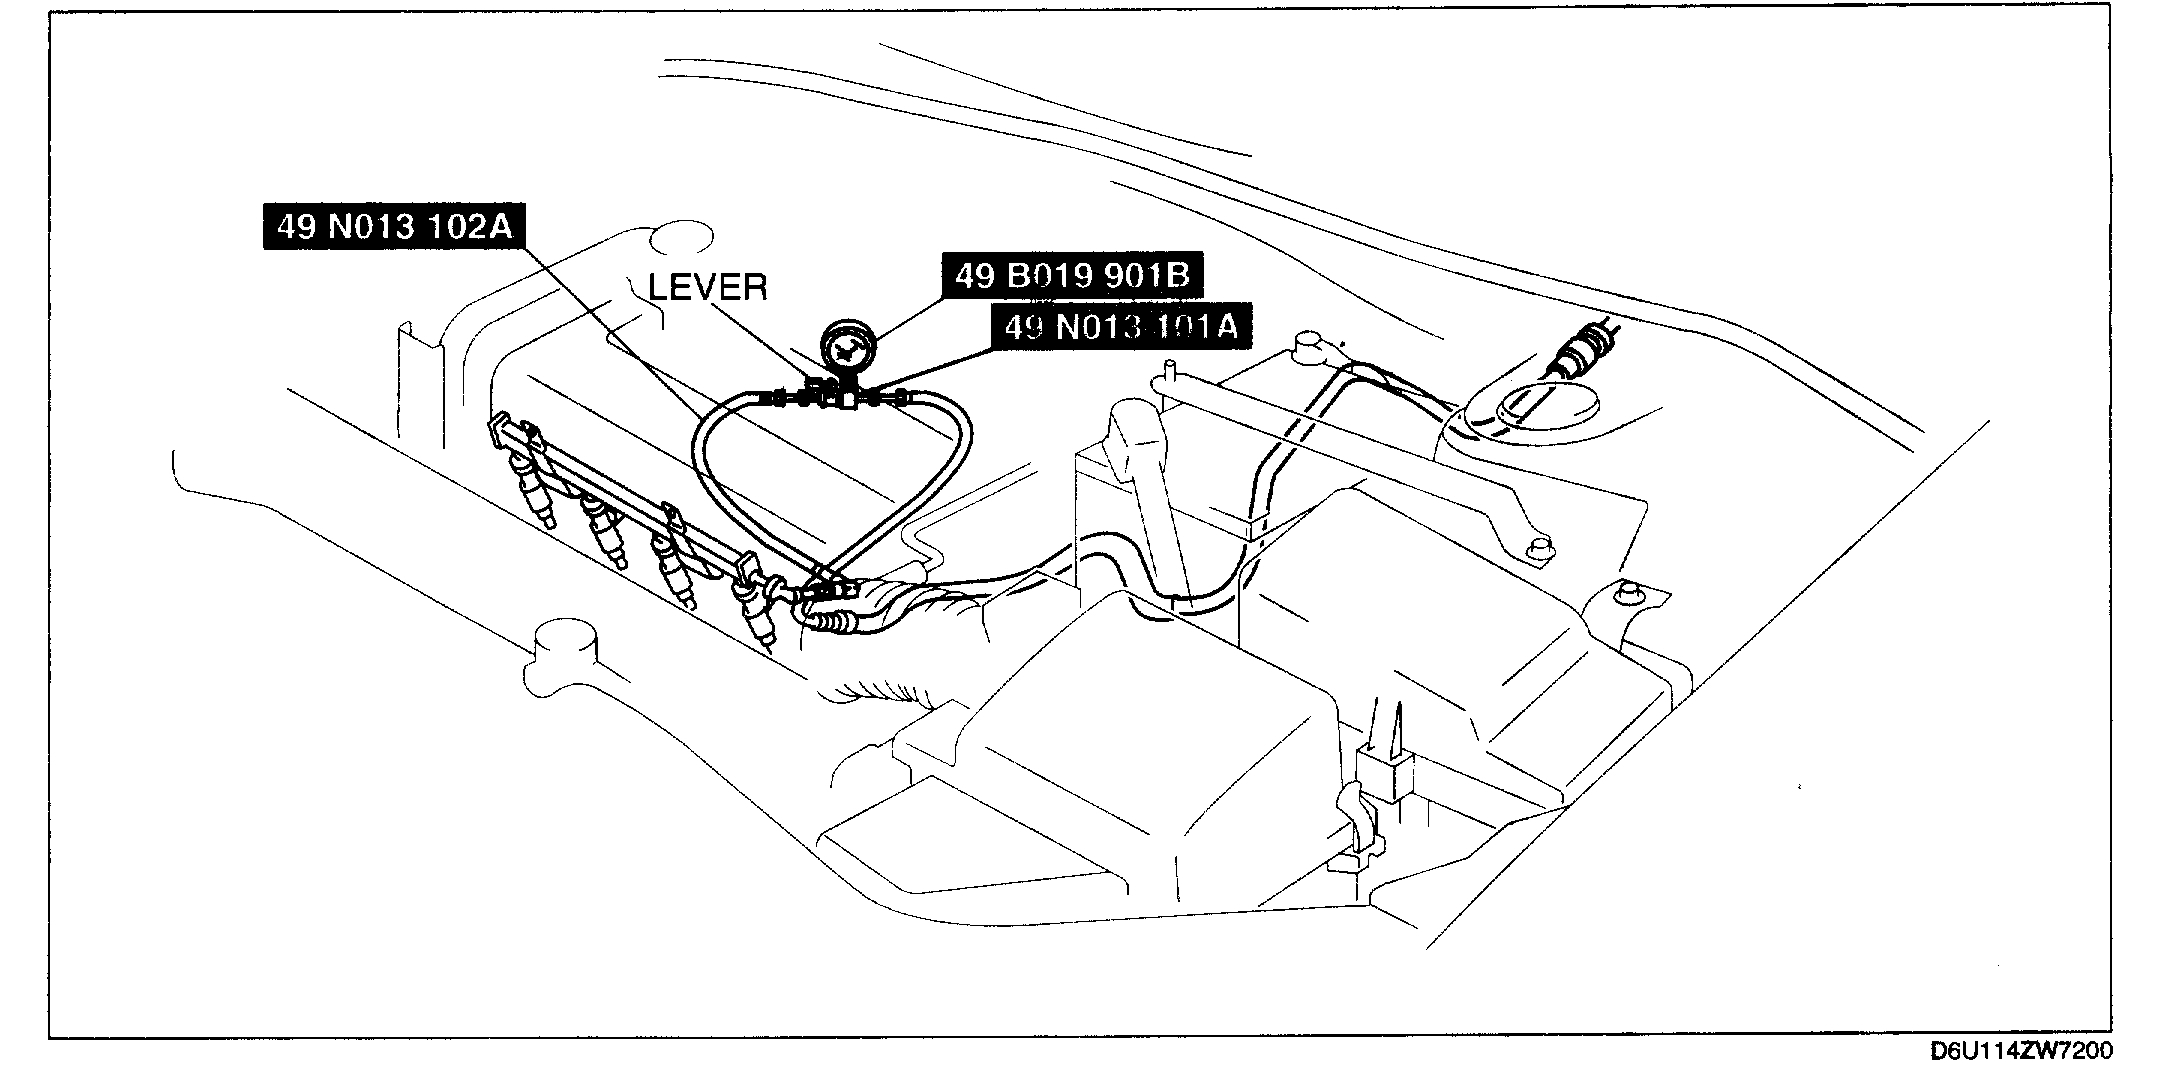
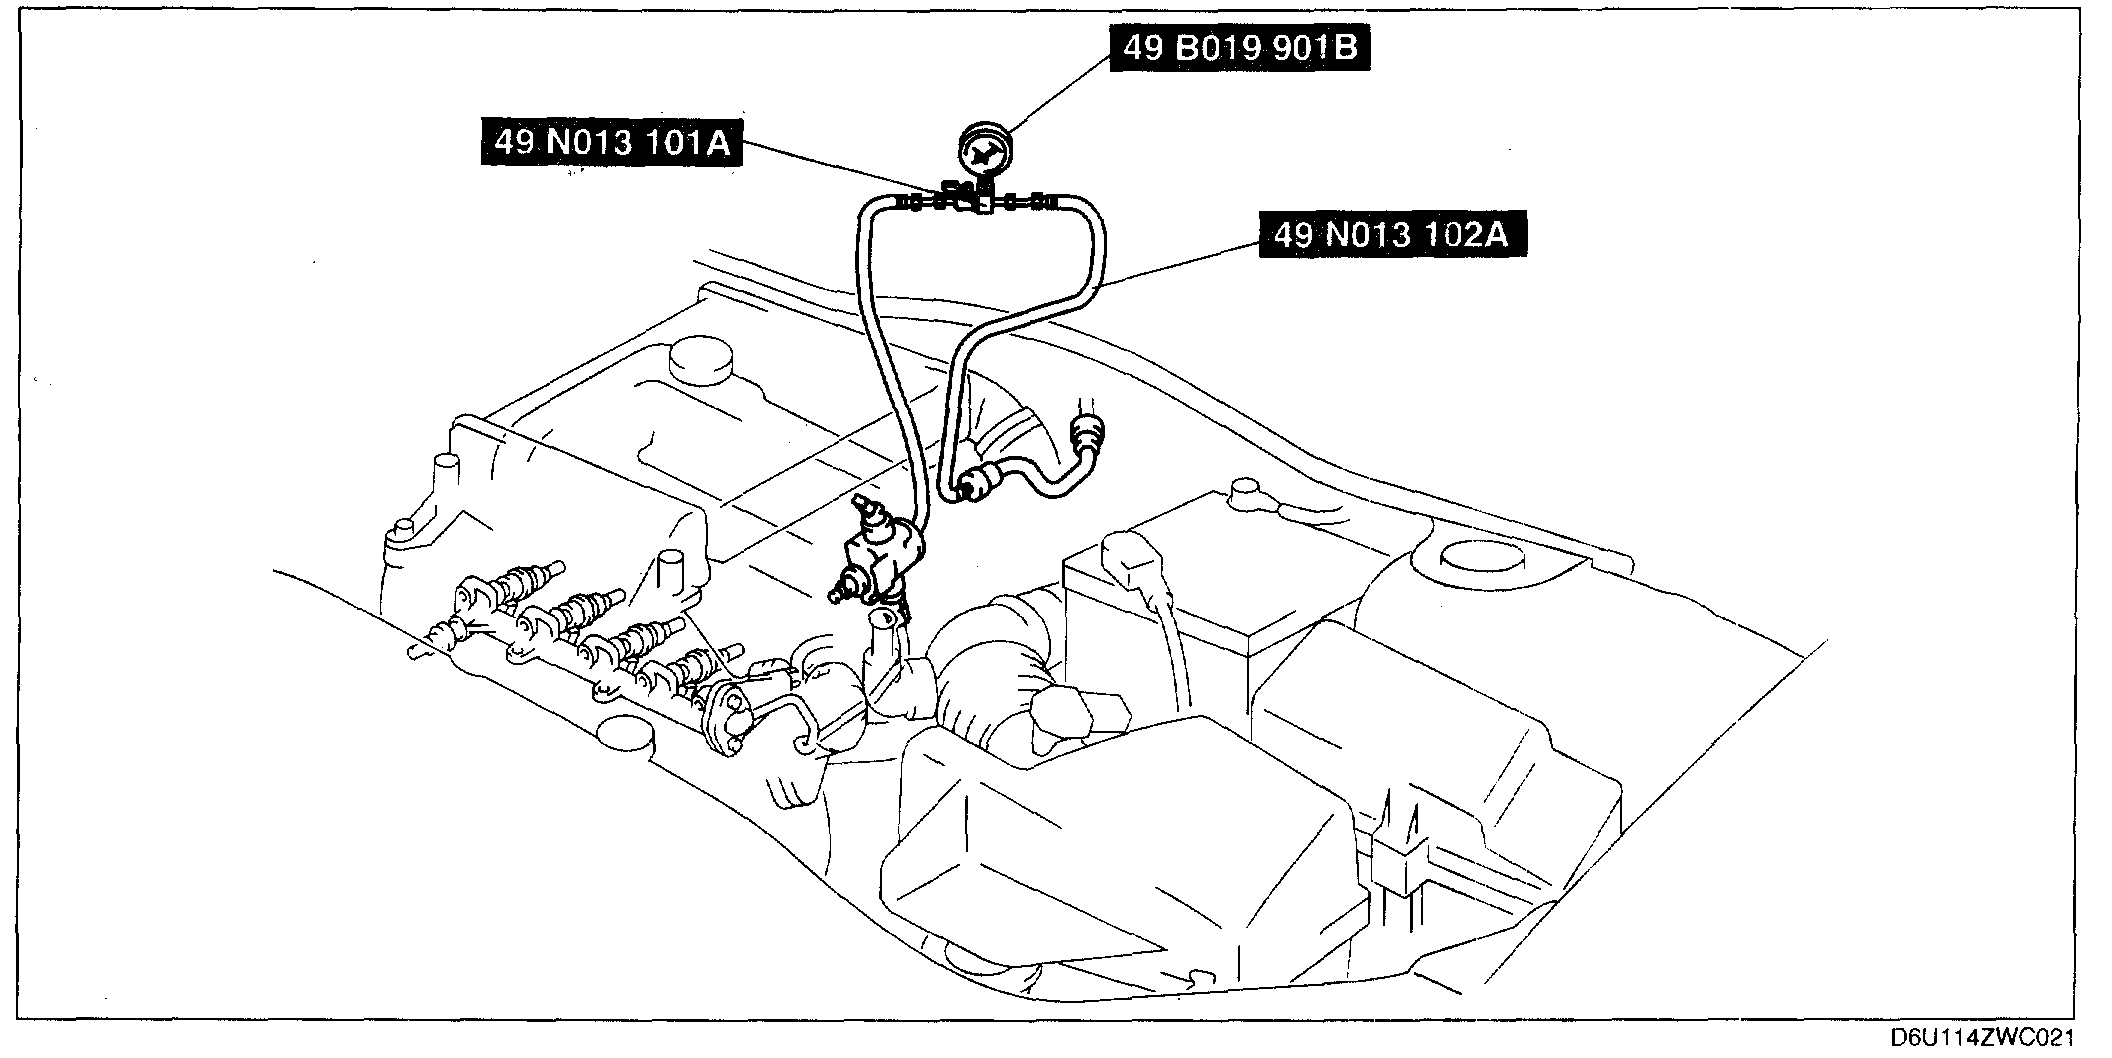
5. Push the SST quick release connector into the fuel pipe and plastic fuel hose into the SST until a click is heard.
pic 3
6. Turn the lever parallel to the hose of the SST as shown.
7. Connect the vacuum hose from the intake manifold that connecting to the brake booster.
8. Connect the negative battery cable.
9. Verify that the vehicles for AT is at N position and MT is at neutral position.
10. Start the engine and let it idle. Measure the fuel line pressure.
- If not as specified, inspect the following:
Zero or low
- FP circuit
- FP
- Fuel line (clogged)
- Fuel leakage inside pressure regulator
High
- Pressure regulator for high pressure cause
Fuel line pressure
430 - 510 kPa 4.4 - 5.2 kgf/sq.cm, 63 - 73 psi
11. Observe the fuel pressure gauge indicator during heavy acceleration.
12. Verify that the fuel pressure fluctuation is within the specification during the test.
- If not as specified, inspect the following:
- PCM
- FP
- Fuel line for improper routing, kinks or leakage
Fuel pressure fluctuation
420 - 510 kPa 4.3 - 5.2 kgf/sq.cm, 61 - 73 psi
13. Turn the ignition switch to the LOCK position.
14. Measure the fuel hold pressure after 5 min.
- If not as specified, inspect the following:
- FP hold pressure
- Fuel injector for leakage
- Fuel line for improper routing, kinks or leakage
Fuel hold pressure
More than 250 kPa 2.5 kgf/sq.cm, 36 psi
15. Complete the "BEFORE REPAIR PROCEDURE".
16. Disconnect the vacuum hose from the intake manifold that connecting to the brake booster.
17. Disconnect the SST.
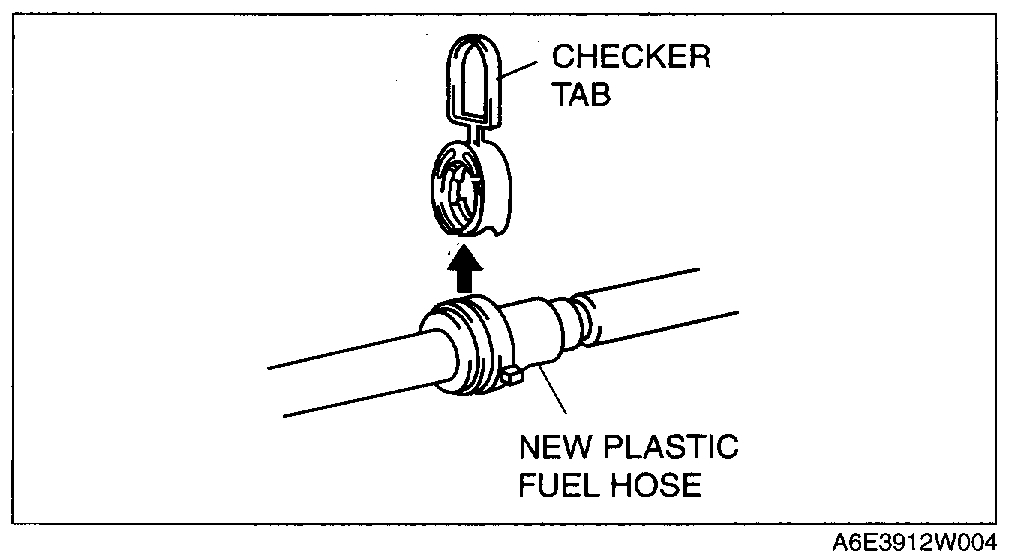
NOTE: A checker tab is integrated with quick release connector for new plastic fuel hoses. The checker tab will be released from the quick release connector after it is completely engaged with the fuel pipe.
pic 4
18. Inspect the plastic fuel hose and fuel pipe sealing surface for damage and deformation, and replace as necessary.
- If the quick release connector O-ring is damaged or has slipped, replace the plastic fuel hose.
19. Apply a small amount of clean engine oil to the sealing surface of the fuel pipe.
20. Reconnect the fuel main hose to the fuel distributor until a click is heard.
21. Lightly pull and push the quick release connector a few times by hand and verify that it can move 2.0 - 3.0 mm 0.08 - 0.11 in and it is connected securely.
- If quick release connector does not move at all, verify that O-ring is not damaged and slipped, and reconnect the quick release connector.
22. Connect the vacuum hose from the intake manifold that connecting to the brake booster.
23. Complete the "AFTER REPAIR PROCEDURE".
____________________________________
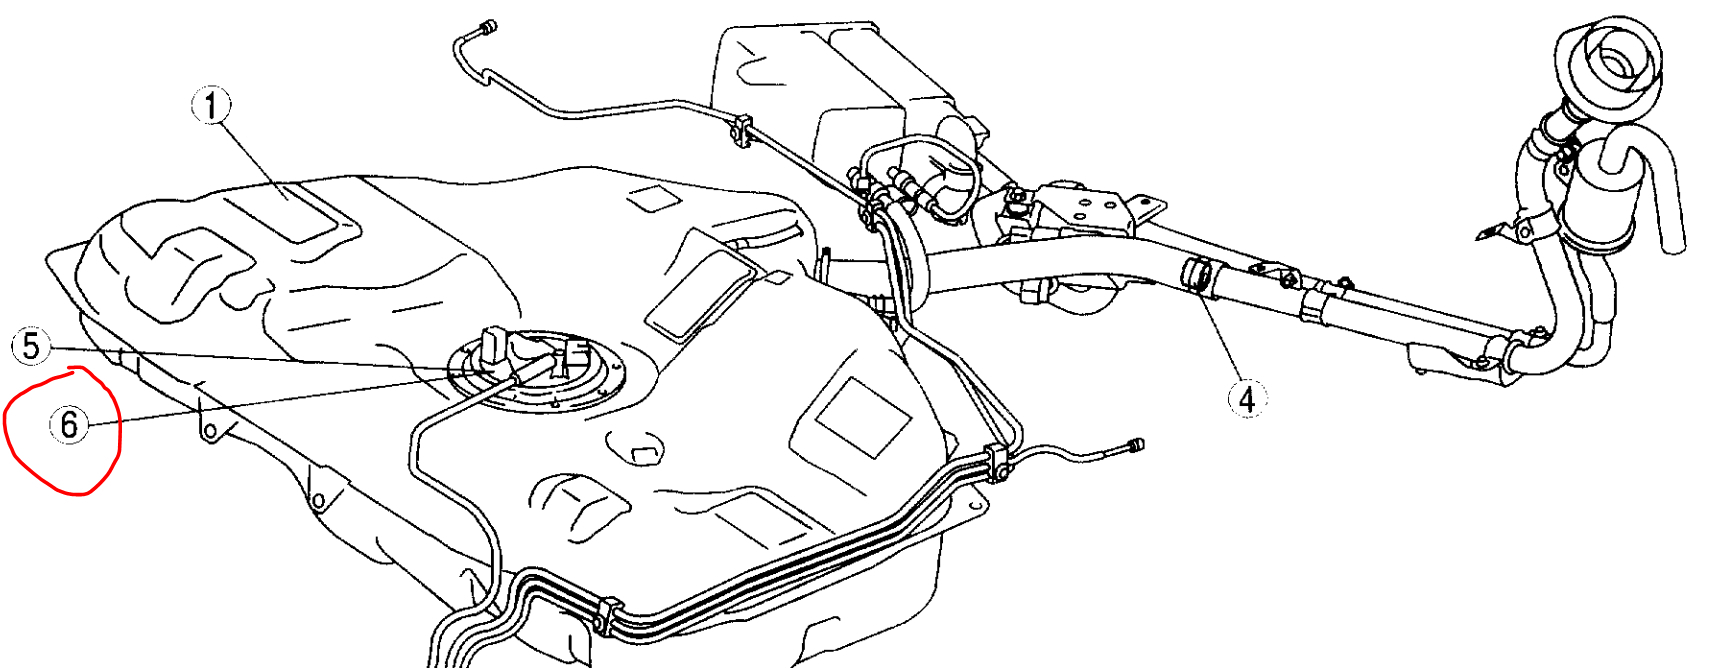
Do this and let me know what you find. I suspect the regulator is bad, but we need to perform the test to confirm. If you determine the regulator is the issue, and I hate to say this, but it is part of the fuel pump assembly at the tank. See pic 5.
Here are directions specific to testing the regulator. This only needs done if you find the fuel pressure to be above the manufacturer's specs.
____________________________________
2006 Mazda 6 L4-2.3L
Fuel Pressure Regulator Inspection
Vehicle Powertrain Management Fuel Delivery and Air Induction Fuel Pressure Regulator Testing and Inspection Component Tests and General Diagnostics Fuel Pressure Regulator Inspection
FUEL PRESSURE REGULATOR INSPECTION
PRESSURE REGULATOR INSPECTION
NOTE: Due to the adoption of the mechanical returnees fuel system, the pressure regulator cannot be inspected separately.
FUEL LINE PRESSURE INSPECTION [L3 WITH TC]
Low Pressure Line (From the Fuel Tank to the High Pressure Fuel Pump)
WARNING: Fuel line spills and leakage are dangerous. Fuel can ignite and cause serious injuries or death. Fuel can also irritate skin and eyes. To prevent this, always complete the "BEFORE REPAIR PROCEDURE".
CAUTION: Disconnecting/connecting the quick release connector without cleaning it may possibly cause damage to the fuel pipe and quick release connector. Always clean the quick release connector joint area before disconnecting/connecting using cloth or soft brush, and make sure that it is free of foreign material.
1. Complete the "BEFORE REPAIR PROCEDURE".
2. Disconnect the vacuum hose from the intake manifold that connecting to the brake booster.
3. Disconnect the negative battery cable.
CAUTION: The quick release connector may be damaged if the tab is turned too far. Do not turn the tab over the stopper.
4. Disconnect the quick release connector from the fuel tank.
5. Push the SST quick release connector into the fuel pipe and plastic fuel hose into the SST until a click is heard.
Pic 6
6. Turn the lever parallel to the hose of the SST as shown.
7. Connect the vacuum hose to the intake manifold that connecting to the brake booster.
8. Connect the negative battery cable.
9. Verify the vehicle's MTX is in neutral position.
10. Start the engine and let it idle. Measure the fuel line pressure.
- If not as specified, inspect the following:
Zero or low
- FP circuit
- FP
- Fuel line (clogged)
- Fuel leakage inside pressure regulator High
- Pressure regulator for high pressure cause
Fuel line pressure: 410-490 kPa 4.2-4.9 kgf/sq.cm, 60-71 psi
11. Turn the ignition switch to the LOCK position.
12. Measure the fuel hold pressure after 5 minutes.
- If not as specified, inspect the following:
- FP hold pressure
- Fuel injector for leakage
- Fuel line for improper routing, kinks or leakage
Fuel hold pressure: More than 230 kPa 2.3 kgf/sq.cm, 33 psi
13. Complete the "BEFORE REPAIR PROCEDURE".
14. Disconnect the vacuum hose from the intake manifold that connecting to the brake booster.
15. Disconnect the SST.
16. Connect the quick release connector.
High Pressure Line (From the High Pressure Fuel Pump to the Fuel Injector)
1. Inspect the fuel pressure sensor.
2. Inspect the high pressure fuel pump..
______________________________
Let me know if this helps. Also, if possible let me know what code was actually retrieved that indicated a rich fuel mixture.
Take care and let me know if you have other questions.
Joe
Images (Click to make bigger)
Sunday, January 12th, 2020 AT 10:55 PM