The pulley should be held on by 4 bolts. As far as removing the crankshaft pulley, I don't see why. You will, however, have to remove the AC compressor and bracket because it bolts through the water pump mount. Here is a guide to help you step by step with instructions in the diagrams below to show you how on your car. Check out the diagrams (Below).
https://www.2carpros.com/articles/water-pump-replacement
Removal
1. Drain engine cooling system.
2. Release drive belt tensioner and remove drive belt.
3. Remove radiator and water heater hose from the water pump connections.
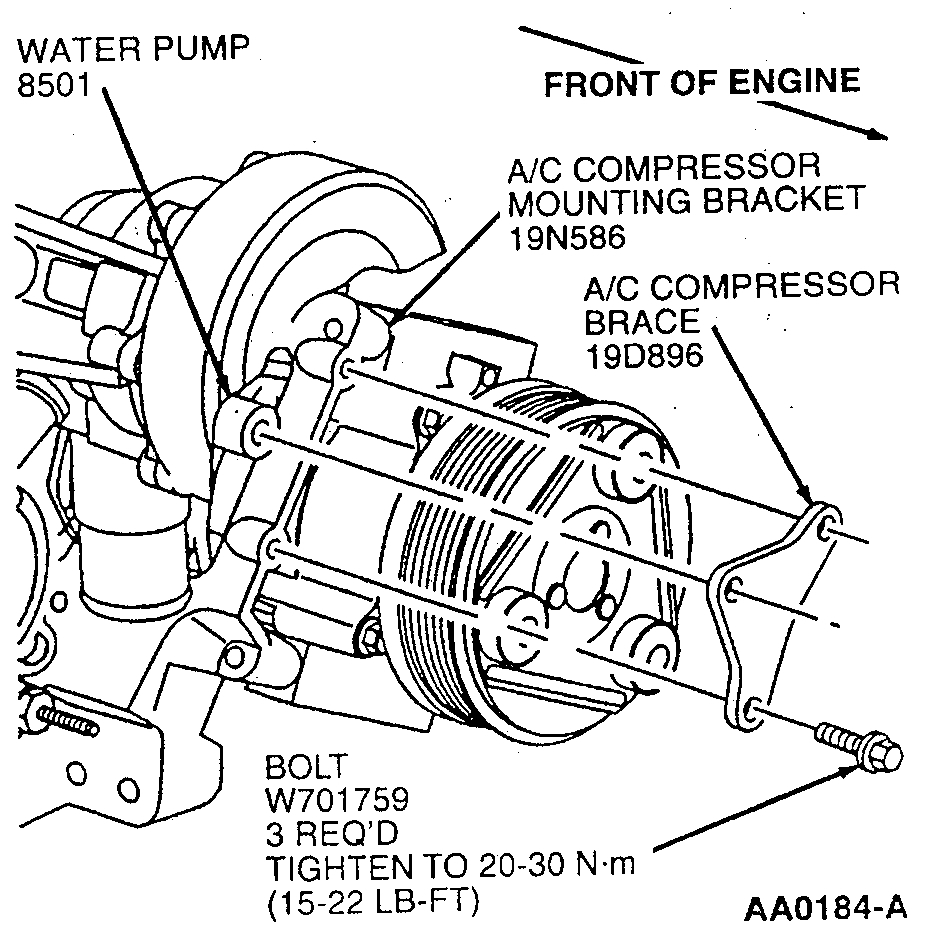
4. Remove A/C compressor to water pump brace.
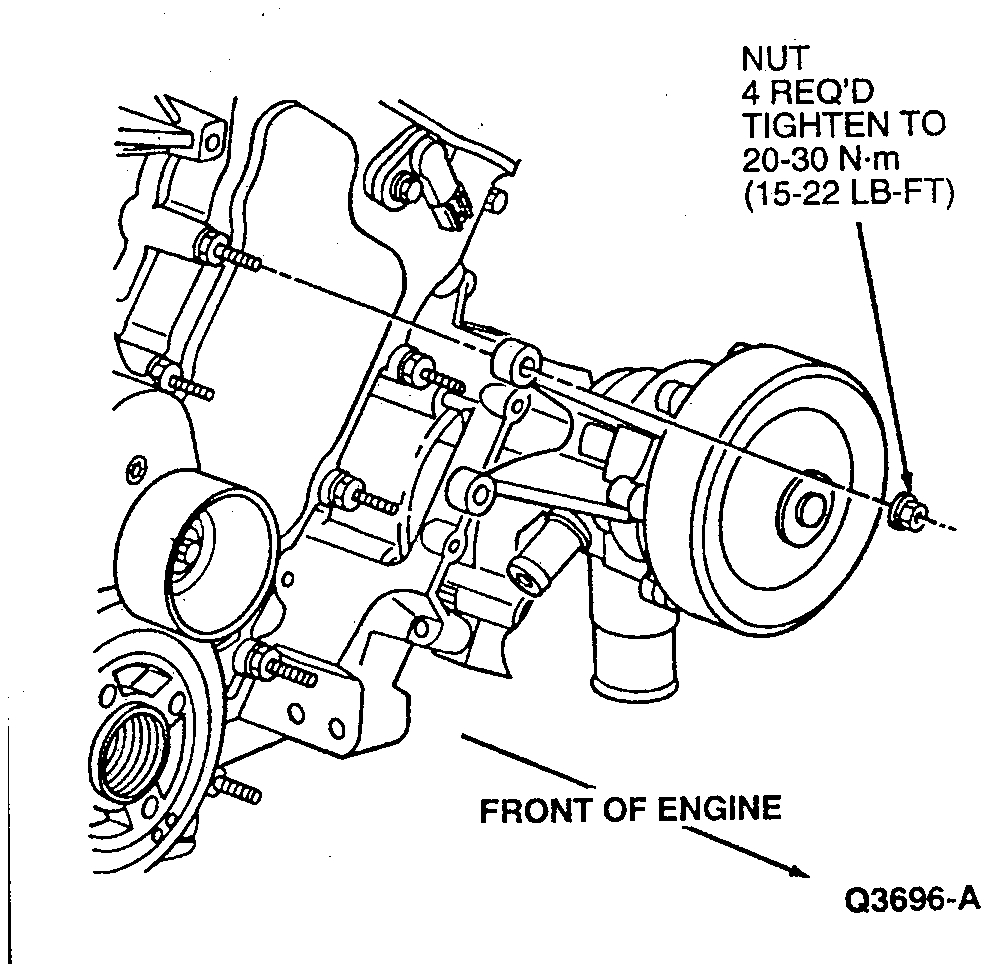
5. Remove four bolts retaining water pump to engine and remove water pump.
Installation
1. Place water pump onto engine and carefully install into position until seated.
2. Install four retaining bolts. Tighten to 20-30 Nm (15-22 ft. lbs.)
3. Install radiator and heater water hose to the water pump. Position clamps securely.
4. Install A/C compressor to water pump bracket. Tighten bolts to 20-30 Nm (15-22 ft. lbs.)
5. Install drive belt.
6. CAUTION: Use extreme care to keep coolant mixture off of the drive belt and pulleys. If needed, remove drive belt and rinse with clear water. Clean pulleys and install drive belt. Belt squeal and early belt fatigue will occur otherwise.
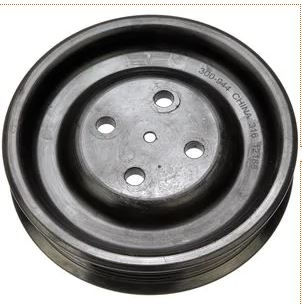
Picture 3 shows the pulley. You can see where it bolts.
Here is a link to help with draining the coolant:
https://www.2carpros.com/articles/coolant-flush-and-refill-all-cars
Here are the directions for draining the coolant:
Removal
The radiator draincock is located near the bottom of the radiator. See Pic 4
CAUTION: Do not mix Standard (green) Coolant with Extended Life Coolant (orange). If mixing occurs, drain engine cooling system and refill with originally equipped coolant type. If this contamination occurs, the service change interval on Extended Life Coolant will be reduced from 6 years/150,000 miles to 3 years/30,000 miles.
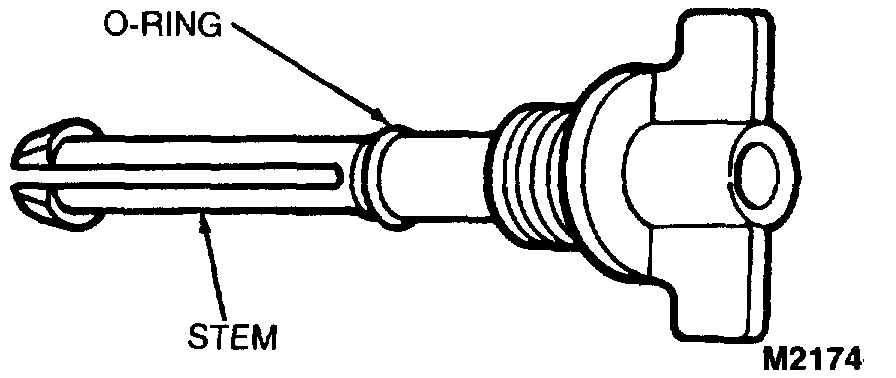
1. Turn the radiator draincock counterclockwise with a pair of needle nose pliers to unscrew. When the radiator draincock is unscrewed to the end of the threads, pull the stem from the radiator.
2. Remove the radiator draincock from the radiator by squeezing the sides together with a pair of needle nose pliers. Then pull the radiator draincock from the radiator.
Installation
1. Make sure O-ring is in groove on stem of radiator draincock.
2. Water-saturate radiator draincock in order to wet O-ring.
3. Push the radiator draincock into the radiator opening until it snaps into place.
4. Tighten the radiator draincock by turning clockwise to 1 Nm (8 inch lbs.).
Here is a link to help with removing the serpentine belt.
https://www.2carpros.com/articles/replace-serpentine-belt
Here are the directions for removal, inspections, and replacement of the belt.
WARNING: DO NOT ALLOW DRIVE BELT TENSIONER TO SNAP BACK AS DAMAGE TO DRIVE BELT TENSIONER OR PERSONAL INJURY COULD RESULT.
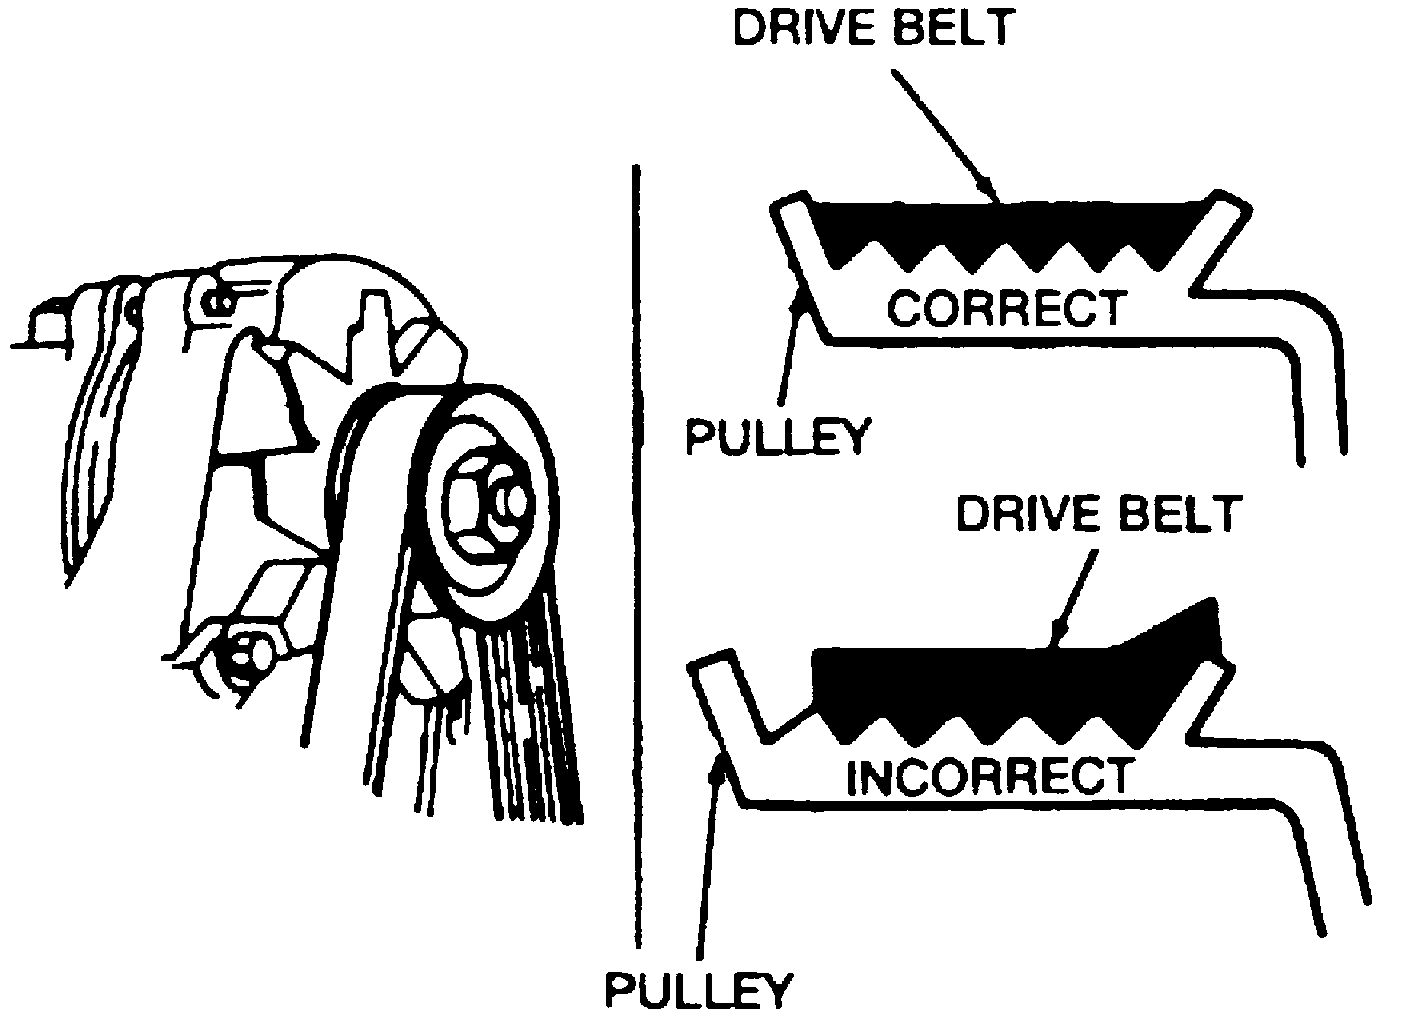
NOTE: Minor cracks in the V-grooved portion of the serpentine drive belt are considered normal and acceptable. If the drive belt has chunks missing from the ribs, the drive belt should be replaced.
NOTE: Conditions requiring drive belt replacement are excessive wear, rib chunk-out, severe glazing, frayed cords or other conditions. Replace any drive belt exhibiting any of these conditions.
Drive belt removal
NOTE: When installing drive belt on pulley, make sure that all V-grooves make proper contact with pulleys.
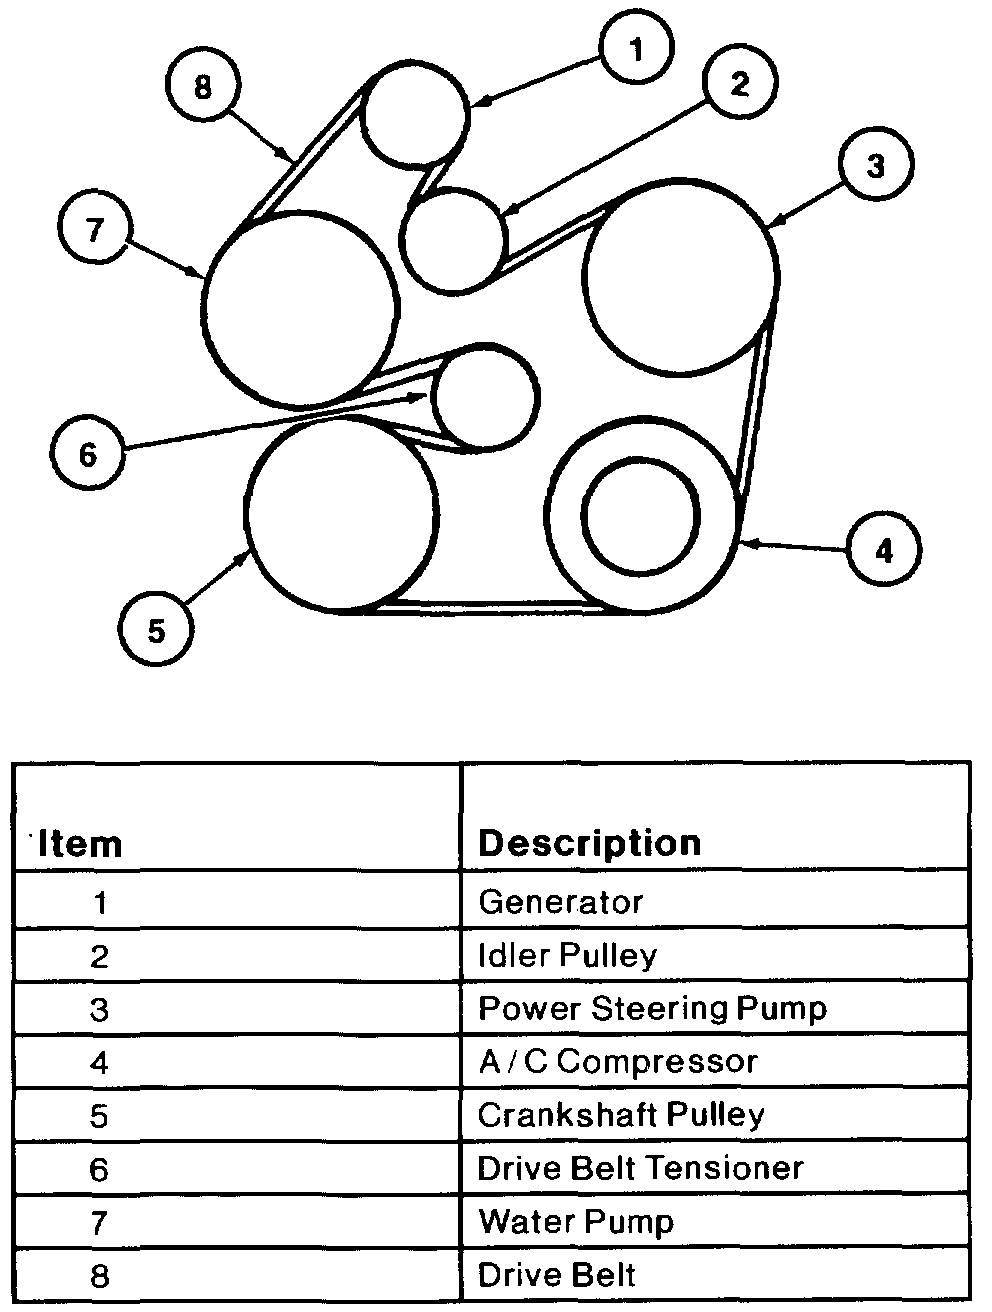
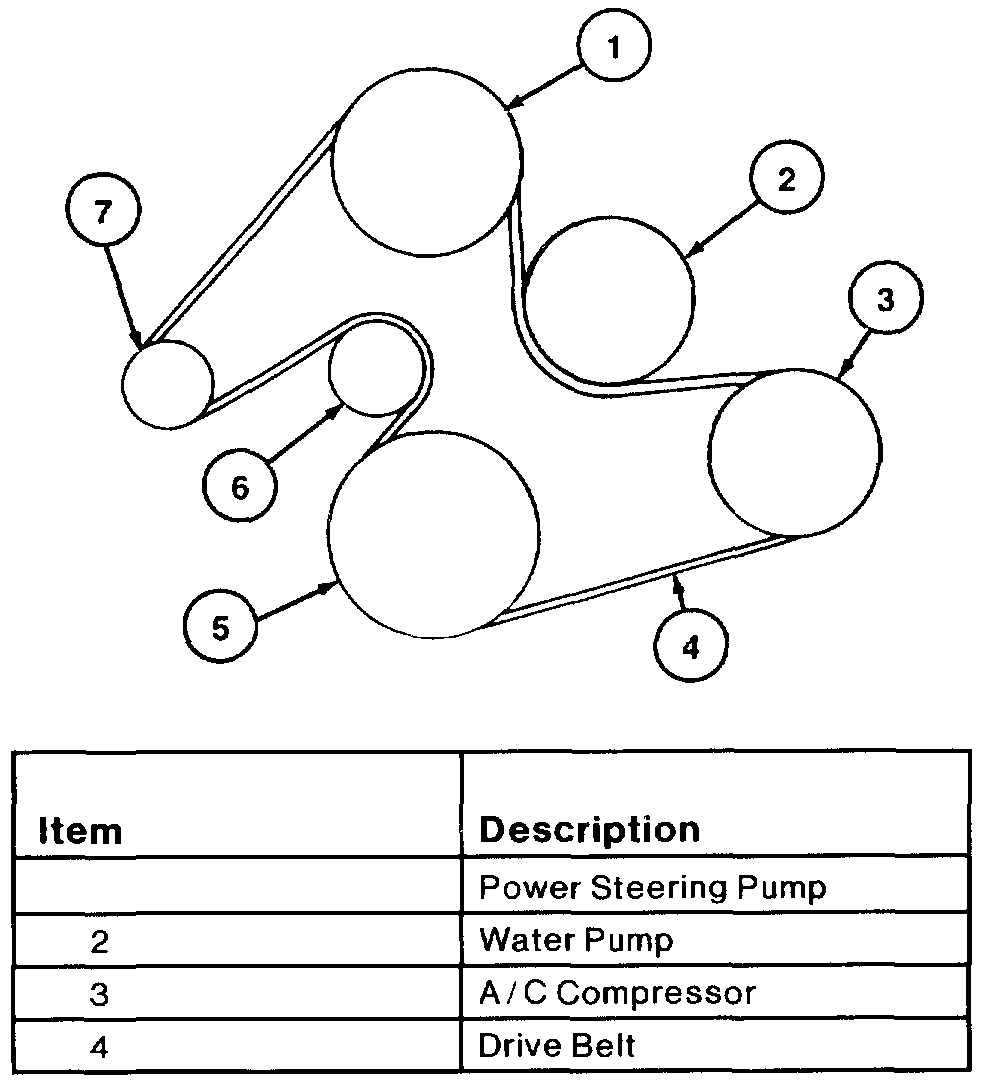
Using a 15 mm socket or wrench on bolt attaching drive belt tensioner pulley, rotate drive belt tensioner clockwise on 3.0L (2V) and 3.0L (2V) FF, rotate the drive belt tensioner counter clockwise on 3.0L (4V) to remove drive belt from pulleys. Make sure spring keeper engages into slot.
Installation
1. Install drive belt over all pulleys (except drive belt tensioner).
2. Rotate drive belt tensioner and install drive belt over drive belt tensioner pulley. Make sure that all V-grooves make proper contact with pulleys. Make sure spring keeper releases or improper belt tension will occur.
Check out the diagrams (Below). Please let us know what you find.
Images (Click to enlarge)
Apr 25, 2021 at 12:50 PM