Welcome to 2CarPros.
Is there any noise associated with the vibration? If there is a clicking noise, it sounds like there is an issue with a CV joint. Take a look through this link. It describes symptoms related to a bad CV joint. See if it seems to mirror what you are experiencing. The first link explains a CV joint, the second symptoms and the third in general replacement.
https://www.2carpros.com/articles/how-a-cv-joint-works
https://www.2carpros.com/articles/symptoms-of-a-bad-cv-axle-joint
If you find that is the problem, here is a link that explains in general how one is replaced.
https://www.2carpros.com/articles/replace-cv-axle
_________________________________________________________
Here are the directions specific to your vehicle for replacement. The attached pictures correlate with the directions.
WHEEL DRIVE SHAFT REPLACEMENT - FRONT
Wheel Drive Shaft Replacement - Front
^ Tools Required
- J 43828 Ball Joint Separator
- J 44015 Steering Linkage Installer
- J 45341 Rear Wheel Drive Shaft Removal Tool
- J 24319-B Steering Linkage and Tie Rod Puller
- J 44394 Seal Protector
- J 2619-01 Slide Hammer
Removal Procedure
pic 1
1. Raise and support the vehicle. Refer to Vehicle Lifting.
2. Remove the tire and wheel assembly.
3. Remove and discard the wheel drive shaft spindle nut.
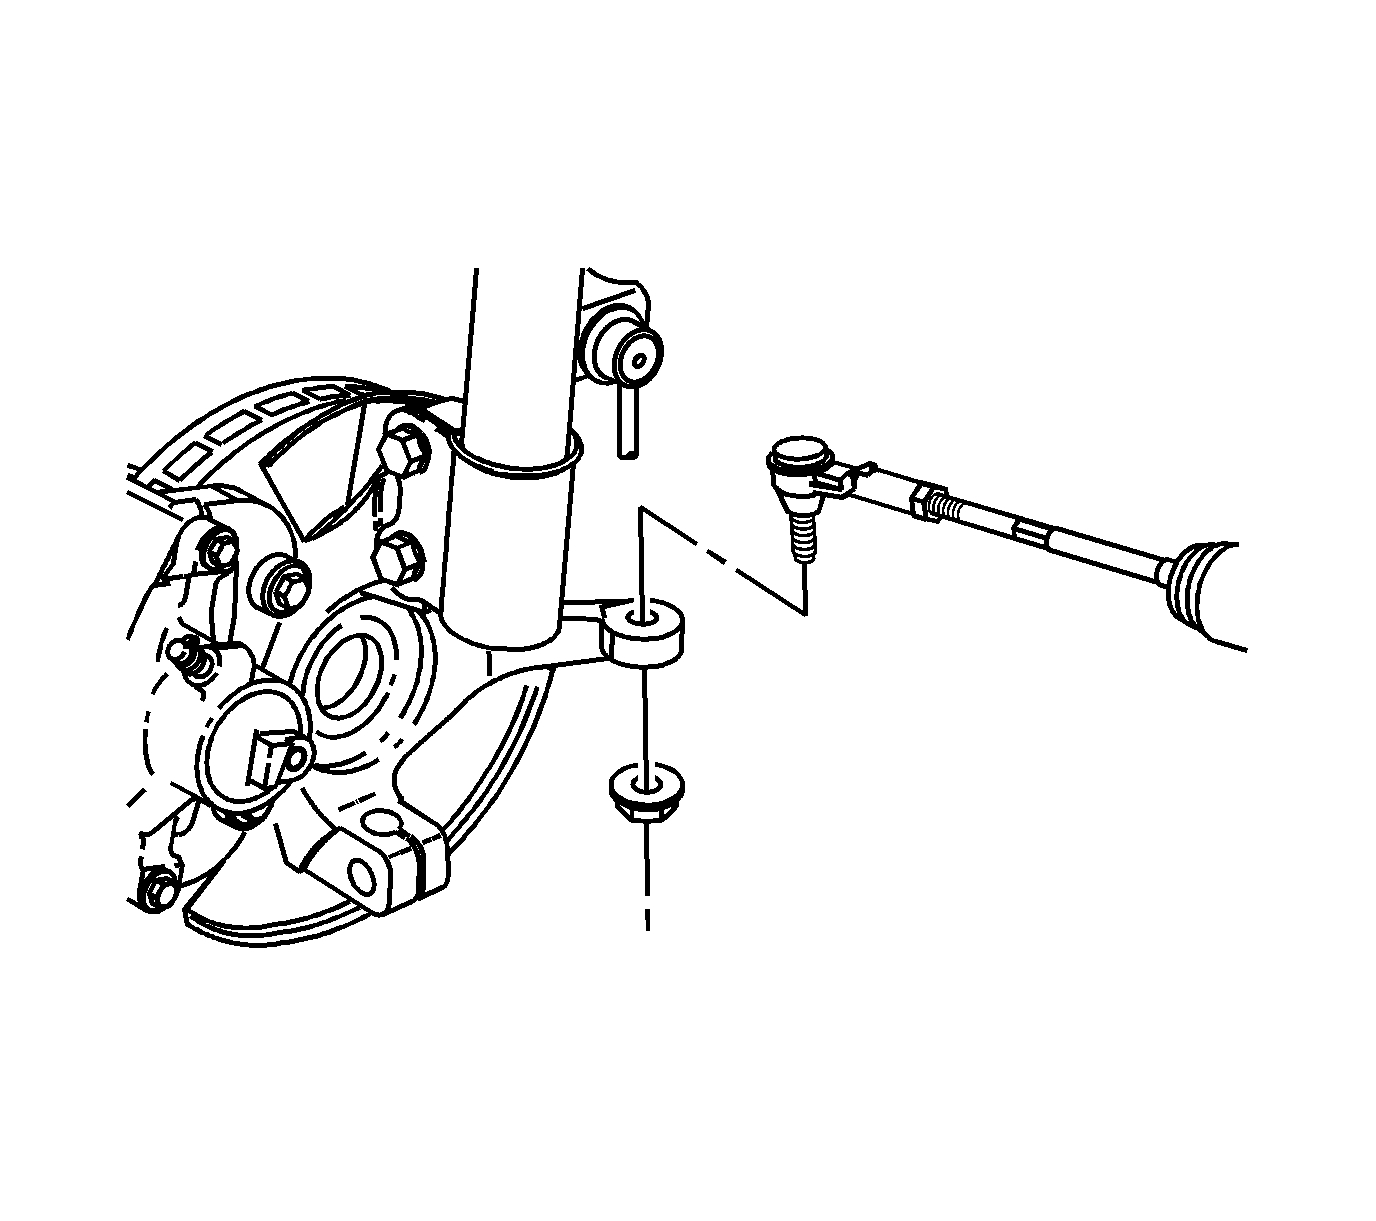
4. Notice: Hold the ball stud from turning when removing/installing the nut. The boot can become torn and damaged if the ball stud turns.
Remove the outer tie rod end-to-steering knuckle nut. Do not loosen the tie rod end jam nut.
pic 2
5. Important: Do not use a wedge type tool to separate the tie rod end from the steering knuckle.
Using the J 24319-B separate the tie rod end from the steering knuckle.
pic 3
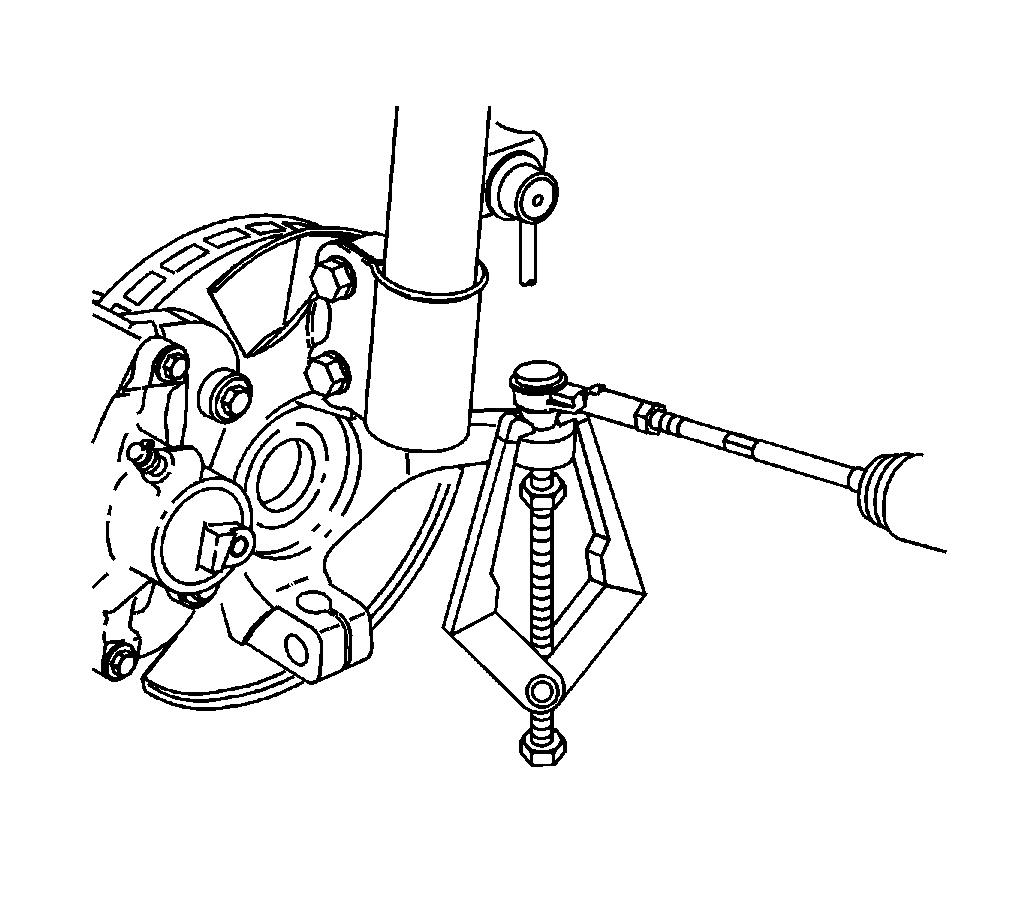
6. Remove and discard the cotter pin from the lower ball joint stud.
7. Remove the ball joint stud nut.
pic 4
8. Using the J 43828 separate the lower ball joint stud from the steering knuckle.
pic 5
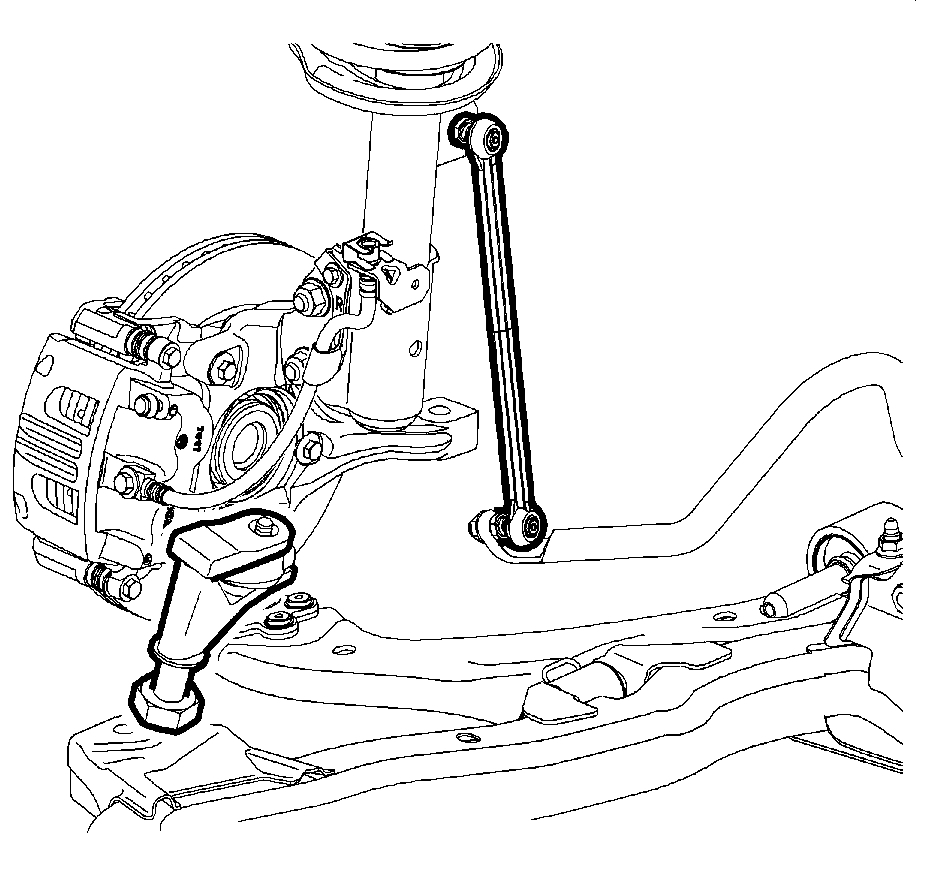
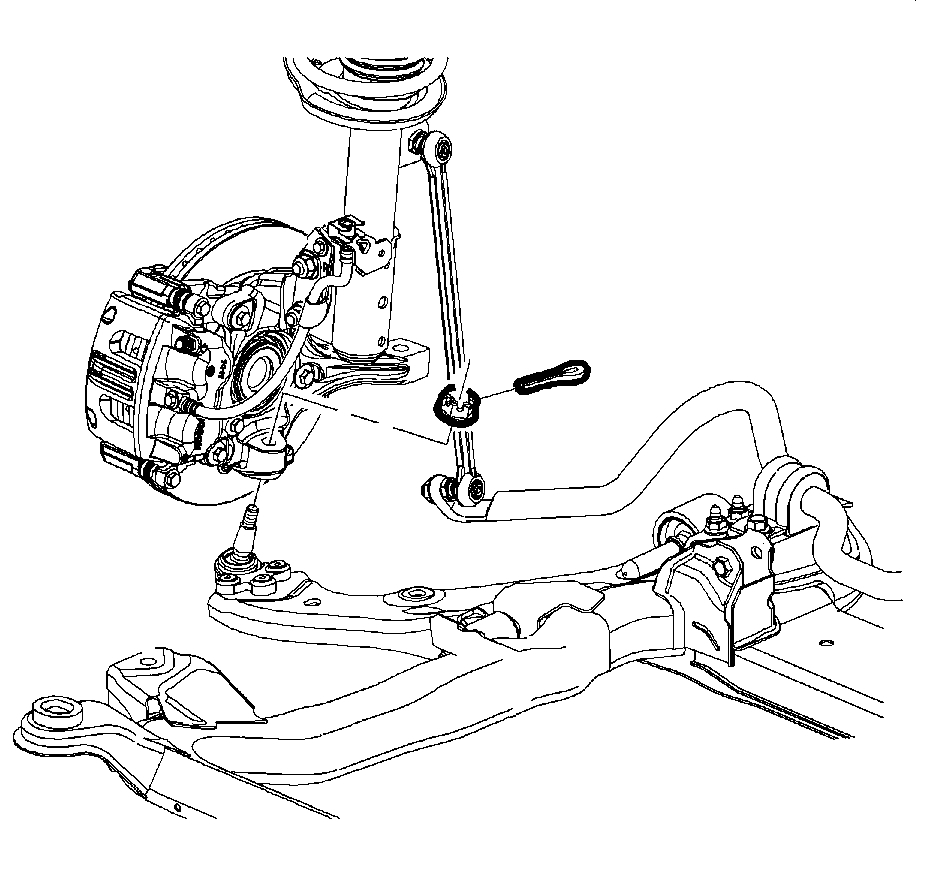
9. Using a backup wrench on the stud, remove the nut securing the lower stabilizer bar link and disengage the link.
10. Disengage the wheel drive shaft spindle from the wheel hub assembly. If necessary, place a wood block against the end of the wheel drive shaft spindle and tap with a hammer to aid removal.
pic 6
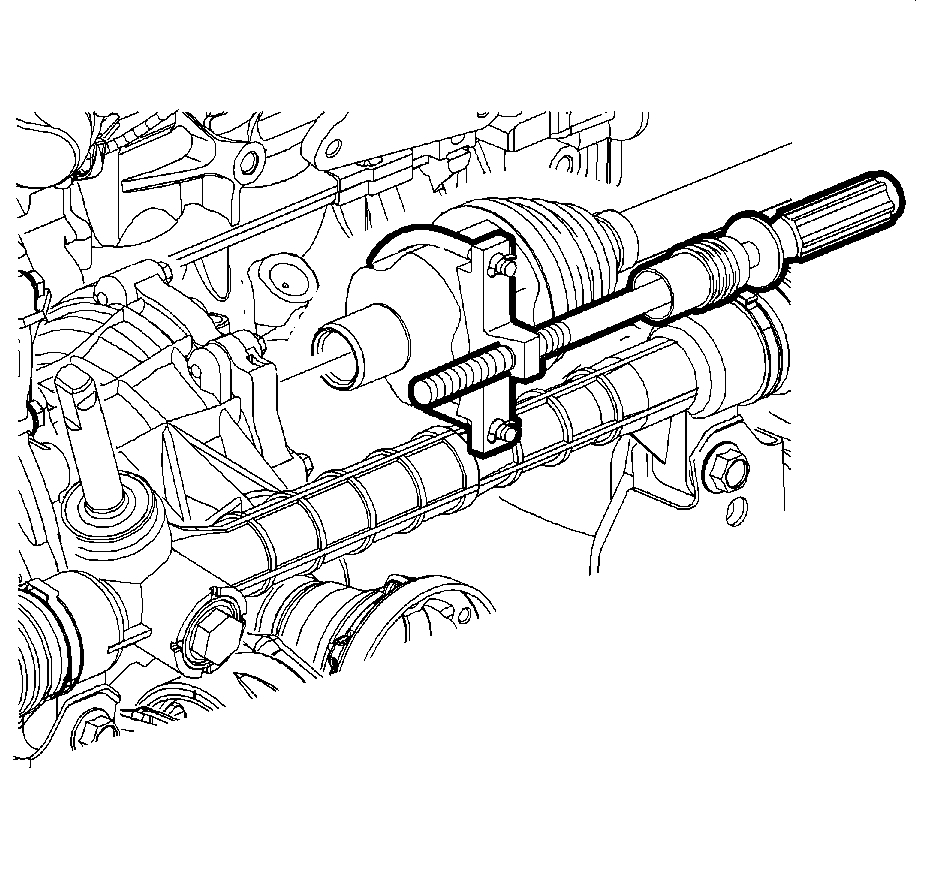
11. Important: Use care not to damage the joint seal when removing the wheel drive shaft.
Assemble the J 45341 and the J 2619-01 to the wheel drive shaft inner tripot joint.
12. Important: On vehicles equipped with all-wheel drive (AWD), the stub shaft may disengage from the power takeoff unit (PTU). If necessary, cap the opening in the PTU to prevent fluid loss.
Disengage the wheel drive shaft from the transmission or power takeoff unit (PTU), if equipped.
13. Remove the wheel drive shaft from the vehicle.
Installation Procedure
pic 7
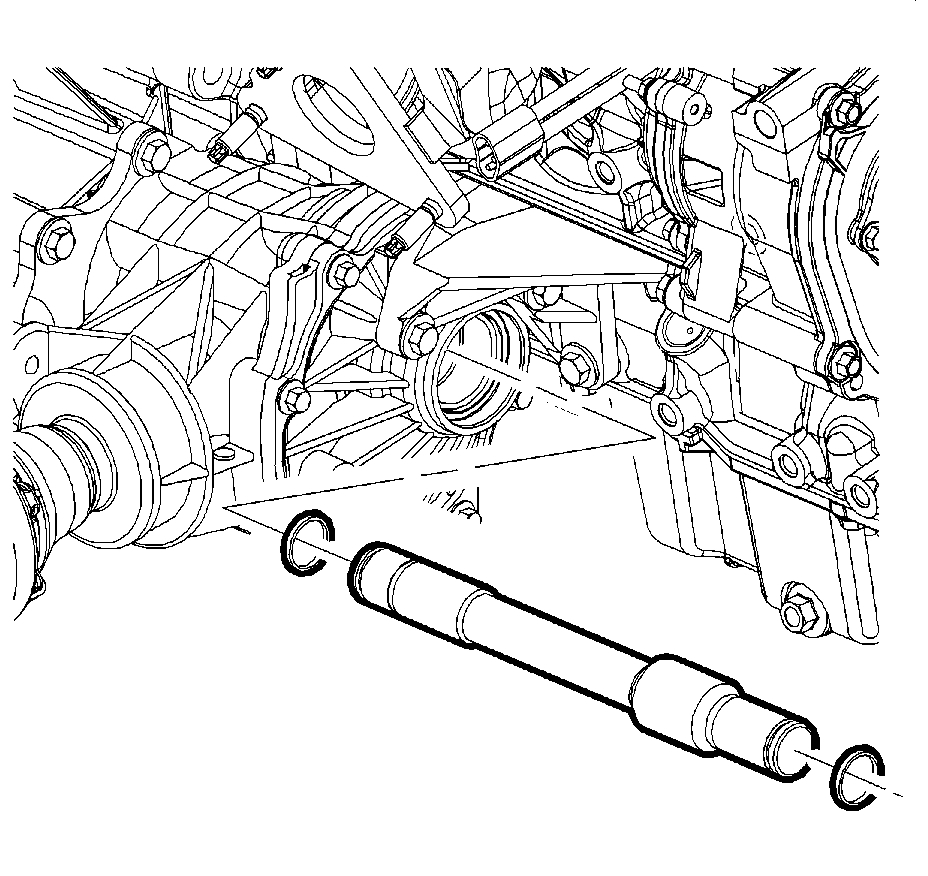
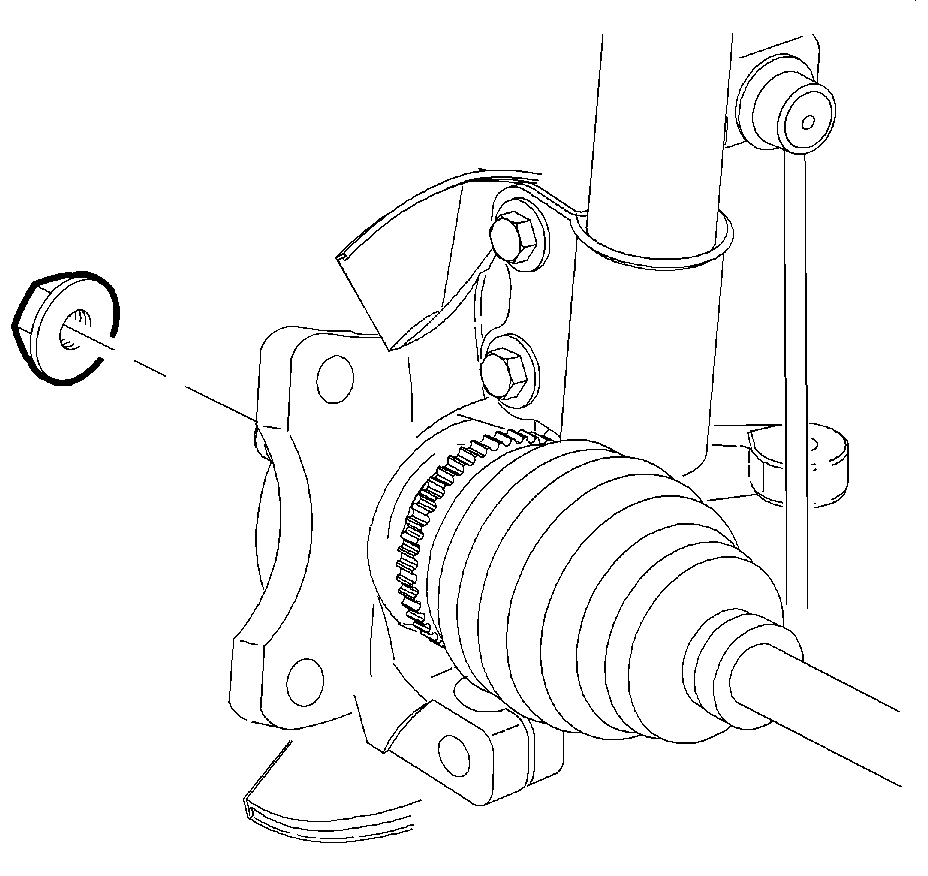
1. Install a new wheel drive shaft retaining ring to the output shaft.
pic 8
2. Install the J 44394 to the wheel drive shaft oil seal.
pic 9
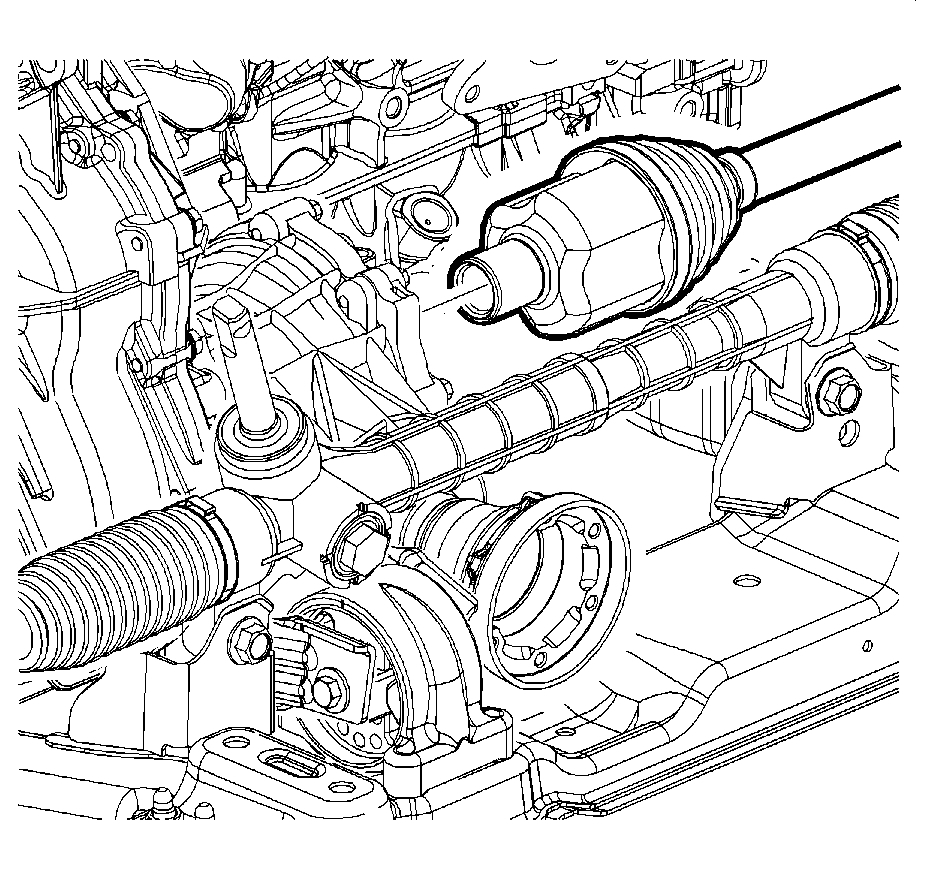
3. Install the wheel drive shaft to the output shaft:
^ Guide the wheel drive shaft tripot joint squarely onto the output shaft.
^ After the splined end of the wheel drive shaft passes the oil seal, remove the J 44394 from the oil seal.
^ Firmly engage the wheel drive shaft to the output shaft.
^ Ensure that the tripot joint is fully seated on the output shaft by grasping the tripot joint and attempting to pull free of the output shaft.
pic 10
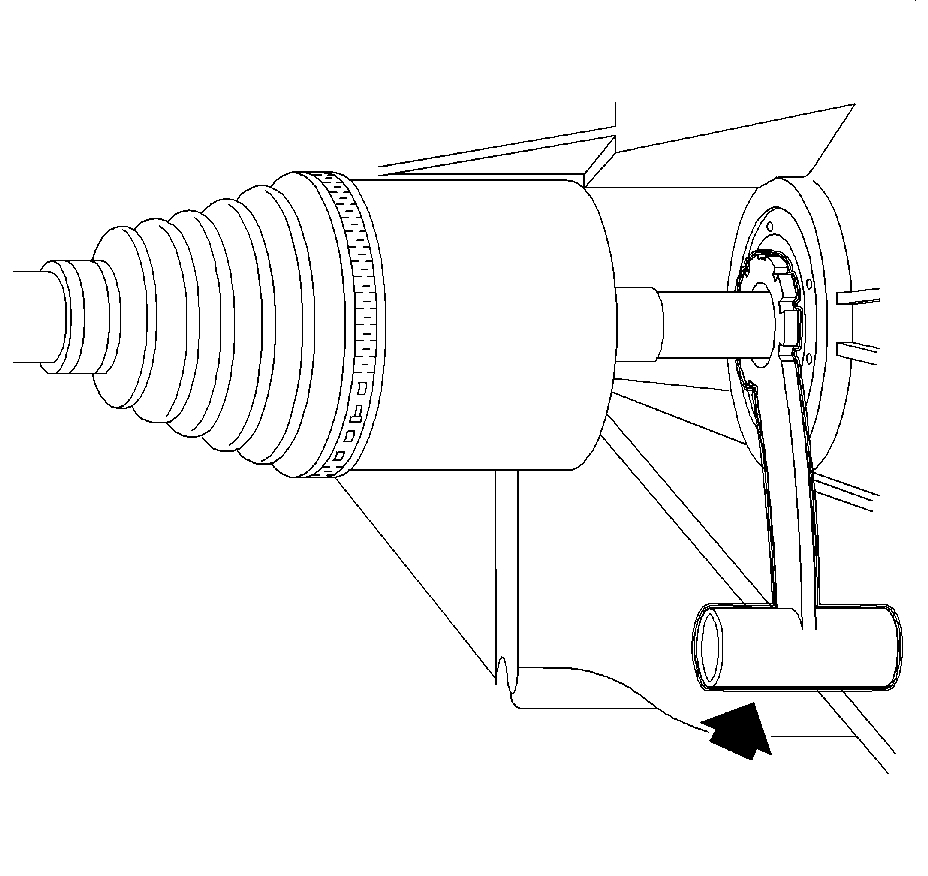
4. Insert the constant velocity (CV) joint spindle to the wheel hub/bearing assembly of the steering knuckle.
5. Hand install a new wheel drive shaft spindle nut.
pic 11
6. Install the lower ball joint stud to the steering knuckle.
7. Notice: Refer to Fastener Notice in Service Precautions.
Install the lower ball joint castle nut to the stud.
^ Tighten the nut to 10 Nm (89 inch lbs.).
^ Tighten the nut an additional 150 degrees.
8. Install the cotter pin to the ball joint stud.
9. If necessary, tighten the nut one additional flat at a time until the castle nut aligns with the hole in the ball joint stud.
10. Secure the cotter pin to the ball joint stud by folding one tine over the end of the ball joint stud.
11. Cut off any excess length of the cotter pin tines.
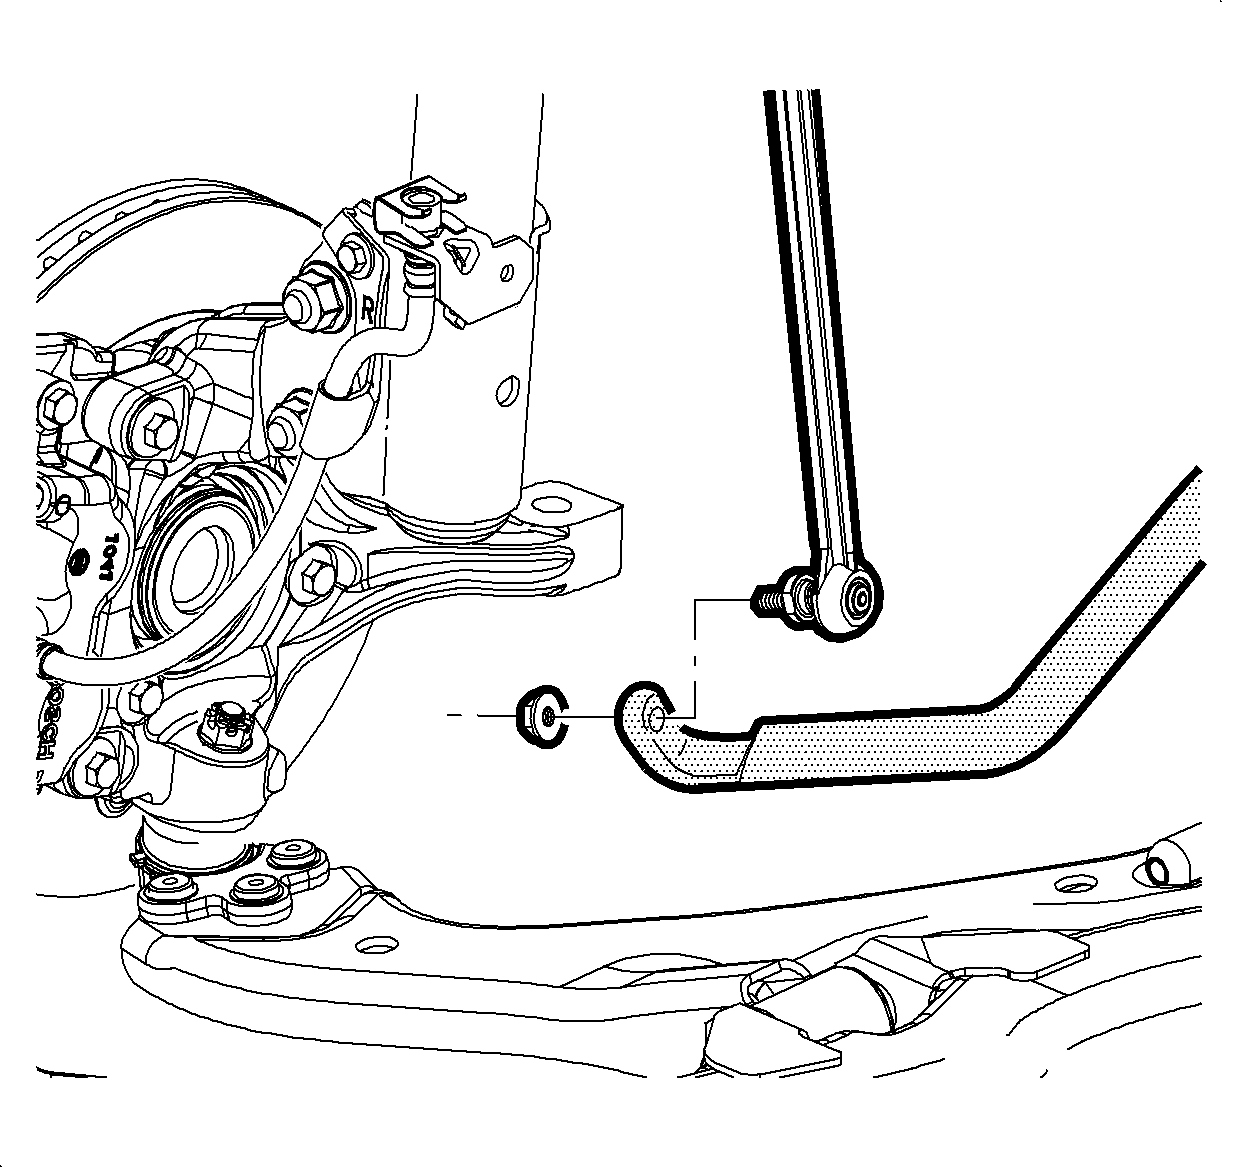
pic 12
12. Install the lower link to the stabilizer bar.
13. Install a new nut to the stabilizer bar link stud.
14. Important: In order to prevent damaging the stabilizer bar link stud seal, do not allow the stud to rotate while tightening the nut.
Use a back up wrench on the stud and tighten the nut.
^ Tighten the nut to 65 Nm (48 ft. lbs.).
pic 13
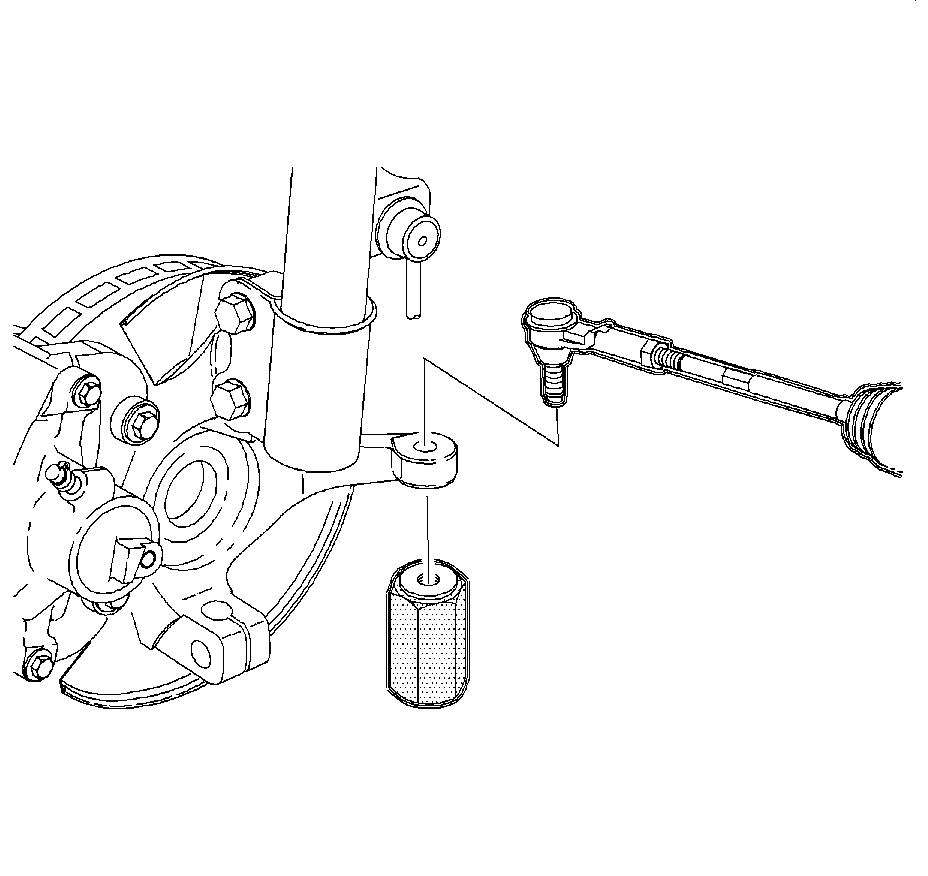
15. Install the tie rod end to the steering knuckle.
16. Using the J 44015 , pull the stud into steering knuckle.
^ Tighten the J 44015 to 40 Nm (30 ft. lbs.).
17. Remove the J 44015 from the tie rod end stud.
pic 14
18. Install a new nut to the tie rod end stud.
^ Tighten the nut to 50 Nm (37 ft. lbs.).
19. Tighten the wheel drive shaft spindle nut.
^ Tighten the nut to 205 Nm (151 ft. lbs.).
pic 15
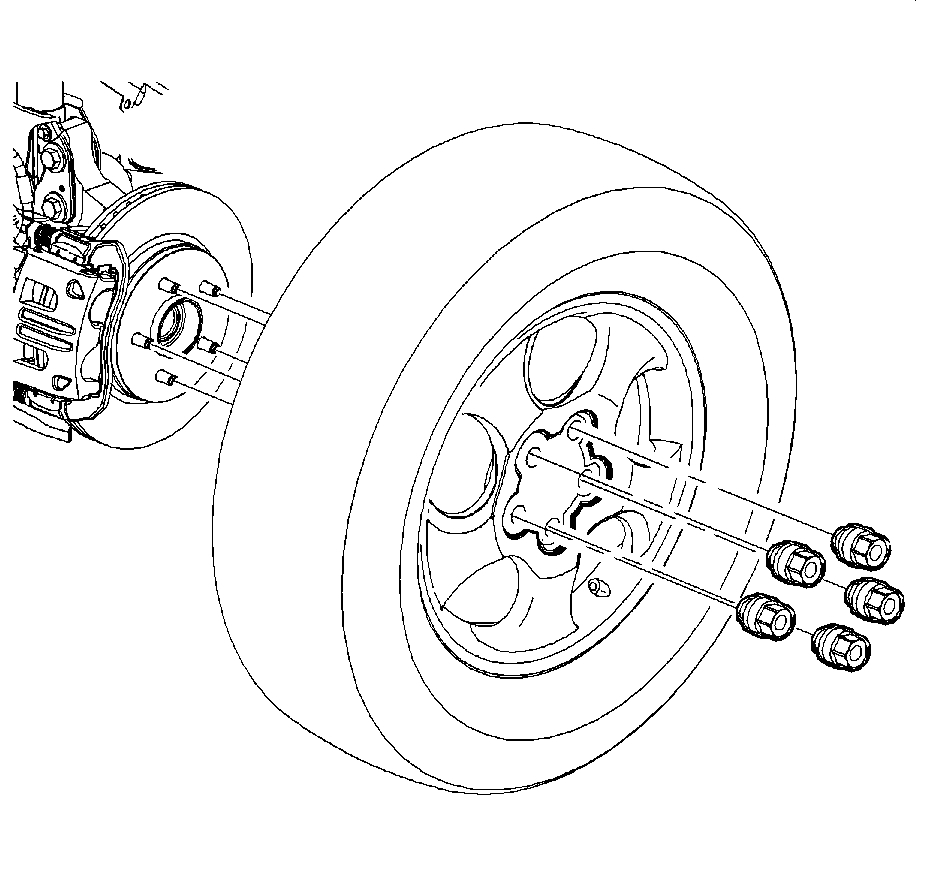
20. Install the tire and wheel assembly.
21. Lower the vehicle.
22. Inspect the transmission fluid level.
___________________________________________________
Let me know if this helps or if you have other questions.
Take care,
Joe
Images (Click to enlarge)
Jul 4, 2019 at 7:40 PM