Hi,
There should be fuel there when you try to release it. It sounds like either something is frozen or the fuel pump is bad. What I suggest is to check fuel pressure. However, if you are pressing the Schrader valve on the fuel rail and there is nothing, then there is no pressure.
Try this trick. See if it starts for a couple of seconds using starting fluid. If it starts and then stalls, we will have confirmed it is a fuel related issue. Or, here is a link that explains how to check fuel pressure:
https://www.2carpros.com/articles/how-to-check-fuel-system-pressure-and-regulator
If you find the fuel pump is the issue, here are the directions for replacement. You will need to remove the fuel tank, so it's not a five-minute job. Note, the pics correlate with the directions. I'll start with the fuel tank removal and then the pump directions.
____________________________________________
2005 Chevy Truck Silverado 1500 4WD V8-5.3L VIN T
Fuel Tank Replacement (Pickup)
Vehicle Powertrain Management Fuel Delivery and Air Induction Fuel Tank Service and Repair Removal and Replacement Fuel Tank Replacement Fuel Tank Replacement (Pickup)
FUEL TANK REPLACEMENT (PICKUP)
FUEL TANK REPLACEMENT (PICKUP)
REMOVAL PROCEDURE
IMPORTANT: Clean the fuel and evaporative emission (EVAP) connections and surrounding areas prior to disconnecting the lines in order to avoid possible system contamination.
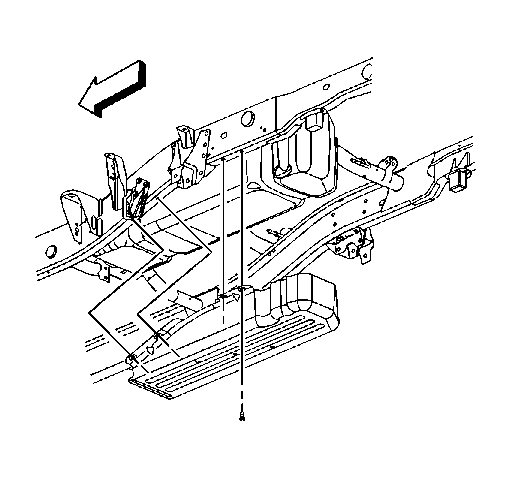
pic 1
1. Relieve the fuel system pressure. Refer to Fuel Pressure Relief Procedure.
2. Drain the fuel tank. Refer to Fuel Tank Draining Procedure.
3. Remove the fuel tank fill pipe.
4. Remove the EVAP canister vent solenoid..
5. Remove the fuel tank shield bolts, if equipped.
6. Remove the fuel tank shield, if equipped.
pic 2
7. Disconnect the fuel feed and EVAP lines.
8. Cap the fuel and EVAP lines in order to prevent possible system contamination.
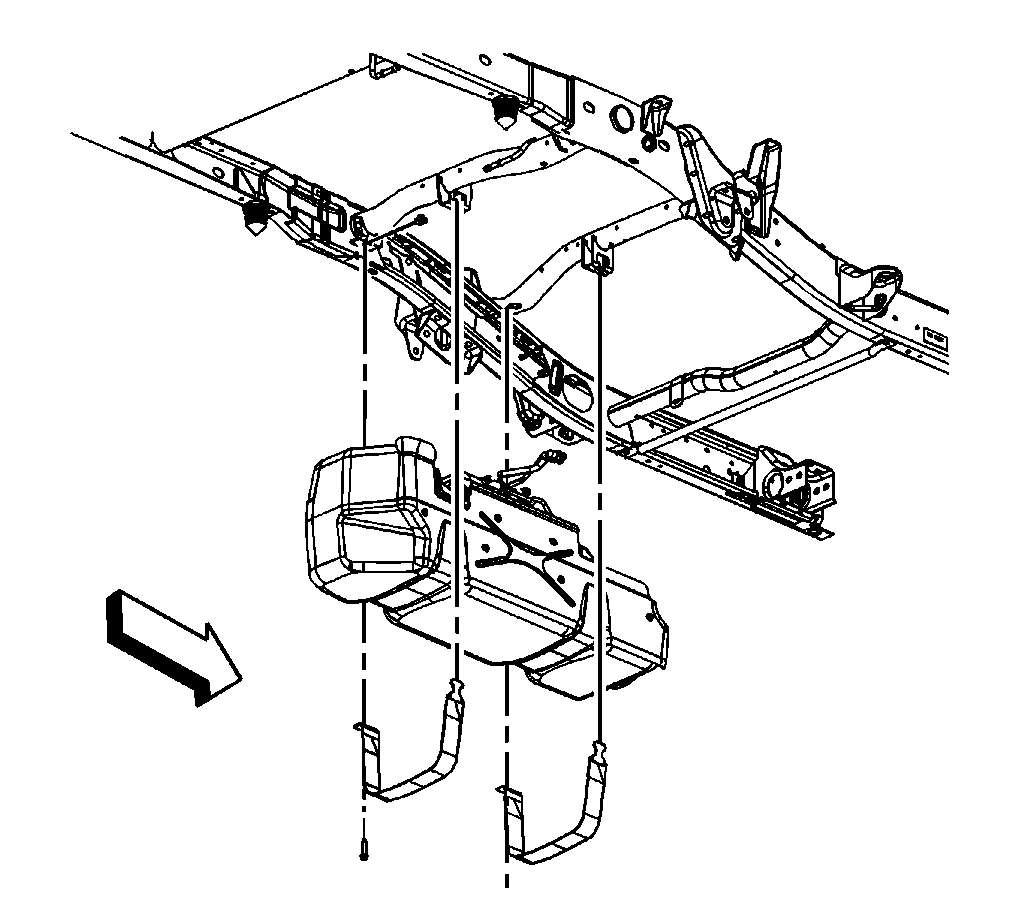
pic 3
9. Place a suitable adjustable jack under the fuel tank.
10. Remove the fuel tank strap bolts.
11. Remove the fuel tank straps.
12. Lower the fuel tank half way.When lowering the tank, ensure that the fill neck on the tank does not get hung up on the harness.
13. Disconnect the electrical harness clip at the frame crossmember.
14. Lower the fuel tank until the electrical connections are accessible.
pic 4
15. Disconnect the fuel pressure sensor electrical connector.
16. Disconnect the fuel sending unit electrical connector, perform the following:
1. Disengage the gray retainer.
2. Push down the black clip.
3. Disconnect the connector.
17. Completely lower the fuel tank.
18. With the aid of an assistant, place the fuel tank in a suitable work area.
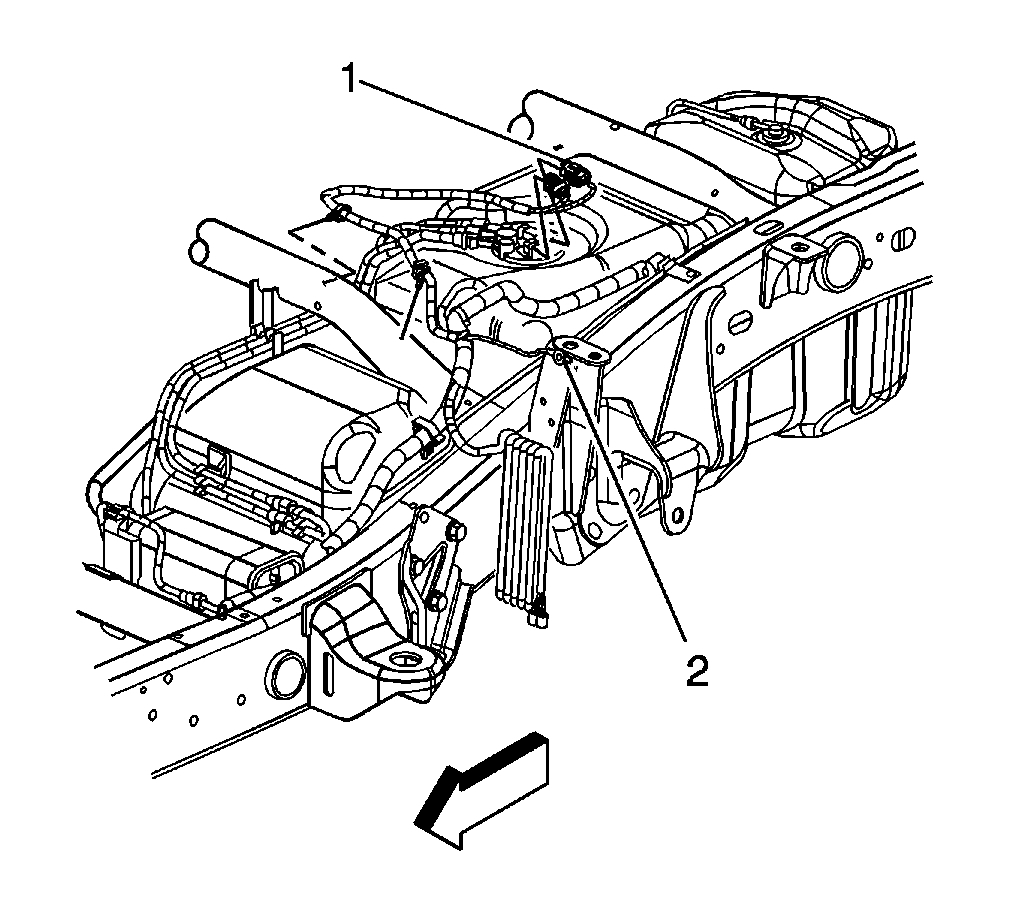
pic 5
19. If necessary, disconnect and remove the fuel feed line (1) from the sending unit and retaining clips.
20. If necessary, disconnect and remove the EVAP purge line (2) from the retaining clips.
21. If necessary, disconnect and remove the EVAP fuel level vent valve (FLVV) line from the FLVV, sending unit, and retaining clips.
22. If necessary, remove the sending unit.
INSTALLATION PROCEDURE
pic 6
1. If necessary, install the sending unit.
2. If necessary, install and connect the EVAP FLVV line to the FLVV, sending unit, and retaining clips.
3. If necessary, install and connect the EVAP purge line (2) to the retaining clips.
4. If necessary, install and connect the fuel feed line (1) to the sending unit and retaining clips.
pic 7
5. With the aid of an assistant, place the fuel tank onto the adjustable jack.
6. Raise the fuel tank until the electrical connections can be made.
7. Connect the fuel sending unit and pressure sensor electrical connectors.
8. Completely raise the fuel tank. When raising the tank, ensure that the fill neck on the tank goes over the harness.
pic 8
9. Install the fuel tank straps.
NOTE: Refer to Fastener Notice in Service Precautions.
10. Install the fuel tank strap bolts.
Tighten the bolts to 40 N.m (30 lb ft).
11. Remove the adjustable jack from under the fuel tank.
pic 9
12. Remove the caps from the fuel and EVAP lines.
13. Connect the fuel feed and EVAP lines.
pic 10
14. If necessary, install the fuel tank shield.
15. If necessary, install the fuel tank shield bolts.
Tighten the bolts to 18 N.m (13 lb ft).
16. Install the EVAP canister vent solenoid..
17. Install the fuel tank fill pipe.
18. Refill the fuel tank.
19. Install the fuel cap.
20. Connect the negative battery cable.
21. Perform the following procedure in order to inspect for leaks:
1. Turn the ignition ON, with the engine OFF, for 2 seconds.
2. Turn the ignition OFF for 10 seconds.
3. Turn the ignition ON, with the engine OFF.
4. Inspect for fuel leaks.
_________________________________
2005 Chevy Truck Silverado 1500 4WD V8-5.3L VIN T
Fuel Sender Assembly Replacement
Vehicle Powertrain Management Fuel Delivery and Air Induction Fuel Tank Unit Service and Repair Procedures Fuel Sender Assembly Replacement
FUEL SENDER ASSEMBLY REPLACEMENT
FUEL SENDER ASSEMBLY REPLACEMENT
TOOLS REQUIRED
J 45722 Fuel Sender Lock Ring Wrench
REMOVAL PROCEDURE
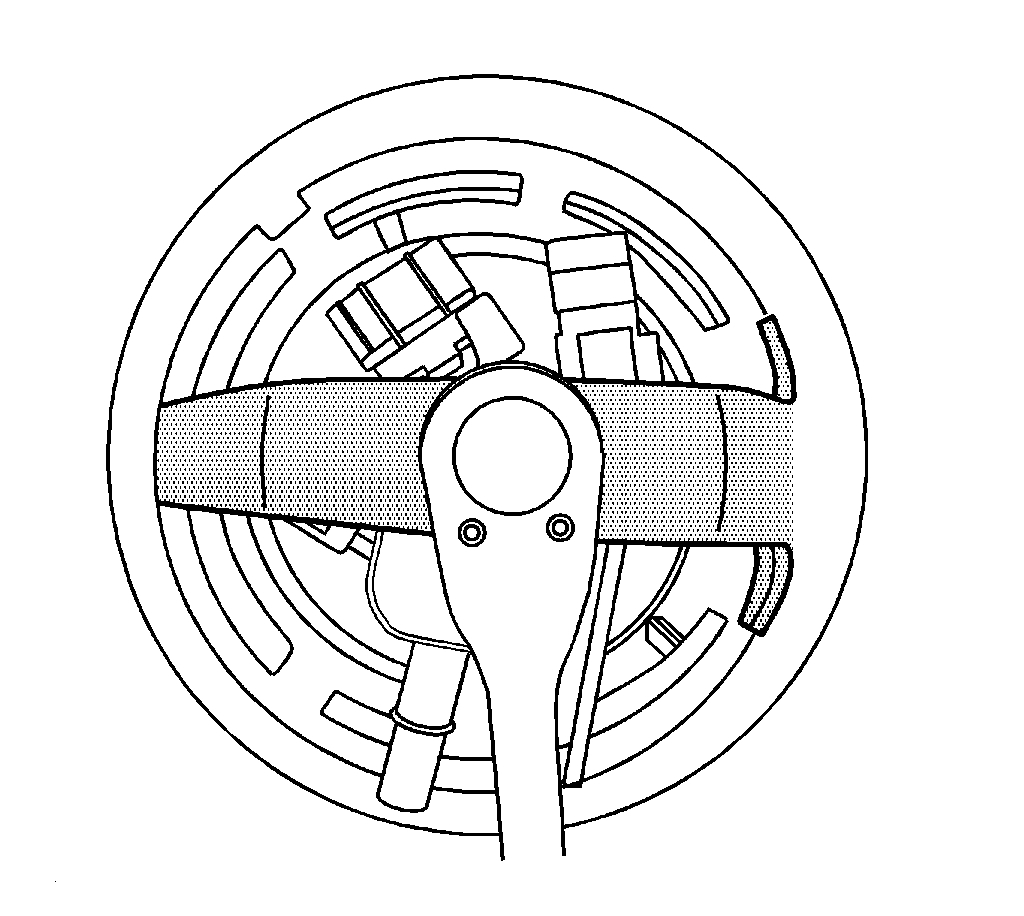
pic 11
1. Remove the fuel tank.
2. Disconnect the fuel line from the sending unit.
3. Disconnect the evaporative emission (EVAP) line from the sending unit.
4. Using J 45722 remove the sending unit lock ring.
CAUTION: Drain the fuel from the fuel sender assembly into an approved container in order to reduce the risk of fire and personal injury. Never store the fuel in an open container.
5. Remove the sending unit and seal. Discard the seal.
6. Clean the sending unit sealing surfaces.
INSTALLATION PROCEDURE
CAUTION: In order to reduce the risk of fire and personal injury that may result from a fuel leak, always replace the fuel sender gasket when reinstalling the fuel sender assembly.
IMPORTANT: The fuel strainer must be in a horizontal position when installing the sending unit is installed in the tank. When installing the sending unit, assure that the fuel strainer does not block full travel of the float arm.
pic 12
1. Install a NEW sending unit seal.
2. Install the sending unit.
3. Using J 45722 install the sending unit lock ring.
4. Connect the EVAP line to the sending unit.
5. Connect the fuel line to the sending unit.
6. Install the fuel tank.
______________________________________
I hope this helps. Let me know if you have other questions.
Take care and God Bless,
Joe
Images (Click to make bigger)
Friday, February 12th, 2021 AT 4:20 PM