Fuel tank replacement (single tank)
TOOLS REQUIRED
J 43178 Fuel Line Disconnect Tool
REMOVAL PROCEDURE
IMPORTANT: Clean the fuel and evaporative emission (EVAP) connections and surrounding areas prior to disconnecting the lines in order to avoid possible system contamination.
1. Relieve the fuel system pressure. Refer to Fuel Pressure Relief Procedure.
2. Drain the fuel tank. Refer to Fuel Tank Draining Procedure (Single Tank) Fuel Tank Draining Procedure (5.3L (L59) Engine) Fuel Tank Draining Procedure (Dual Tanks - Front) Fuel Tank Draining Procedure (Dual Tanks - Rear).
3. Remove the evaporative emission (EVAP) canister.
4. Loosen the vent hose clamp.
5. Remove the vent hose from the fuel tank.
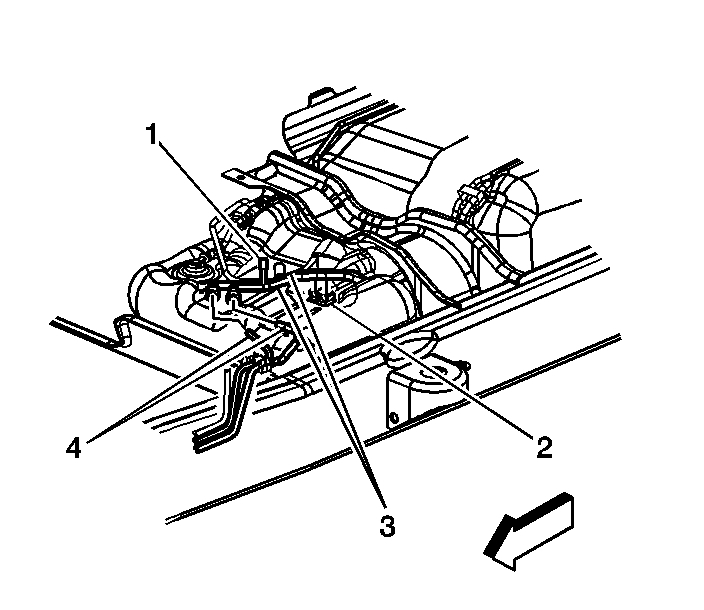
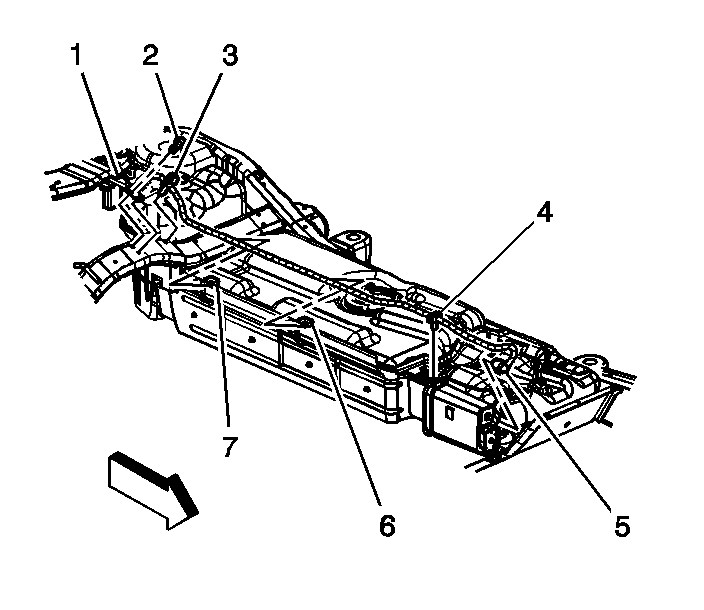
6. Disconnect the chassis fuel pipe (4) from the fuel tank pipe (3).
7. Using J 43178 , disconnect the chassis fuel pipe (4) from the fuel tank pipe (3).
8. Cap the fuel and EVAP pipes in order to prevent possible fuel and/or EVAP system contamination.
9. Using an adjustable jack, support the fuel tank.
10. Lower the fuel tank slightly.
11. Disconnect the EVAP vent pipe from the fuel tank clips (6, 7).
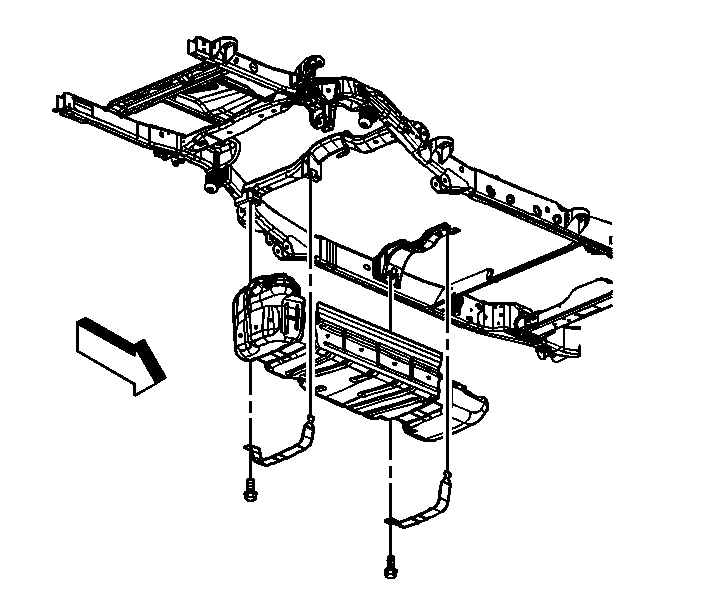
12. Remove the fuel tank strap bolts.
NOTE: Refer to Damage to Fuel Tank Straps Notice in Service Precautions.
13. Remove the fuel tank straps.
14. With the aid of an assistant, carefully lower the rear of the fuel tank.
15. Slide the front of the tank away from the frame.
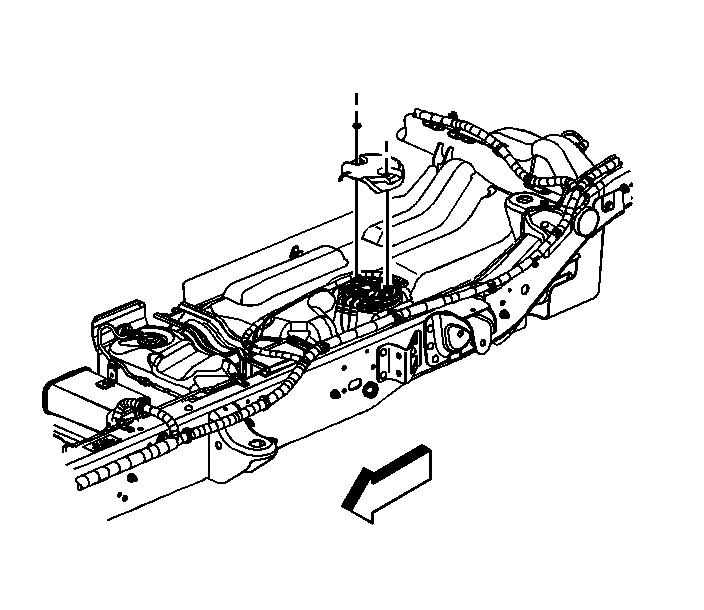
16. If equipped, remove the sending unit shield nuts.
17. If equipped, remove the sending unit shield.
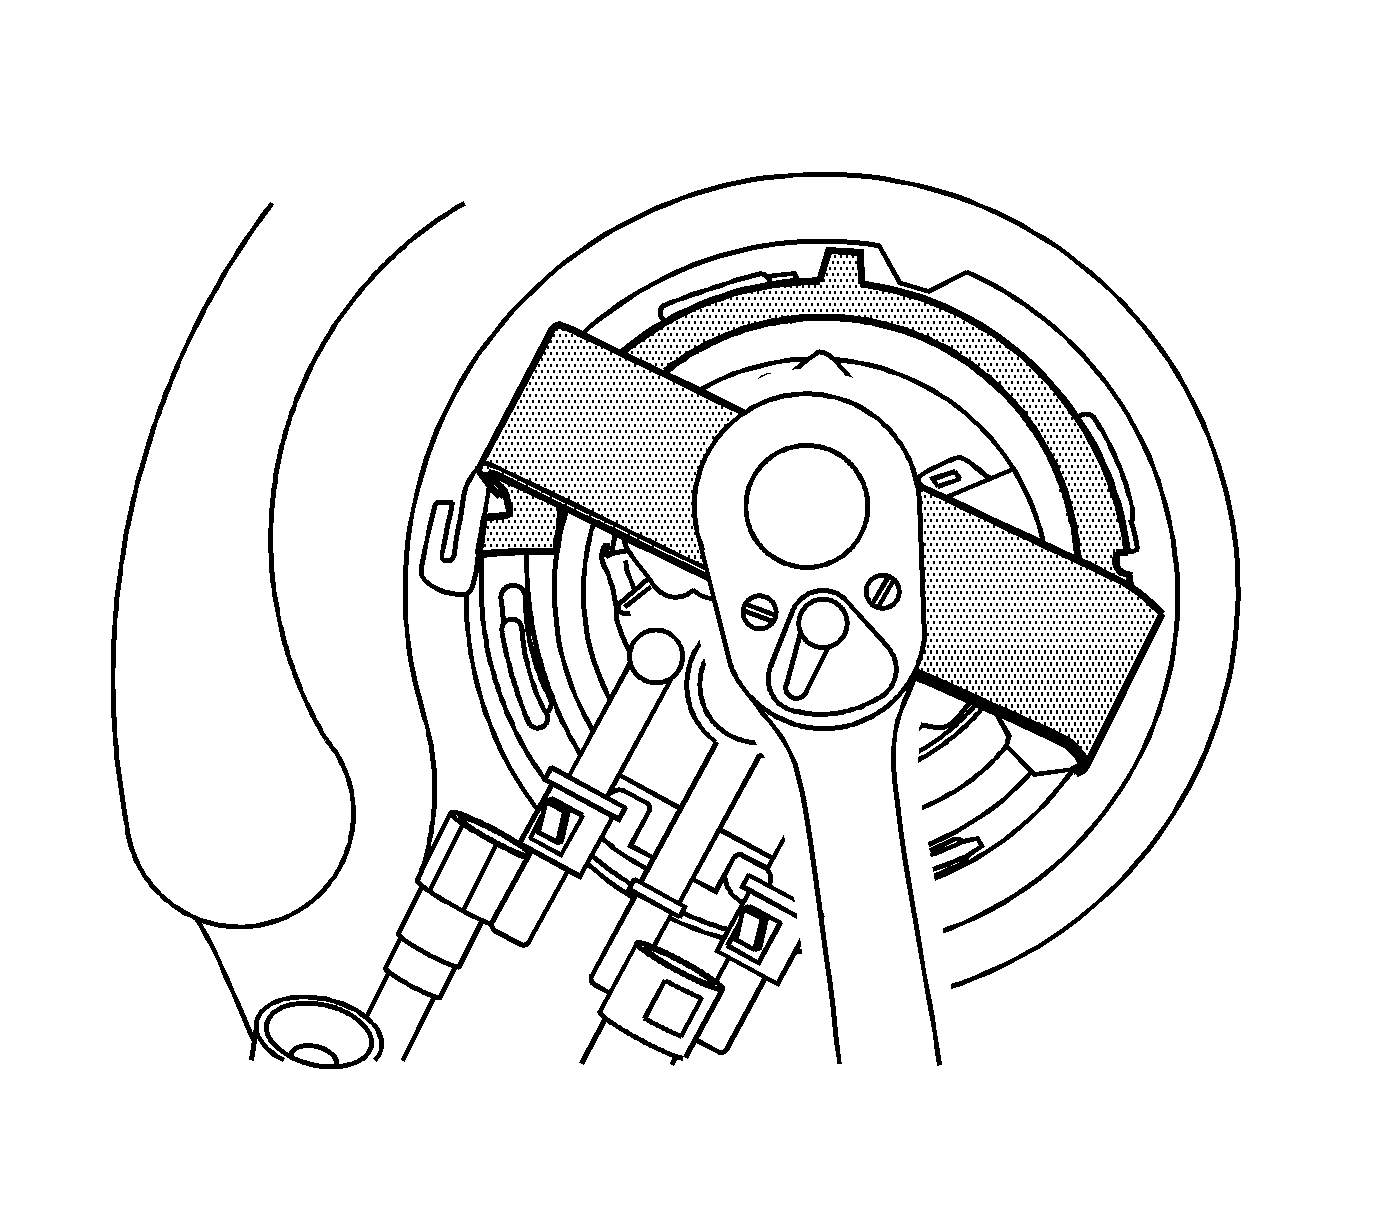
18. Release the connector position assurance (CPA) retainer.
19. Disconnect the fuel sender and fuel pressure sensor electrical connectors (2).
20. Completely lower the fuel tank.
21. Place the fuel tank in a suitable work area.
22. Remove the fuel feed and return pipes from the fuel sending unit and the retaining clips.
23. If necessary, remove the fuel sending unit.
INSTALLATION PROCEDURE
1. If necessary, install the fuel sending unit.
2. Connect the fuel feed and return pipes to the fuel sending unit and the retaining clips.
3. Place the fuel tank onto a suitable jack.
4. With the aid of an assistant, partially raise the fuel tank.
5. Connect the fuel sender and fuel pressure sensor electrical connectors (2).
6. Install the CPA retainer.
7. If equipped, install the sending unit shield.
NOTE: Refer to Fastener Notice in Service Precautions.
8. If equipped, install the sending unit shield nuts.
Tighten the nuts to 10 N.m (89 lb in).
9. With the aid of an assistant, completely raise the fuel tank.
10. Install the fuel tank straps.
11. install the fuel tank strap bolts.
Tighten the bolts to 40 N.m (30 lb ft).
12. Remove the adjustable jack from the fuel tank.
13. Connect the vent hose and fill hose to the tank.
14. Tighten the vent hose and fill hose clamps at the tank.
Tighten the clamps to 2.5 N.m (22 lb in).
15. Connect the EVAP vent pipe to the fuel tank clips (6, 7).
16. Remove the caps from the fuel and EVAP pipes.
17. Connect the chassis fuel pipes (4) to the fuel tank pipes (3).
18. Install the EVAP canister.
19. Lower the vehicle.
20. Refill the fuel tank.
21. Install the fuel fill cap.
22. Connect the negative battery cable.
23. Use the following procedure in order to inspect for leaks:
1. Turn the ignition ON, with the engine OFF, for 2 seconds.
2. Turn the ignition OFF for 10 seconds.
3. Turn the ignition ON, with the engine OFF.
4. Inspect for fuel leaks.
Images (Click to enlarge)
Sep 26, 2019 at 12:00 PM