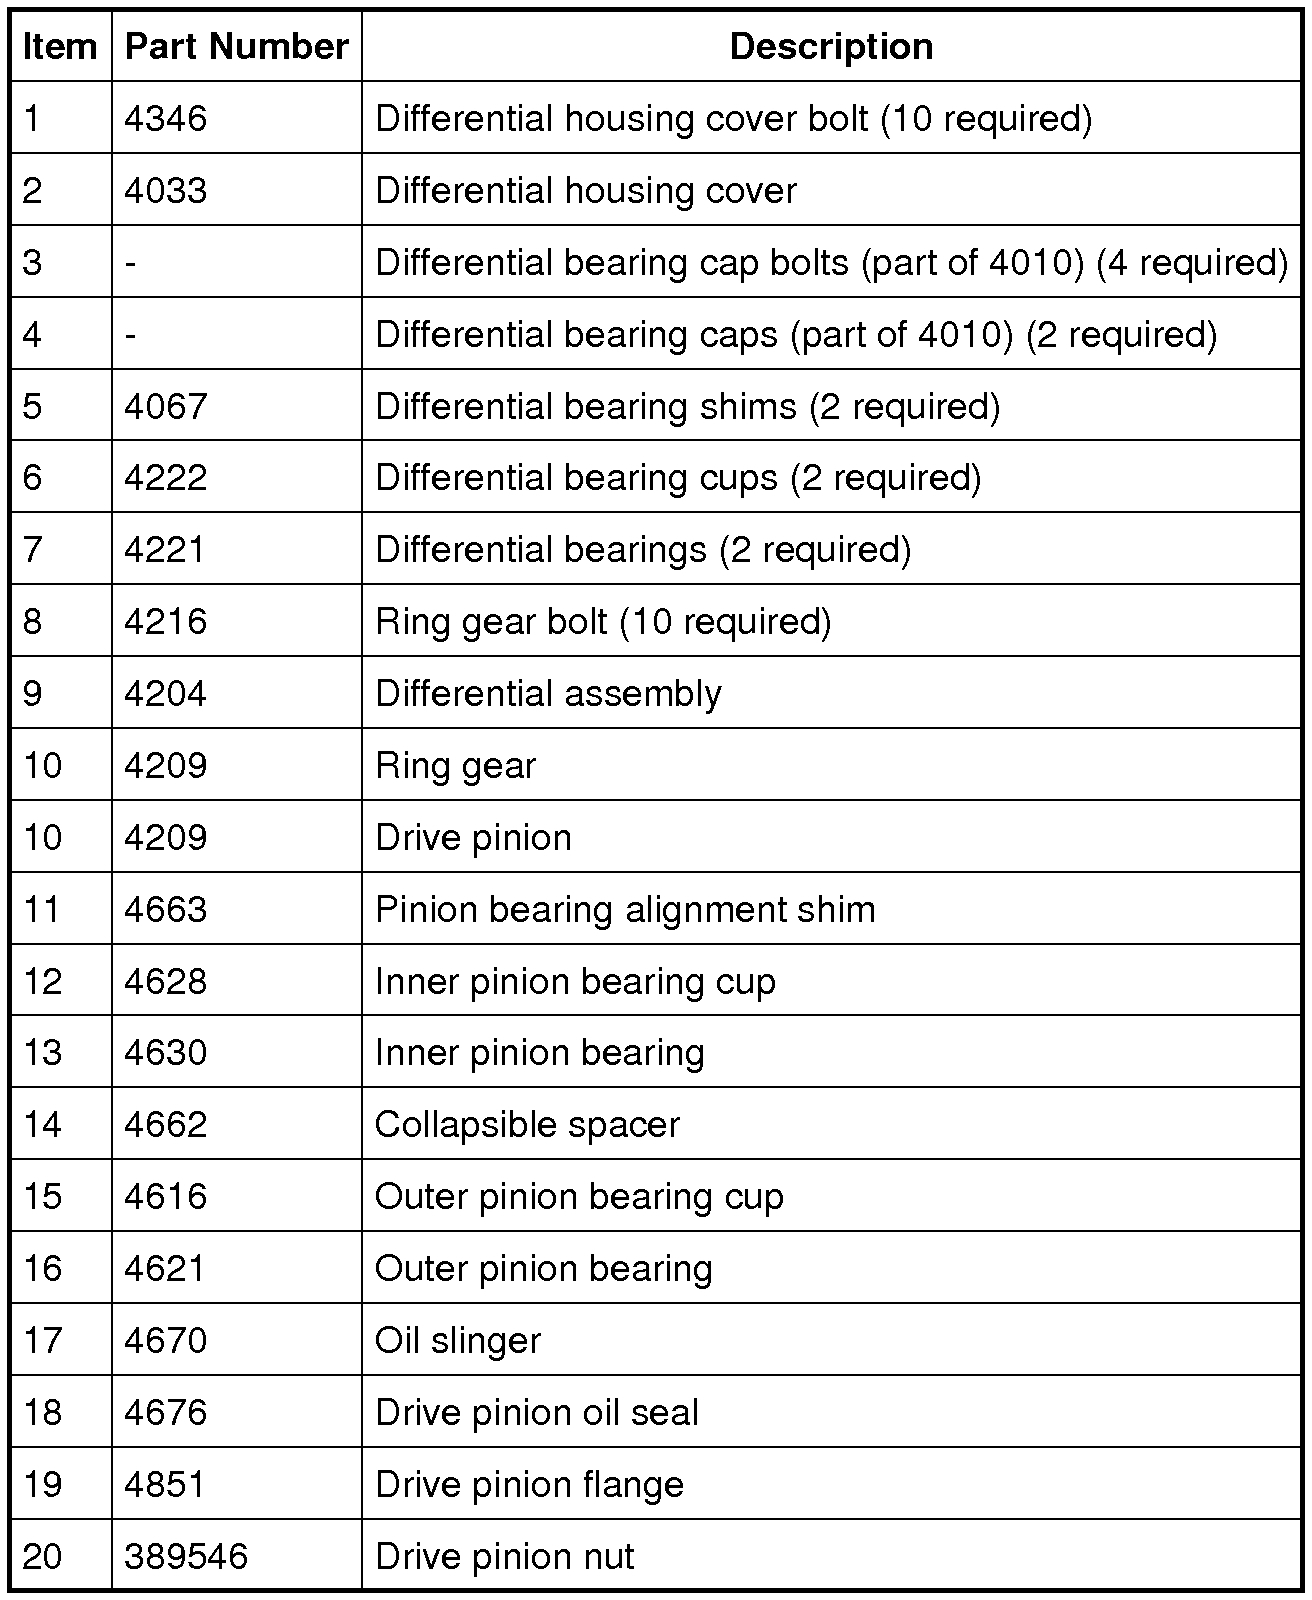
Hi,
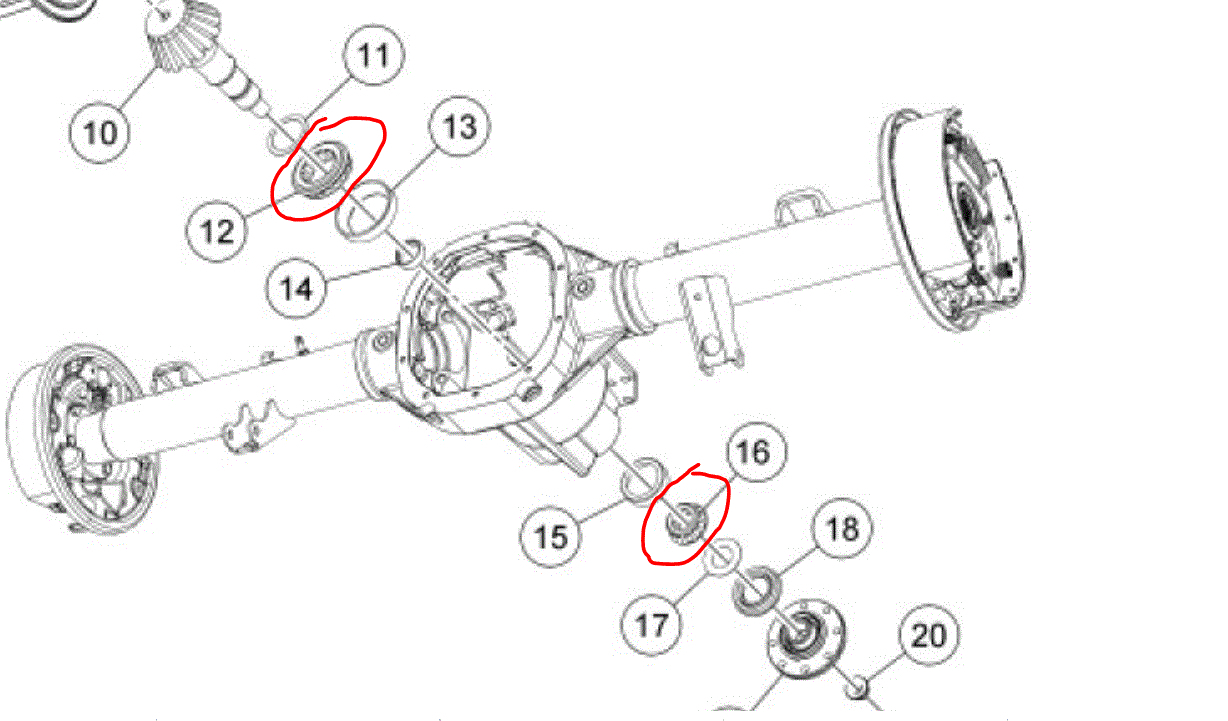
In the last pic, I circled the two bearings that need replaced. You will need to replace the race for each bearing. You will need special tools for this and a press. Note most parts stores will lend you the tools.
_________________________________________
2011 Ford Truck F 150 2WD V6-3.7L
Differential Bearings
Vehicle Transmission and Drivetrain Differential Assembly Service and Repair Removal and Replacement Rear Drive Axle/Differential - Ford 8.8-Inch Ring Gear Differential Bearings
DIFFERENTIAL BEARINGS
Differential Bearings
pic 1
pic 2
pic 3
pic 4
Removal
1. Remove the drive pinion seal. For additional information, refer to Drive Pinion Flange and Drive Pinion Seal See: Pinion Flange, Differential > Removal and Replacement > Drive Pinion Flange and Drive Pinion Seal.
2. Remove the differential carrier. For additional information, refer to Differential Carrier See: Differential Assembly > Removal and Replacement > Differential Carrier.
3. Remove the axle drive pinion shaft oil slinger.
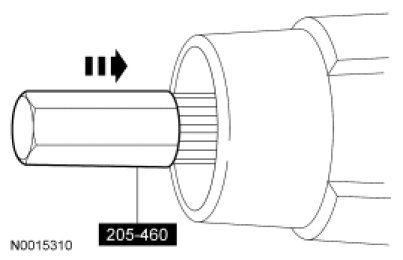
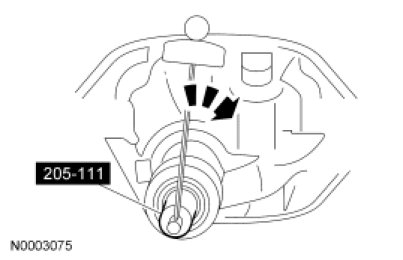
4. Using the Drive Pinion Thread Protector and a soft-faced hammer, drive the pinion assembly out of the outer pinion bearing and remove it through the rear of the differential housing.
Pic 5
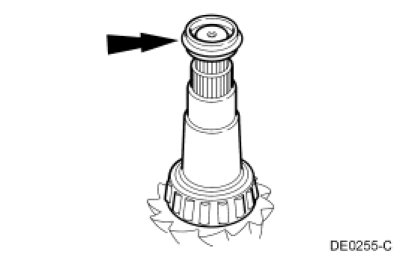
5. Remove the outer pinion bearing.
6. Remove the drive pinion collapsible spacer and discard it.
Pic 6
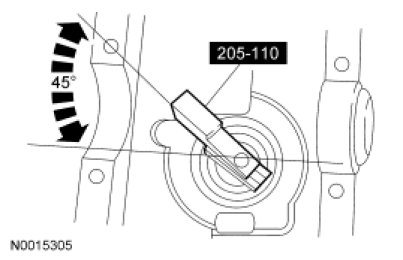
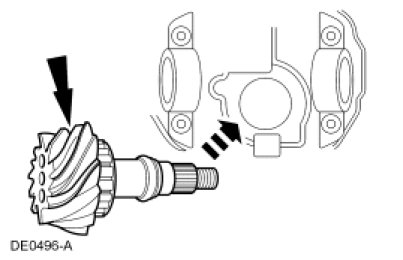
7. Using the Bearing Puller and a suitable press, remove the inner pinion bearing.
Pic 7
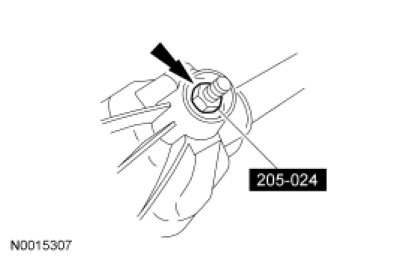
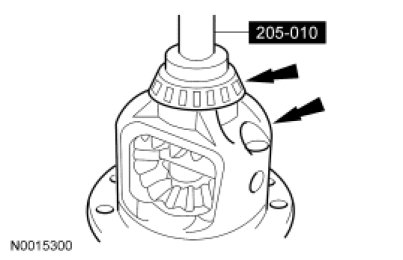
8. Using a brass drift, remove the pinion bearing cups by tapping alternately on opposite sides of the bearing cups.
Pic 8
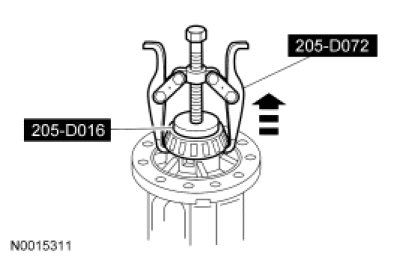
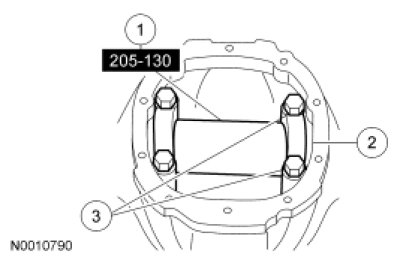
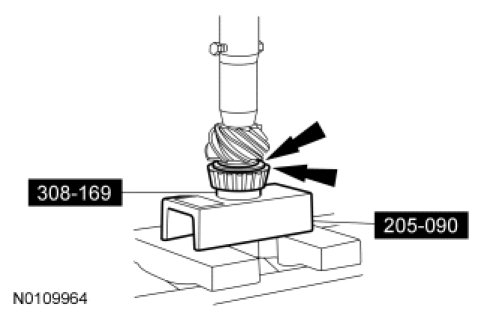
9. Using the 2 Jaw Puller and Step Plate, remove the 2 differential bearings.
Pic 9
Installation
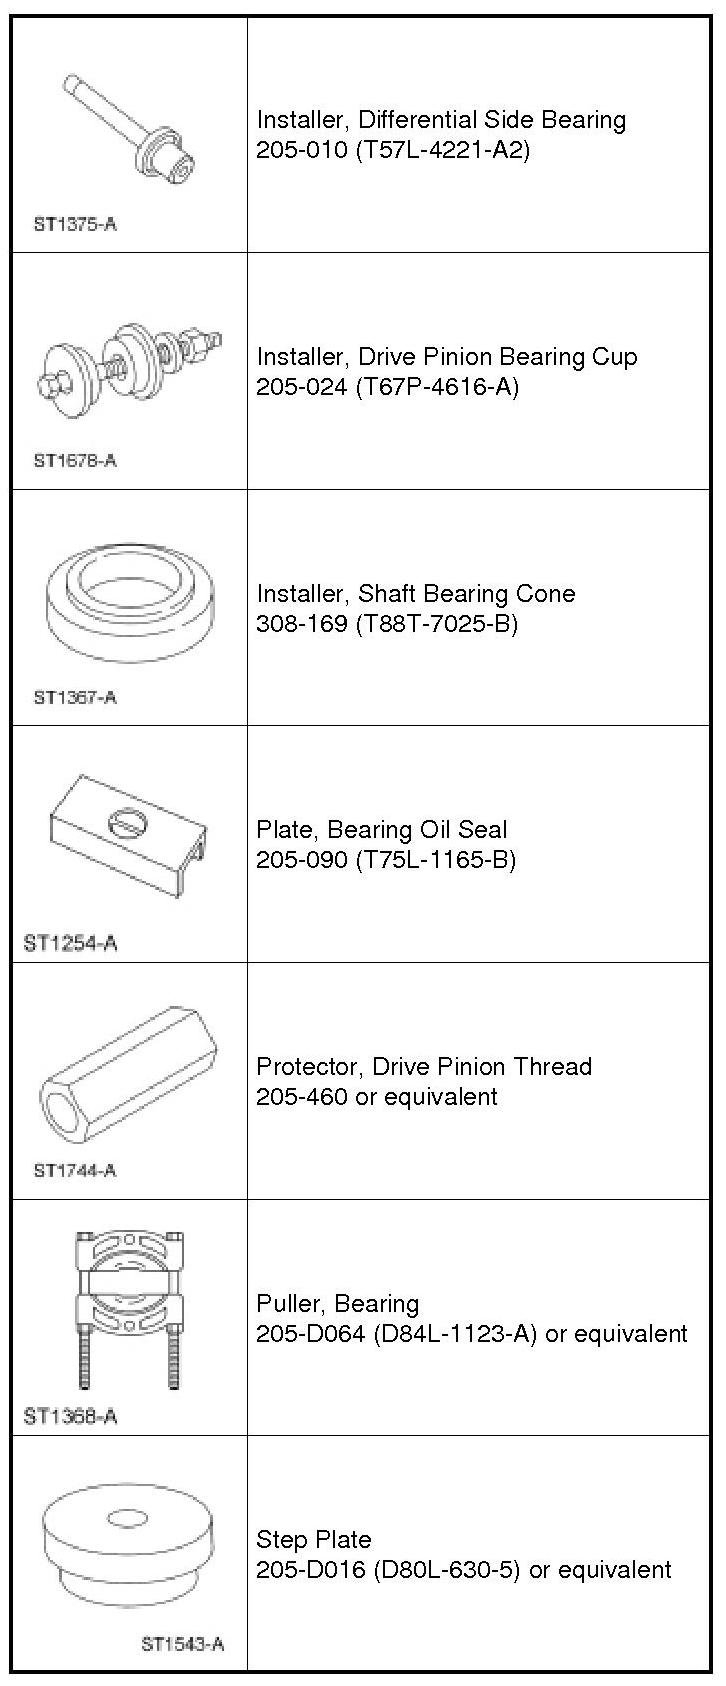
1. Position the Drive Pinion Bearing Cup Installer and the inner and outer bearing cups in their respective bores.
1. After placing the inner and outer bearing cups in their respective bores, place the Drive Pinion Bearing Cup Installer on the inner bearing cup.
2. Place the Drive Pinion Bearing Cup Installer on the outer bearing cup.
3. Install the Drive Pinion Bearing Cup Installer.
Pic 10
2. Tighten the Drive Pinion Bearing Cup Installer to seat the pinion bearing cups in their bores.
Pic 11
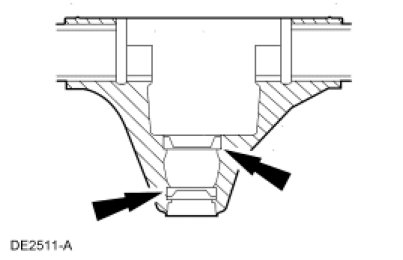
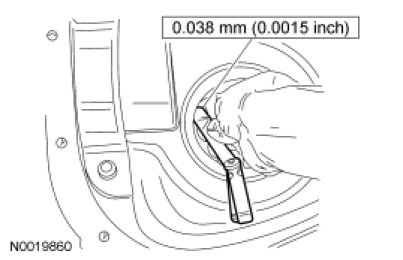
3. NOTE: If a feeler gauge of the specification shown can be inserted between a cup and the bottom of its bore at any point around the cup, the cup is not correctly seated.
Make sure the differential pinion bearing cups are correctly seated.
Pic 12
4. NOTE: Install new drive pinion bearings without any additional lubricant since the anti-rust oil provides adequate lubricant without upsetting the drive pinion bearing preload settings.
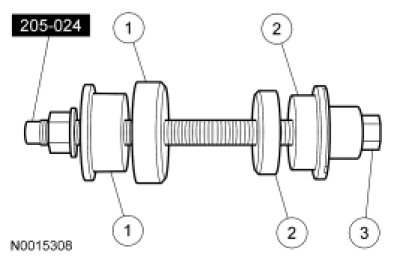
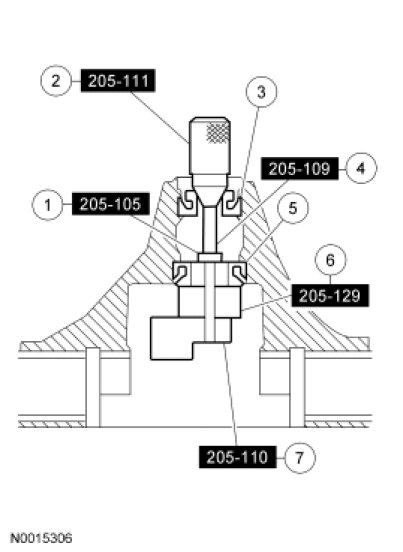
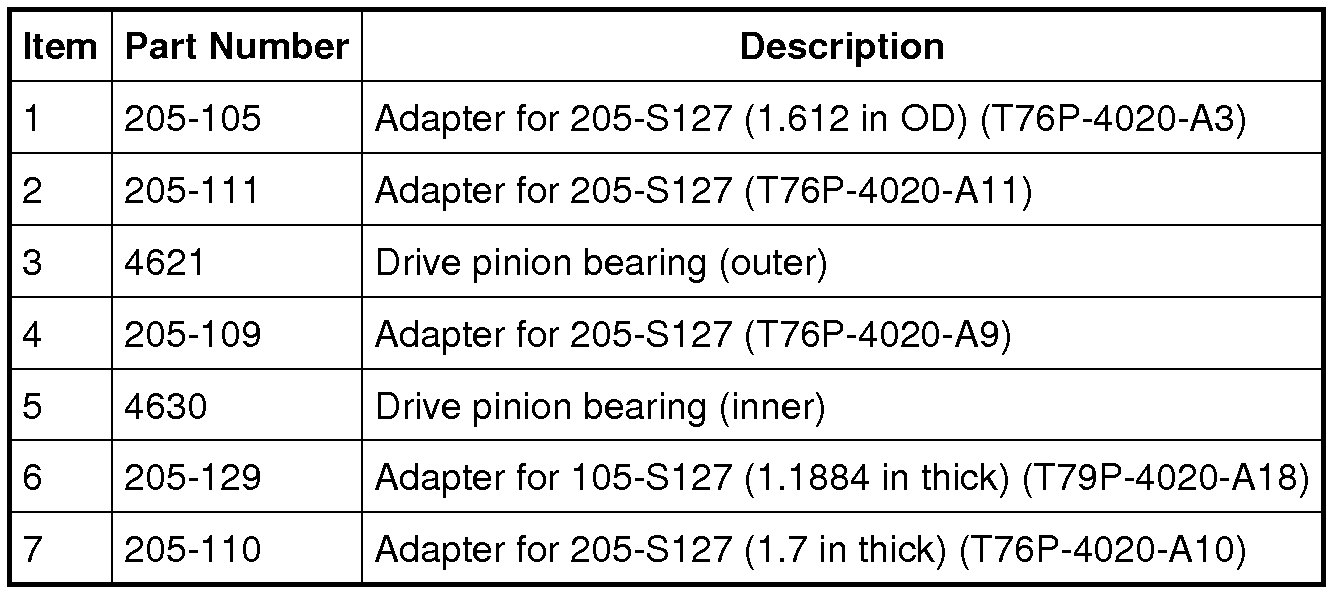
Assemble and position the Adapters.
Pic 13
pic 14
5. NOTE: This step duplicates final drive pinion bearing preload.
Tighten the Adapter.
- Tighten to 2.2 Nm (20 lb-in) rotational torque.
Pic 15
6. NOTE: The Adapter must be offset to obtain an accurate reading.
Rotate the Adapter several half turns to make sure of correct seating of the drive pinion bearings and position the Adapter.
Pic 16
7. Install the Adapter.
1. Position the gauge tube.
2. Install the 2 differential bearing caps.
3. Install the 4 differential bearing cap bolts.
- Tighten to 112 Nm (83 lb-ft).
Pic 17
8. NOTE: Drive pinion bearing adjustment shims must be flat and clean.
NOTE: A slight drag should be felt for correct drive pinion bearing adjustment shim selection. Do not attempt to force the drive pinion bearing adjustment shim between Adapter and gauge tube. This will minimize selection of a drive pinion bearing adjustment shim thicker than required, which results in a deep tooth contact in final assembly of integral axle assemblies.
Use a drive pinion bearing adjustment shim as a gauge for drive pinion bearing adjustment shim selection.
- After the correct drive pinion bearing adjustment shim thickness has been determined, remove all of the Adapters.
Pic 18
9. Using the Shaft Bearing Cone Installer and Bearing Oil Seal Plate and a shop press, drive the inner drive pinion bearing and drive pinion bearing adjustment shim until they are firmly seated on the pinion shaft.
Pic 19
10. Install a new drive pinion collapsible spacer on the pinion shaft against the pinion shaft shoulder.
Pic 20
11. Install the drive pinion assembly into the axle housing.
Pic 21
12. Install the outer drive pinion bearing and the drive pinion shaft oil slinger.
13. Install the drive pinion seal and flange. For additional information, refer to Drive Pinion Flange and Drive Pinion Seal See: Pinion Flange, Differential > Removal and Replacement > Drive Pinion Flange and Drive Pinion Seal.
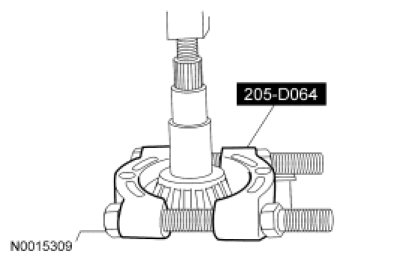
14. Using the Differential Side Bearing Installer, install the 2 new differential bearings.
Pic 22
15. Install the differential carrier. For additional information, refer to Differential Carrier See: Differential Assembly > Removal and Replacement > Differential Carrier.
_____________________________
Let me know if you have questions.
Joe
Images (Click to make bigger)
Thursday, April 9th, 2020 AT 6:51 PM