Rear brake diagram

Tiny
HOMESCHLR
  • MEMBER
  • 1997 FORD E-SERIES VAN
  • 2WD
  • AUTOMATIC
How do you attach the hold down spring on a Ford E350? (Changing rear drum brakes).
Do you
have the same problem?
Yes
No
Wednesday, January 5th, 2011 AT 9:07 PM

18 Replies

Tiny
BMRFIXIT
  • MECHANIC
  • 19,053 POSTS
Installation

This guide might help you by showing you all brake springs are the same.

Check out this video.

https://youtu.be/-Ts8SRUxRc8

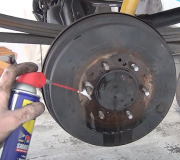
Lubricate the brake backing plate friction points. Use Silicone Brake Caliper Grease and Dielectric Compound D7AZ-19A331-A (Motorcraft WA-10) or an equivalent silicone compound meeting Ford specification ESE-M1C171-A.

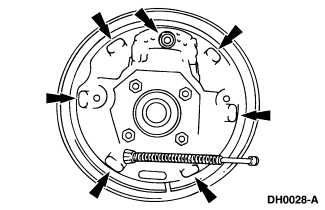
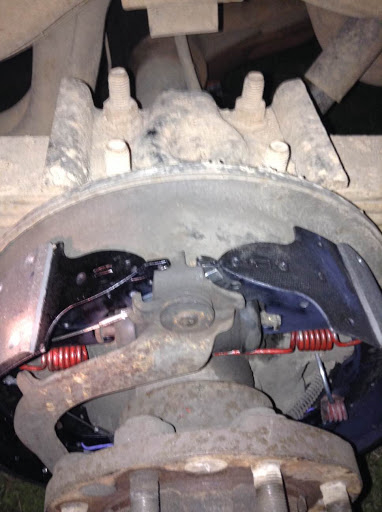
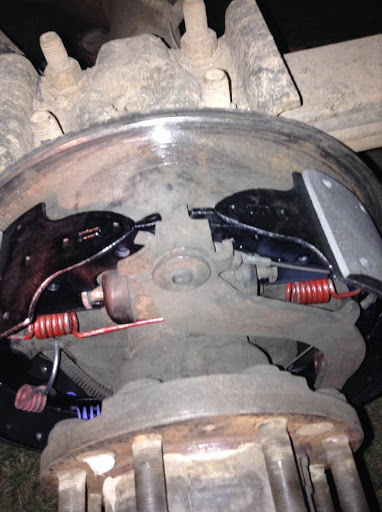
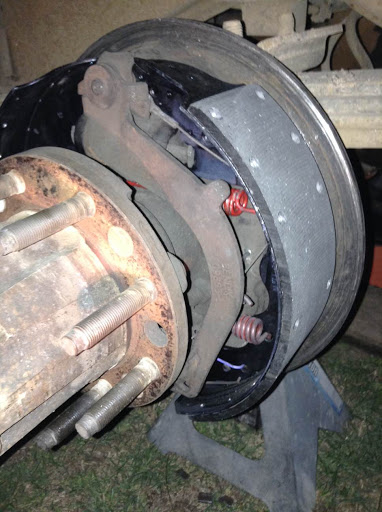
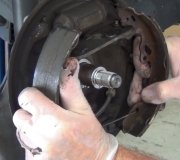
Install the rear brake shoes and linings.
Position the rear brake shoes and linings.
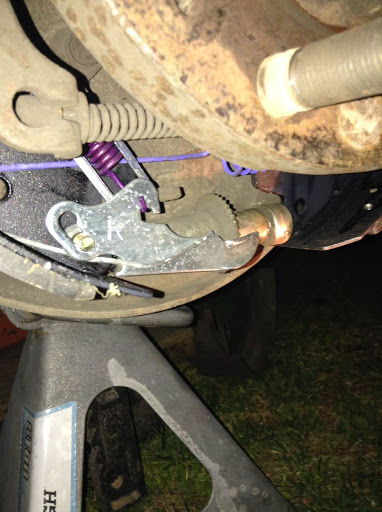
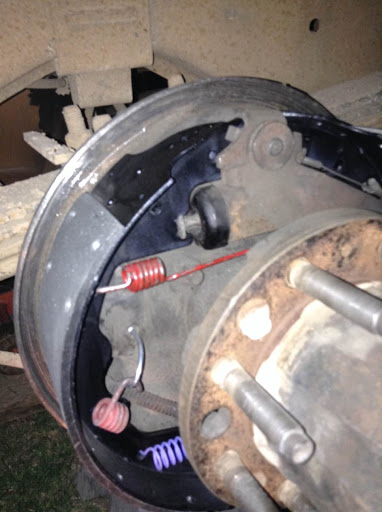
Install the (A) brake shoe hold-down spring pins and the (B) brake shoe hold-down springs.
Install the brake shoe anchor pin guide plate.

NOTE: To prevent incorrect installation, the socket end of each brake adjuster screw is stamped R or L.

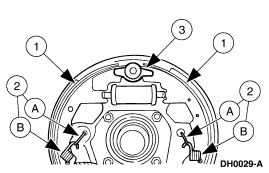
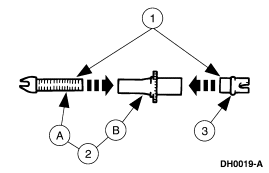
Assemble the brake adjuster screw assembly.
Apply Silicone Brake Caliper Grease and Dielectric Compound D7AZ-19A331-A (Motorcraft WA-10) or an equivalent silicone compound meeting Ford specification ESE-M1C171-A.
Install the (A) brake adjuster screw into the (B) brake shoe adjusting screw nut to the end of the threads, and then loosen one-half turn.
Install the brake shoe adjusting screw socket on the brake shoe adjusting screw nut.

Install the brake adjuster screw assembly.
Position the brake adjuster screw assembly.
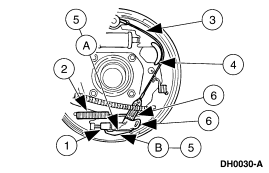
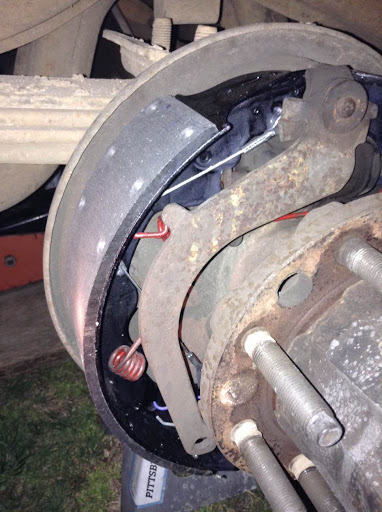
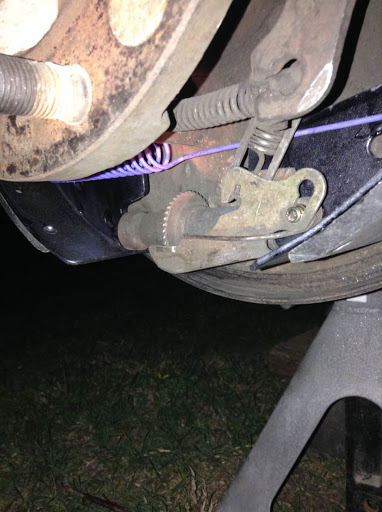
Install the brake shoe adjusting screw spring.
Position the brake shoe adjusting lever cable.
Install the cable guide.
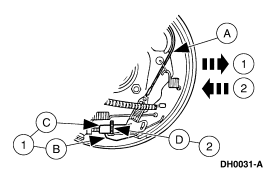
Position the (A) adjusting lever return spring and the (B) brake shoe adjusting lever.
Hook the brake shoe adjusting lever cable to the brake shoe adjusting lever.

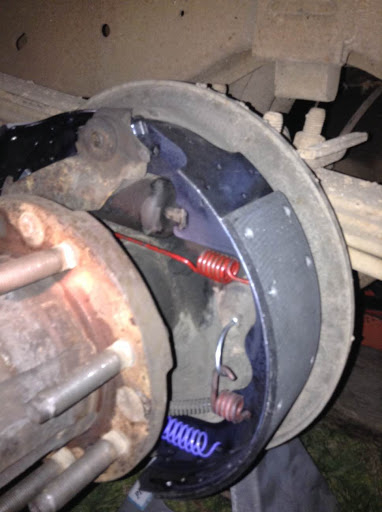
Test the operation of the automatic self-adjuster.
Pull the (A) brake shoe adjusting lever cable and check that the (B) brake shoe adjusting lever rotates the (C) brake shoe adjuster assembly.
Release the brake shoe adjusting lever cable and check that the brake shoe adjusting lever advances to the next notch on the (D) brake shoe adjusting screw nut.

Install the parking brake lever.
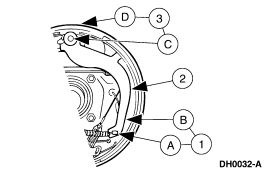
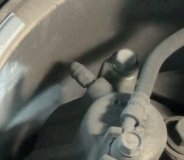
Attach the (A) parking brake rear cable and conduit to the (B) parking brake lever.
Position the parking brake lever.
Install the (C) parking brake lever bolt and, at the back of the brake backing plate, the (D) parking brake lever bolt lock nut.

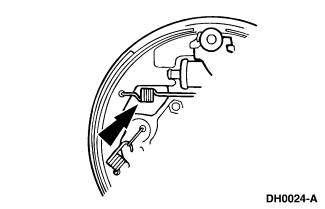
Install the brake shoe retracting spring.

Adjust the brakes. Refer to Brake Shoe and Lining Adjustments in the General Procedures portion of this section.
NOTE: The brake drum spring nut is not necessary for installation.

These Ford hold down springs use a specific tool that will allow you to push it down (towards backing plate) while you put the hold down anchor pin in place

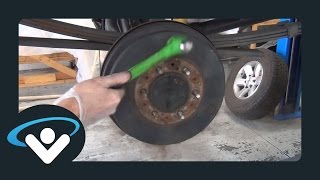
Install the brake drum.
Install the tire and wheel assembly.
Was this
answer
helpful?
Yes
No
-1
Wednesday, January 5th, 2011 AT 9:32 PM
Tiny
MOVINUP
  • MEMBER
  • 12 POSTS
  • 1995 FORD E-SERIES VAN
  • 5.8L
  • V8
  • RWD
  • AUTOMATIC
  • 246,000 MILES
Passenger side rear brake drum adjuster lever cable appears to be too tight, not allowing the lever to swing back down and be ready for the next adjustment
I have made sure the e-brake was completely released (using a strap to pull on the e-brake arm in the drum)
All the springs are in the right place. All the springs are new. And the cable in question is new also.
Is this a common problem? Or did I just get a bad cable (twice, or three times)? Or do I just have a slightly messed up vehicle? Lol
With it all assembled (except for the drum itself) I tried pushing around the shoes to see if something would loosen up. I know everything is installed correctly, and it's not just my problem cuz I just did the other side too. (Yes, I know they don't go on exactly the same)
I've looked around online quite a bit to see if other people are discussing it, but I haven't found one yet.
Was this
answer
helpful?
Yes
No
Monday, April 24th, 2017 AT 10:41 AM (Merged)
Tiny
CARADIODOC
  • MECHANIC
  • 33,689 POSTS
Be sure the shorter lining is toward the front of the vehicle. It sounds like you may have a cable for a 10" brake and you need one for an 11" brake, or something similar. Compare the cable's length to the one on the other side.

Can you post a photo of the assembly?

Check that you can push the parking brake strut bar forward 1/8" against anti-rattle spring pressure with your thumb. Be sure both shoes are touching the large anchor pin on top of the backing plate.
Was this
answer
helpful?
Yes
No
Monday, April 24th, 2017 AT 10:41 AM (Merged)
Tiny
MOVINUP
  • MEMBER
  • 12 POSTS
To the best of my knowledge the problem has been there since I've had the vehicle. (12 years) I just got really interested in learning how to fix it.
Was this
answer
helpful?
Yes
No
Monday, April 24th, 2017 AT 10:41 AM (Merged)
Tiny
CARADIODOC
  • MECHANIC
  • 33,689 POSTS
Post a photo if you can. My laptop battery is dying. I'll be back tomorrow night to see how you're doing.
Was this
answer
helpful?
Yes
No
Monday, April 24th, 2017 AT 10:41 AM (Merged)
Tiny
MOVINUP
  • MEMBER
  • 12 POSTS
I'm having some real trouble uploading images. Bmp, jpg, png. Not working it says "Unable to upload image"
Was this
answer
helpful?
Yes
No
-1
Monday, April 24th, 2017 AT 10:41 AM (Merged)
Tiny
MOVINUP
  • MEMBER
  • 12 POSTS
Never mind, so it worked even though it said it didn't. Lol

Here's the bad (passenger) side.
Was this
answer
helpful?
Yes
No
+1
Monday, April 24th, 2017 AT 10:41 AM (Merged)
Tiny
MOVINUP
  • MEMBER
  • 12 POSTS
And here's the good (driver) side. Just for reference. :)
Was this
answer
helpful?
Yes
No
Monday, April 24th, 2017 AT 10:41 AM (Merged)
Tiny
MOVINUP
  • MEMBER
  • 12 POSTS
As you can see in on the bad side, that bottom lever is riding too high up so it can't grab that gear when it's supposed to.

Good night boss!
Was this
answer
helpful?
Yes
No
Monday, April 24th, 2017 AT 10:41 AM (Merged)
Tiny
MOVINUP
  • MEMBER
  • 12 POSTS
So I've been reading a little bit how sometimes the parts from O'reilly are just slightly off compared to a "dealer's" part. Do you think this could be the case?
Was this
answer
helpful?
Yes
No
Monday, April 24th, 2017 AT 10:41 AM (Merged)
Tiny
CARADIODOC
  • MECHANIC
  • 33,689 POSTS
It shows the purple spring in the wrong position. I don't think so. They don't make parts. They buy them from suppliers, and those suppliers are often the same ones that supplied the original manufacturer.

Your brake style wasn't what I had in mind last night. For this style, look at the guide the cable runs in at the center of the shoe frame. Be sure that guide is fully seated and the tabs are bent over tightly. Be sure the hook on top is pulled all the way down on the anchor.

In the worst case, I suppose you could swap the cables side-to-side to see if the problem only affects the other side then.
Was this
answer
helpful?
Yes
No
Monday, April 24th, 2017 AT 10:41 AM (Merged)
Tiny
MOVINUP
  • MEMBER
  • 12 POSTS
Okay, thanks. I'll try it, but I don't like having to deal with the springs. Lol
Was this
answer
helpful?
Yes
No
Monday, April 24th, 2017 AT 10:41 AM (Merged)
Tiny
MOVINUP
  • MEMBER
  • 12 POSTS
Oh, and I did check the guide on the shoe.
Was this
answer
helpful?
Yes
No
Monday, April 24th, 2017 AT 10:41 AM (Merged)
Tiny
CARADIODOC
  • MECHANIC
  • 33,689 POSTS
I don't like those springs either. There are special tools for them but I never bought them because I didn't work on that many of that style. I just made do with other tools.
Was this
answer
helpful?
Yes
No
Monday, April 24th, 2017 AT 10:41 AM (Merged)
Tiny
MOVINUP
  • MEMBER
  • 12 POSTS
Alright, so I put the good side's cable on the bad side, and it still is not allowing the adjuster lever to ride low enough. So I'm gunna compare every part with the other side to see if there's anything off.
Was this
answer
helpful?
Yes
No
Monday, April 24th, 2017 AT 10:41 AM (Merged)
Tiny
MOVINUP
  • MEMBER
  • 12 POSTS
Compared everything I could think of comparing, and they're all the same. So I can't find why it's not working right.
Was this
answer
helpful?
Yes
No
Monday, April 24th, 2017 AT 10:41 AM (Merged)
Tiny
CARADIODOC
  • MECHANIC
  • 33,689 POSTS
I'm afraid I don't have a better answer than to be sure both shoe frames are all the way retracted so they hit the anchor pin on top, and check that there's 1/8" or so free play in the parking brake strut bar.
Was this
answer
helpful?
Yes
No
Monday, April 24th, 2017 AT 10:41 AM (Merged)
Tiny
MOVINUP
  • MEMBER
  • 12 POSTS
Well, I checked everything, and measured as much as I could think to measure. Still nothing, so I called a mechanic friend of mine and after looking about an hour over all of it, he said: "Well the only thing I can think of doing now is compensating for the tight cable." So we bent the little guide on the shoe that the cable runs through, and now the lever is riding where it's supposed to be. Let's see how long it lasts. :) Thanks for trying!
Was this
answer
helpful?
Yes
No
-1
Monday, April 24th, 2017 AT 10:41 AM (Merged)

Please login or register to post a reply.

Sponsored links