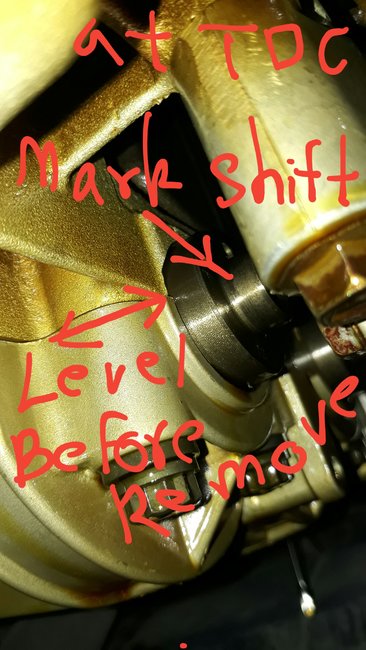
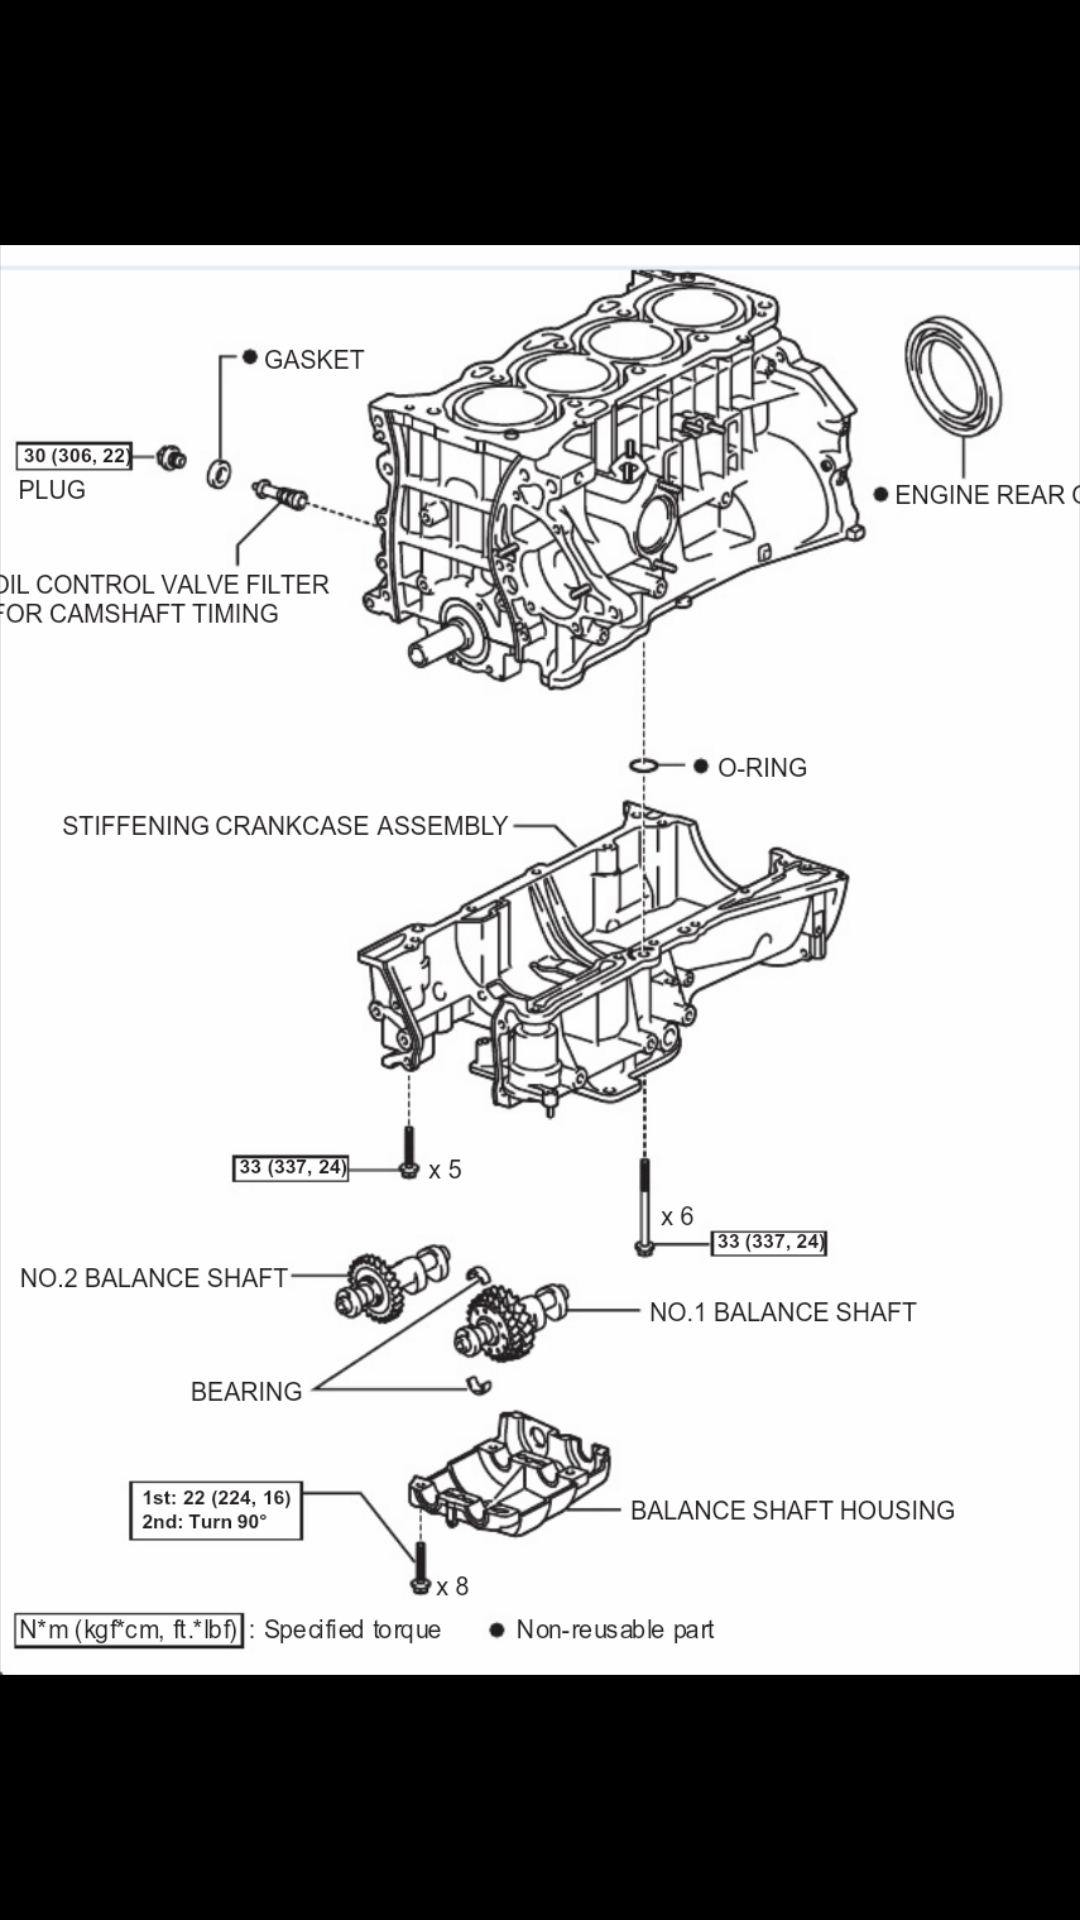
I am hearing; clak, clak, clak, clak, clak cool engine run. And quieted after ten to twenty minutes. 2az fe. I remove balance shaft to check
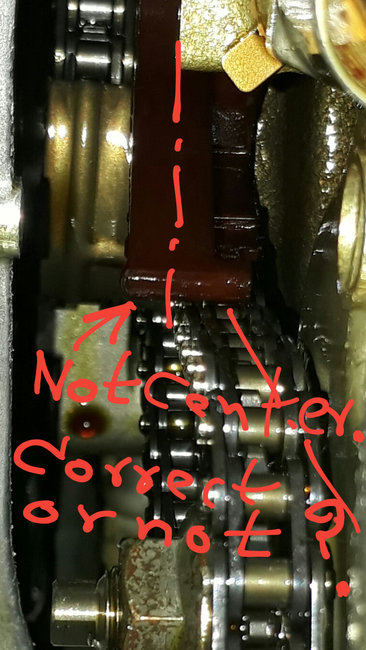
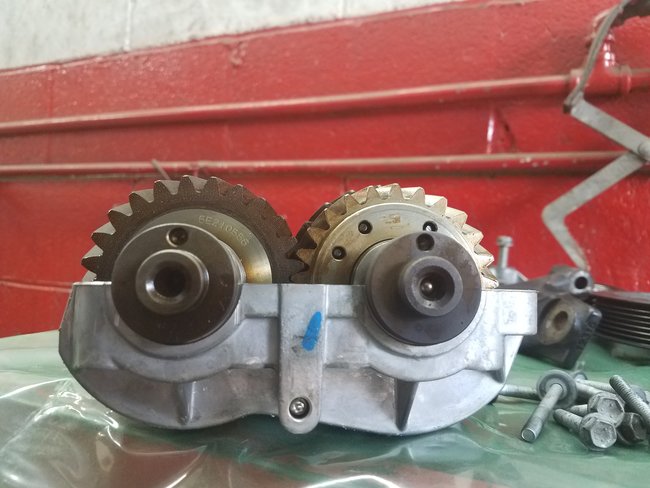
1. balance shaft no1. Driven( resin,polymer)gear no1. Can be rotating(no fixe) about 1/2 - 1 teeth..
****This is cause of noise?
2. Diameter Journal shaft no1. (Gear,mass) 22.95 , 22.94 mm
Thickness bearing 1.46 mm all
Diameter journal shaft no2.
(gear,mass) 22.96 , 22.95 mm
Thickness bearing 1.46 mm all
Spec mark 2 22.985-23.000mm
Bearing thickness 1.489 - 1.492mm
****This is cause of noise?
3.Thrust clearlance not measure.(i thing over spec to.)
****This is cause of noise?
4.Gear clearance steel with resin.
This is cause of noise?
5. Bearing side has mark 1 , 2 , 3 .Use for? My engine mark on stiffening crankcase is 2222.
Can use mark3 repleace mark2 ?
Now I have new bearing mark2 × 8 .
I hope do not hear clak noise or better reduce the noise.
Please. Thank you very much.
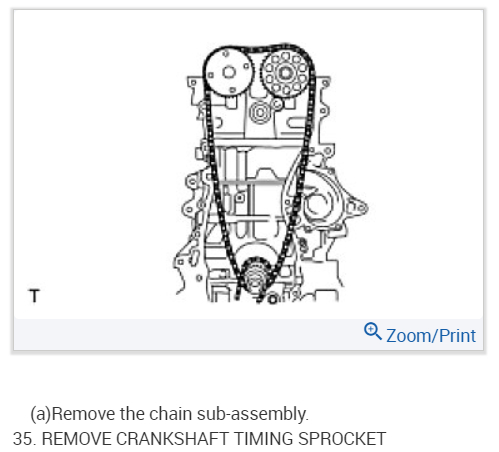
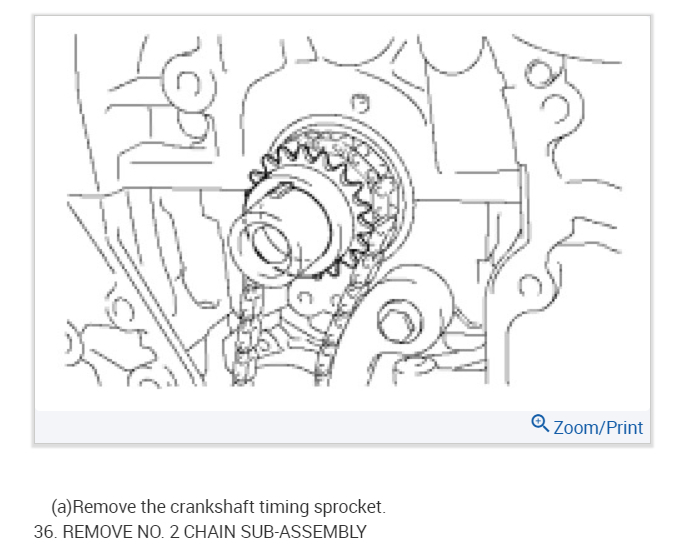
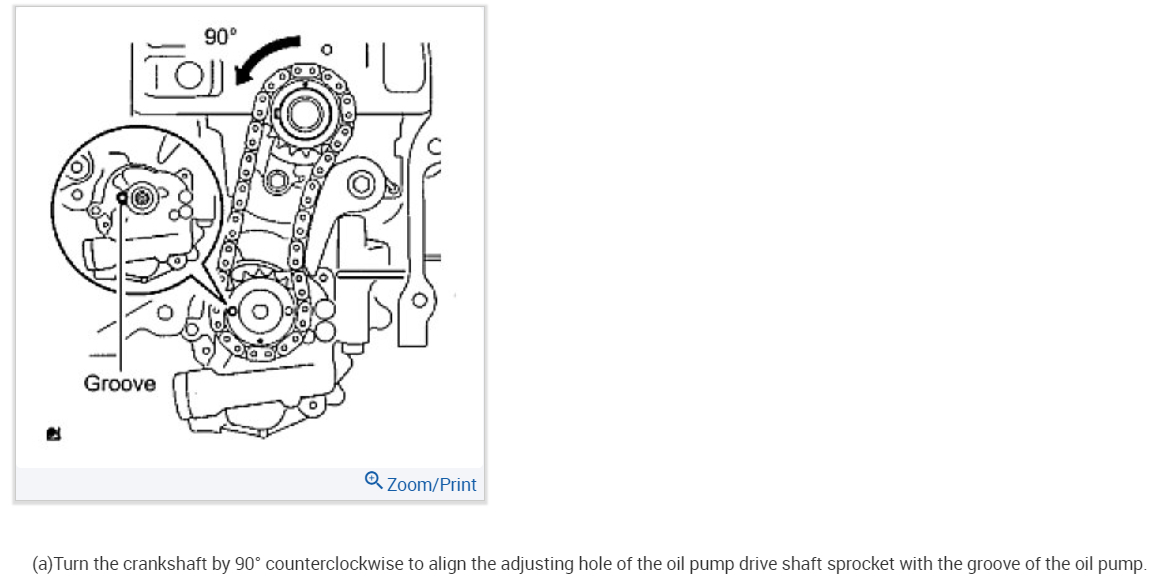
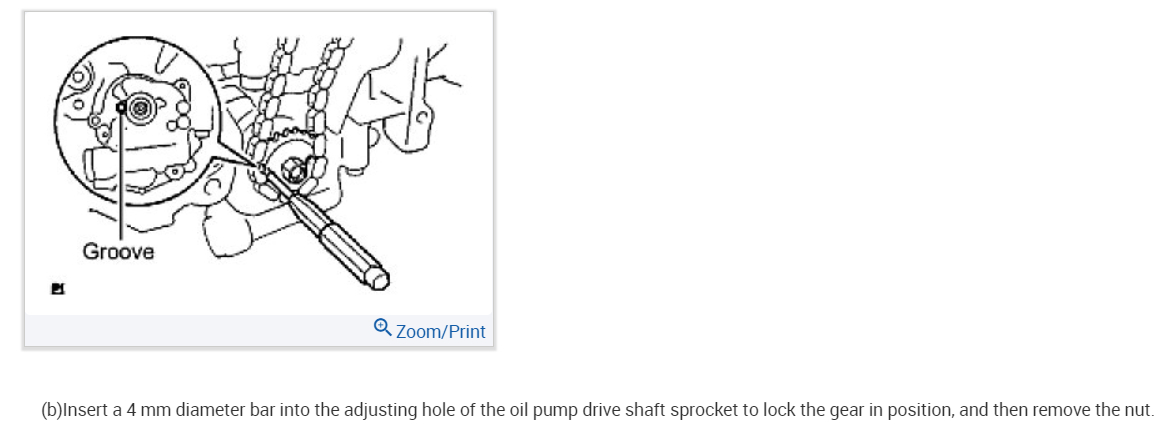
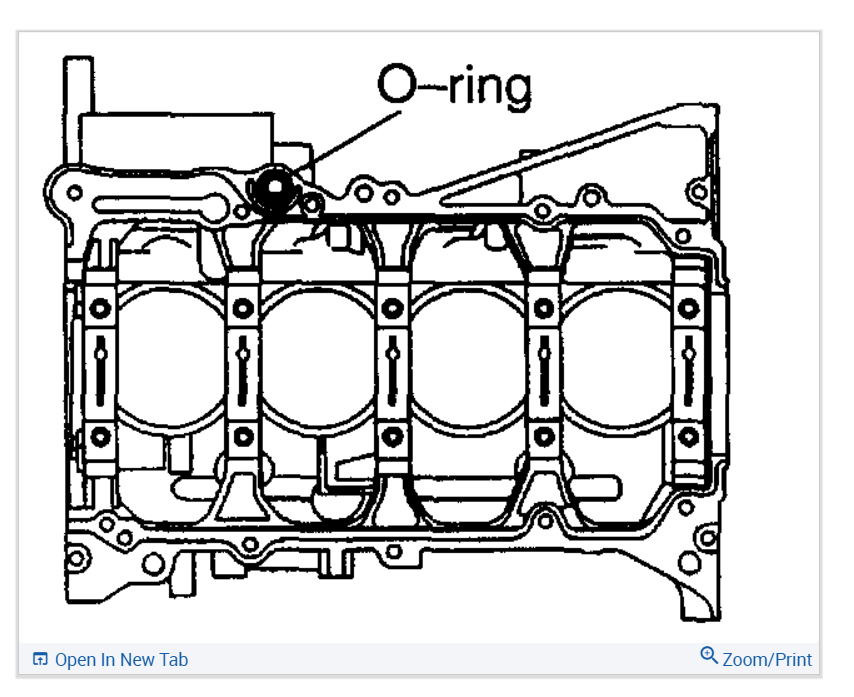
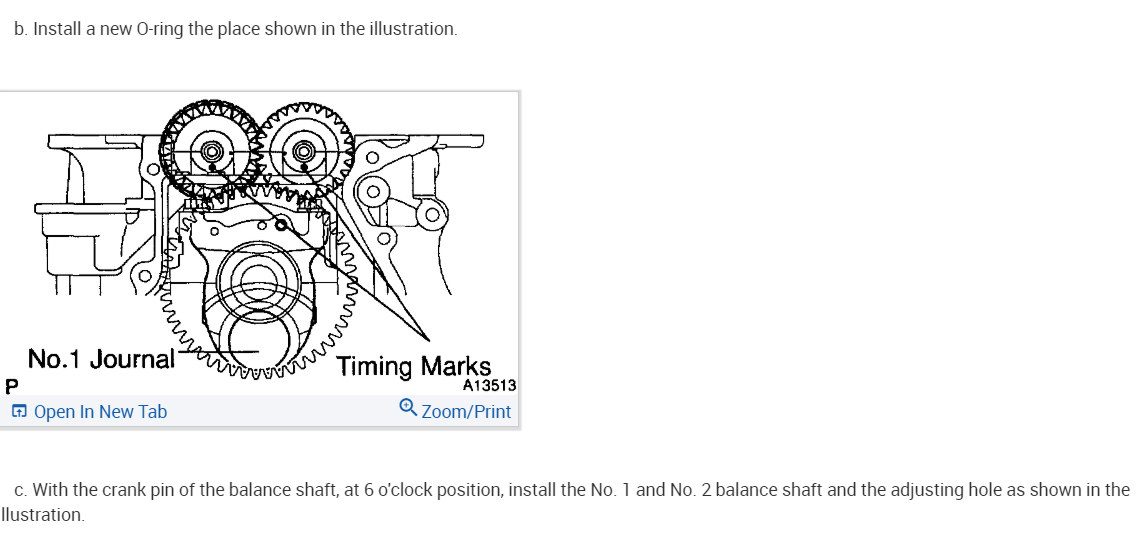
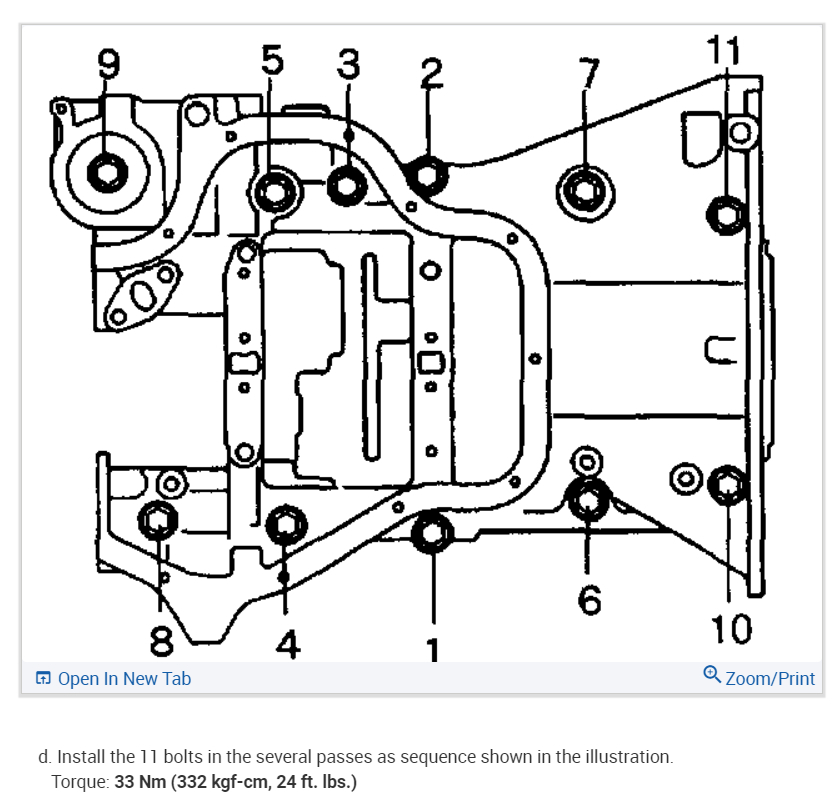
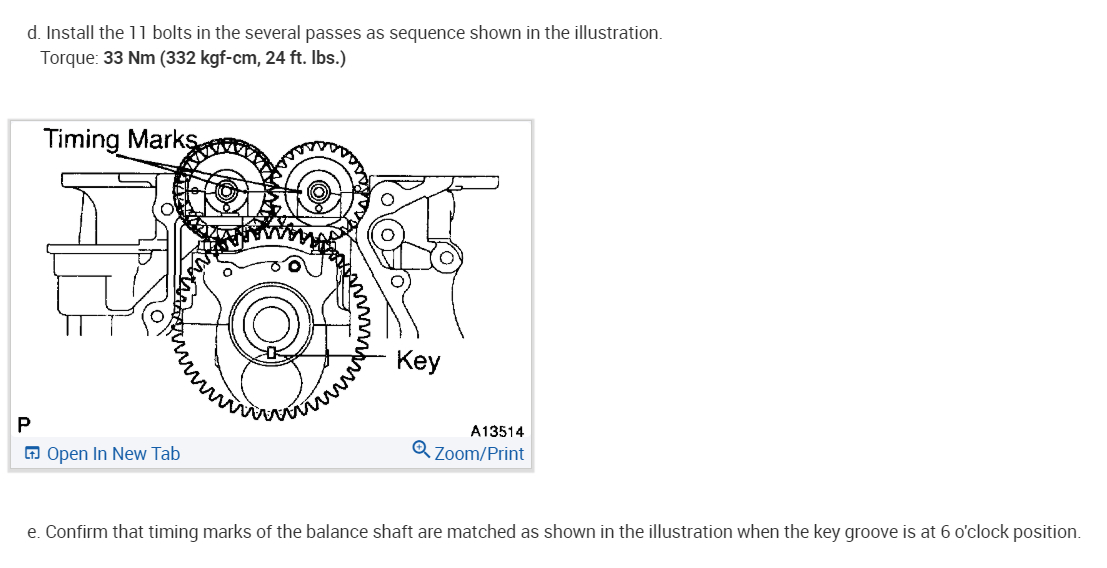
Images & Videos (Click to enlarge)


Jul 18, 2018 at 6:10 AM