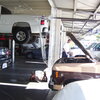
This is another possibility that we had to deal with
on a vibration in ideal
SYMPTOM/CONDITION:
A shudder (vibration) is felt inside the vehicle while turning the steering wheel at idle or during low speeds such as a parking lot maneuver. The shudder may be felt in the steering wheel, seat, and/or body.
DIAGNOSIS:
1. Verify the condition: - Perform stationary turns and/or low speed turns in drive and reverse. Perform the evaluation with the A/C in the on and off position. Is steering shudder detected? Yes : Go to Step #2. No : Further diagnosis is needed, this bulletin does not apply.
2. Inspect for the presence of a power steering finned cooler. Is a finned cooler present? Yes : Go to "Replace Power Steering Hose - Step #1 ". No : Go to "Install Finned Cooler - Step #1 ".
INSTALL FINNED COOLER:
CAUTION:Throughout the following procedure, special care should be taken to prevent introducing contamination into the power steering system.
1. Open the hood.
2. Remove the cap from the power steering fluid reservoir.
3. Using a siphon pump/suction gun, remove as much power steering fluid as possible from the power steering fluid reservoir.
4. Remove and save the constant tension spring clamp securing the power steering return line hose to the power steering fluid reservoir.
5. Remove the rubber hose portion of the power steering return line from the power steering fluid reservoir fitting.
6. Drain the power steering fluid reservoir into an appropriate container.
NOTE: This fluid should not be reused to avoid introducing contamination from the container.
7. Raise the vehicle on an appropriate hoist.
8. Remove the fuel vapor canister.
9. Locate the bracket connecting the power steering return line cooler loop to the cradle reinforcement plate
10. Remove the fasteners connecting the cooler line to the reinforcement plate. Save the fasteners for use in Step #17.
11. Locate the bracket connecting the power steering pressure line to the cradle reinforcement plate 12. Remove the fastener connecting the bracket to the reinforcement plate. Save the fastener for use in Step #18.
13. Remove and discard the J/U nut clip on the bracket.
14. Locate and unscrew the tube nut connecting the power steering return line to the steering gear pinion housing.
NOTE: The tube nut will remain loosely assembled to the power steering return line.
15. Drain the remaining fluid into an appropriate container and discard the loop cooler line that was removed from the vehicle.
NOTE: This fluid should not be reused to avoid introducing contamination from the container.
16. Install the new power steering return line, p/n 04743473AE. Attach the power steering return line tube nut to the steering gear pinion housing and tighten to 27.1 - 35.0 N.M (240 - 310 in. Lbs.).
17. Reuse the fastener removed in Step #10. Install the fastener into the left weld nut on the cooler fin pack bracket and the left hole in the cradle reinforcement plate. Tighten the fastener to 9 - 11.3 N.M (80-100 in. Lbs.)
18. Line up the pressure line bracket and the right weld nut in the cooler fin pack bracket. Reuse the fastener removed in Step #12. Install the fastener through the right hole in the cradle reinforcement plate, the fin pack bracket and the pressure line bracket.
Tighten the fastener to 9 - 11.3 N.M (80-100 in. Lbs.)
19. Install the fuel vapor canister.
20. Lower the vehicle.
21. Install the constant tension spring clamp removed in Step #4 onto the rubber hose on the power steering return line. Slide the clamp so that it is 3 inches from the end of the rubber hose.
22. Push the end of the rubber hose portion of the power steering return line onto the power steering fluid reservoir suction port. Secure the hose by sliding the constant spring tension clamp installed on the hose in the last step, to within 6 mm (0.25 in.) Of the end of the rubber
hose. Be sure the hose clamp is installed past the bead on fluid reservoir fitting.
23. Check the vehicle production date. Was the vehicle built on or before September 13, 2004 (MDH 091344XX)? Yes : Go to "Replace Power Steering Hose - Step #1 ". No : Go to "Steering/Pump - Standard Procedure - Step #1 ".
REPLACE POWER STEERING HOSE:
1. Cut 850 mm (33.5 in.) Of power steering hose (p/n 05135964AA) or equivalent.
2. Cut 790 mm (31 in.) Of 15.9mm (5/8 in.) Or 17.5 mm (11/16 in.) Convolute tubing. Place the convolute tubing around the power steering hose.
3. Open hood and remove the power steering reservoir cap.
4. Raise the vehicle on an appropriate hoist.
5. Locate the power steering cooler attached to the crossmember support. Remove the forward (closest to front of vehicle) hose from the cooler and tube. Drain the power steering fluid in an appropriate container. 6. Remove the two tension clamps from the removed hose and install on the new power steering return hose. 7. Install the new hose and tension clamp onto the power steering cooler.
8. Wrap the hose clockwise around the perimeter and on top of the power steering cooler as shown in. Install the hose and tension clamp to the power steering return tube.
9. Use two tie straps to strap the return hose to the power steering cooler and pressure steering hose shown in
10. Lower vehicle and open hood.
11. Proceed to "Steering/Pump - Standard Procedure".
STEERING/PUMP - STANDARD PROCEDURE
WARNING: FLUID LEVEL SHOULD BE CHECKED AND ADJUSTED WITH ENGINE OFF TO PREVENT INJURY FROM MOVING ENGINE COMPONENTS.
CAUTION:Use only Mopar(R) ATF+4 Automatic Transmission Fluid (MS-9602) in power steering system. Use of other Mopar(R) power steering fluids (MS5931 and MS9933) should be avoided to ensure peak performance of the power steering system under all operating conditions. Do not overfill.
Read the fluid level through the side of the power steering fluid reservoir. The fluid level should be within " FILL RANGE" when the fluid is at a temperature of approximately 21 °C to 27 °C (70 °F to 80 °F).
1. Wipe the filler cap and area clean, then remove the cap.
2. Fill the fluid reservoir to the proper level and let the fluid settle for at least two (2) minutes.
3. Start the engine and let run for a few seconds, then turn the engine off.
4. Add fluid if necessary. Repeat the above steps until the fluid level remains constant after running the engine.
5. Raise the front wheels off the ground.
6. Start the engine.
7. Slowly turn the steering wheel right and left, lightly contacting the wheel stops.
8. Add fluid if necessary.
9. Lower the vehicle, then turn the steering wheel slowly from lock-to-lock.
10. Stop the engine. Check the fluid level and refill as required.
11. If the fluid is extremely foamy, allow the vehicle to stabilize a few minutes, then repeat the above procedure.
Monday, July 27th, 2020 AT 9:40 AM
(Merged)