Hi,
Replacing the brake pads isn't too hard to do. Usually, one can expect them to last around 25,000 miles, but that is based on the driver and how the brakes are used.
As far as replacement, here is a link that explains in general how to replace them. You can use this as a guide.
https://www.2carpros.com/articles/how-to-replace-front-brake-pads-and-rotors-fwd
Here are the directions specific to your vehicle. The attached pics correlate with the directions.
_____________________________
Front Disc Brake - Repair Procedures
Vehicle Brakes and Traction Control Disc Brake System Service and Repair Procedures Front Disc Brake - Repair Procedures
FRONT DISC BRAKE - REPAIR PROCEDURES
Removal
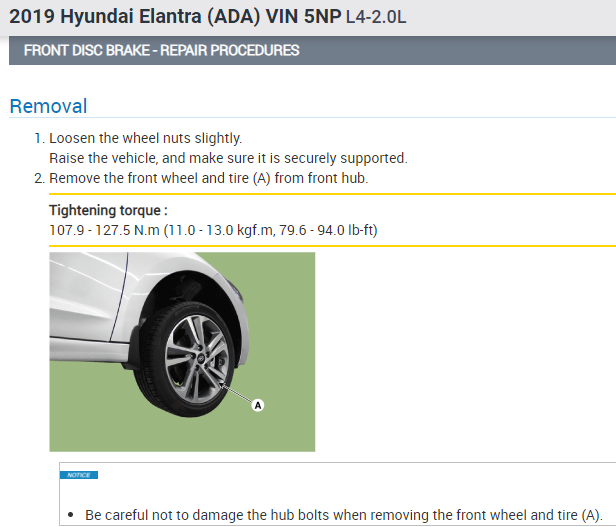
Loosen the wheel nuts slightly.
Raise the vehicle, and make sure it is securely supported.
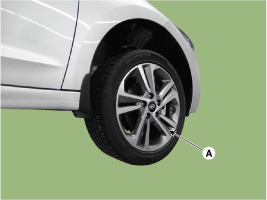
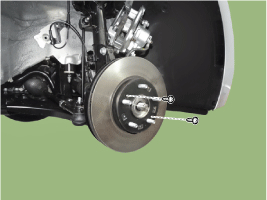
Remove the front wheel and tire (A) from front hub .
Tightening torque :
107.9 - 127.5 N.m (11.0 - 13.0 kgf.m, 79.6 - 94.0 lb-ft)
pic 1
Be careful not to damage the hub bolts when removing the front wheel and tire (A).
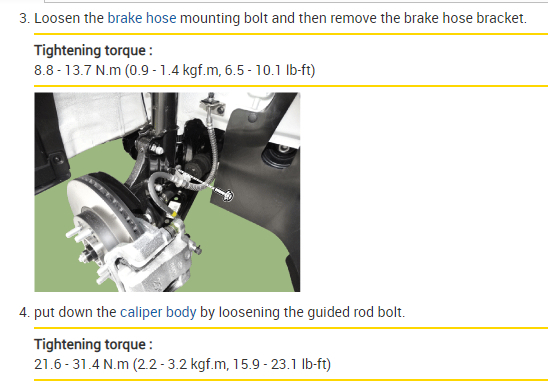
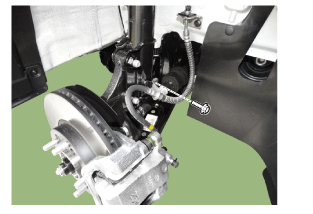
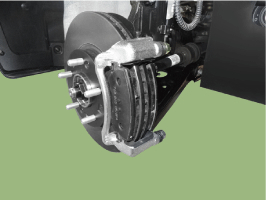
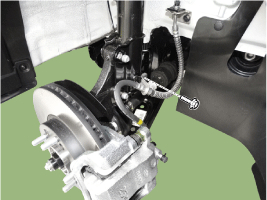
Loosen the brake hose mounting bolt and then remove the brake hose bracket.
Tightening torque :
8.8 - 13.7 N.m (0.9 - 1.4 kgf.m, 6.5 - 10.1 lb-ft)
pic 2
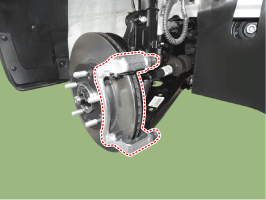
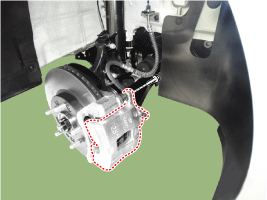
put down the caliper body by loosening the guided rod bolt.
Tightening torque :
21.6 - 31.4 N.m (2.2 - 3.2 kgf.m, 15.9 - 23.1 lb-ft)
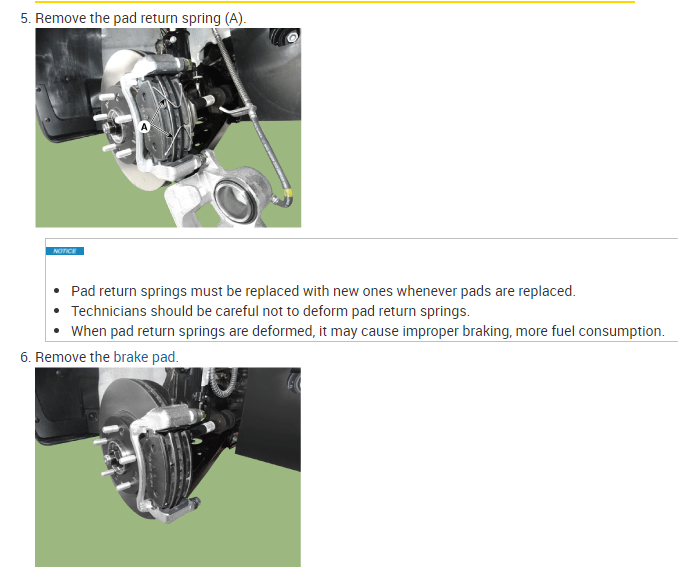
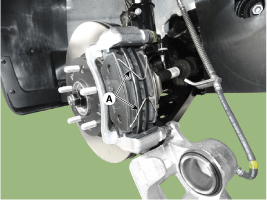
Remove the pad return spring (A).
pic 3
Pad return springs must be replaced with new ones whenever pads are replaced.
Technicians should be careful not to deform pad return springs.
When pad return springs are deformed, it may cause improper braking, more fuel consumption.
Remove the brake pad.
pic 4
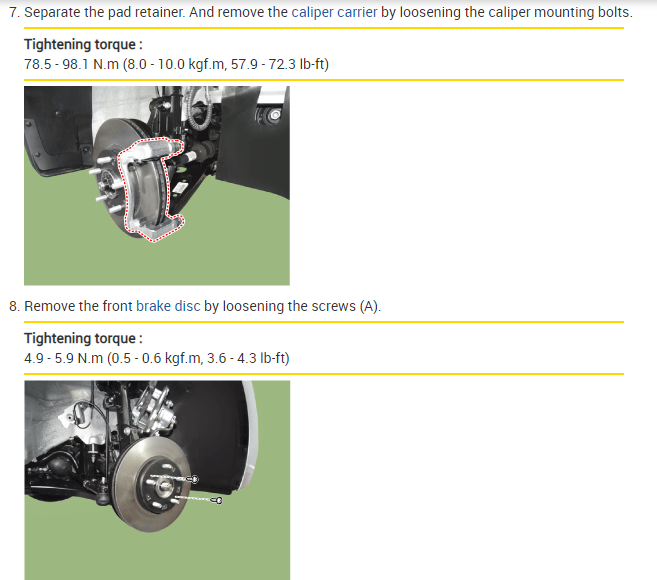
Separate the pad retainer. And remove the caliper carrier by loosening the caliper mounting bolts.
Tightening torque :
78.5 - 98.1 N.m (8.0 - 10.0 kgf.m, 57.9 - 72.3 lb-ft)
pic 5
Remove the front brake disc by loosening the screws (A).
Tightening torque :
4.9 - 5.9 N.m (0.5 - 0.6 kgf.m, 3.6 - 4.3 lb-ft)
pic 6
Replacement
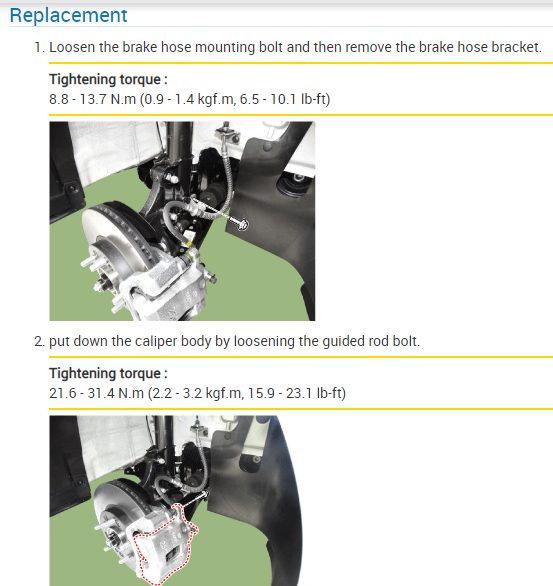
Loosen the brake hose mounting bolt and then remove the brake hose bracket.
Tightening torque :
8.8 - 13.7 N.m (0.9 - 1.4 kgf.m, 6.5 - 10.1 lb-ft)
pic 7
put down the caliper body by loosening the guided rod bolt.
Tightening torque :
21.6 - 31.4 N.m (2.2 - 3.2 kgf.m, 15.9 - 23.1 lb-ft)
pic 8
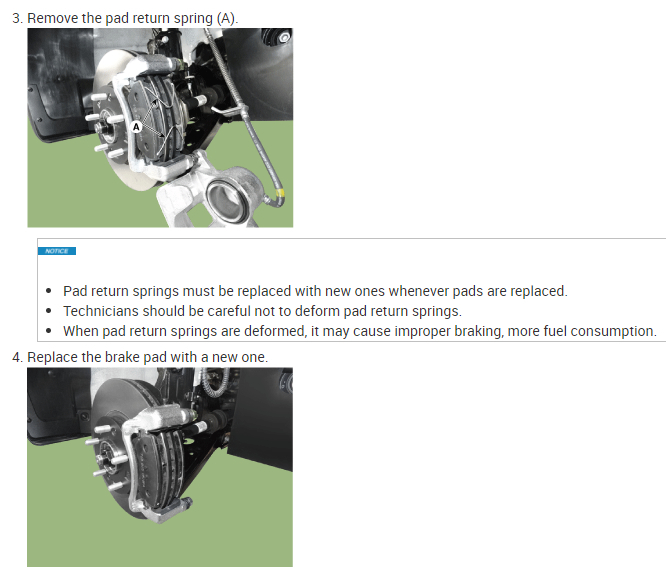
Remove the pad return spring (A).
pic 9
Pad return springs must be replaced with new ones whenever pads are replaced.
Technicians should be careful not to deform pad return springs.
When pad return springs are deformed, it may cause improper braking, more fuel consumption.
Replace the brake pad with a new one.
pic 10
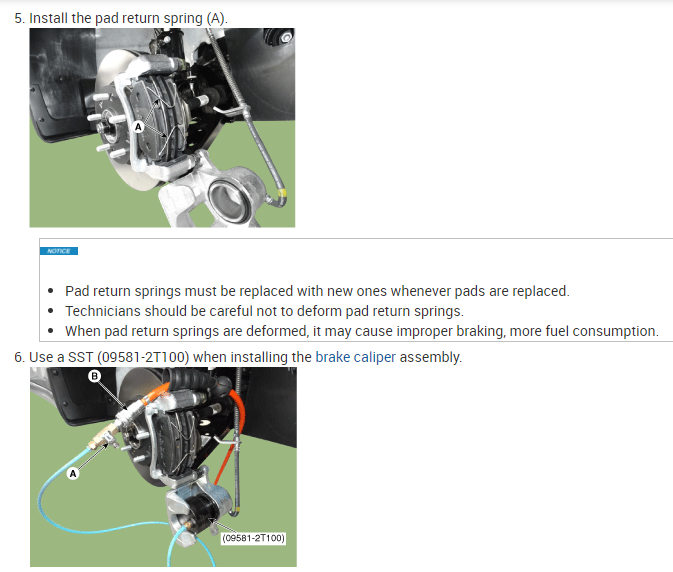
Install the pad return spring (A).
pic 11
Pad return springs must be replaced with new ones whenever pads are replaced.
Technicians should be careful not to deform pad return springs.
When pad return springs are deformed, it may cause improper braking, more fuel consumption.
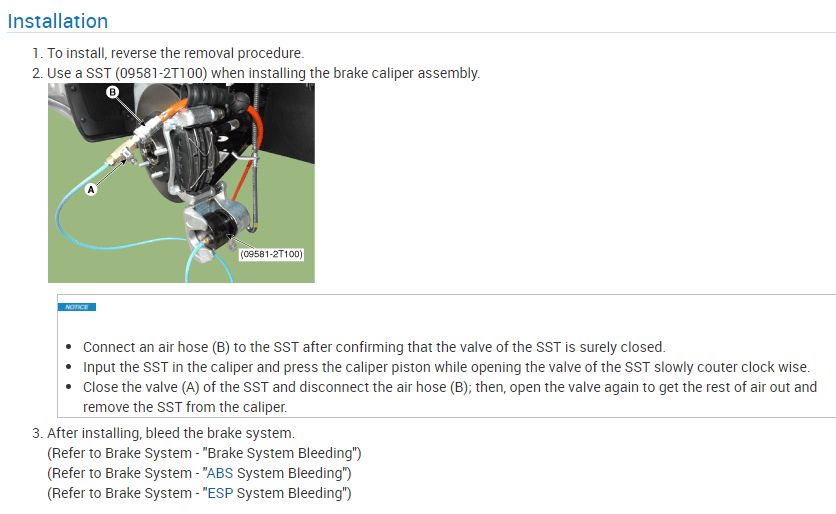
Use a SST (09581-2T100) when installing the brake caliper assembly.
pic 12
Connect an air hose (B) to the SST after confirming that the valve of the SST is surely closed.
Input the SST in the caliper and press the caliper piston while opening the valve of the SST slowly couter clock wise.
Close the valve (A) of the SST and disconnect the air hose (B); then, open the valve again to get the rest of air out and remove the SST from the caliper.
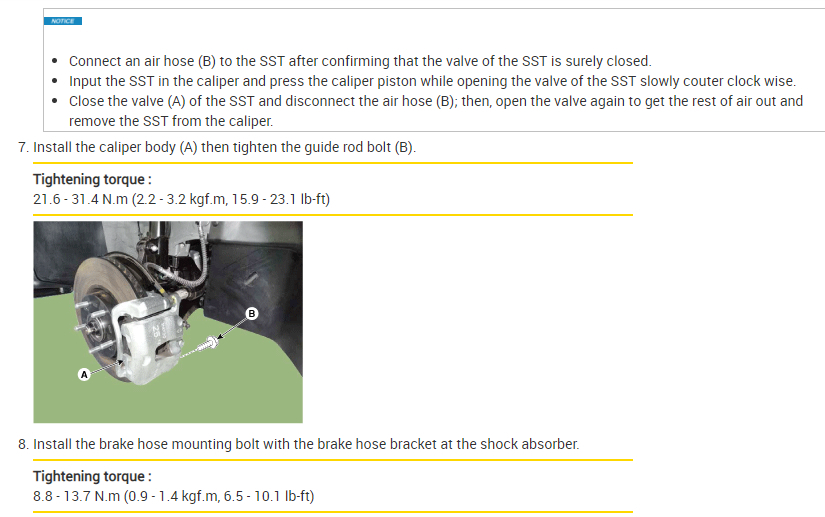
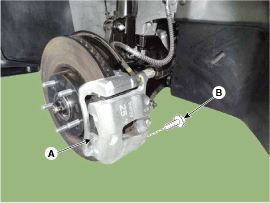
Install the caliper body (A) then tighten the guide rod bolt (B).
Tightening torque :
21.6 - 31.4 N.m (2.2 - 3.2 kgf.m, 15.9 - 23.1 lb-ft)
pic 13
Install the brake hose mounting bolt with the brake hose bracket at the shock absorber.
Tightening torque :
8.8 - 13.7 N.m (0.9 - 1.4 kgf.m, 6.5 - 10.1 lb-ft)
pic 14
__________________________
To replace the brake rotor, remove the brake caliper and mounting bracket. Once the bracket is off, the rotor will pull off.
__________________________
I hope this helps. Let me know if you have other questions.
Take care and God Bless,
Joe
Images (Click to enlarge)
Feb 12, 2021 at 7:39 PM