Leaking AC from expansion valve

Tiny
JBECK2862
  • MEMBER
  • 1994 TOYOTA CAMRY
  • 6 CYL
  • 2WD
  • AUTOMATIC
  • 110,000 MILES
I just recently replaced the expansion valve and o-rings. Pulled a vacuum and let it sit for a few minutes and the vacuum did not hold. I did notice that the expansion tubes are loose and will not tighten against the expansion valve. Am I doing something wrong? Do I need to replace the tubes? Should I have unbolted the tubes from the two nuts inside the firewall or the two bolts outside the firewall. I could not see an easy way to take off the outside bolts behind the engine as they are blocked.
Friday, August 3rd, 2018 AT 8:27 PM

5 Replies

Tiny
JACOBANDNICKOLAS
  • MECHANIC
  • 108,328 POSTS
Hi and thanks for using 2CarPros. Com.

What I have are the directions for removal and replacement of the expansion valve right from alldata. Take a look through the specifics to see if you did it correctly. The attached pictures correlate with these directions.

REMOVAL AND INSTALLATION
1. Disarm airbag system as outlined under Airbags and Seatbelts.
2. Recover refrigerant.
3. Remove blower unit, as follows:
a. Remove glove compartment.
B. Disconnect ECU electrical connector, then remove ECU and bracket.
C. Disconnect connector bracket electrical connector, then remove connector bracket.
D. Disconnect blower unit electrical connector.
E. Disconnect air inlet damper control cable.
F. Remove blower unit three attaching screws and nut, then remove blower unit.
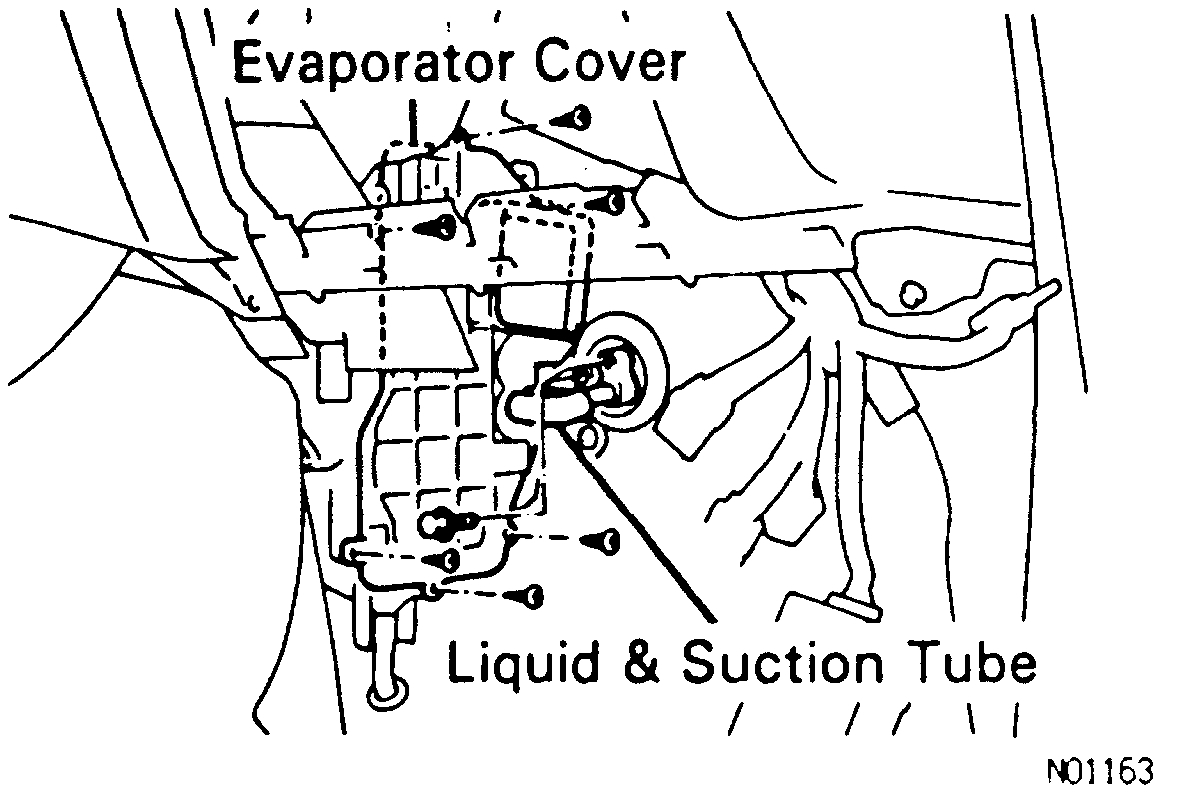
4. Disconnect and cap evaporator liquid and suction tubes.
Removing Evaporator Case Cover
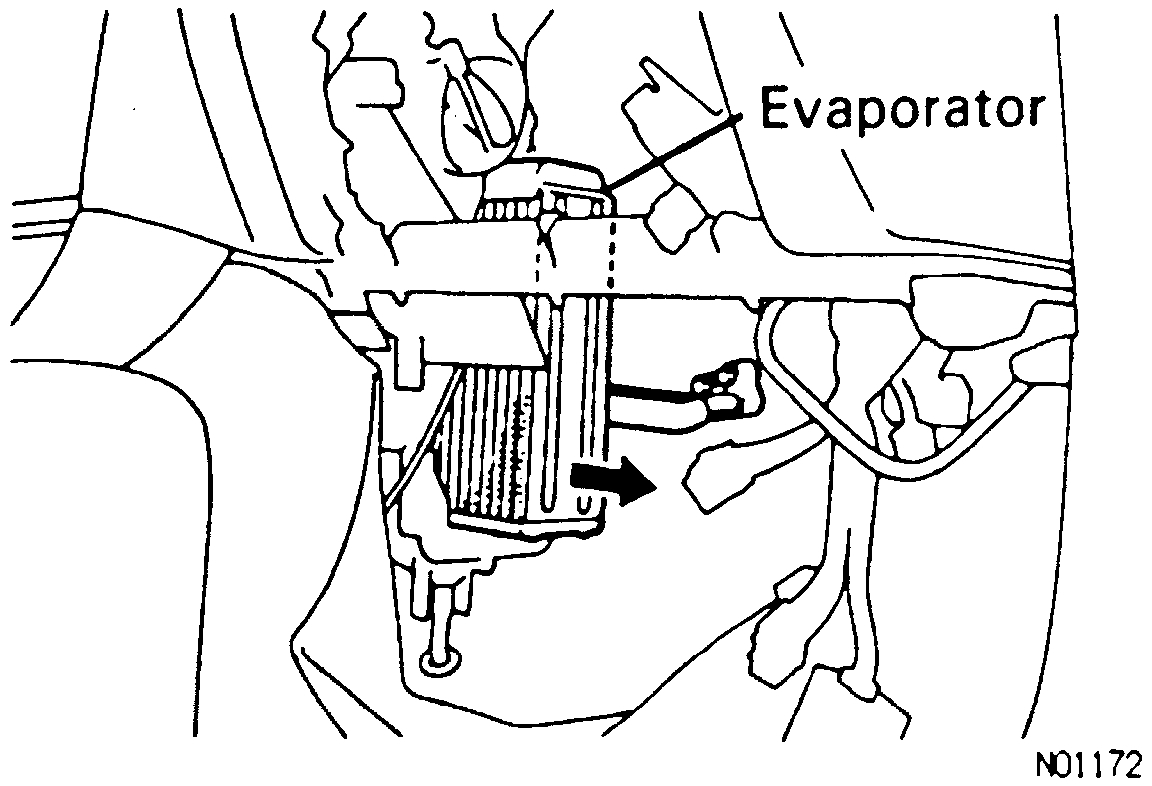
Removing Evaporator Core
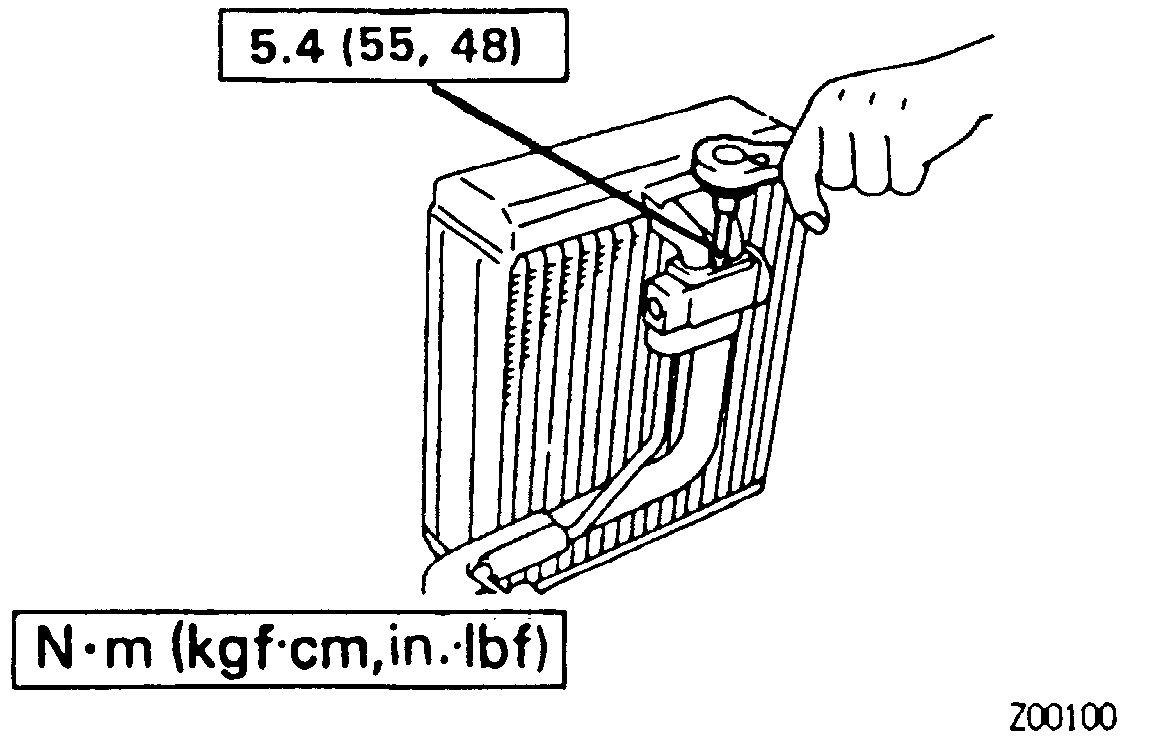
Removing Expansion Valve
5. Remove evaporator cover.
6. Remove evaporator assembly, then separate evaporator and expansion tube.
7. Reverse procedure to install.
8. When new evaporator is installed, add 1.6 oz. Refrigeration oil.

TORQUE VALUES
Expansion Valve To Evaporator: 4.8 lb. Ft. (5.4 Nm)
Refrigerant Tubes: 7 lb. Ft. (9.8 Nm)

I hope this information is helpful. Let me know if you have other questions or need additional help.

Take care,
Joe
Was this
answer
helpful?
Yes
No
+1
Friday, August 3rd, 2018 AT 9:03 PM
Tiny
JBECK2862
  • MEMBER
  • 3 POSTS
These are exactly the steps I already took. The only thing I did not do is torque the bolts just tightened them by hand. There is still air leaking from where the expansion tubes meet the expansion valve. Is it possible I over tightened the bolts? Why would there still be a leak?
Was this
answer
helpful?
Yes
No
Friday, August 3rd, 2018 AT 9:52 PM
Tiny
JACOBANDNICKOLAS
  • MECHANIC
  • 108,328 POSTS
I would suspect that an o-ring was damaged.
Was this
answer
helpful?
Yes
No
Friday, August 3rd, 2018 AT 10:05 PM
Tiny
JBECK2862
  • MEMBER
  • 3 POSTS
Update: I was able to get the expansion tubes to seal against the expansion valve. What I did was put two o-rings behind the expansion tube between the tubes and the plastic block that holds the nuts for the bolts. After putting it back together and pulling a vacuum it held the vacuum for over an hour. I will now attempt to recharge and see what happens.
Was this
answer
helpful?
Yes
No
Saturday, August 4th, 2018 AT 8:41 AM
Tiny
KEN L
  • MASTER CERTIFIED MECHANIC
  • 43,110 POSTS
Nice work. I am thinking the new expansion block must be a little different depth wise. Here is a guide to help you vacuum down and recharge the system:

https://www.2carpros.com/articles/re-charge-an-air-conditioner-system

Please let us know what happens.

Cheers, Ken

Was this
answer
helpful?
Yes
No
Monday, August 6th, 2018 AT 3:26 PM

Please login or register to post a reply.

Sponsored links