Hi,
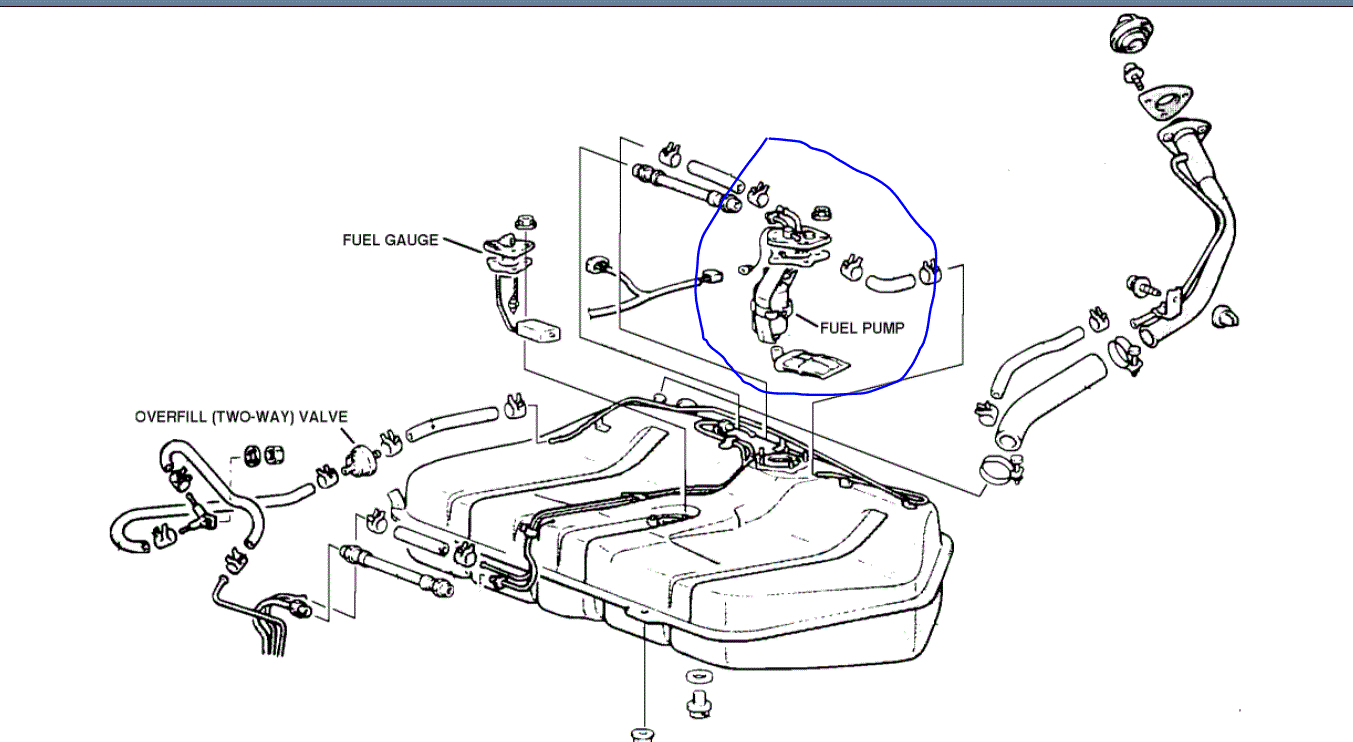
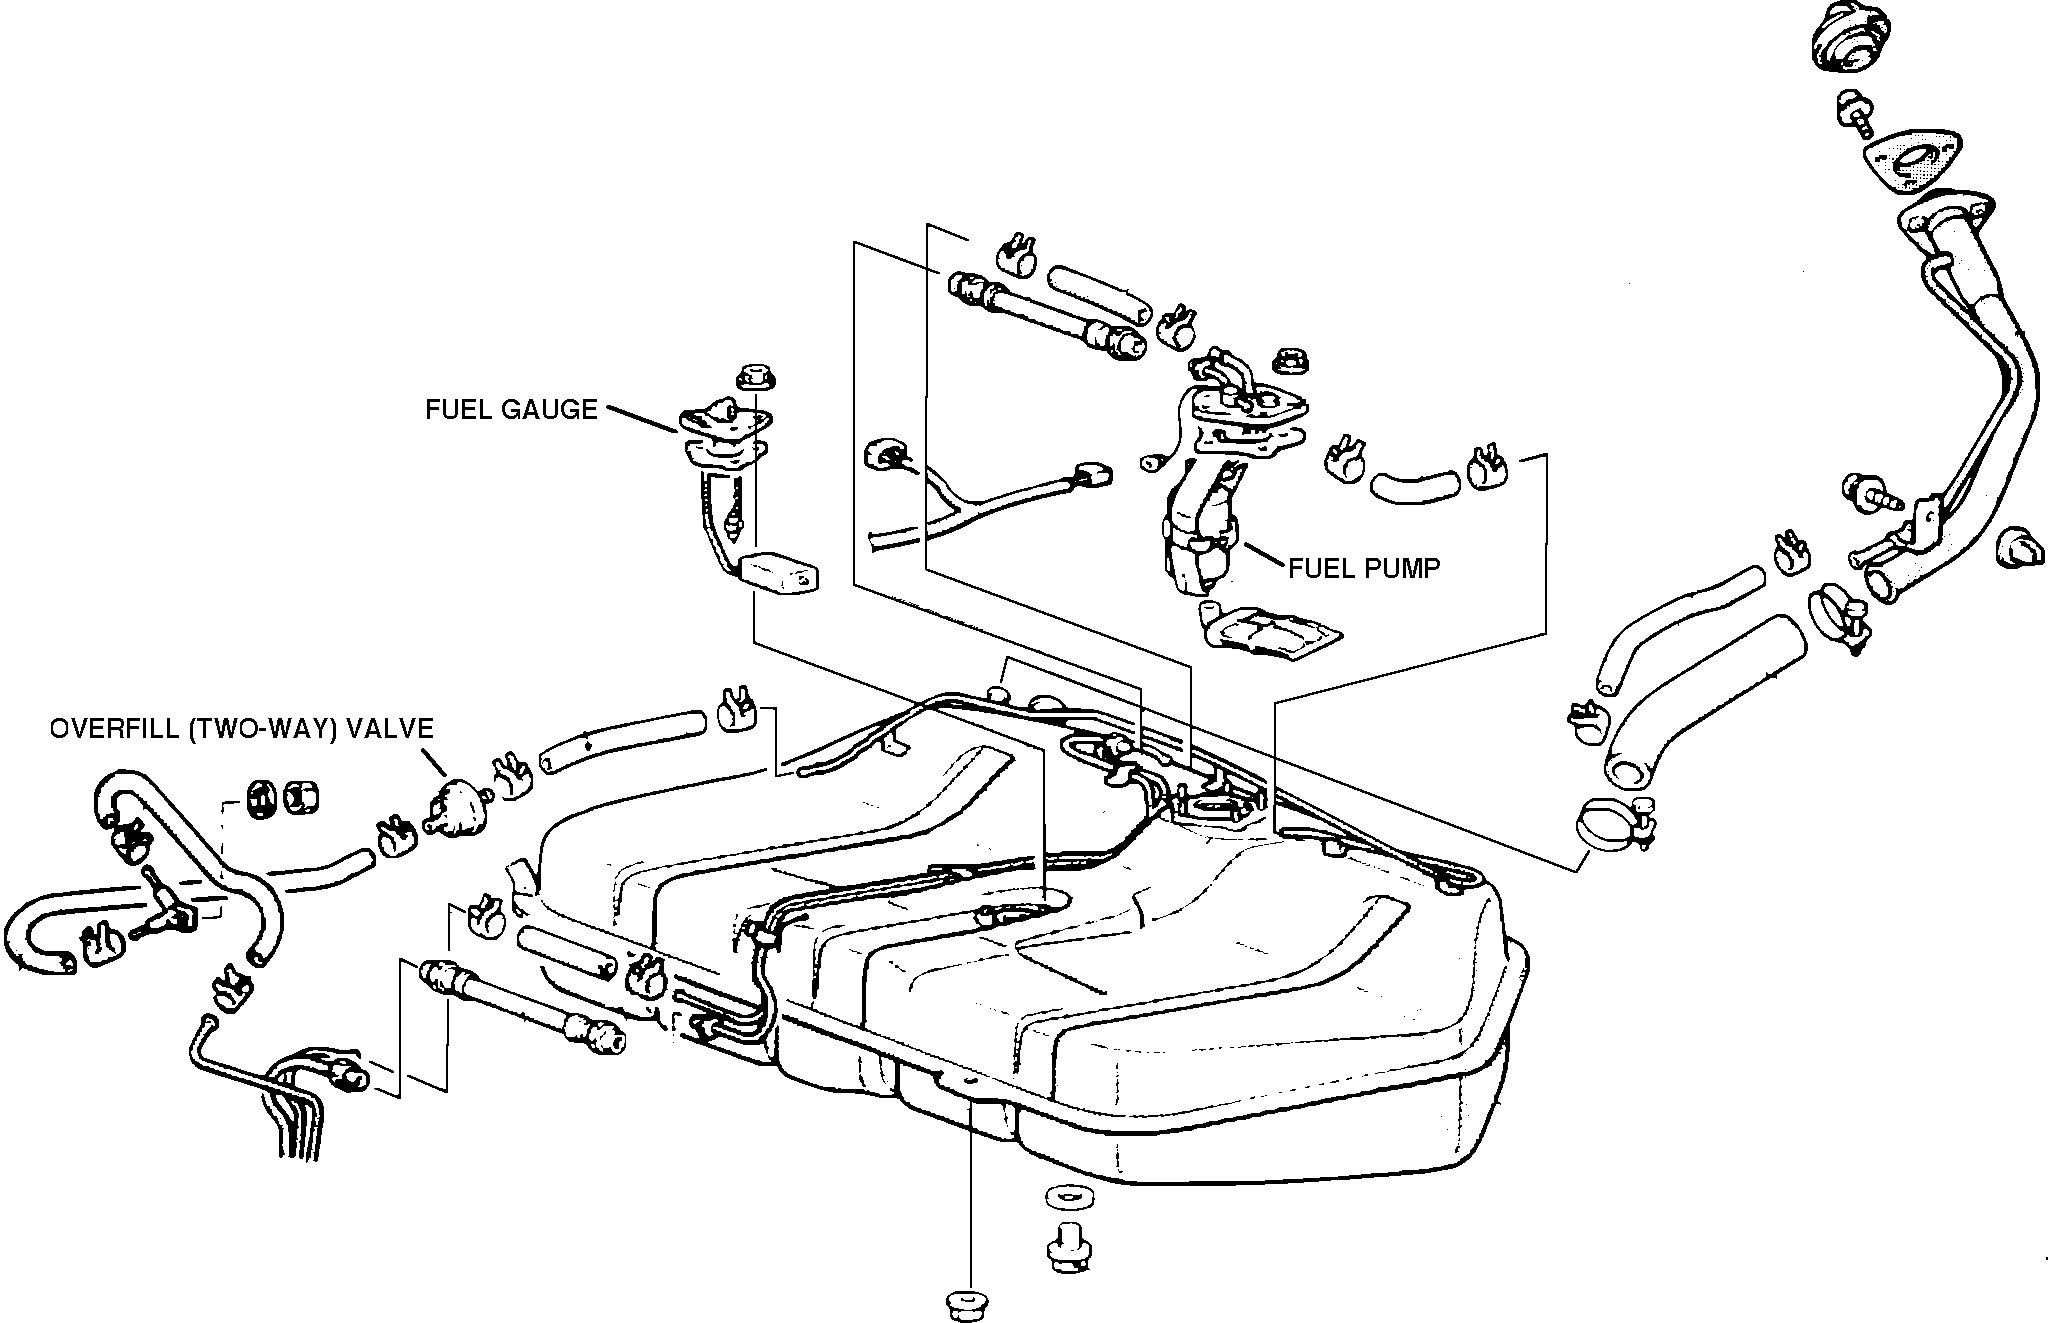
The pump is in the fuel tank. See pic 1. You will need to remove the tank to replace it. Note: This information is for the 1989 Mitsubishi Mirage which is what took the Lancer's place.
________________________
Here are the directions for pump replacement. I will include tank removal after this. The attached pics correlate with the directions.
________________________
1989 Mitsubishi Mirage L4-1468cc 1.5L SOHC
Procedures
Vehicle Powertrain Management Fuel Delivery and Air Induction Fuel Pump Service and Repair Procedures
PROCEDURES
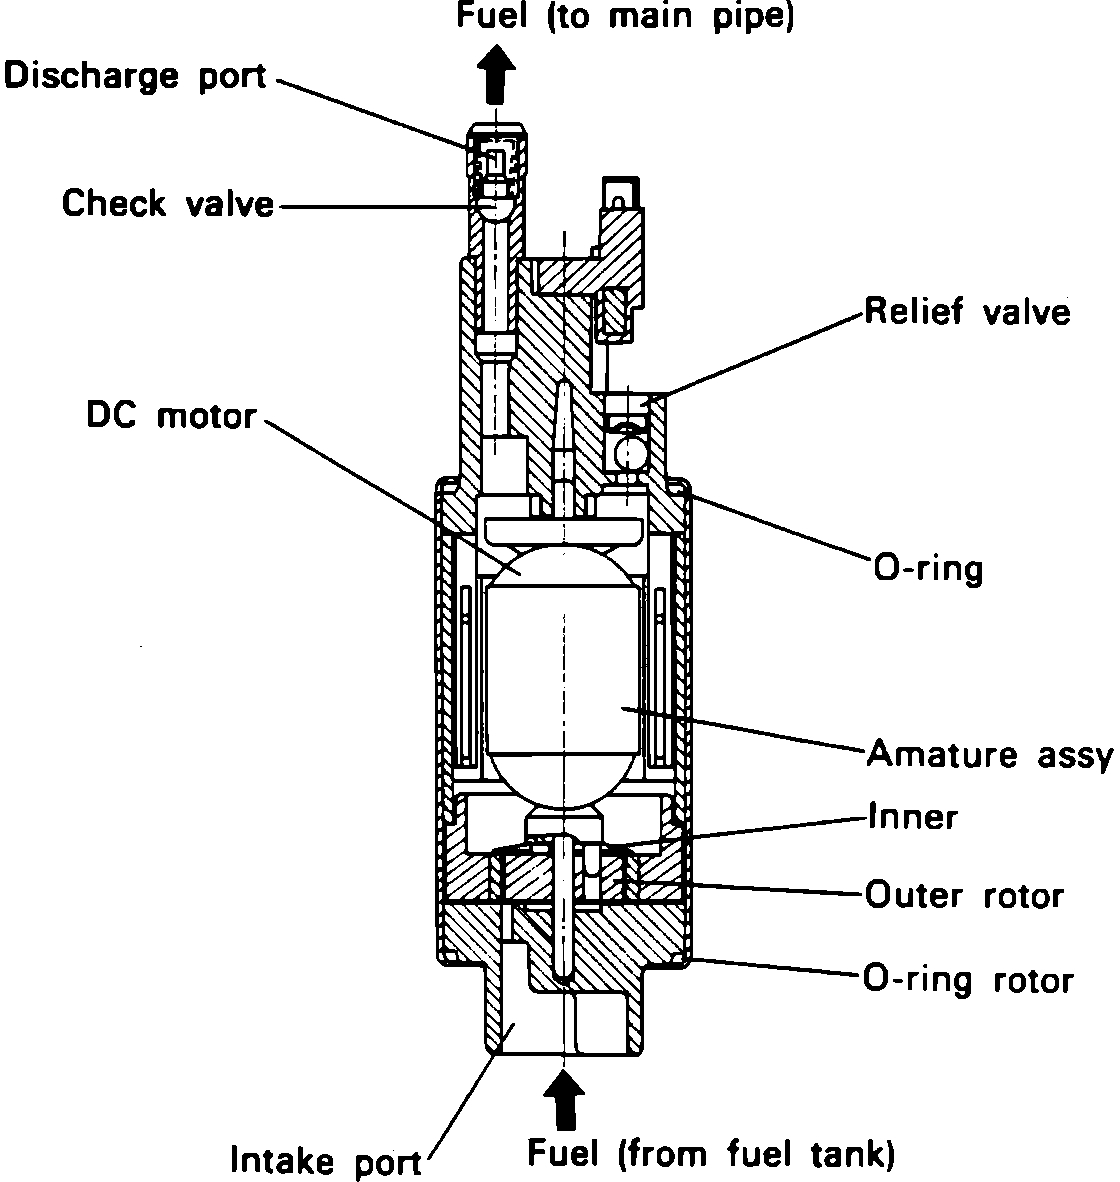
High Pressure Electric Fuel Pump
Pic 2
REMOVAL
Fuel tank removal is required to service the fuel pump. For these procedures refer to FUEL TANK, under the appropriate paragraph heading.
Fuel Pump Mounting Screws
Pic 3
After fuel tank removal, remove the fuel pump installation screws, then remove the pump from the fuel tank.
INSTALLATION
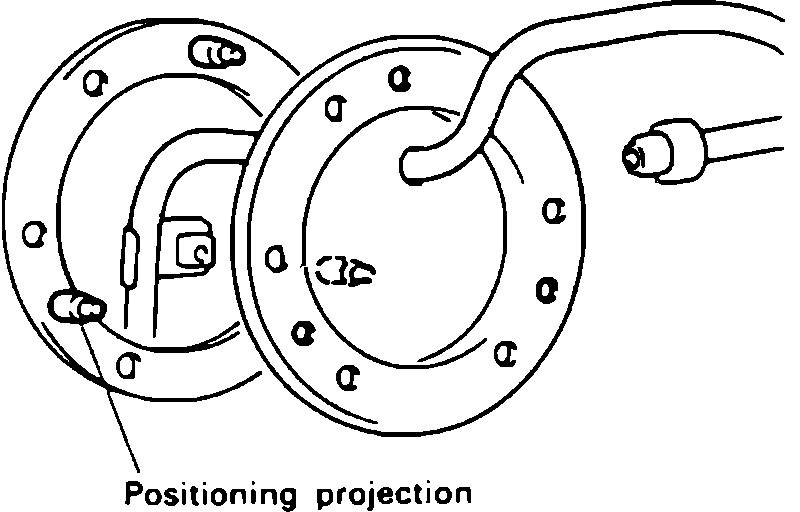
Fuel Pump Positioning Projections
Pic 4
1. Install the gasket, taking care to properly align it with the three positioning projections.
2. As the fuel pump is re-installed, align the three positioning projections with the holes in the fuel pump. Care should be taken at this time to insure that the gasket is properly seated.
3. Install the fuel tank, refer to fuel tank, under the appropriate paragraph heading.
_____________________________________
1989 Mitsubishi Mirage L4-1468cc 1.5L SOHC
Procedures
Vehicle Powertrain Management Fuel Delivery and Air Induction Fuel Tank Service and Repair Procedures
PROCEDURES
Fuel Tank And Components
pic 5
REMOVAL
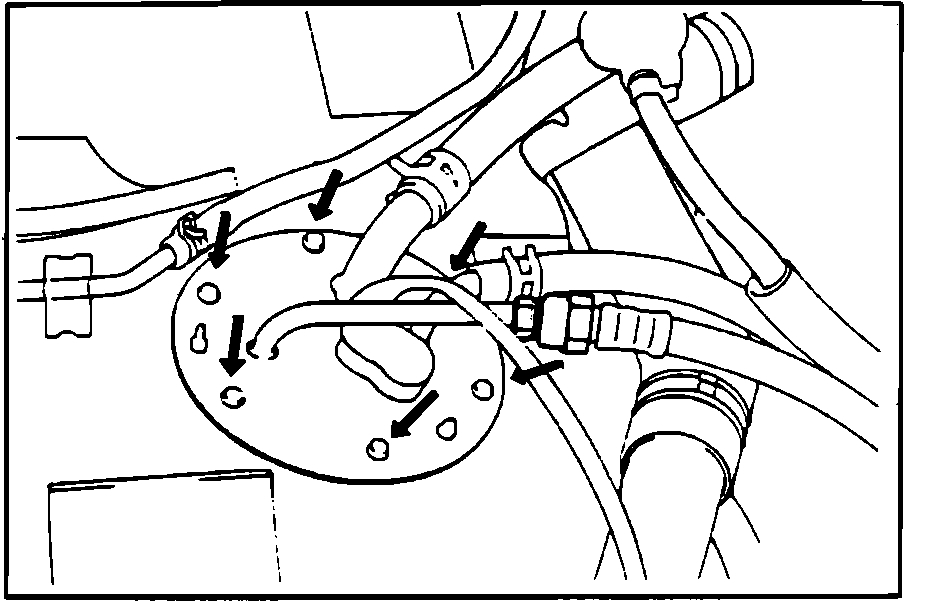
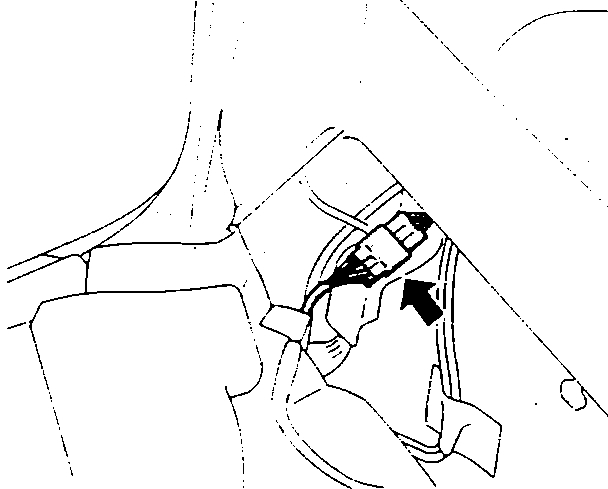
Fuel Pump Connector Location
pic 6
1. Disconnect the fuel pump and fuel gauge connectors.
2. Start and run the engine until it stalls, then turn the ignition switch to OFF.
3. Disconnect the battery negative terminal.
4. Remove the fuel tank cap.
5. Drain the fuel.
6. Disconnect the fuel high pressure line.
CAUTION: Cover with a shop towel to avoid gasoline spillage from any residual fuel in the line.
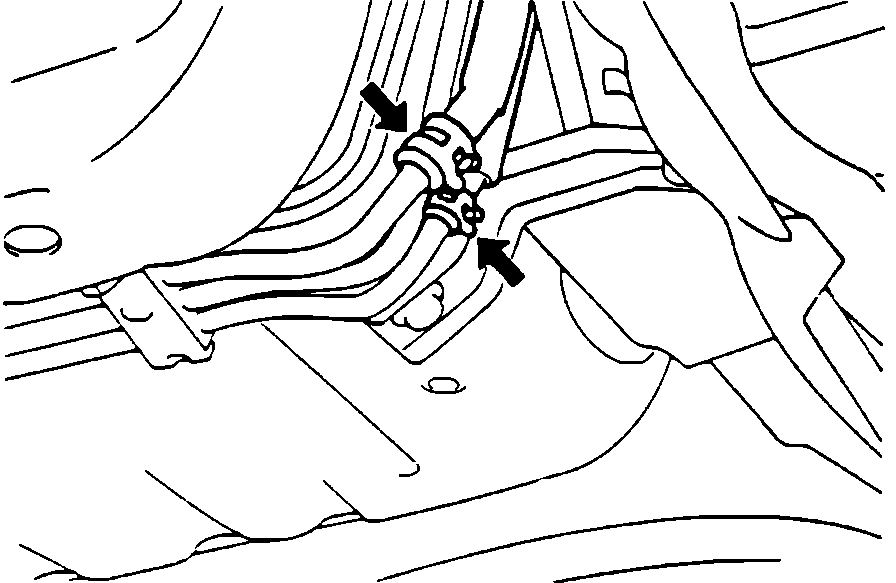
Fuel Return And Vapor Line Connectors
pic 7
7. Disconnect the return line and vapor hose.
8. Detach the fuel filler hose and leveling hose.
9. Remove the bolts that hold the tank in position.
CAUTION: Insure that there is something in position to restrain the tank from falling prior to removing the tank mounting bolts.
10. Remove the fuel tank.
INSTALLATION
1. Install and bolt into place the fuel tank.
2. Connect the leveling hose, from the tank, approximately 1.6 in. (40mm) onto the filler neck.
3. Connecting the filler hose.
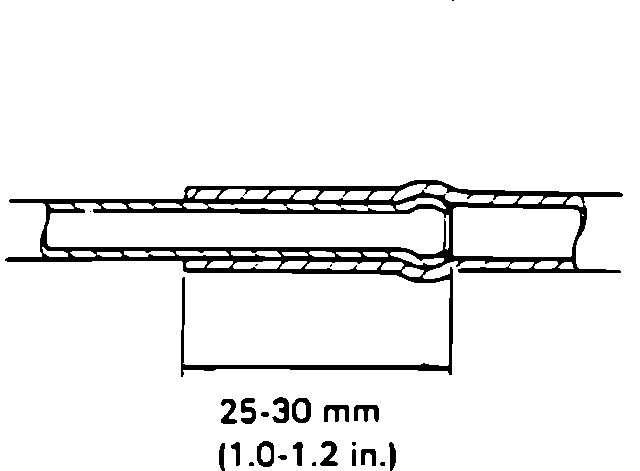
Vapor Hose Connection Specifications
pic 8
4. Connect the vapor hose and return line as shown in the illustration.
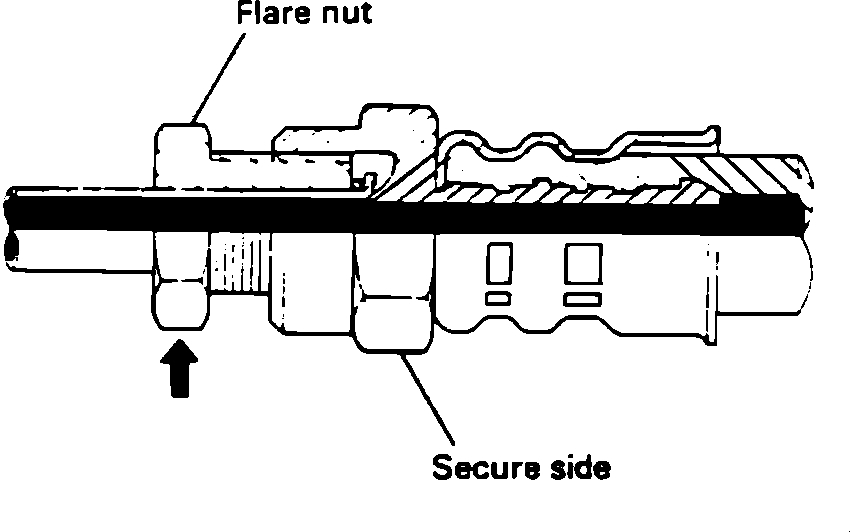
High Pressure Hose Connection
pic 9
5. Connect the high pressure hose.
CAUTION: When tightening the flare nut, be careful not to bend or twist the line.
6. Connect the electrical fuel pump and fuel gauge unit connector.
7. Tighten the drain plug.
8. Connect the negative battery terminal.
________________________________
Let me know if this helps or if you have other questions.
Take care,
Joe
Images (Click to enlarge)
Mar 31, 2021 at 12:33 PM