Hi,
The air flow meter could be going bad or you could just have a poor connection. Here is a test for checking the sensor. You will need a digital multi meter to do this, but it really isn't hard. Here are a couple links you may find helpful:
https://www.2carpros.com/articles/how-to-use-a-voltmeter
https://www.2carpros.com/articles/how-to-check-wiring
Here are the directions for checking the sensor. The attached pics correlate with these directions and provide the needed specs for testing.
____________________________________
1991 Toyota Camry Sedan 2WD L4-2.0L (3S-FE)
Component Test
Vehicle ALL Diagnostic Trouble Codes ( DTC ) Testing and Inspection Manufacturer Code Charts Engine Control System DTC 31 Component Test
COMPONENT TEST
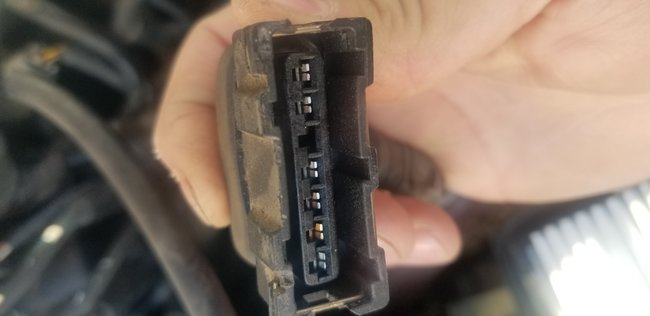
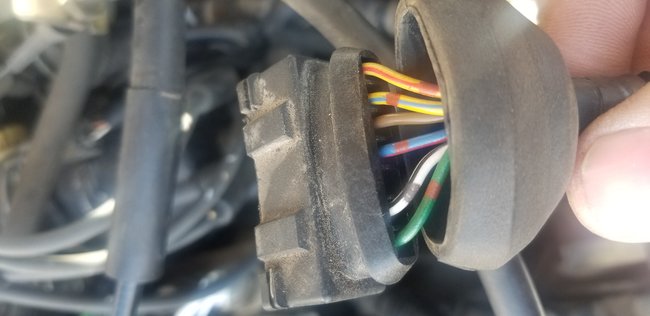
1. Disconnect Air Flow Meter connector.
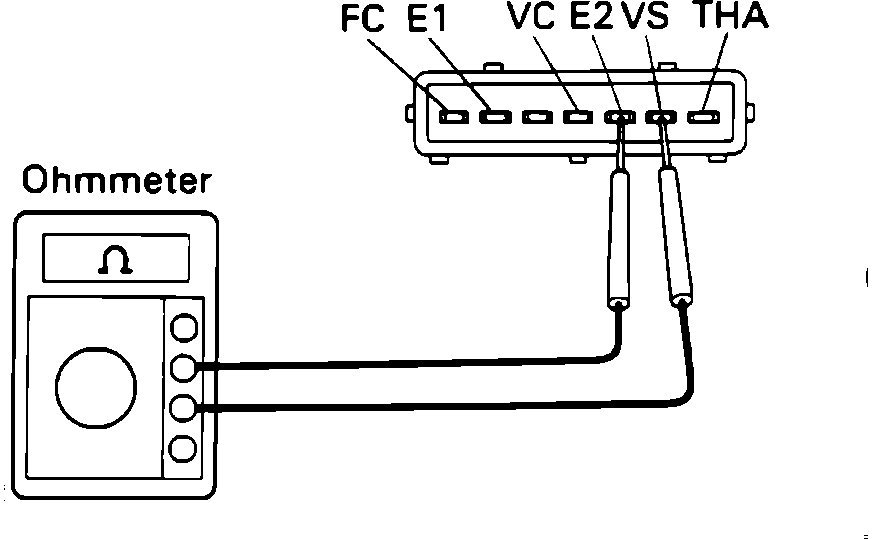
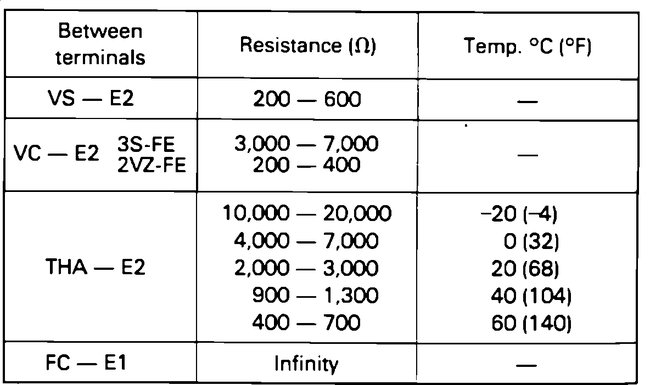
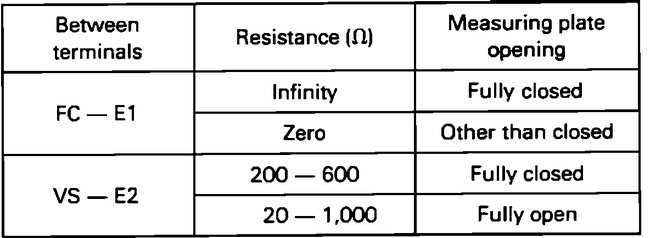
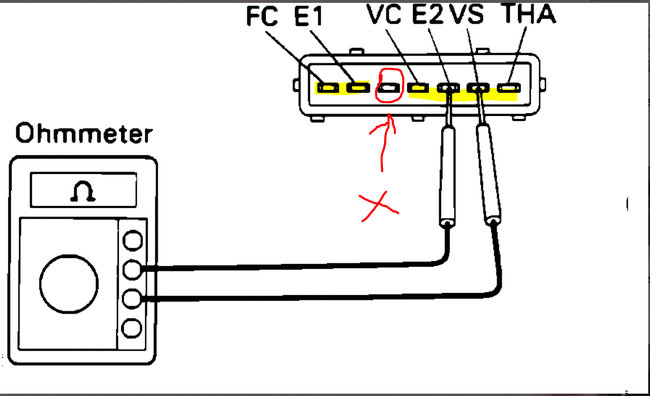
2. Using an Ohmmeter, measure the resistance between each terminal. (Refer to chart)
Testing Air Flow Meter
pic 1
Air Flow Meter Flap Resistance Chart
pic 2
3. If the readings are not as specified, replace the Air Flow Meter.
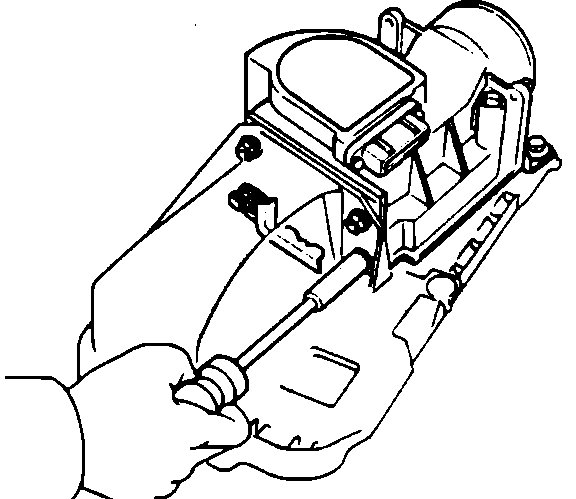
4. If readings are normal, remove the Air Flow Meter.
Removing Air Flow Meter
pic 3
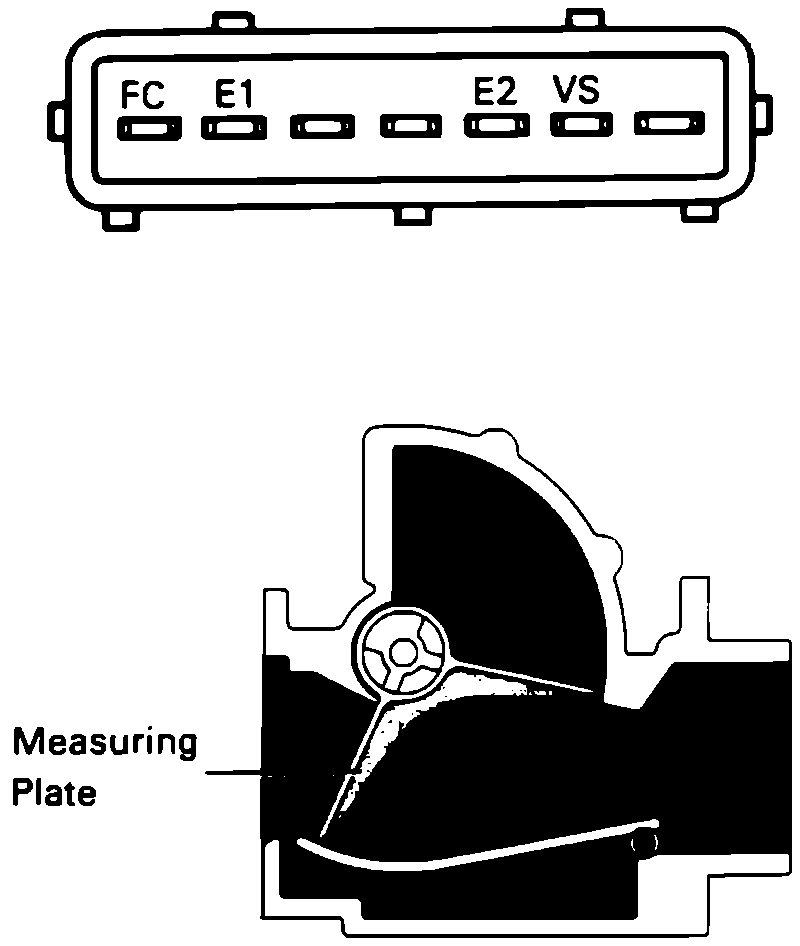
5. Using an Ohmmeter, measure the resistance between the terminals while moving the flap (measuring plate).
Air Flow Meter Flap
pic 4
6. Refer to resistance chart for correct readings.
Air Flow Meter Flap Resistance Chart
pic 5
7. If readings are not as specified, replace the Air Flow Meter.
8. Check that flap does not bind and moves smoothly in its travel.
9. Reinstall Air Flow Meter and reattach the connector.
______________________________
Let me know if this helps. Also, I assume since you have asked, the vehicle is still running the same. If this checks good, I would check fuel pressure to confirm it is within spec. It could be low or even too high if a regulator has failed.
Here is a general link that shows how to test fuel pressure.
https://www.2carpros.com/articles/how-to-check-fuel-system-pressure-and-regulator
Here are the directions specific to testing fuel pressure on this vehicle. The remaining pics correlate with the directions.
____________________________
1991 Toyota Camry Sedan 2WD L4-2.0L (3S-FE)
Fuel Pressure Test
Vehicle Powertrain Management Fuel Delivery and Air Induction Fuel Pump Fuel Pressure Testing and Inspection Component Tests and General Diagnostics Fuel Pressure Test
FUEL PRESSURE TEST
FUEL PUMP QUICK CHECK:
1. Check that battery voltage is at least 12 volts.
2. Turn on the ignition switch.
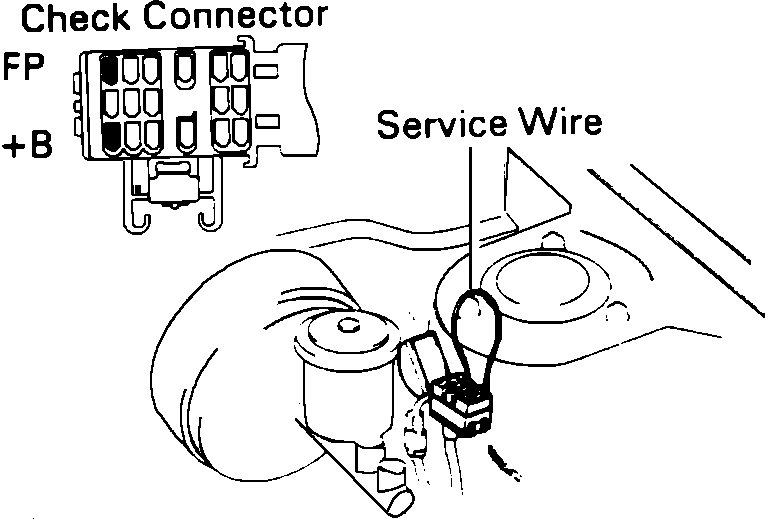
3. Using a service wire, short terminals +B and FP on the engine check connector. The fuel pump should operate.
Shorting Fuel Pump Test Terminals
pic6
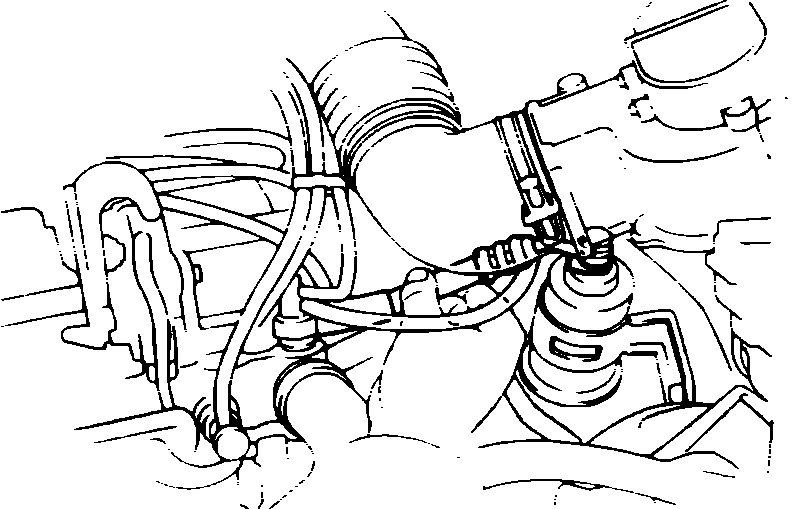
4. Feel the fuel hose coming from the fuel filter to the fuel rail. The fuel flow should be felt, if the fuel pump is operating.
EFI Fuel Filter
pic 7
5. If not, perform pressure test below.
6. If fuel flow is felt, fuel pump operation is indicated, although fuel pressure may not be correct. For an accurate diagnosis, perform pressure test.
FUEL PRESSURE TEST:
1. Check that battery voltage is at least 12 volts.
2. Disconnect battery negative terminal.
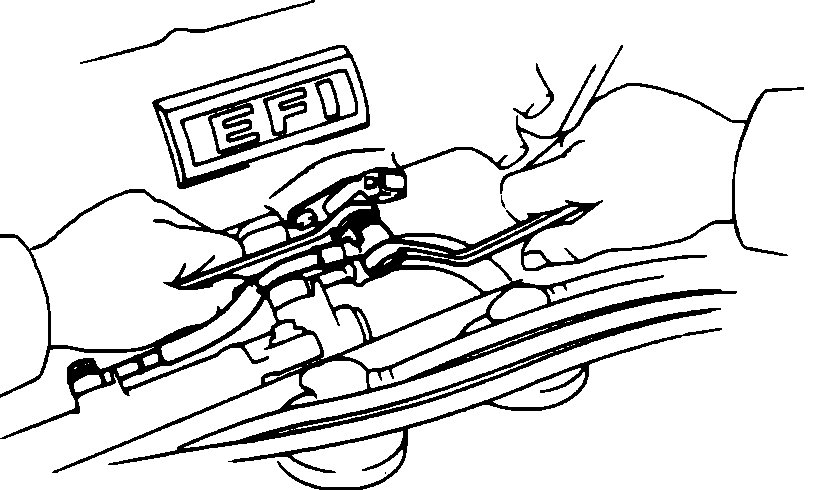
3. Remove fuel delivery pipe between Cold Start Injector and fuel rail. Use caution if the fuel system is still under pressure.
Disconnecting Cold Start Injector Delivery Pipe
pic 8
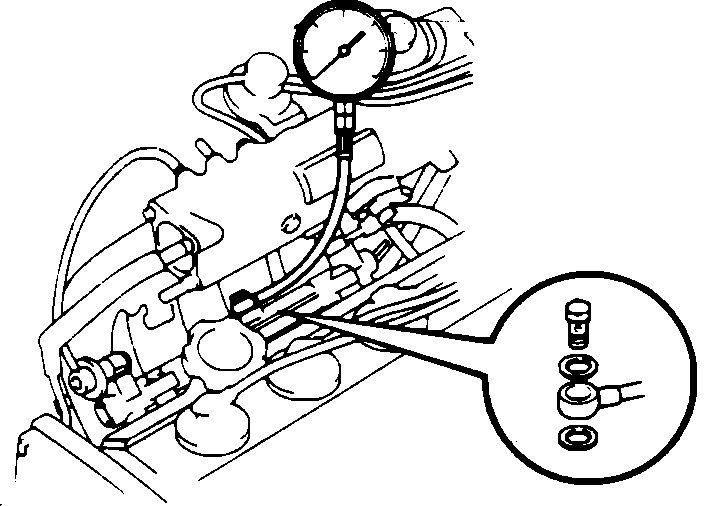
4. Connect a suitable fuel pressure gauge to the fuel rail using the union bolt and gaskets to provide a tight seal.
Connecting Fuel Pressure Gauge
pic 9
5. Wipe off any gasoline that may have escaped when the fuel pipe was disconnected and reconnect negative battery terminal. Turn on the ignition switch.
6. Using a service wire, short terminals +B and FP on the engine check connector. The fuel pump should operate and cause the pressure gauge to deflect.
Shorting Fuel Pump Test Terminals
pic 10
Fuel Pressure: 38 - 44 PSI (265 - 304 kPa)
7. If pressure is low, check fuel pump output and/or fuel filter for restrictions. If pressure is high, refer to FUEL PRESSURE REGULATOR/FUEL RAIL and test components.
8. If there is zero fuel pressure, check fusible links, fuses (EFI 15A, IGN 7.5A), EFI Main Relay and circuit wiring. Refer to CHASSIS ELECTRICAL DIAGRAMS for circuit schematics.
9. If no problem is found with the above components, go to the gas tank and listen for sound from the electric fuel pump.
10.If sound is heard, confirm that there is fuel in the tank.
11.If no sound is heard, remove the fuel pump from the tank, (refer to COMPONENT REPLACEMENT AND REPAIR PROCEDURES), and bench test the fuel pump with battery current.
12.If fuel pump does not operate, replace the fuel pump.
13.After repairs are made, remove all test equipment from engine, start engine and check for fuel leaks.
___________________
Let me know if this helps. Also, let me know if any new codes have come up and exactly how the vehicle is running now that you have done work. If you were extremely low on fuel when this happened, make sure to check fuel pressure. Also, I need to know if the tank was filled beyond when the pump automatically clicks off.
Take care and I'll watch for your reply.
Joe
Images (Click to make bigger)
Tuesday, February 18th, 2020 AT 7:11 PM
