Hello friend,
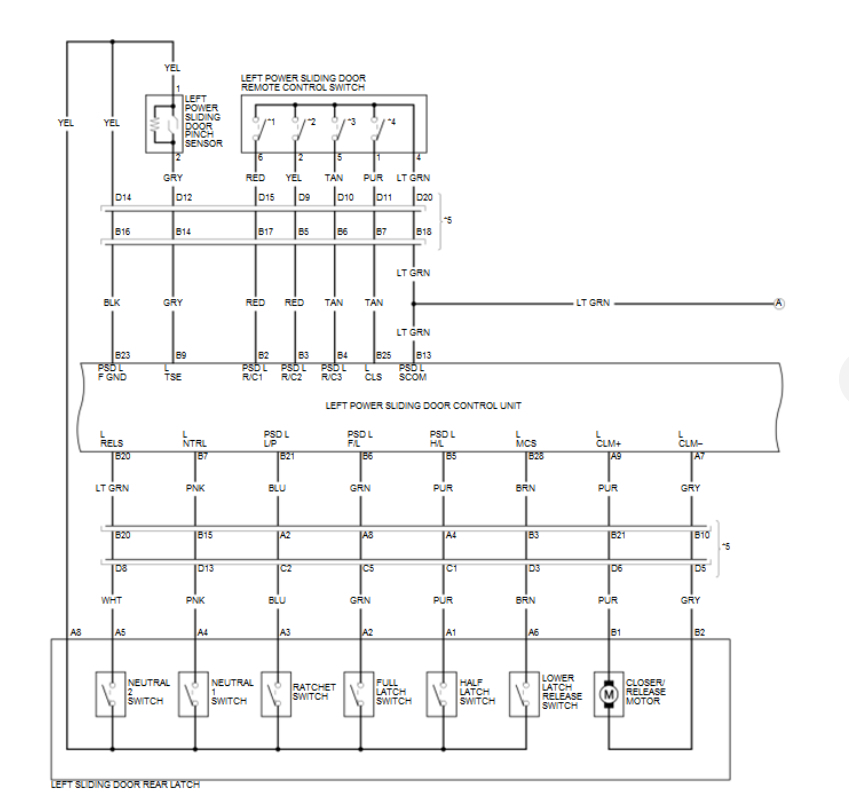
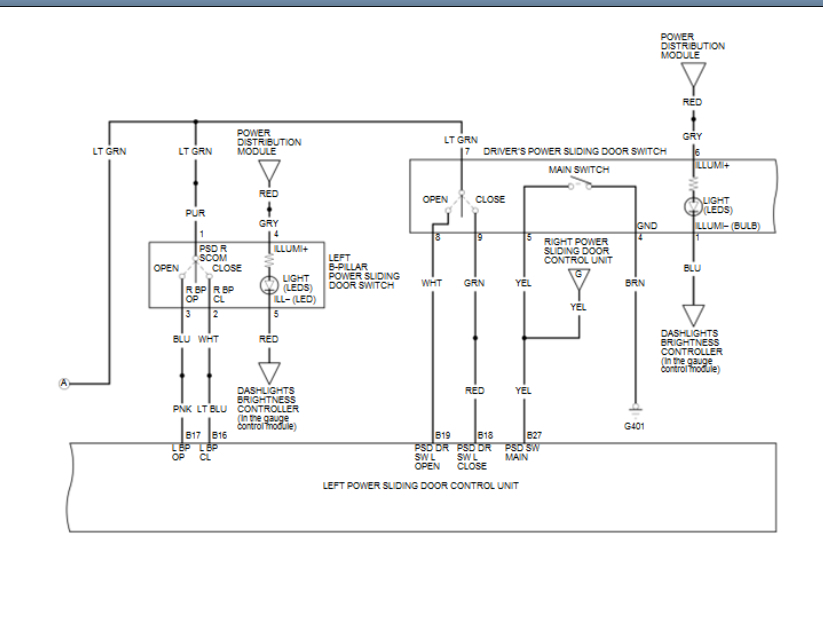
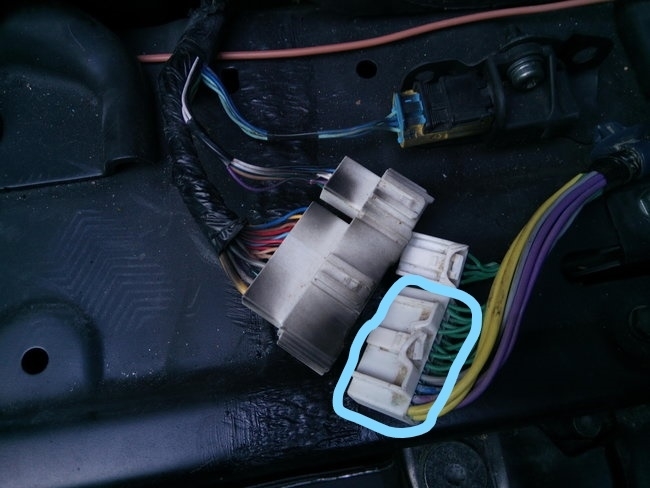
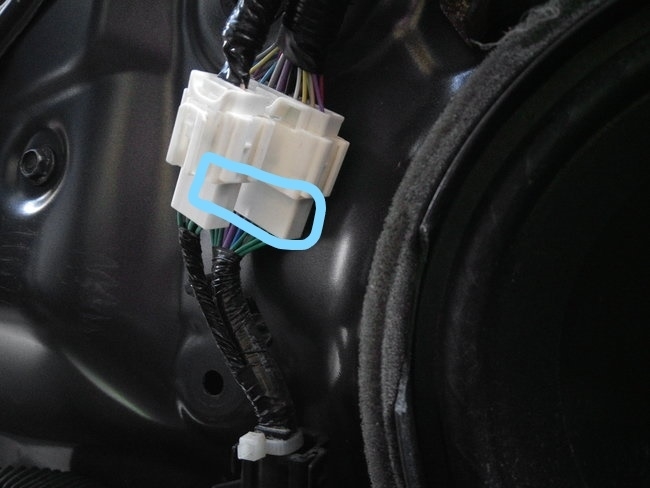
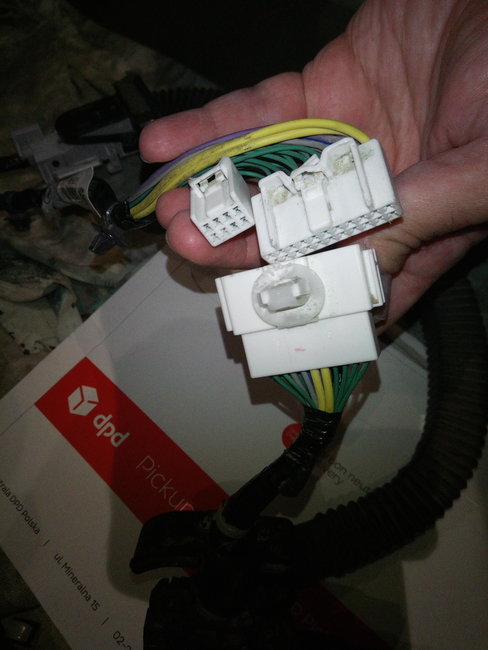
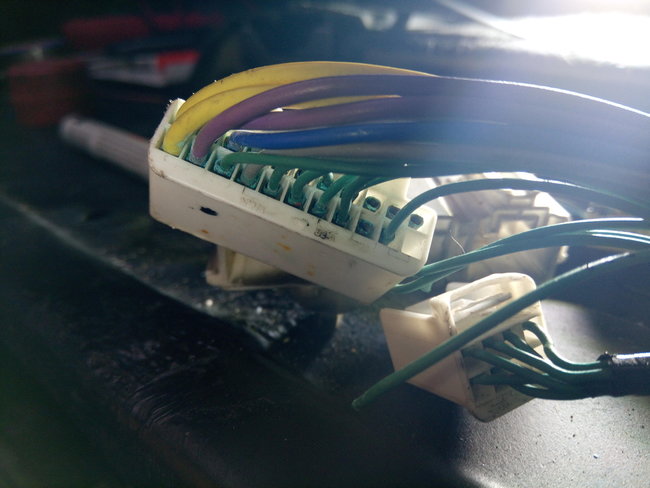
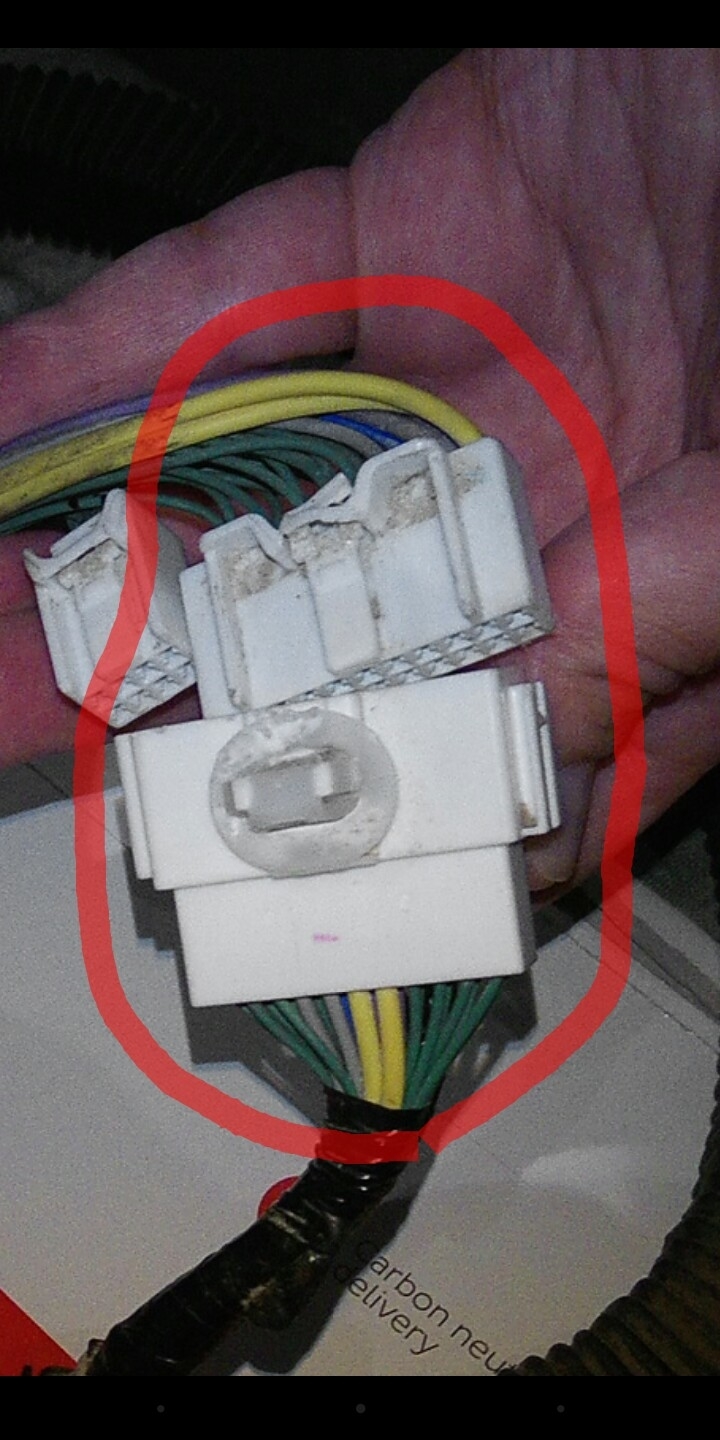
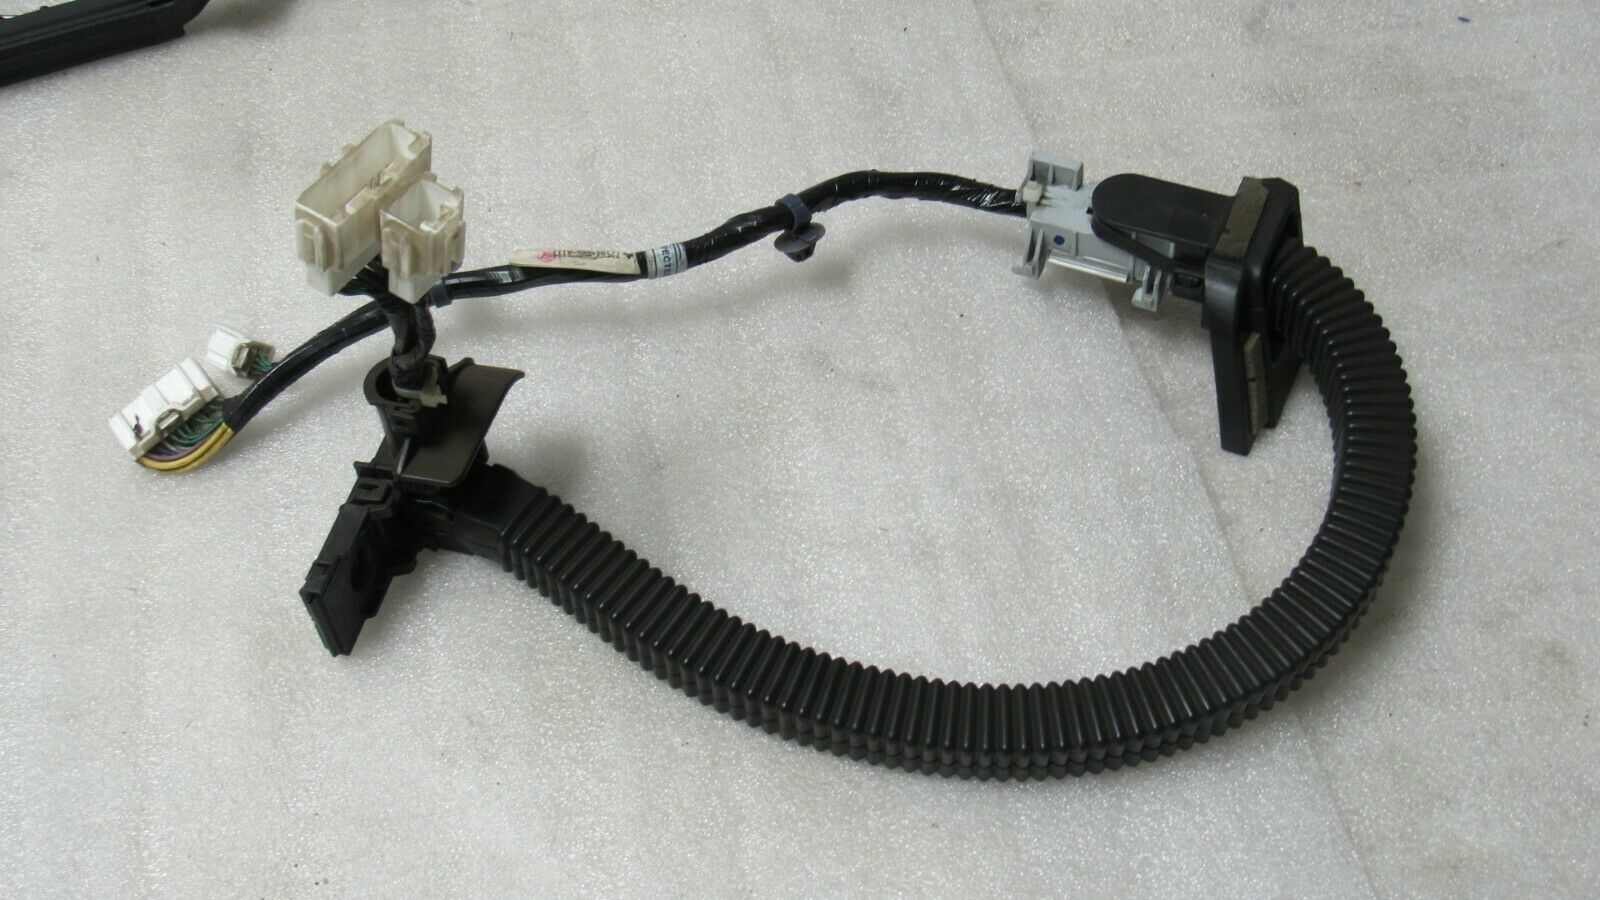
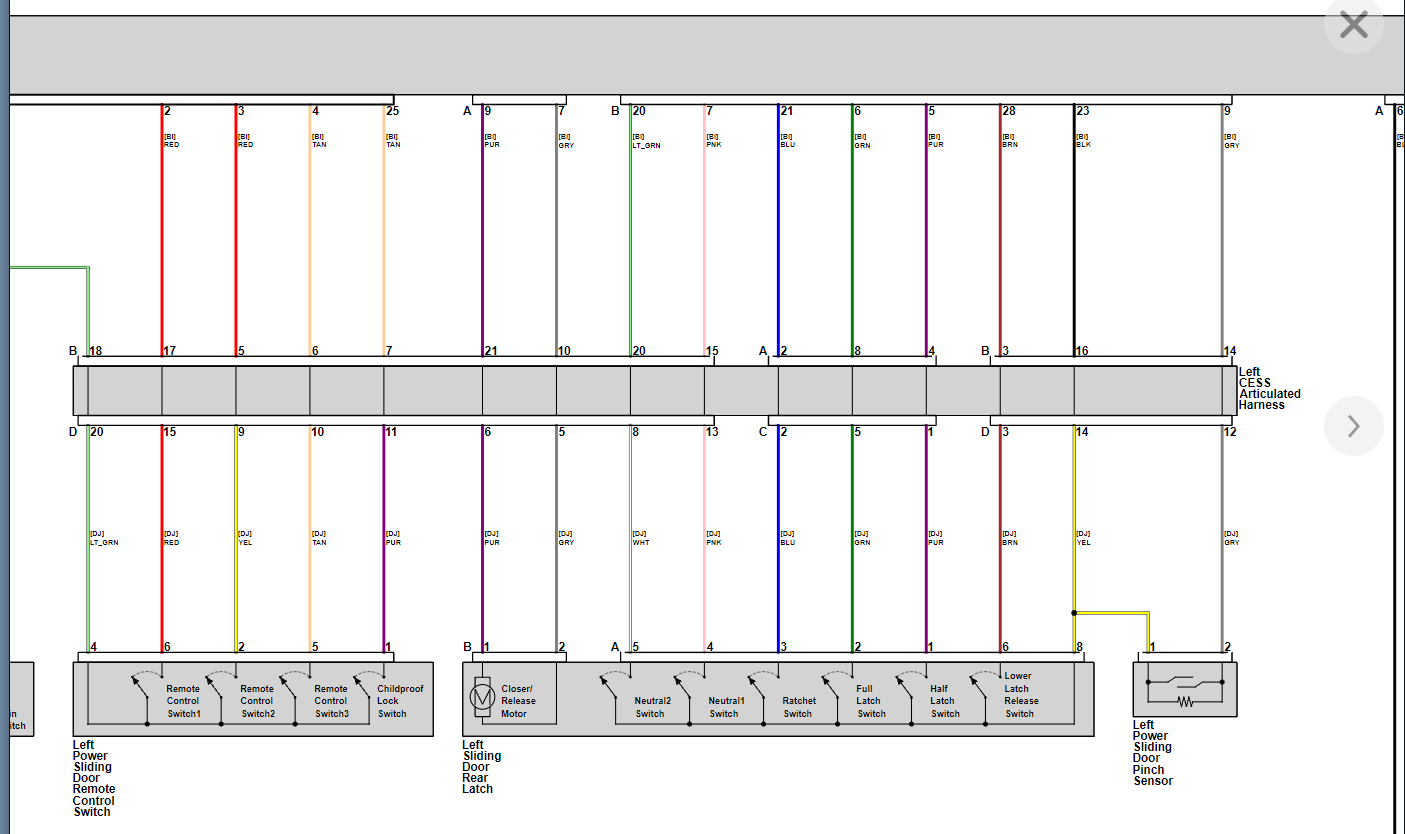
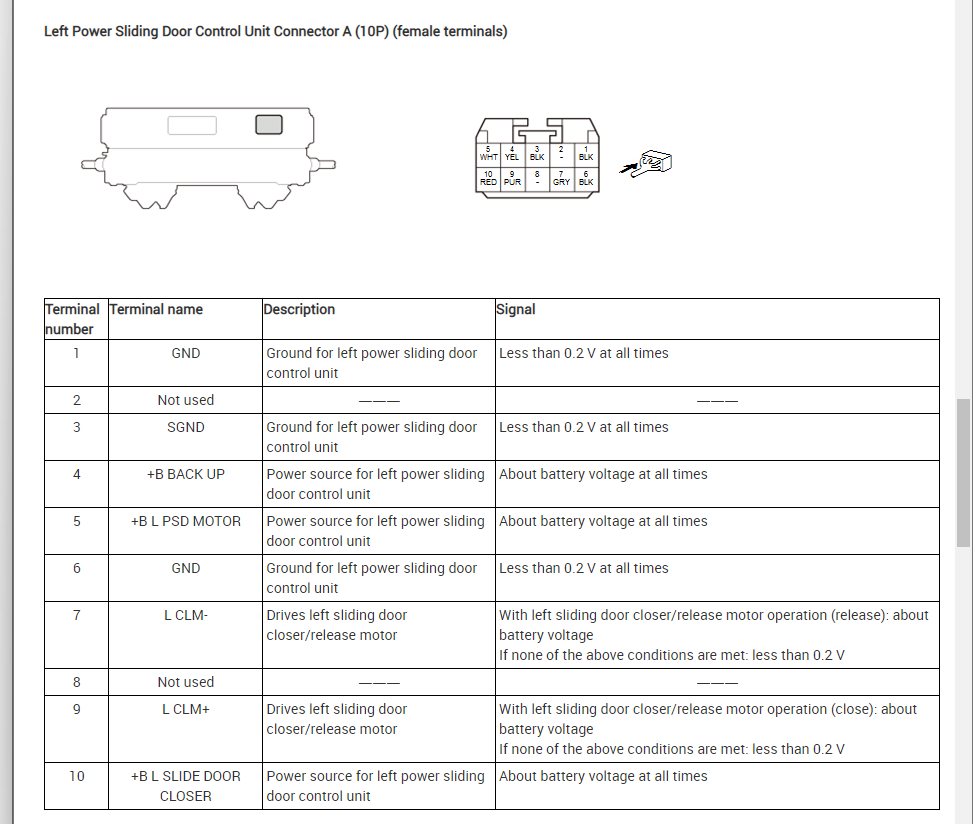
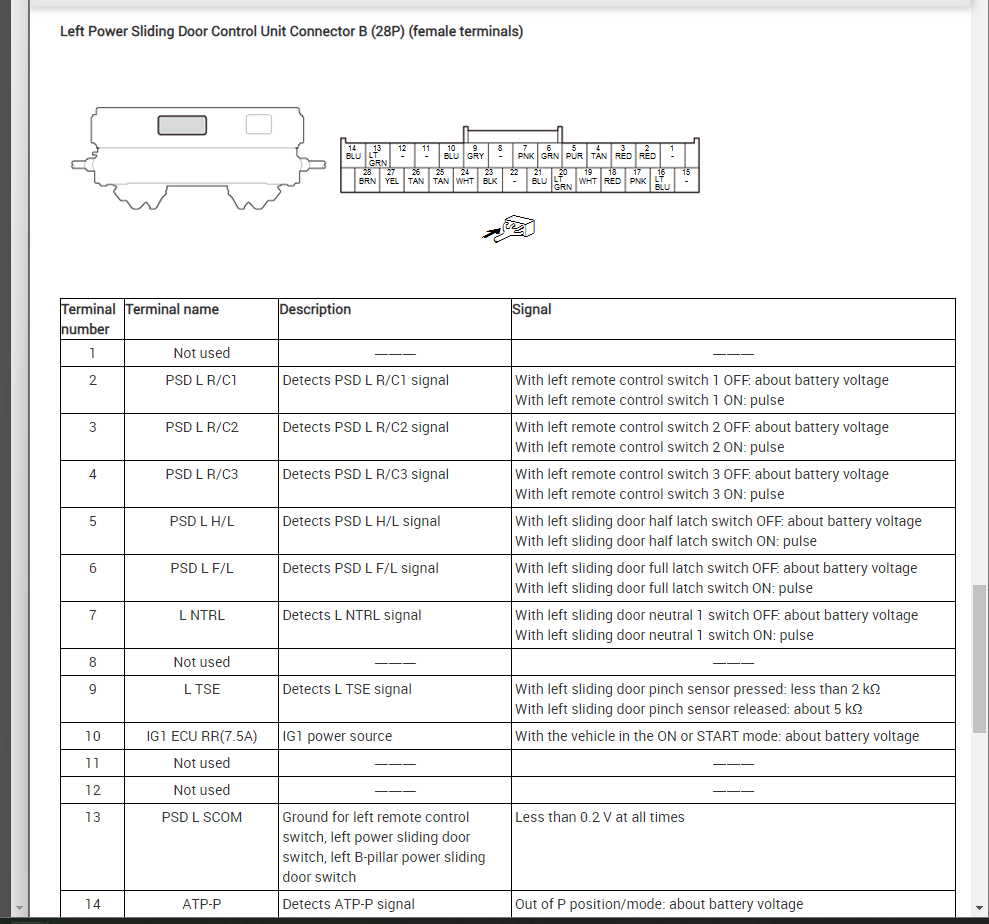
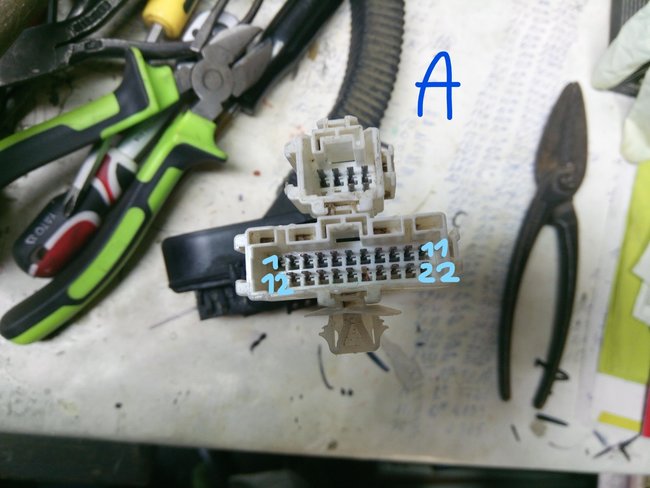
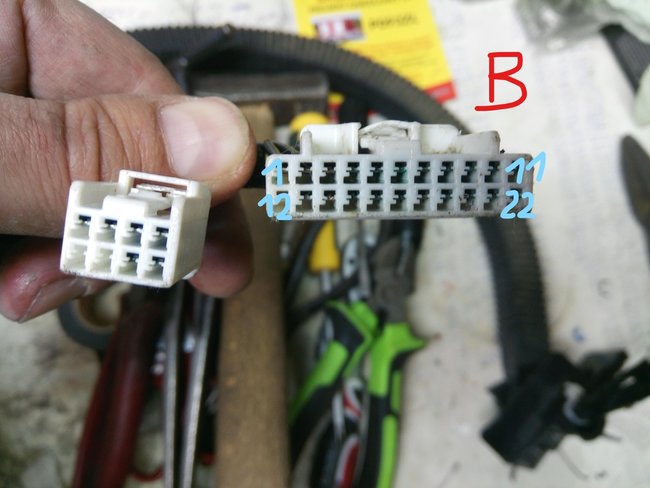
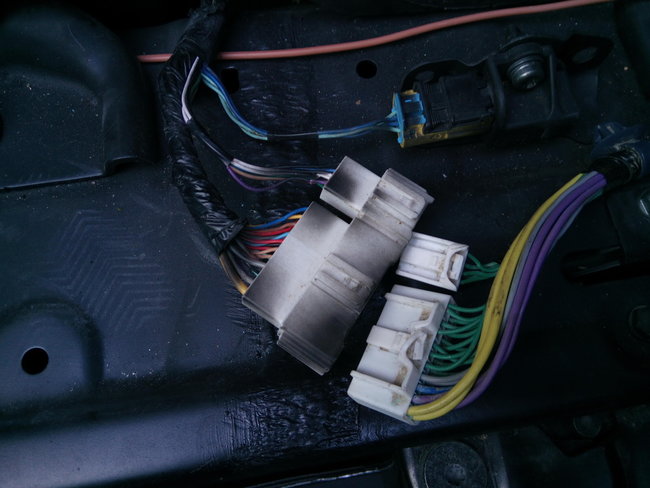
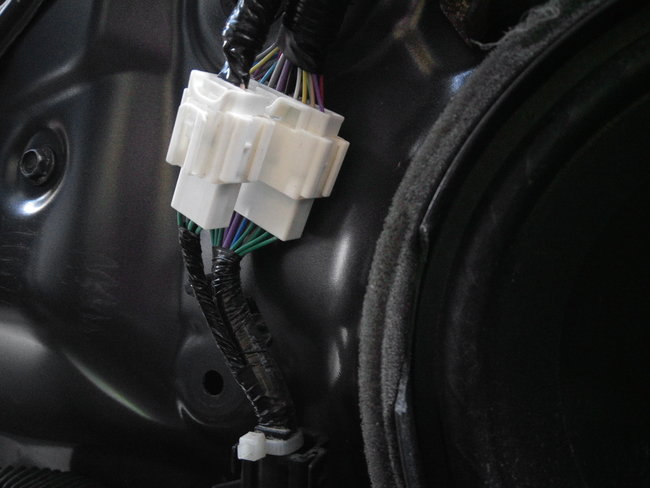
Unfortunately, some wires to sliding door are broken. Some green wires are disconnected from connector, and I do not know where green wires should be connected. it is 21 pin (it is 22 pin but one is without plug) connector as I added the photo. Just to be clear which wire where connect the second junction of connector is colorful wires. The second end of this cable is placed on the door. And one connector have many green wires and second way of connector is with colorful wires too. And these colors are not the same. :-(
I am sorry my English, I do not know how I should explain it.
The wiring diagram for sliding door will be very helpful for me now.
I am waiting for your reply.
Have a nice day,
Pawel
Images (Click to enlarge)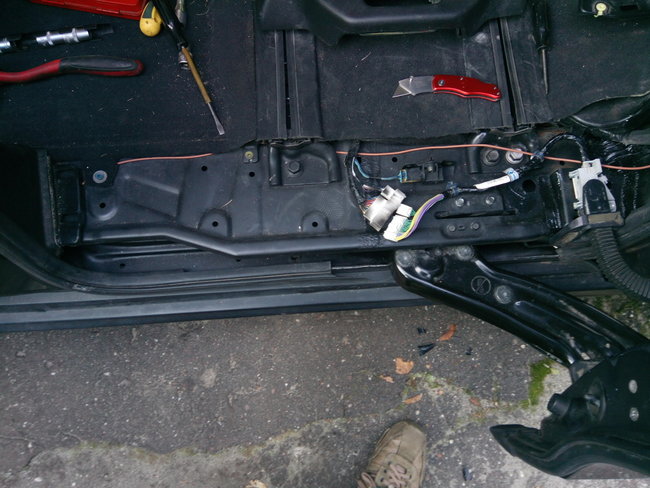


Oct 10, 2021 at 11:02 AM