do I need to lower engine to replace front main seal

2013 CHEVROLET IMPALA
175,000 MILES • 3.6L • V6 • AUTOMATIC
Avatar
DAVENOOB
  • MEMBER
  • 322 POSTS
so I've been told I need to lower the eninge 2" to be able to change front main seal? Also do I need the special 3 point puller to get pulley off?
Aug 13, 2025 at 7:03 PM
Advertisement
Avatar
STEVE W.
  • CAR REPAIR CONTRIBUTOR
  • 15,157 POSTS
You need to lower it to get room enough to get the balancer off the crank snout. There isn't enough room for the puller and crank snout with the engine in stock position. You need the remover and installer kit to get it off and back on. You can generally get it as a loaner tool.
Aug 14, 2025 at 1:17 AM
Avatar
DAVENOOB
  • MEMBER
  • 322 POSTS
Do you know where the lift points are on the engine for engine support bar?
Aug 14, 2025 at 10:33 AM
Avatar
STEVE W.
  • CAR REPAIR CONTRIBUTOR
  • 15,157 POSTS
Check the other post you put up.
https://www.2carpros.com/questions/engine-lift-points-for-2013-impala-ltz
Aug 14, 2025 at 1:56 PM
Avatar
DAVENOOB
  • MEMBER
  • 322 POSTS
Thanks I didn't see the notification.
Aug 14, 2025 at 2:31 PM
Avatar
STEVE W.
  • CAR REPAIR CONTRIBUTOR
  • 15,157 POSTS
No problem.
Aug 14, 2025 at 10:33 PM
Avatar
DAVENOOB
  • MEMBER
  • 322 POSTS
Ok just a fyi. I used a cheater bar to pop the bolt on the Pulley. The AutoZone has a loaner tool #57139 it's a low profile puller for Chrysler and some gm. Got it pulled through the wheel well. All told took me 5 mins to take off didn't have to lower or remove anything. I'll probably have to remove radiator hose to get belt on otherwise just the wheel well. Thanks for the info.

I don't have a seal puller and don't want to scratch up the inside any suggestions?
Aug 17, 2025 at 5:12 PM
Avatar
STEVE W.
  • CAR REPAIR CONTRIBUTOR
  • 15,157 POSTS
Surprised they have it as it's not what they normally stock around here. I have one but it came off a truck. For pulling the seal, grab a screw like a sheet rock or similar and screw it into the flat on the seal and use it with a short bar to pull the seal out.
Aug 18, 2025 at 12:05 AM
Avatar
DAVENOOB
  • MEMBER
  • 322 POSTS
Great idea thanks. Ya I noticed there is a few low profile pullers for gm. Some are pretty cool instead off having to use hooks to grab the back of the pulley the have L shaped notches so it's more like a twist top around the inner arms of the pulley. Reasonabley priced as well.
Aug 18, 2025 at 9:25 AM
Avatar
STEVE W.
  • CAR REPAIR CONTRIBUTOR
  • 15,157 POSTS
Depends on where you shop if the price is reasonable these days. I have drawers full of the specialty tools over the years. Some were OK, others are made of gold. I'm glad you have a better store there that actually has the better tools. I've used the screw trick for years on seals like those. I try not to use anything that would remove metal from the seal, so the sharp point on the screw gets tapped into the seal like a nail, then screwed in. 2 of them 180 apart works the best on larger seals.
Aug 18, 2025 at 9:34 AM
Avatar
DAVENOOB
  • MEMBER
  • 322 POSTS
Is the best way to install the new seal to press in place then use a screwdriver backwards(or any flat surfaced item) and tap it in?
Aug 18, 2025 at 11:23 AM
Avatar
STEVE W.
  • CAR REPAIR CONTRIBUTOR
  • 15,157 POSTS
I usually use a pipe or similar and then tap around it in a circle to get the seal into place. That spreads the force around so the seal doesn't distort as it seats. Be sure to lube the seal lips where they ride on the crank and be sure the spring doesn't come out.
Aug 18, 2025 at 1:11 PM
Avatar
DAVENOOB
  • MEMBER
  • 322 POSTS
Spring? I haven't seen one thanks. I don't have that big of a socket but pipe idea is good thanks. Now with the tightening of the bolt. I know you have to use a torque wrench. What about the 150° part how important is that? Is there anyway to do this without an angle torque?
Aug 18, 2025 at 1:54 PM
Avatar
STEVE W.
  • CAR REPAIR CONTRIBUTOR
  • 15,157 POSTS
There is a spring on the back side of the seal, it applies a constant pressure. Tighten it to the starting number 75 lb ft, stop, mark where the wrench is, now go straight across, that is 180. Tighten until you get 1 inch away from the 180 mark. Should put you close enough to 150
Aug 18, 2025 at 4:14 PM
Avatar
DAVENOOB
  • MEMBER
  • 322 POSTS
Thanks
Aug 18, 2025 at 5:04 PM
Avatar
STEVE W.
  • CAR REPAIR CONTRIBUTOR
  • 15,157 POSTS
You are welcome. Let us know what the results are.
Aug 18, 2025 at 10:00 PM
Avatar
DAVENOOB
  • MEMBER
  • 322 POSTS
So got seal in and got the pulley started. I was told to use old pulley bolt to install pulley. The bolt is too short for the threads to connect. Can I use same pipe that I pounded seal in to push pulley on so I can get bolt started to pull the pulley into place?
Aug 25, 2025 at 12:33 PM
Avatar
DAVENOOB
  • MEMBER
  • 322 POSTS
Got it. I've tighten the bolt as much as I possibly can without stripping bolt head. I've got pulley locked but haven't even gotten the torque wrench to click yet at 75lbs. Can't get a good wrench on it without extension. This meses with the torque right?
Aug 25, 2025 at 2:13 PM
Avatar
STEVE W.
  • CAR REPAIR CONTRIBUTOR
  • 15,157 POSTS
Straight extension won't do much as long as you keep it straight and it's a good extension. I've tapped them on with soft mallets before. Most of the better installer tools include adapters and a puller rod but they get in the way. Torqueing them is always fun, I use a three quarter drive extra long torque wrench normally.
Aug 25, 2025 at 3:59 PM
Avatar
DAVENOOB
  • MEMBER
  • 322 POSTS
Okay so installation question. I've done this twice now with same results little oil leaks coming from what looks like harmonic balancer. I think the balancer isn't in all the way. I used the old bolt to pull the pulley in place. Is it possible the bolt doesn't have enough threading to pull pulley in all the way? I was going to pull the bolt and use a pulley installer to tighten pulley then tighten and torque a new bolt. Could this be the problem? If not could you think of another issue to address? Thanks
May 28, 2026 at 7:29 PM
Avatar
STEVE W.
  • CAR REPAIR CONTRIBUTOR
  • 15,157 POSTS
A more common issue is a groove worn in the balancer or just a poor fitting seal. Next is if the oil is coming through the balancer itself. Most have a keyway that goes through the casting. It can act as a pathway for oil to get through. Look at where the oil seems to be collecting, inside the face of the balancer is commonly the keyway. Outside or back is usually seal related. I would do two things that should stop any oil. First pull it off and inspect the seal, especially if it uses a spring behind the lip, they can fall out, if it looks OK, find a "speedi-sleeve" to fit the vehicle. It is basically a VERY thin sleeve that you press into place to create a new surface for the seal, plus as it makes the hub just fractionally larger it generally seals better if you have a marginal seal. I use loctite sleeve retainer on them, just to be sure they cannot leak. Then apply some silicone into and around the keyway, and apply some retainer around the crank. Then install the balancer. usually that stops any leaks.
May 28, 2026 at 8:46 PM
Avatar
DAVENOOB
  • MEMBER
  • 322 POSTS
Few things it's a brand new balancer. So find a speedi sleeve that fits my seal and add loctite seal retainer around seal or around the whole slide in key hole part of the balancer? Automotive silicon just apply it around as well? I'm sorry I'm having issue visualizing this. Thanks
May 29, 2026 at 3:58 AM
Avatar
STEVE W.
  • CAR REPAIR CONTRIBUTOR
  • 15,157 POSTS
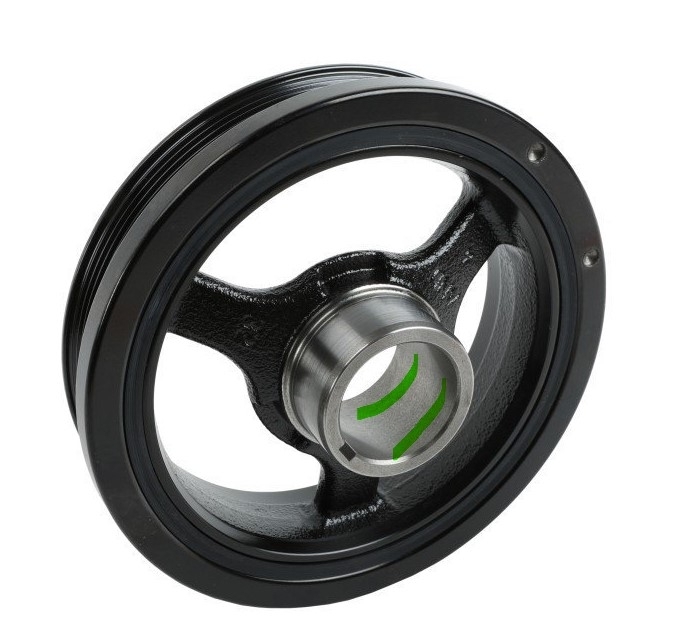
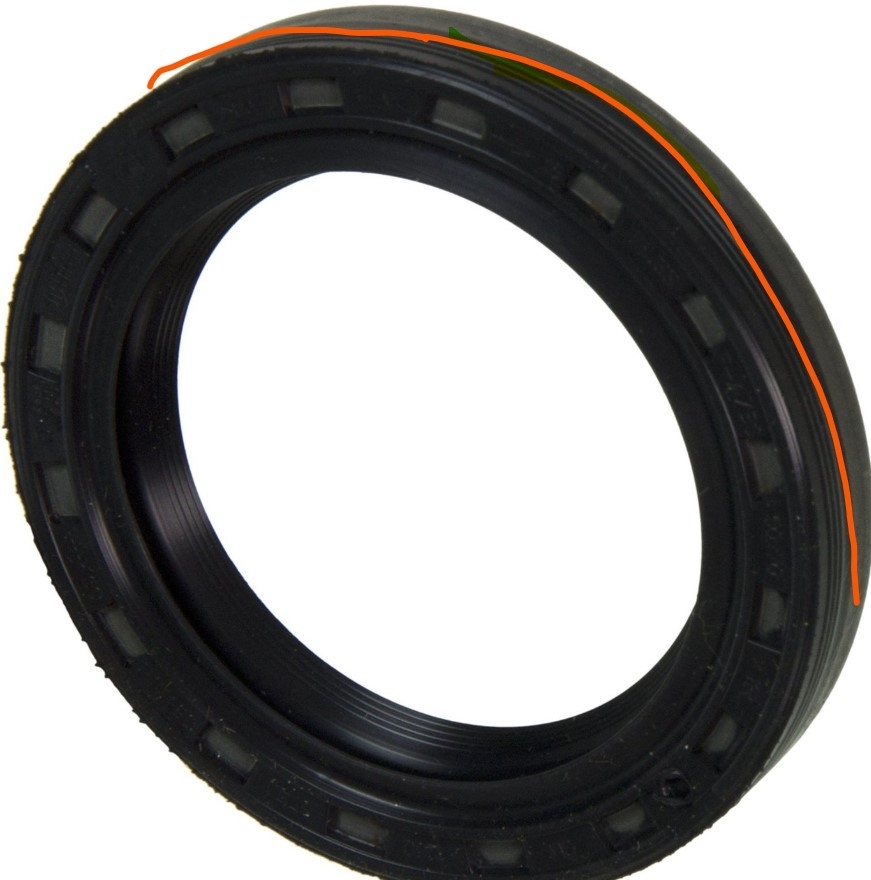
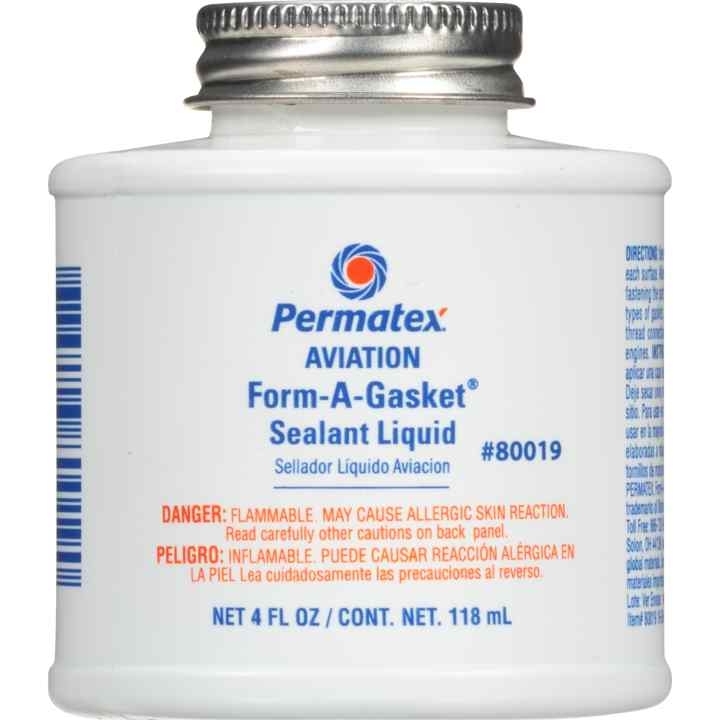
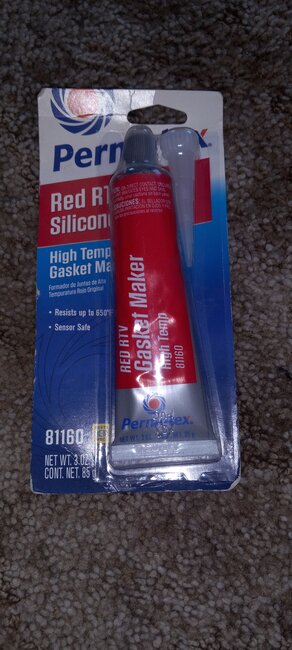
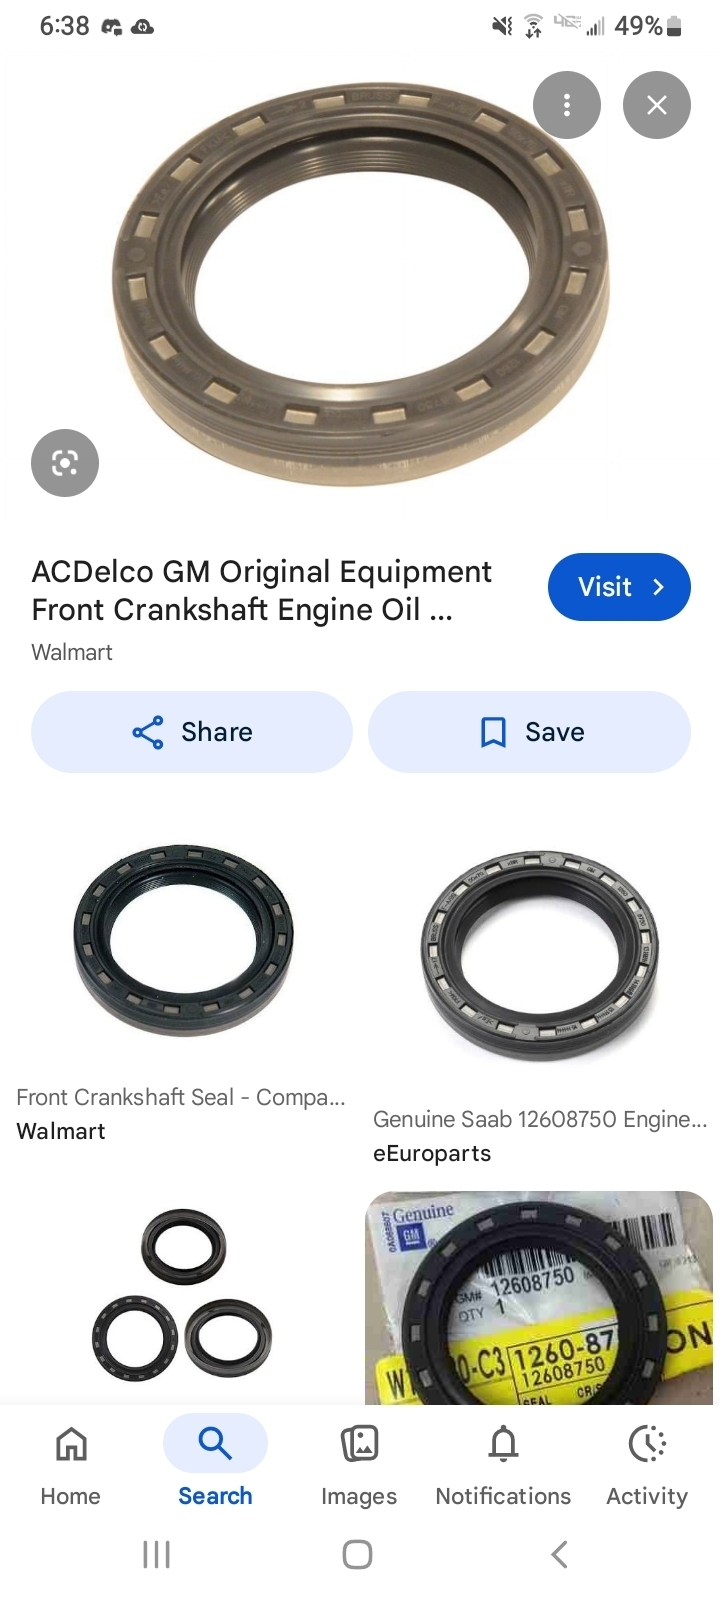
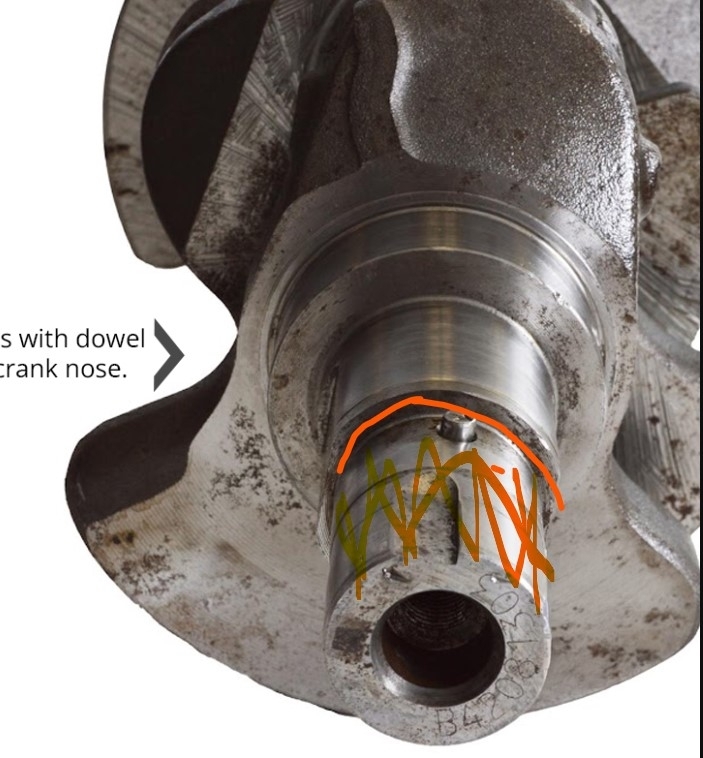
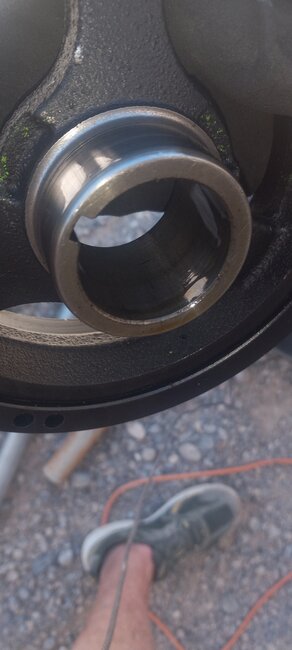
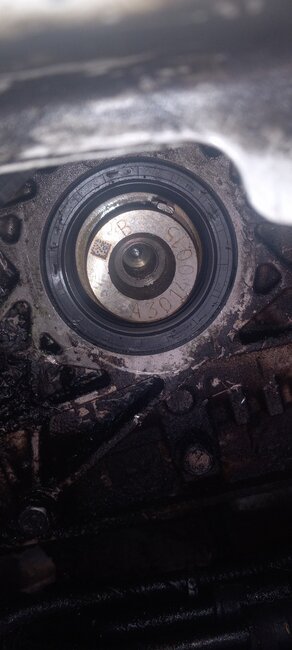
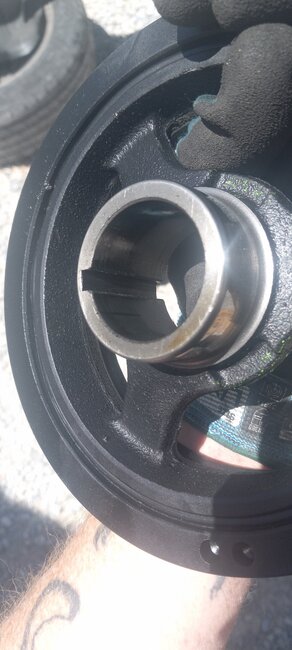
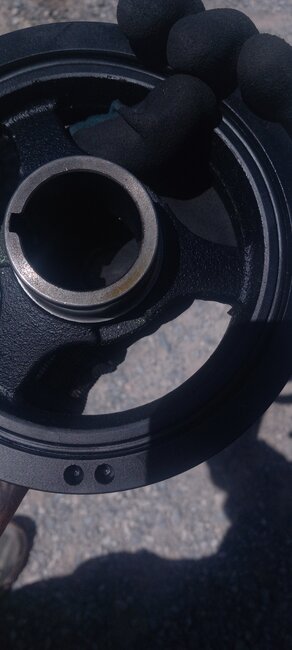
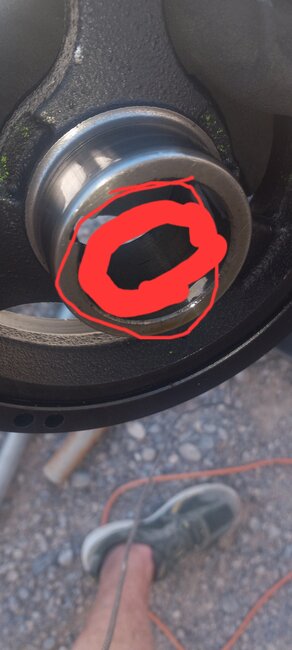
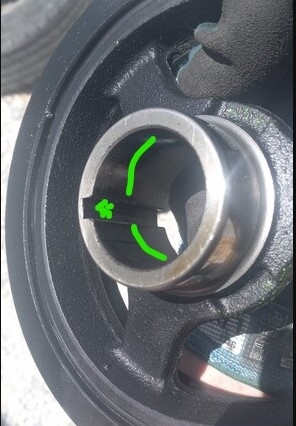
New OE parts or aftermarket? The sleeve would be used on the balancer snout, however if it's new there shouldn't be any wear groove to leak. As such it shouldn't need a sleeve. I would inspect the seal for damage as well as fit, in the front cover as well as around the snout. The seal should need to be driven into the front cover and should slip over the snout with some drag. For the sealer, a THIN coating on the area I added green to as well as a small dab on the crank key so that oil cannot bypass the key in the slot. The snout should bottom out on the face of the crankshaft but I've seem them still seep, so the sealer stops that. I've used silicone, sleeve retainer and even the old style Permatex non hardening sealer in that area, all seemed to work. I usually apply it to the perimeter surface of the seal (edge where the orange is) just prior to install, just in case there is a ding or imperfection in the surface. Old school engine builders trick. Warning, don't get it on clothes, it doesn't wash out very well.
May 29, 2026 at 2:55 PM
Avatar
DAVENOOB
  • MEMBER
  • 322 POSTS
Will this work? It's what I have on hand.
May 29, 2026 at 6:08 PM
Avatar
DAVENOOB
  • MEMBER
  • 322 POSTS
Nevermind I see mine is a hardening seal maker. So get a new seal add the silicon and add around snout? Mine has a key "notch" to make sure it goes in one way. Do I cover that weird square piece as well?
May 29, 2026 at 6:12 PM
Avatar
DAVENOOB
  • MEMBER
  • 322 POSTS
Also how strong are those seals? This one seems to be curved so it pops in and expands no spring. Using a correct size socket and hammer an acceptable way to install seal? Is the seal supposed to be flush with engine or set in as far as it can possibly go? Trying to only have to do this one more time lol. Thanks
May 29, 2026 at 6:15 PM
Avatar
STEVE W.
  • CAR REPAIR CONTRIBUTOR
  • 15,157 POSTS
That silicone will work but apply a very thin layer. For the key I generally swipe the back with a finger that has about 3 grains of rice of sealant, then install the key in the crank. Then apply the sealer inside the damper and add about the same 3-4 grains of rice at each end of the key, the idea being that as the damper goes on it pulls some above the key. The seals all depend on which you buy. The OE are usually thin tin with a double lip seal, some use a spring, others don't. Most of the aftermarket ones will have a spring and a rubber coating that attempts to seal the exterior and hold it in place. When the engine is running correctly and the PCV system is working there should be virtually no pressure in the crankcase it usually is barely over atmospheric as the PCV gases are pushed into the engine to be burnt. An older engine that has some blowby can have more pressure in there and that can cause leaks.
May 29, 2026 at 11:44 PM
Avatar
DAVENOOB
  • MEMBER
  • 322 POSTS
This is what seal it uses. It's slightly fatter around the diameter of the seal. I need to go buy a new seal anyways so I'll get the silicon you recommended. Thanks for the marked lines where to put it. I'll be knocking this out tomorrow. Just finished cv axle replacement on the other car so I can go get parts. Lol fml have a good one.
May 30, 2026 at 1:42 AM
Avatar
DAVENOOB
  • MEMBER
  • 322 POSTS
Silicone on outside and inside of seal? The back of dampened and key notch.
May 30, 2026 at 1:44 AM
Avatar
STEVE W.
  • CAR REPAIR CONTRIBUTOR
  • 15,157 POSTS
Silicone on outside of the seal only. I do put some grease in the inner seal lips though. You don't want sealant there. Then a smear inside the hub on the damper and around the key. If you look at the image, the area at the back is where the crank pulley bottoms out. The problem is that they rarely fit real tight and oil can get through. So you apply the sealer in a thin coat and on the key and it usually stops oil migration. They used a few different cranks, some have the pin, some have a key others used a different key. What you don't want is any sealant on the outer surfaces of the damper or crankshaft. The polished area that you see farther back is where the crank bearing sets, when the engine is running there is oil spraying out of that area, right across the damper at the sealing area. Any imperfection and you get a leak.
May 30, 2026 at 2:40 AM
Avatar
DAVENOOB
  • MEMBER
  • 322 POSTS
Here's some pics of the oil setting and snout all that. Also the seal.
May 30, 2026 at 9:05 PM
Avatar
STEVE W.
  • CAR REPAIR CONTRIBUTOR
  • 15,157 POSTS
Seal looks OK, apply the light coat inside the balancer and button it up. Won't hurt to apply some oil to the seal lips and outside of the balancer on the seal surface. That generally keeps the seal from sticking as the balancer goes through it.
May 31, 2026 at 5:17 AM
Avatar
DAVENOOB
  • MEMBER
  • 322 POSTS
So where Seal and snout touch a dab of grease. Now my pulley is different then the second pic with orange on outside of shaft below the notched. So I'll add silicone to the inside and a little where it sits against crank. My key or notch coming out of the engine do I want to put some there as well? The first 2 picks with orange and green lines makes sense. Your second pic with orange on lower "shaft"(don't know proper term) doesn't quit make sense. That part is in the engine itself not part of the pulley.
May 31, 2026 at 3:05 PM
Avatar
DAVENOOB
  • MEMBER
  • 322 POSTS
Sorry about bad drawing. So the inside will get a few rice size dabs spread around. Then the back where it sits against crank gets a smear, right? I marked very sloppy in red. Just making sure I've done this 2 times this is my 3rd so want to make sure. Thanks
May 31, 2026 at 3:10 PM
Avatar
STEVE W.
  • CAR REPAIR CONTRIBUTOR
  • 15,157 POSTS
Apply the sealant inside the balancer and in the key slot. Normally I put some on a finger and just wipe it inside the bore, then some in the slot. Don't put any on the face where the hub and crank meet, putting it there it can squeeze out and foul the seal surface.
May 31, 2026 at 3:51 PM
Avatar
DAVENOOB
  • MEMBER
  • 322 POSTS
Thanks. Once I got it tighten in there was a nice little bead around keyhole and hole shaft. Also put a little between bolt and washer since it's a floating washer. Just got to let it cure and I'll let you know results tomorrow.
Jun 1, 2026 at 12:51 AM
Avatar
STRAILER
  • CAR REPAIR CONTRIBUTOR
  • 54,328 POSTS
Sounds good, how did it go?
Jun 3, 2026 at 2:37 PM
Repair Safety Notice: This information is for general instructional purposes only. Vehicle repair can be dangerous. Verify all information, follow manufacturer service procedures, use proper tools and safety equipment, and consult a qualified repair shop when needed.