Cranks but will not start

Tiny
BRYCEJ00
  • MEMBER
  • 1994 TOYOTA CELICA
  • 2.2L
  • 4 CYL
  • 2WD
  • MANUAL
  • 257,000 MILES
Car shut off and stopped running after I started it one morning. I was letting it warmed up before work in the winter. When I was ready I got in and tapped the accelerator with my foot and it immediately shut off. Tried jumping it and that didn't work. Couldn't hear the fuel pump running at all so I replaced that but that didn't fix it. Replaced the spark plugs now and it still won't run. Not sure what to do next besides replacing the distributor cap and rotor. Looking for some help.
Friday, February 12th, 2021 AT 6:06 PM

10 Replies

Tiny
JACOBANDNICKOLAS
  • MECHANIC
  • 108,179 POSTS
Hi,

Before replacing anything, we need to determine what is causing it. You replaced the fuel pump, but did you check fuel pressure? Is the new pump working? If it is and the pressure is good, then I need you to check for spark to the plugs.

Here are three links you may find helpful. One explains the most common causes of a crank no start, and the others are for checking spark and fuel.

https://www.2carpros.com/articles/car-cranks-but-wont-start

https://www.2carpros.com/articles/how-to-check-fuel-system-pressure-and-regulator

https://www.2carpros.com/articles/how-to-test-an-ignition-system

Let me know what you find or if you have other questions.

Take care and God Bless,

Joe
Was this
answer
helpful?
Yes
No
Friday, February 12th, 2021 AT 7:59 PM
Tiny
BRYCEJ00
  • MEMBER
  • 6 POSTS
Hi Joe,

I forgot to mention this but the reason I am going through the electrical part of the ignition system is because there was no spark at the plugs. I should also mention that there was no check engine light before or when it shut off.
Was this
answer
helpful?
Yes
No
Sunday, February 14th, 2021 AT 4:47 PM
Tiny
JACOBANDNICKOLAS
  • MECHANIC
  • 108,179 POSTS
That sounds like a crankshaft position sensor. They can fail, cause spark loss, and never set a code.

Have you tried to check for diagnostic trouble codes? Even with the light off, there could be something stored. Here is a link that shows how it's one:

https://www.2carpros.com/articles/toyota-trouble-code-definitions-and-code-gathering-method-1990-1995

Let me know what you find.

Joe
Was this
answer
helpful?
Yes
No
Sunday, February 14th, 2021 AT 4:54 PM
Tiny
BRYCEJ00
  • MEMBER
  • 6 POSTS
Joe,

I just attempted to check my codes and when I turned the ignition to on the check engine light just continuously blinked with no pauses. I'm not sure what that means of if I am doing something incorrectly. Do you know?
Was this
answer
helpful?
Yes
No
Monday, February 15th, 2021 AT 10:14 AM
Tiny
JACOBANDNICKOLAS
  • MECHANIC
  • 108,179 POSTS
That's an odd one. If you followed the link, it should provide codes. Are you certain you are getting the correct pins in the connector?

As far as the distributor. Remove the cap and have a helper crank the engine while you watch to confirm the rotor is turning.

Also, is it possible for you to record the engine cranking and upload it for me to hear?

Let me know.

Joe
Was this
answer
helpful?
Yes
No
Monday, February 15th, 2021 AT 5:21 PM
Tiny
BRYCEJ00
  • MEMBER
  • 6 POSTS
Joe,

I double checked the pins for the diagnostic port and as far as I can tell the pins I'm using are correct. I included a photo of the pins I'm using just to be safe. I also checked if the rotor was spinning and It was indeed spinning. I also included a video of the engine cranking. In the video the distributor cap is off and you can see the rotor spinning. If there's anything else you need let me know.
Was this
answer
helpful?
Yes
No
Monday, February 15th, 2021 AT 6:29 PM
Tiny
JACOBANDNICKOLAS
  • MECHANIC
  • 108,179 POSTS
Hi,

It looks correct. We need to do a few more checks. Let's start with the ignition coil. Here are the directions. The pics correlate with the directions.

1994 Toyota Celica L4-132 2164cc 2.2L DOHC (5S-FE)
Federal Vehicles
Vehicle Powertrain Management Ignition System Ignition Coil Testing and Inspection Component Tests and General Diagnostics Federal Vehicles
FEDERAL VEHICLES
IGNITION COIL INSPECTION
NOTICE:"Cold" and "Hot" in the following sentences express the temperature of the coils themselves."Cold" is from - 10°C (14°F) to 50°C (122°F) and "Hot" is from 50°C (122°F) to 100°C (212°F).
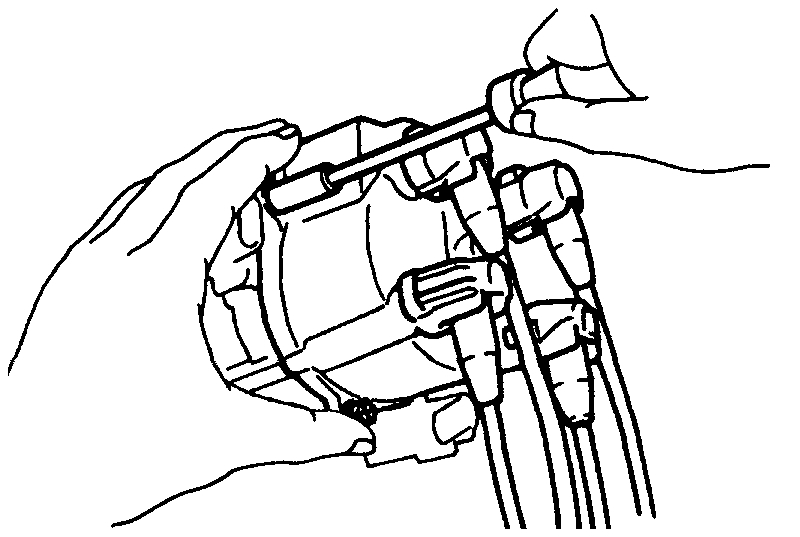
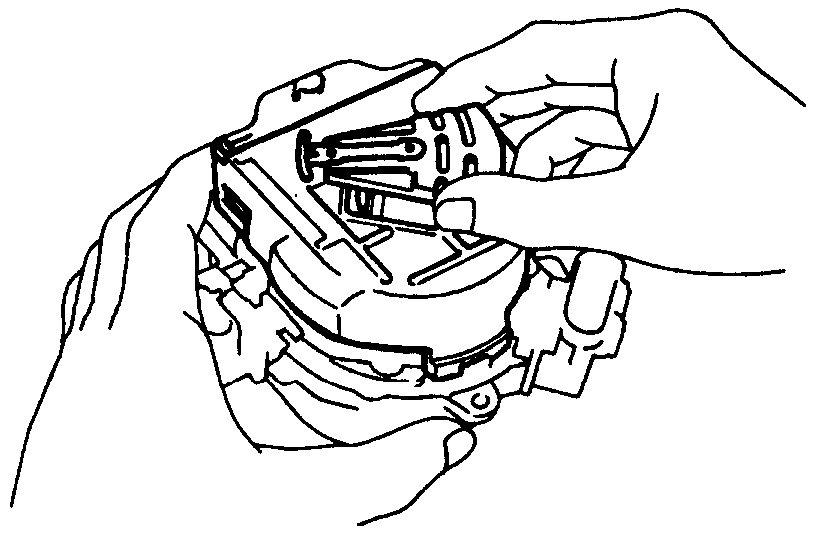
1. Disconnect distributor connectors.
2. Remove distributor cap.
3. Remove rotor.
4. Remove ignition coil dust cover.
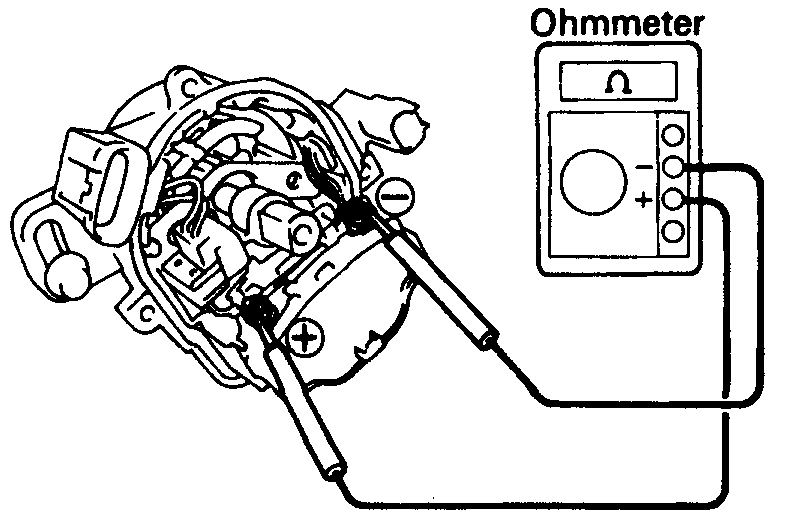
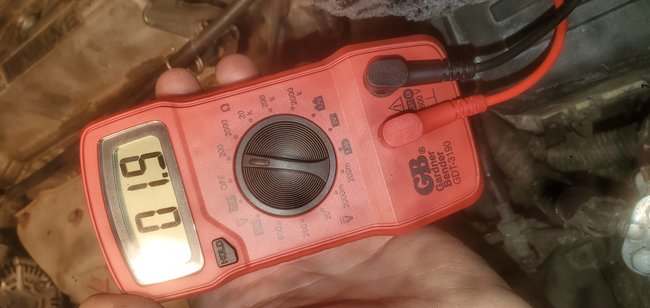
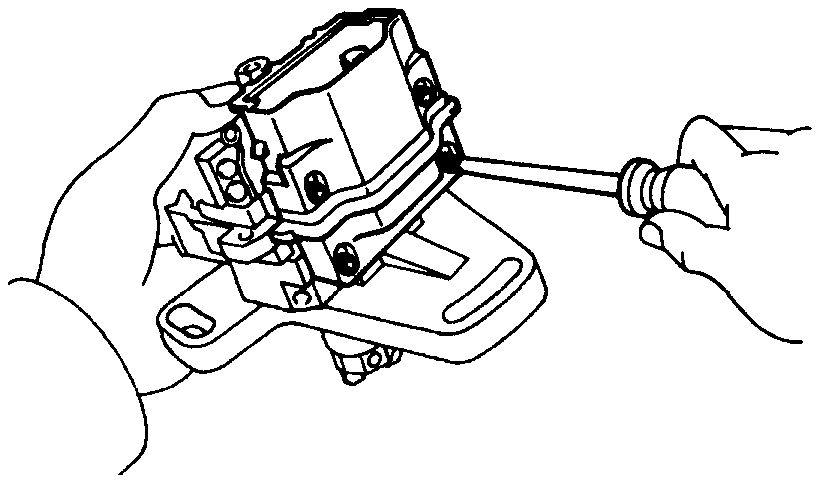
5. Inspect primary coil resistance.

ImageOpen In New TabZoom/Print

-Using an ohmmeter, measure the resistance between the positive (+) and negative (-) terminals.
Primary Coil resistance:
Cold: 0.36 - 0.65 Ohms
Hot: 0.45 - 0.65 Ohms
If the resistance is not as specified, replace the ignition coil.
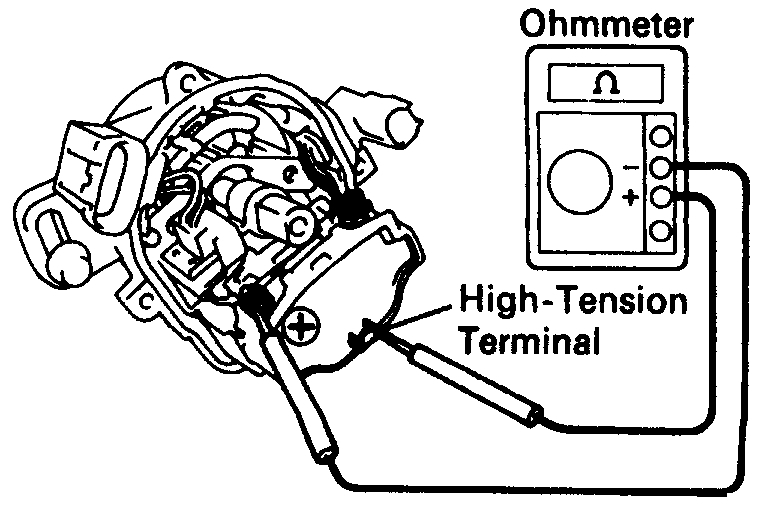
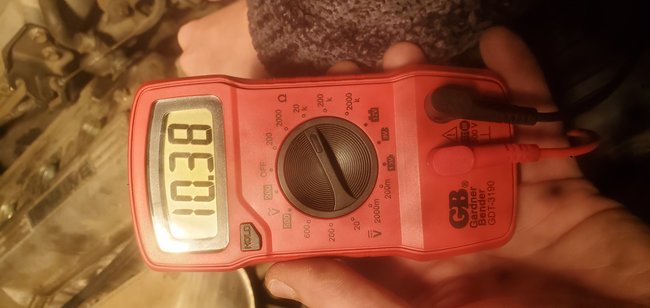
6. Inspect secondary coil resistance.

ImageOpen In New TabZoom/Print

-Using an ohmmeter, measure the resistance between positive (+) and high-tension terminals.
Secondary coil resistance:
Cold: 9.0 - 15.4 k Ohms
Hot: 11.4 - 18.1 k Ohms
If the resistance is not as specified. Replace the ignition coil.

__________________________

Note: I provided info for a vehicle having Federal Emissions. If you are in CA, I need to know.

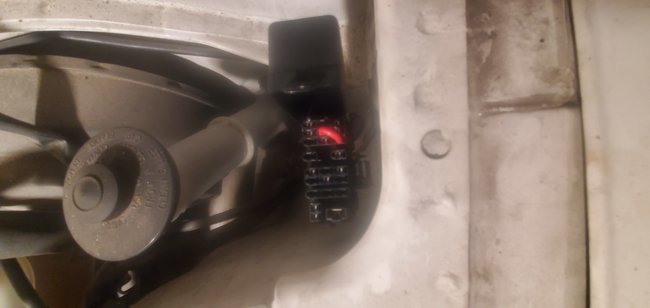
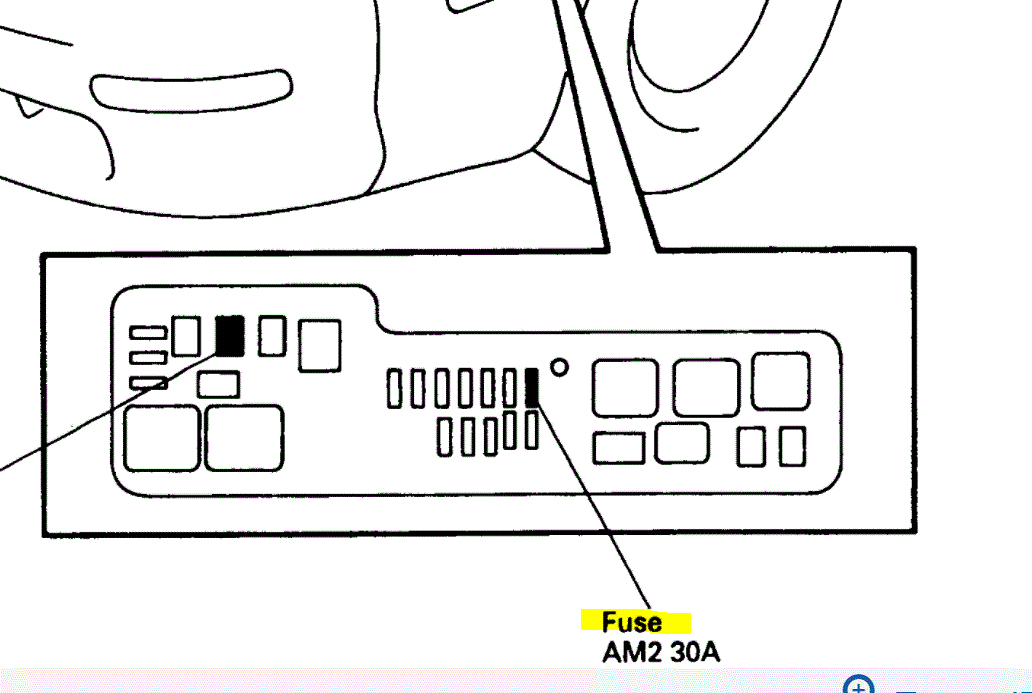
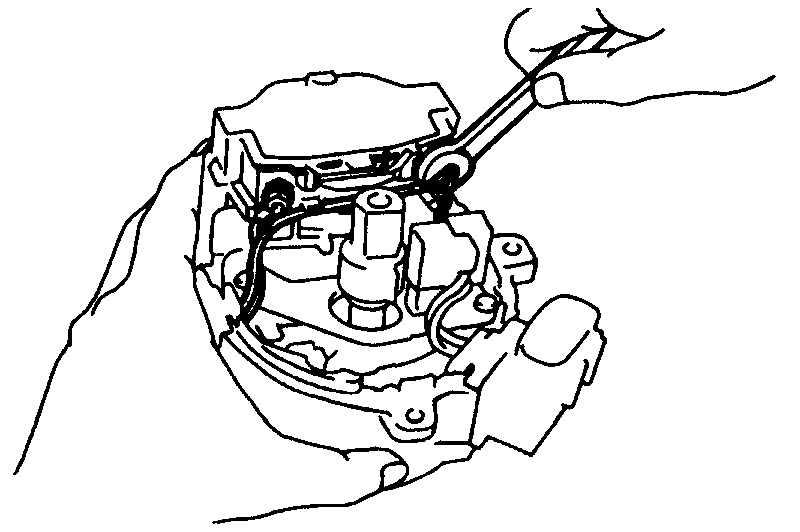
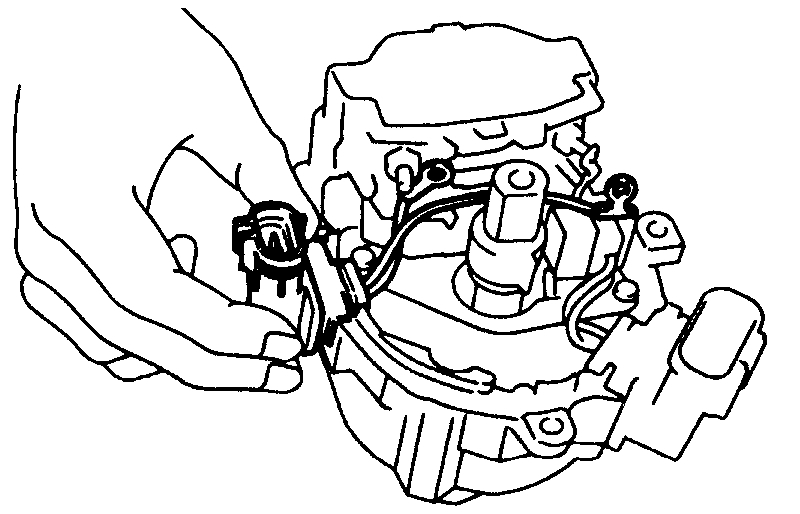
If you are in CA, check the fuse indicated in pic 3.

Let me know what you find or if you have other questions.

Joe
Was this
answer
helpful?
Yes
No
Monday, February 15th, 2021 AT 7:30 PM
Tiny
BRYCEJ00
  • MEMBER
  • 6 POSTS
Joe,

I just preformed the checks and these were my findings:

Primary coil resistance: 1.9.
Secondary coil resistance: 10.38k.
Both checks were performed in cold weather. To be clear does this mean that I need to replace the ignition coil?
Was this
answer
helpful?
Yes
No
Tuesday, February 16th, 2021 AT 3:28 PM
Tiny
BRYCEJ00
  • MEMBER
  • 6 POSTS
I forgot to add this in the previous reply, but I am not located in California.
Was this
answer
helpful?
Yes
No
Tuesday, February 16th, 2021 AT 3:38 PM
Tiny
JACOBANDNICKOLAS
  • MECHANIC
  • 108,179 POSTS
Hi,

It sounds like the primary circuit is bad. This sounds like the problem.

I don't know if you need them but here are the directions for removal and replacement. The pics attached correlate with them

DISTRIBUTOR DISASSEMBLY
1. Remove distributor cap.

Pic 1

-Remove the 3 bolts and distributor cap.

Pic 2

2. Remove rotor
3. Remove ignition coil dust cover.
A. Remove the dust cover.
B. Remove the packing.
4. Remove distributor wire.

Pic 3

a. Remove the 2 nuts, and disconnect the 3 wires from the ignition coil terminals.

Pic 4

b. Remove the distributor wire from the distributor housing.
5. Remove ignition coil

pic 5

Remove the 4 screws and ignition coil.

______________________________________

I hope this helps and takes care of the problem. Let me know.

Take care,
Joe
Was this
answer
helpful?
Yes
No
Tuesday, February 16th, 2021 AT 6:23 PM

Please login or register to post a reply.

Sponsored links