Good afternoon,
Did you replace the clutch slave or the throw-out bearing?
https://www.2carpros.com/articles/throw-out-bearing-replacement
I attached the bleeding process below for you to follow.
If it does not create a pedal, you may have a failed clutch master cylinder.
Roy
Hydraulic Clutch Bleeding
Notice: Do not reuse the fluid that has been bled from a system in order to fill the clutch master cylinder reservoir for the following reasons:
1. The fluid may be aerated
2. The fluid may be contaminated
3. The fluid may contain too much moisture
Important: Maintain the fluid level in the clutch reservoir to the top step with GM P/N 12345347, or equivalent.
1. Clean dirt and grease from the cap in order to ensure that no foreign substances enter the system.
2. Attach a hose to the bleeder screw on the clutch actuator assembly. Submerge the other end of the hose in a container of Hydraulic Clutch Fluid GM P/N 12345347, or equivalent.
3. Depress the clutch pedal slowly and hold.
4. Loosen the bleeder screw to purge air.
5. Tighten the bleeder screw to 2 Nm (18 inch lbs.).
6. Repeat steps 3 - 5 until air is purged.
7. Fill the reservoir to the top step with GM P/N 12345347, or equivalent.
8. Repeat the bleeding procedure if necessary.
Clutch Master Cylinder Replacement
Removal Procedure
Notice: Refer to Brake Fluid Effects on Paint and Electrical Components Notice.
1. Remove the driver side instrument panel insulator.
imageOpen In New TabZoom/Print
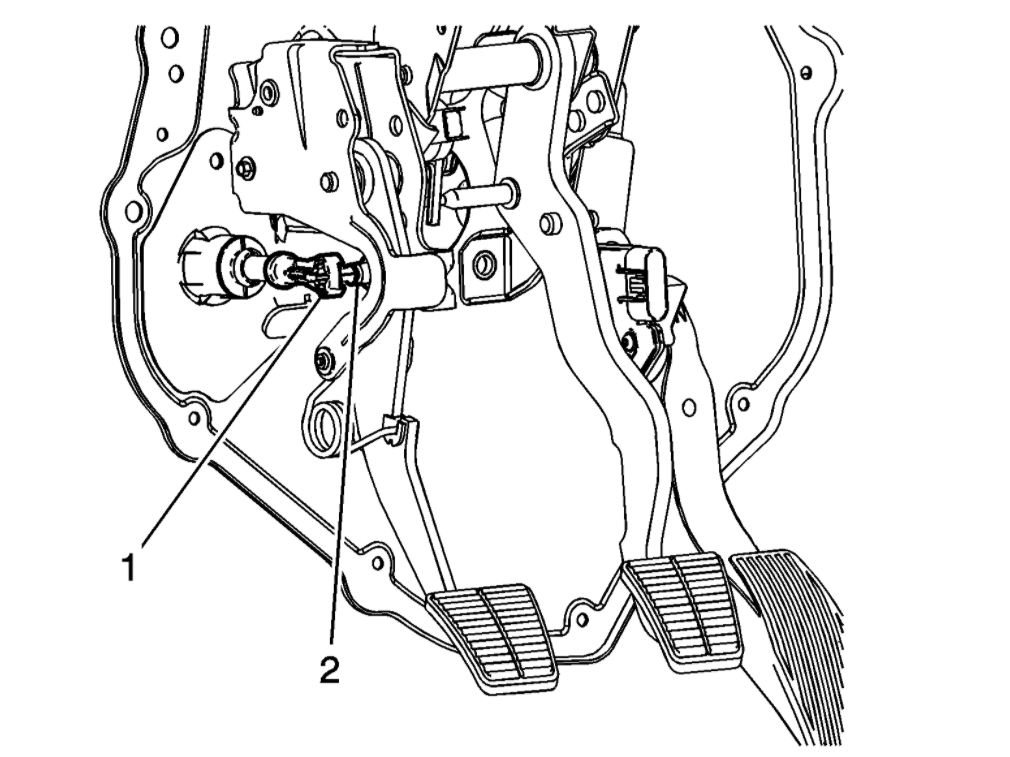
2. Disconnect the clutch master cylinder push rod (1) from the clutch pedal pin (2).
imageOpen In New TabZoom/Print
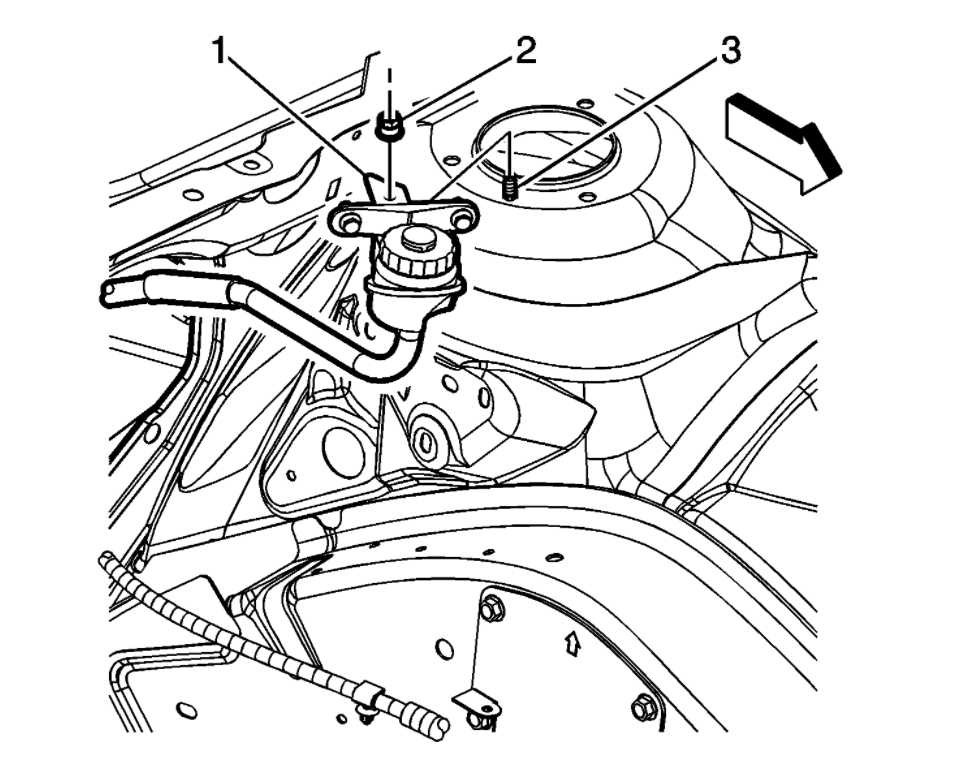
3. Remove the clutch fluid reservoir retaining nut (2).
4. Remove the clutch fluid reservoir (1) from the strut tower stud (3).
5. Remove the air cleaner outlet duct.
imageOpen In New TabZoom/Print
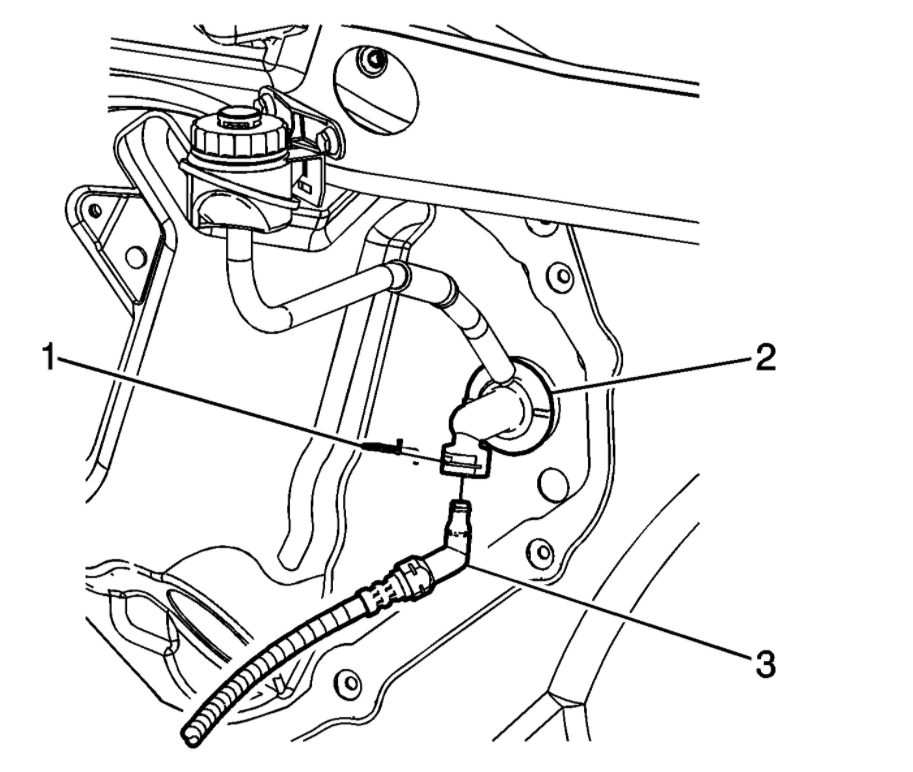
6. Important: Install a rubber cap over the exposed hose fitting in order to prevent fluid loss and contamination.
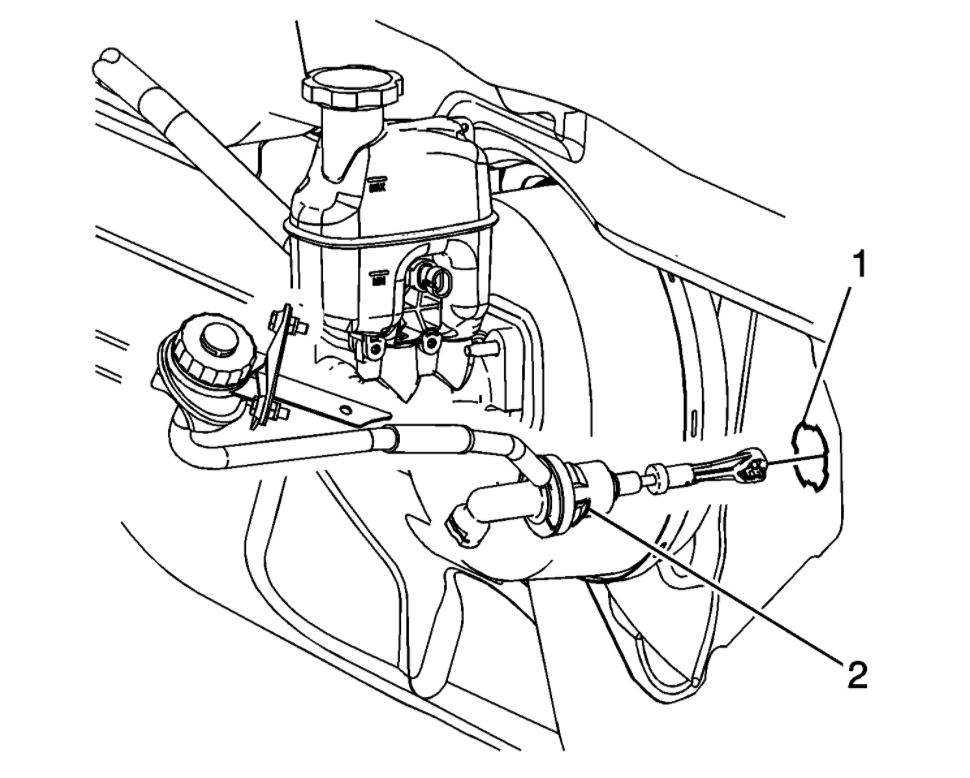
Remove the clutch hose retaining clip (1)
7. Disconnect the clutch hydraulic hose (3) from the clutch master cylinder (2).
imageOpen In New TabZoom/Print
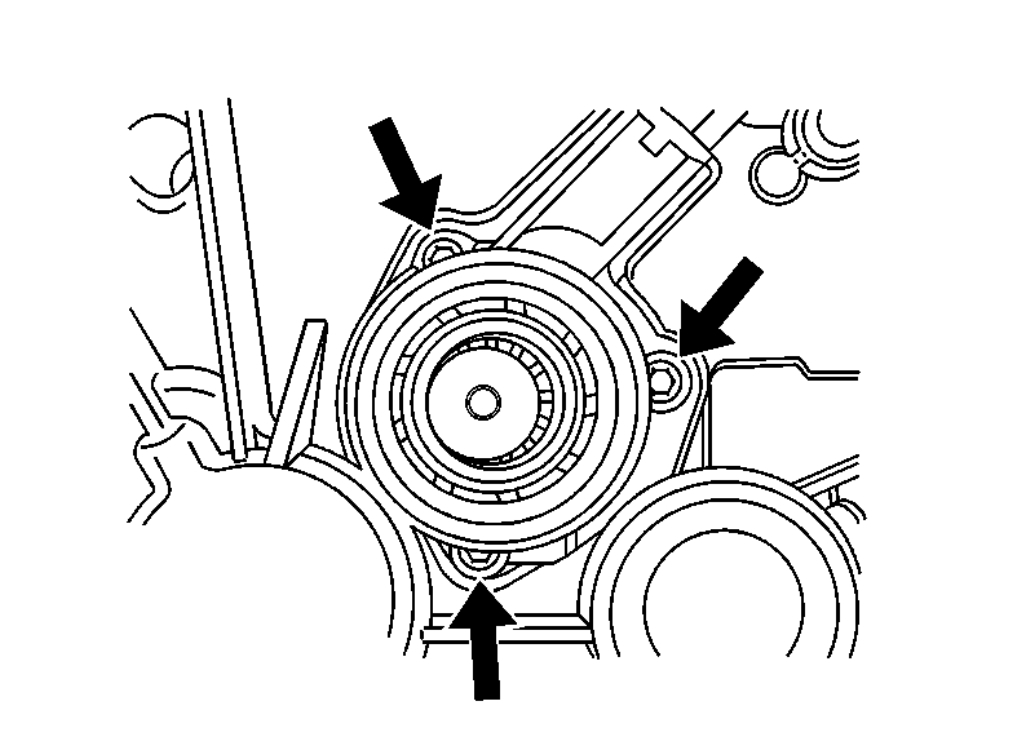
8. Rotate the clutch master cylinder (2) clockwise 1/8 turn.
9. Remove the clutch master cylinder (2) from the cowl (1).
Images (Click to enlarge)
Oct 24, 2020 at 1:59 PM